


guy66
-
Posts
747 -
Joined
-
Last visited
-
Days Won
5
Content Type
Profiles
Forums
Gallery
Blogs
Events
Articles
Store
Downloads
Everything posted by guy66
-
sorry Richard butt I have some outer data: cylinder head bolts 126 Nm 93 lbf ft connecting rod nuts 85Nm 62 lbf ft crankshaft main bearing bolts front and intermediate 156Nm 115lbf ft rear 92Nm 68 lbf ft flywheel bolts 65Nm 48 lbf ft That are the torque settings that I used on my engine, be careful if you use the old lock plates on the crankshaft bolts as thees don't torque very well. I replaced thees with tight fitting washers and some lock-tight tread lock on the bolts. Guy
-
yes, out of the factory it was black!
-
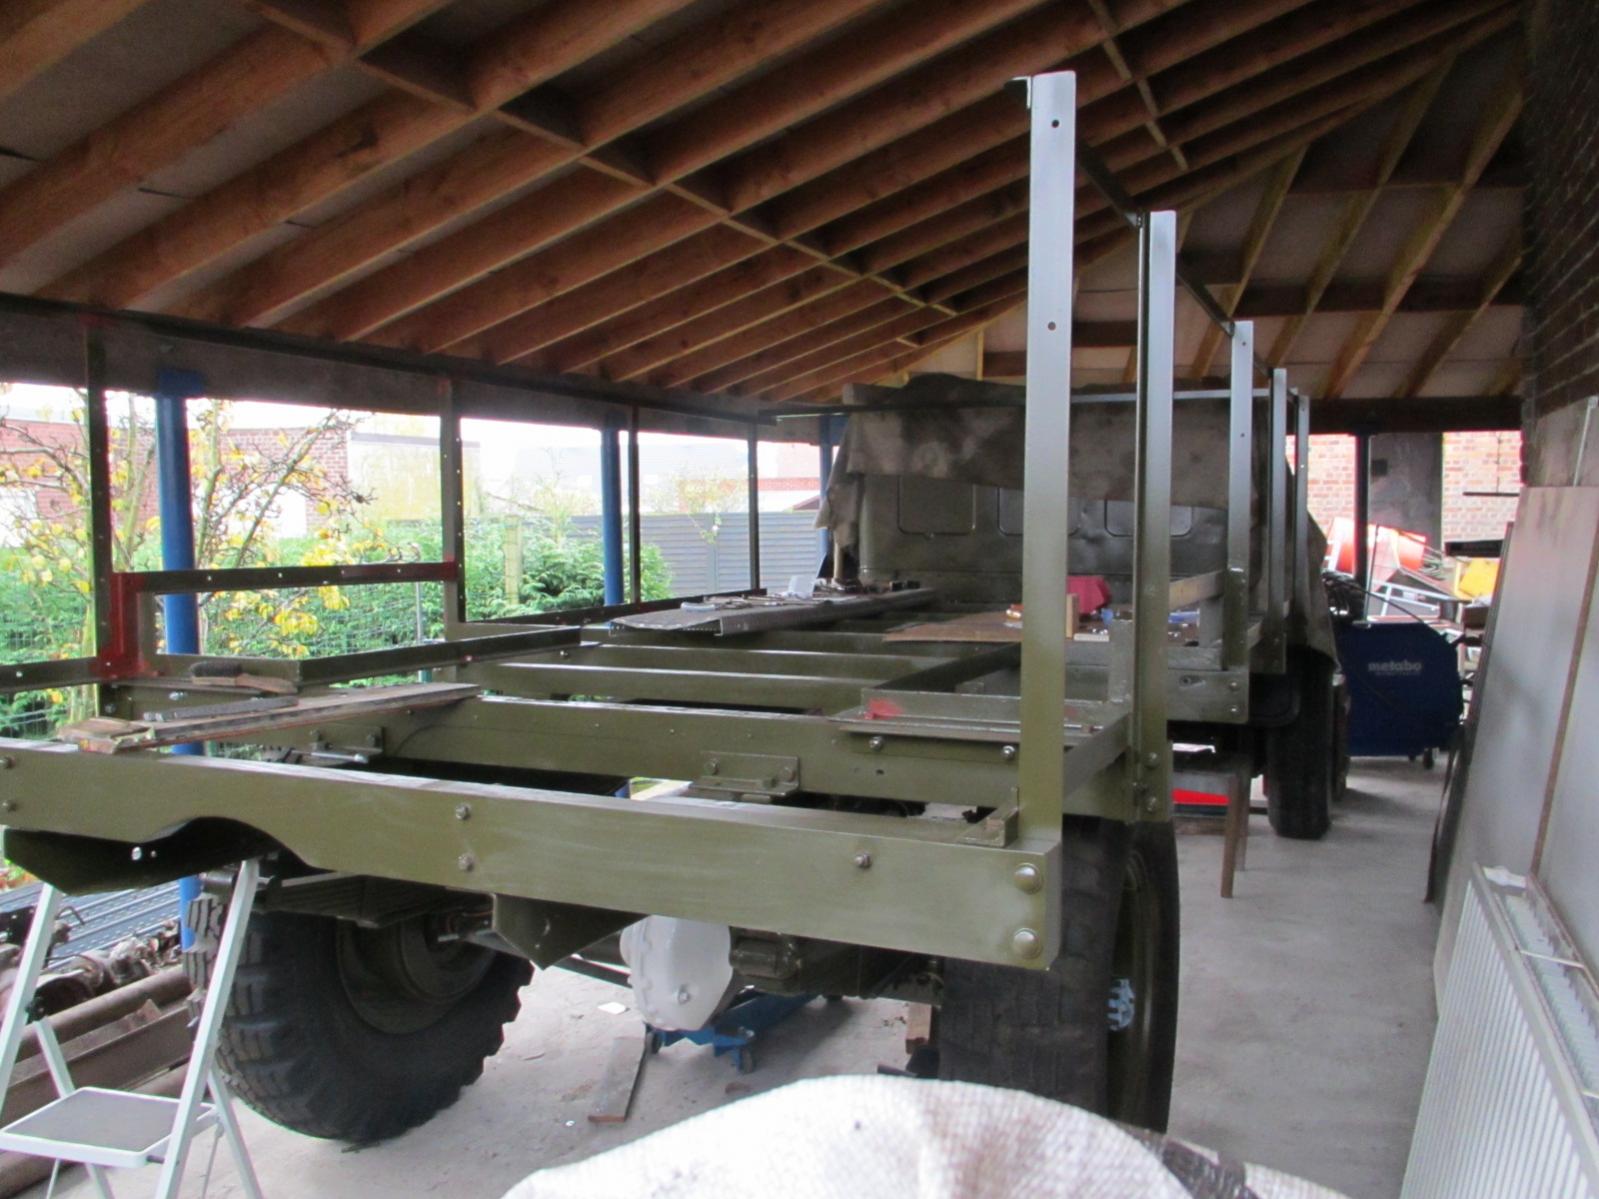
The side angle iron sections are ready, now I can start to take some measurements for the 8 sheet metal plates for the side and 2 extra that go in to the front of the cargo body.

-
No problem the bikes will be in the back of the QL for 2014!
-
Hello, here some pictures of my renovated copula, the inner hip ring is made of 3 metal sections with captive nuts and I had them covered with black vinyl over hard foam . But after some information in books and a inspection of a friend his QLD it appears that the 3 sections are covered in canvas. My copula with black vinyl as it is original .


-
Yes Normandy 2014 with the QL is the challenge, if I see al the work that has been done this last year (yes it is almost a year that I made a start on this project) it will be ready in time. This is a very good idea to have QL meet up there, somewhere on the forum there is a tread for a bedford MW meet in 2014, maybe we can make it a WD bedford meet! Guy
-
one side of the angle iron construction on the cargo body is ready, up to the other side!


-
Here we have a almost complete floor on the cargo section of my QL, the cleaning of the planks is the biggest job of it al because there is some sticky stuff on the top floor that I want to get rid of before the woodwork get some fresh paint. After the trial fit and cleaning of the floor I will remove this lot to paint and then store as I discovered now that the easiest way to make the metal sides will be without the floor in place. Numbered al the planks and it will be a easy yob to put everything in place when the side sections are made. Next week we move from woodwork to metal work.


-
Hi Niels , on my floor al the planks where screwed to the cross members, butt the difference of fitments can be that my floor is coming from a caravan type body. I will screw the planks back in place as this is a match stronger way of mounting. Guy
-
After a few weeks of for work I made a new start on the QL, repaired and renew some of the wooden cross members. The angel iron underside parts are in place and now I can start to make the cargo body side sections from angle iron and sheet metal plate. First have to clean the floor planks and hive them some fresh paint before I screw thees in place.


-
Hello, the best source for WD bikes related information is the BSA m20 site. Just have a look you will find a lot of information about m20 stuff. Guy
-
Here you gave some pictures of my filter kit I had from John Morter.


-
Hi Niels, there is a repair kit for the ac fuel pump and carburettor , check with john Morther are bygone bedford bits!
-
On my QL there was some provision to month the right hand headlight in the lower position. On the picture you can just see the opening for the electrical lead, the mounting goals where welded up butt the re-enforcement plate is still on the inside of the corner section. Have a look at the bottom of the picture!

-
Bedford QL in Korea.

-
A local sheet metal worker specialised in making custom cars made some very nice cabin floor sections to put over the gearbox. Thanks Niels for sending my the original part that we used as a model. And this are the remains of my gearbox covers and the newly made parts !!!!


-
now problem , the front tires are the tires from the rear body I took apart. These will changed with the same tires as on the rear!
-
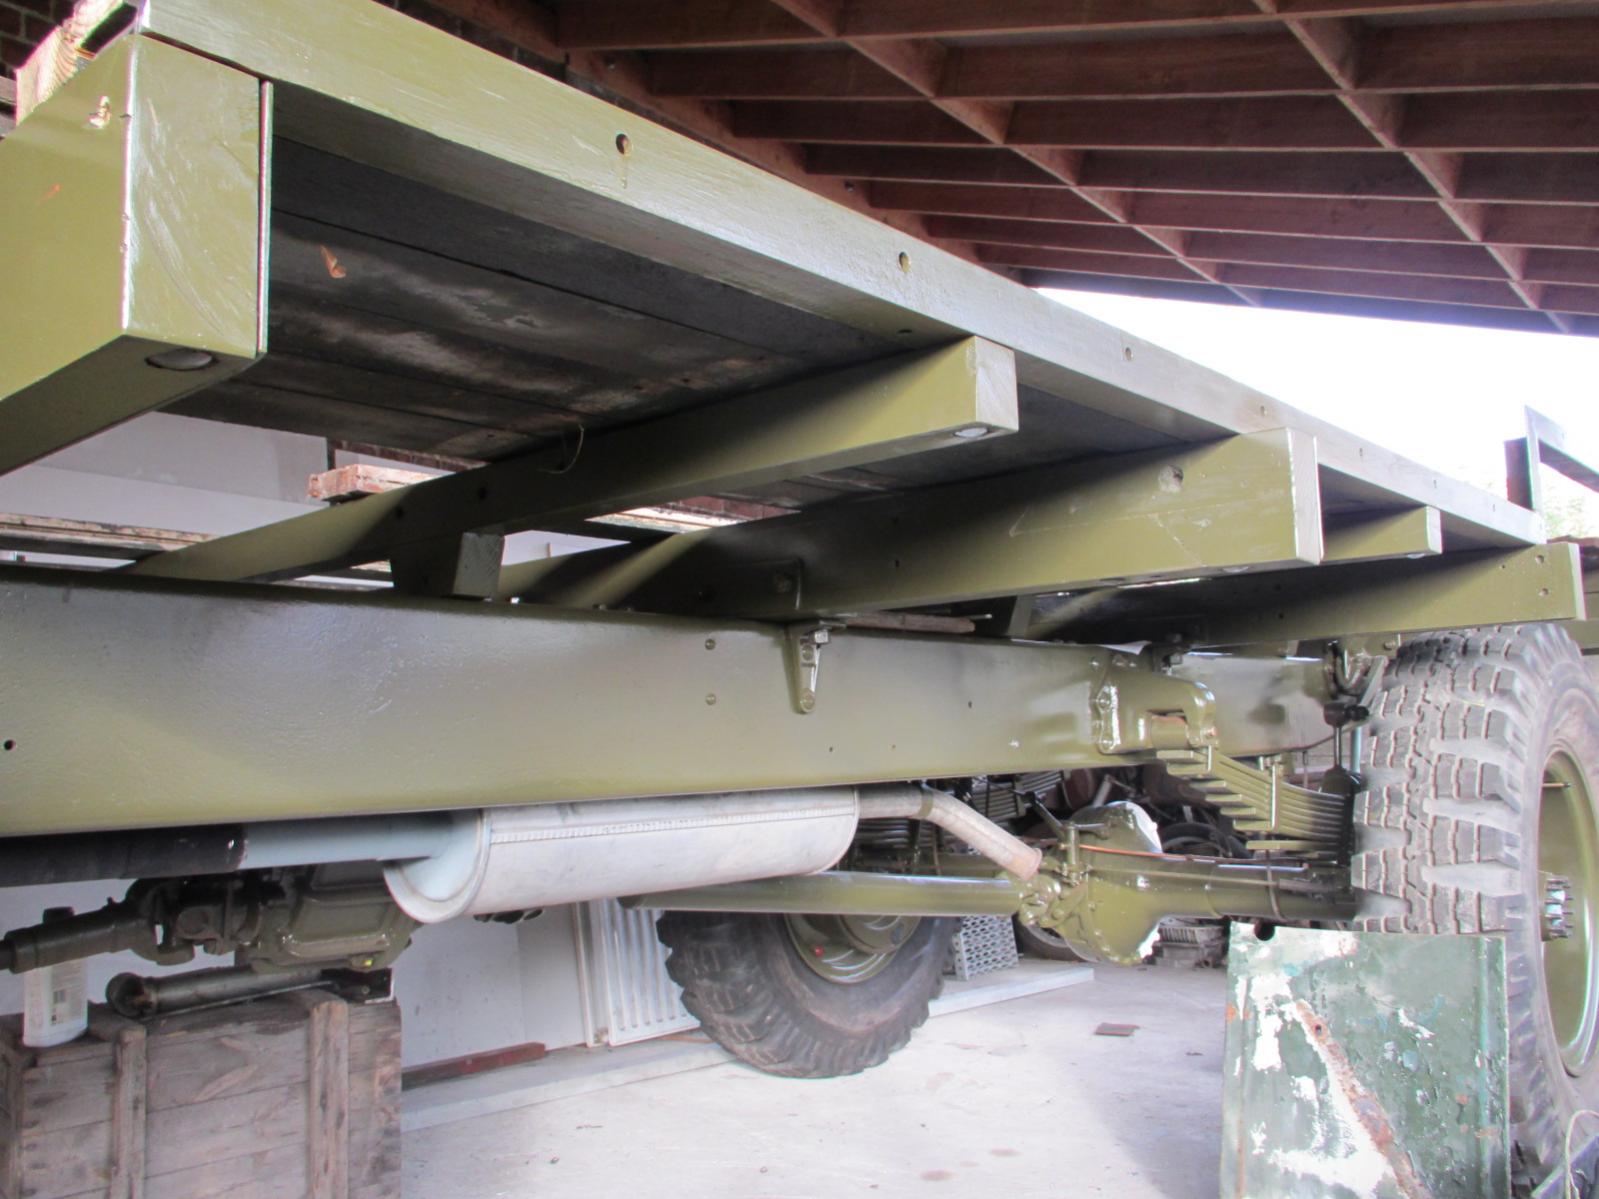
The back axle is completely ready, new brake cylinders and some fresh grease in to the rear bearings. Have some new tyres on the wheels, yes I know these are not the right tires, it are nato tires but came very cheep (for free). Looking to fabricate the side sections of the cargo body.


-
That's really a very nice job, love ford wot lorry's. Keep up this splendid work! Guy
-
Hello Ian and Alex, first the paint and it will be a little bit difficult to explain. It is a colour from Renault commercial vehicles that was really a nice match with some original ww2 bike part still in the original painted colour. The problem is that I use a epoxy based paint and it don't is really matt. After I painted my body parts I need to rub thees a bit to have a matt look. Yes I know why use epoxy paint, it is very strong and will last. The wiring , autosparks did not have a sample harness for a QLR ( yes my bedford started life as a radio box) and as there are some differences between a QLD and QLR I send them my very bad wiring harness to replicate in a working electrical unit. The real difference on a radio box is that very match of wiring is sleeved in a protecting wiring for the radio interferences, and this was really not my problem. It was the different location of the regulator unit on the back site of the cabin. If you need a working ( not really original) wiring harness best to contact autosparks as they know the problem now!! But watch out the wires are not the same colour as original!!!! Guy
-
Received my copy of my wiring harness from autosparks on Tuesday and have everything in place. It was a bit of a Chickasaw puzzle as the colours did not match the colours of the wiring diagram, but we made it! As there is no provision on a original wiring harness for rear lights ( just one lead for a small rear light) I will need to make this section my self, think to put the extra fuse box for the rear lights under the driver seat where the battery is situated and where it is out of view.


-
I still need a good front crash bar for my QL, think it is the only part on the picture of this QL that looks good!
-
Yes Niels on mine there is also a piece of metal plate the hole length of the wooden cross bar. It is really a big puzzle to put al the bits back together, but locally there is some wane with a QLD and had a lot of information and pictures this last wings and wheels military show last weekend. Guy
-
Just trying the new pictures attachment. every time something works well on a pc they need to change things

-
Had a start on the cargo floor.


