


guy66
-
Posts
749 -
Joined
-
Last visited
-
Days Won
5
Content Type
Profiles
Forums
Gallery
Blogs
Events
Articles
Store
Downloads
Everything posted by guy66
-
The axillary generator on a Bedford QLR is DW7X8X and match bigger than the D5LA-26X , they use the same 141 regulator. picture is from a MWR axillary generator.

-
On a QLR the axillary generator was shaft driven from the PTO on the gearbox.

-
Ian , have a look on : http://dynamoregulators.com .
-
Good luck Jules , the best way to repair them is by fitting them on there original location. if you work on then of the vehicle they are difficult to handle and bend always the wrong way. :cool2:
-
Modified a pair of headlight supports that I can put over the centre of the mudguard support. The repainted headlights are now on the modified supports . The windscreen supports have been trail fitted and will have a look for the glass in to the frames, the frames I have are in brass so now welding and repair required on these bits. refitted the original plate on top of the toolbox on to the sill after bending back the bottom angle . There were some original parts modified when they build this tow truck ! The engine cover is in to paint and the same for the sides but these need some adjustment as they don't fit to well. Guy


-

restoration 1941 Morris Commercial 8cwt PU Restoration 2014
guy66 replied to thedawnpatrol's topic in Blogs of MV restorations
waw , starts to look like the real ting , splendid job . How did you fitted the glass in to the windscreen frames ? This is my next work on my C4. Guy. -
Mudguards in paint and back on there place . For the front fitments I found some brass clamps that are used in electrical high tension cabins and these are a perfect fitting on the front mudguard support . Next step well be the doors and the front windscreens. :undecided:


-
Passenger side boxes back in place with the passenger foot well , and started to assemble al the gages on there place on dash board . The Autovac that I found at a jumble will first been send to the UK for a rebuild but now it's sure this C4 was equipped with this devise as all the fitting holes are all still there . :cheesy:


-
restoration 1941 Morris Commercial 8cwt PU Restoration 2014
guy66 replied to thedawnpatrol's topic in Blogs of MV restorations
Maybe I will have a reserve petrol tank tap spare , but if so it will only be in a few months time . Guy -
Have a good look in to the workshop manual before you assemble the brake master cylinder to the brake servo as the adjustment can be a bit tricky . The adjustment needs to be spot on and on my servo I honed the aluminium cylinder to have the inside really clean. Guy
-
restoration 1941 Morris Commercial 8cwt PU Restoration 2014
guy66 replied to thedawnpatrol's topic in Blogs of MV restorations
The elbow on your petrol tank looks a bit the same as the elbow on the inlet manifold of a C4 to take the vacuum to the autovac ?
-
Filler and sanding ! Not really a job I like, but the filler was really needed as the mudguards where well dented. Now in high build primmer and tomorrow I need to sand the primmer a bit to get everything smooth. Made also new little strips that hold the felt in between drivers floor and side of the bonnet and found almost the same material as original that act as some anti slip under the accelerator pedal. :nut:


-
All the little screw holes on the rear bulkhead of the cabin kept my wondering what there use was. But after I found some picture of a C4 in a Russian collection my penny started to drop ! Took the measurements of the fitting pins of my new old stock door side screens and this felt just in between the little holes on the rear of the cabin. So it looks like there where some brackets on the back of the cabin to store the side screens when not in use on the door. I don't can put these pictures I found of the Russian collection on here but if you google you will surely find them So I made a very basic jig to bend a piece of plate to make the little bracket The holes in the rear of the cabine And I think that this was there use


-
Hello Jules . As Richard put it in to his message think it will be better to make a new start on your cam timing. If you still have the original cam chain there are some bright links for the timing on the chain but you really need to have a good look because they are difficult to spot . Had the same problem on my C4 engine ! Guy.
-
This Austin was a long time for sale in France , looks like a K3 that have been modified for animal transport. Think they just painted them in green, the same for the Fordson.
-
Peter , A picture of the clip for the traficator cable on my QL dashboard. Will look for a more detail picture tomorrow . Don't think there will be match difference between a OY and QL.
-
restoration WW2 Humber Box Heavy Utility 4X4
guy66 replied to Ian L's topic in Blogs of MV restorations
Looks great Ian :wow: ! -
Made some progress on the interior of the cabin. Seats back in place, gearbox cover on the floor and a trial fit for the engine cover. Started to put the door hinges back on there place ( on the existing holes for the screws) but I think the front edge of the door sticks out to match ! Will need to look what's wrong with these hinges, if I leave it like it is there is a change that the postmen thinks it is a letter box . Will need to fabricate a new door skin for the driver door, this side is to bad. Not yet decided if I will also make a new door skin for the passenger side.


-
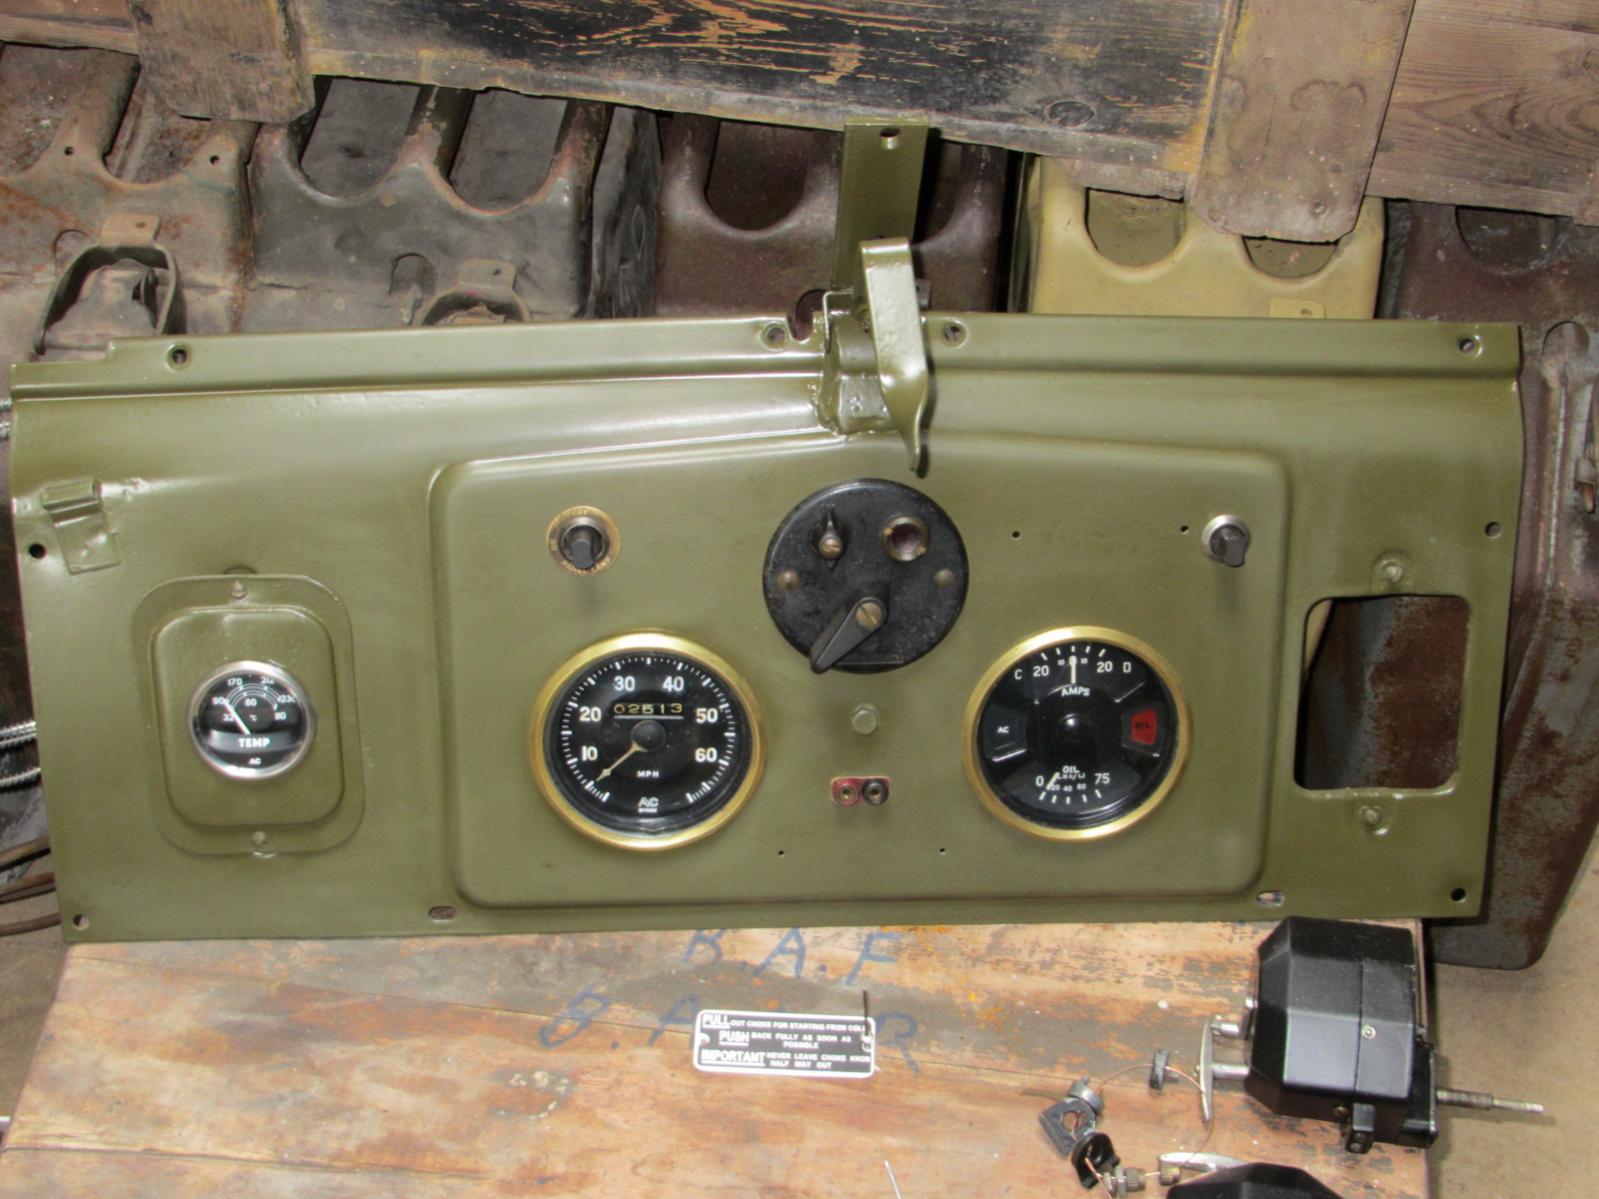
Here some extra pictures from the switchboard No.1, it's a 550 Watt type.


-
Think it's 700 Watt, will check and post some pictures tomorrow. Guy
-
Hello Jerry. When I started on this C4 there where still two turn button clips left on the passenger bulkhead , at first I didn't know there use but after a bit of investigation it seems that these where there to fit the passenger back rest . you still can see the fitting holes for the two missing turn buttons.


-
Did some repairs on the drivers seat, had to weld the rear cross bar on the base of the seat rails . Modified the passenger seat back to original, in the past they fitted a back rest on to the seat but normally there is a cushion for the passenger fitted on the rear of the cabin. I am not sure if the wooden pieces under the passenger seat or in the right position, is there someone that can come up with a picture go these must be fitted to the floor? :undecided: Passenger seat before back to original. Is the wood under the passenger seat on the right location ?? I think they need to move a bit to the front .


-
Are these the right type for a post-war bike ?


-
Passenger side petrol tank back in place , now I need to paint the tool box in front of the petrol tank as soon as the sandblaster is reddy with it . The cabin is also back on to its place and had a trial fit for the drivers seat , and at first glance the cabin looks so small. This is a big difference to my Bedford QL as on these as a driver you have a nice place to do the job. Also had a look how the doors will fit , these came from France completely striped , will make new door skins and have a good look to reassemble the hinges. The new old stock petrol tank filler filter from Norway will be of some use , pity that I had to remove the part number tag on it.


-
I have a pair , will post some pictures tomorrow !


