


Old Bill
-
Posts
1,668 -
Joined
-
Last visited
-
Days Won
33
Content Type
Profiles
Forums
Gallery
Blogs
Events
Articles
Store
Downloads
Everything posted by Old Bill
-
I had a nice weekend making up more bits. This time, the shovel and pick brackets. I am fortunate to have the original Dennis works drawing for these but it appears that they are a Govenment standard so the Thorny will have the same type. First challenge was to find some suitable timber. Fortunately, I had a pice of school woodwork bench in stock which is Beech and hard as hell! I manually planed this to shape. The second one was cut from a piece of Herbert Machine Tools workbench which I also had in stock as being too nice to scrap. I did have to dodge the bolt holes, however. I had nothing in stock for the last one so I laminated it and then cut it to size. I did the chamfers with Grandfather's spoke shave which he used to build frigates at Charles Hill's Shipyard during the second war. I do love using his tools. Then onto the steelwork which I bent using the press. It was bright steel strip so I had to anneal it frst to prevent it from cracking. The shovel handle bracket was a bit tricky. It is supposed to be riveted together but I couldn't see how I could get a snap in there or bend it afterwards so I bottled and used my favourite silver solder. The rivets are supposed to be countersunk so the bracket looks no different from the drawing Complete and ready for the paintshop. Headboard and rear lamp bracket next. Steve


-
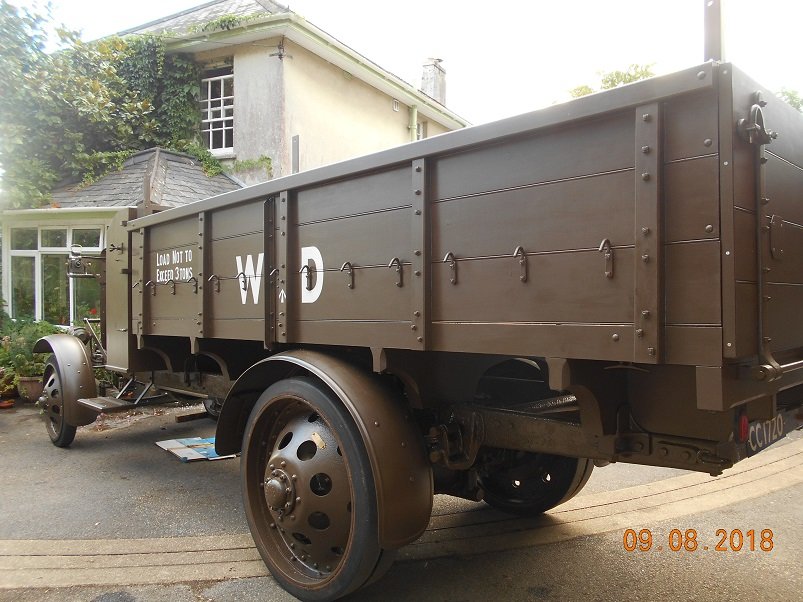
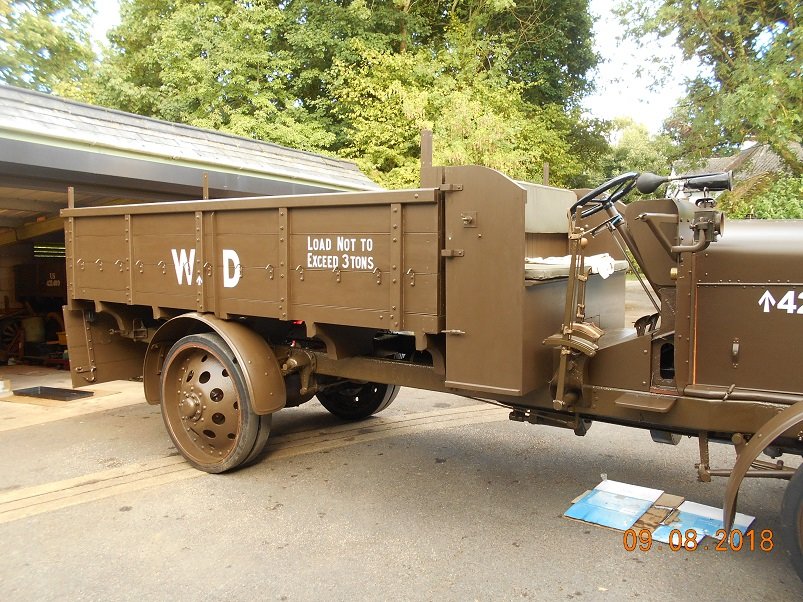
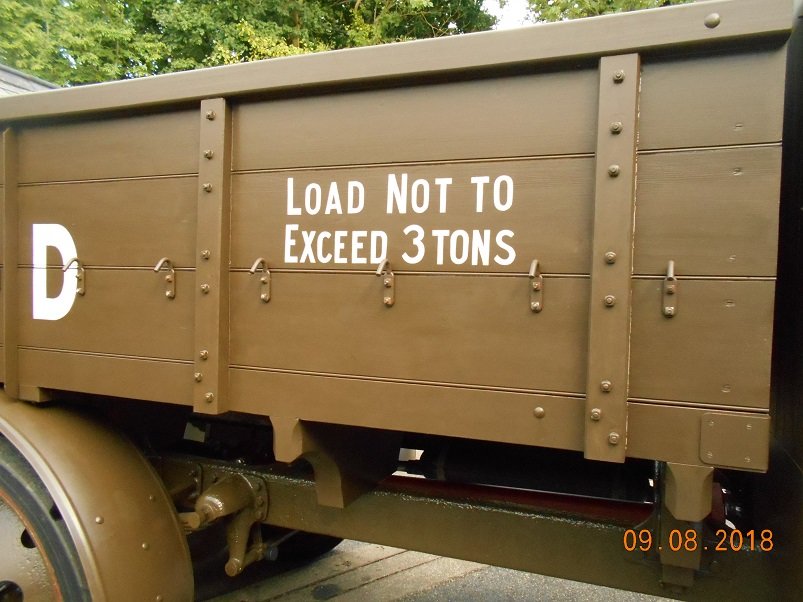
Thanks, Chaps for all of the advice. At least I have recognised the potential hazard before finding out the hard way! Current thinking is to fill to the brim completely with water to push all of the fumes out. Then I want to unsolder just the outer skin which, with a bit of care, I should be able to do without getting the inner one too hot. I shall drill a couple of holes in it so I can drain the petrol in that space and tap the plate so I can put a screw in it to start lifting it up. It is a real pain living 200 miles from the project as everything has to be planned in detail to make use of the short timescale. Oh well. Some things still going on slowly. When we were down last week, Tim spent an age touching up bolt heads. This is a very tedious job but has done wonders for the lorry's appearance. We have also carried on with the hood bows. I started off by bending them to shape using an anvil tool that I made up. Dad had cut the angles perfectly so the quadrants just dropped in and were ready to weld. In the mean time, I riveted the lap strip onto the centre flat bow. And then drilled the bottom edges where they bolt onto the extension pieces left by Father. The longitudinal bar brackets, I had already bent so these were riveted as well. Centre bow ready for paint! We riveted the joiner plates onto the end bows. Then a trial fit to get the bolt hole positions. Once welded by a pal (Thanks John), the longit brackets were riveted in as well. Dressed off ready for paint. Just the top-coats remain and then we can tick another job off. Steve


-
A hammer and pliers on the kitchen table? You'll be in the dog house! Steve
-
Many thanks for all of your comments chaps. My experience of welding old aluminium has been of 100% failure. There is something in it which just won't weld no matter what kit you have so I feel more inclined towards the filler route at the moment. However, we had a brainstorm this afternoon and had a look in the spares collection and came up with this. It is an earlier pattern sump which doesn't have the holes drilled for the oil pump but the boss for it is there. Dad is going to clean it up and see if it looks promising. Fitting a good one might be the easiest way out of all! To use it, we will have to remove the old sump anyway so that will be an opportunity to have a good look at it. Steve


-
Ah, but you know how much I love my silver solder! Seriously though, a good silver-soldered joint is as strong as a modest grade of steel so I am quite confident that this will survive. No doubt time will tell! Cheers! Steve
-
We have had a nice day again and have fitted all of the rope hooks. Definitely a two-man job to avoid climbing in and out of the back all the time. Another job ticked off! I also took the opportunity to crawl underneath and have a look at the sump. Once I had wiped the oil away, it became obvious that some sort of filler had been used to fill some porosity in the casting. It looks like soft solder. The oil is leaking and steadily dripping from the joint line between the two metals. The question now is what to do about it. I am wondering if I could cut some of it out with the Dremel and fill the resulting groove with Plastic Padding or even a silicone gasket material. Any suggestions please chaps? Steve


-
We had a nice day out yesterday at the Bovington Amiens Commemoration Day with all the lorries you can see above and some more. No doubt Tim will post a report shortly. In the meantime, we now have a horn! Thanks to Barry's photos above, I have made up some representative bits. These were done in Leicester and I have since cleaned them up with a file and broken all of the corners. Then it was on to the base which is bolted to the curved top edge of the dash plate. My usual favourite, silver-solder! Getting closer to being legal. We only need a rear lamp bracket to complete the requirements. Hood frames are in the plan for today. Steve


-
Thanks Ed. You are very kind. I still maintain that anyone could do it, though. You just have to want to enough! Yes, Gordon. The leaking tank is a puzzle and I am very disappointed. I would have thought that the sealant should have held it all together, even if I did leave a pin-hole. The tank is strapped to the dash plate as per the original and whilst the plate can twist as the chassis wracks, it is only 1/8" flat steel so would have expected it to deform itself before putting much stress into the tank. Oh well. We will have to pull the tank off and unsolder the end plate outer skin to have a look. More excitement with a propane torch on a petrol tank! Chris. The one on the LH end of Tim's photo is John Marshall's Thorny J so no doubt we will be able to park up next to it one day. Of course, the Hampshire Museums Service have a military J and the the IWM has their AA gun lorry so between us, we form more than half a battery! Steve
-
It is the Bovington WW1 Day tomorrow and we have promised to take something. We have therefore been working towards getting the Thorny ready so Saturday was the day for the next test run. It started very easily and I drove it out and parked up so that we could fit the canvas. This is the first time we have seen it with Canvas and wings together and we think it is looking rather nice. The moment of truth! All went well for half a mile, all downhill, and then we returned. It was looking good until disaster struck and the engine seized again, 50 yards from home. On opening the bonnet, we found it all to be incredibly hot. Two of the leads had begun to melt and the bonnet was too hot to touch. Once it had cooled down and freed off, we started it again and brought it back into the drive. We decided that it must have been running lean or retarded, both of which would make it run hotter. The detent on the advance lever doesn't work very well and this had allowed it to retard on the trip without me noticing so that will need some attention. Our pal, John, went and got his timing light to check what I had set up with a Rizla paper and it all looked OK. Fully retarded, it fires just before TDC. We fitted the next jet size up as well and then decided to have another go. The lorry was now facing the wrong way so we backed it out into our neighbour's driveway where we learned something else. As you can see, the FL wheel is much lower twisting the chassis. We had been warned and now found out that under this condition, the clutch jams up and won't let go! I stalled the engine and could not get it out of reverse due to the tension on the driveline. We put a pinch bar under the back wheel and shook it until it released the gear and then pushed it back into Father's driveway where everything freed up. I managed a nine point turn (I was sweating after that!) and off we went again. All was well and we were very pleased with ourselves. Then we realised that there was oil trickling from the sump and petrol from the tank. There is a hole in both. The sump will probably fix by drilling and tapping a screw into it. The tank however will want re-soldering. This is severely irksome as I took a great deal of care with it and we lined it with Slosh tank sealant whilst it was new and clean as I realised how troublesome a leak would be to fix. That is not going to be a quick job so we have scratched Bovington for the Thornycroft this year. We are, however, in the very fortunate position of having another string to our bow so we have decided to take the Autocar instead. It hasn't run for two years but after pushing out and oiling up, started on the first swing and we went for a test run. This lorry really is a joy to drive and deserves an outing. Thorny is back in the shed. This one really isn't giving in without a fight but we will get there eventually. We just have to keep knocking them down. Steve


-
This is the best info I have. The holes which would match this are in the scuttle so i will sketch it up and carve it out. More filing! Steve

-
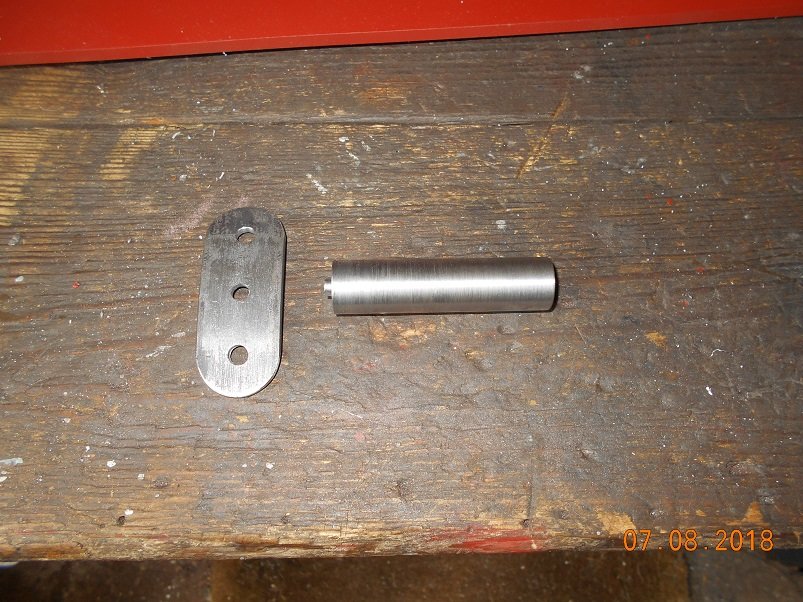
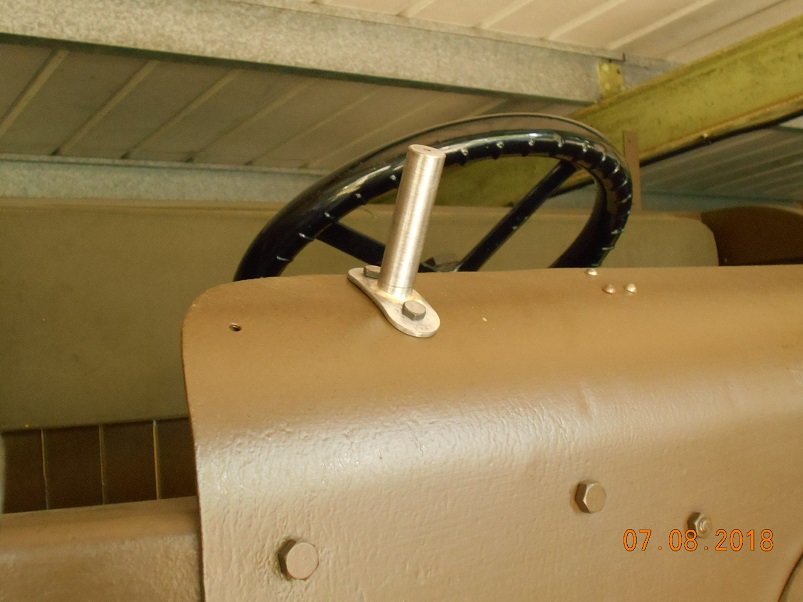
Well, we are getting ready for Bovington next week. One thing we don't have fitted is the horn. Dad found this super example on a well known auction site and fitted a new bulb as the original had perished. Unfortunately, the rubber is a bit thicker and the ferrule would no longer fit so I have had to spin up a new one. First job was to turn up the chuck. Then cut and anneal a disc of 20swg brass. After the first go, it looked like this. I annealed it three more times before it was right down. A quick polish with a bit of emery. Bore out a suitable hole. Looking promising. # And then fitted using washing up liquid as a lubricant. Now we need a bracket for it! Dad is keeping busy and has fitted the gas generator bracket down by the driver's right foot. That has filled up two more holes in the chassis. We have only ever found one original WD gas generator and that is on the Dennis so when I get a moment, I will make up a copy. The other thing we are aiming to complete before Bovington are the main hood frames. They won't be painted in time but should give us a refuge from the weather if needed. Dad has cut and fitted the centre bow bases to the body. The bows should be structural and permanent but as our shed is too low, we have to make them detachable, hence the stub piece. The full bow will overlap and be bolted through. The other bows are 2" x 3" angle and need to be bent. That is a bit beyond our capabilities so we have had some quadrants cut and these are to be welded in on completion of the bends. Once the bows are bent and welded, there are brackets to be rivetted in which carry the longitudinal bars and I have been making these up. They need to be 45mm wide but we couldn't get that size steel so first job was to cut along their length to width. Then a simple case of bending in the press using my jig which is never quite big enough. Corners filed to a radius and rivet and bolt holes drilled. Ready for fitting when the time comes. Steve


-
Fascinating! Thanks for sharing! Steve
-
I like having a long weekend as I get into the swing of it! Sadly, I am back at work but we did have a good day yesterday where the next job was to fit the wings. Dad has painted the brackets so they were loosely fitted. Then a positioning trial for the wing itself. Once in the right place, we scribed through the hole from underneath and then took the wing off to drill it. The wing was refitted with one bolt, the remainding holes were marked and we drilled them all through. Then to the other side where it became apparent that something had gone wrong with our alignment. A bit of attention from the press soon sorted that out but the paint will need touching up. Fronts complete! Onto the rear where we played the same game. The full set. It doesn't look much but it took us all day to do it. Oh well. Another tick in the box. We are just about ready for the Bovington WW1 day on Wednesday 8th August followed by the road run to Great Dorset Steam Fair on Saturday 11th. We hope to have at least one trial trip before then! Steve


-
Here is a clip of it running. Much better than it has been. Now we need to get brave enough to attempt a road run! Steve
-
We are making some progress again now. I am having a long weekend in Devon and started off yesterday by trial fitting my tailboard catches. They were fine and Father will paint them shortly. Whilst I was playing with these, Father took the opportunity to replace some coach screws I had fitted to the back of the seat. I had used metric ones which have hex heads as I couldn't find any proper ones with square heads until our good friend Mick had a rummage in his garage and came up with some. That little detail has now been corrected.! Then it was on to the main project of the weekend which was to get the engine back together. Following some good avice, we took the block off again in order to wash it out with paraffin.. I really didn't want to do this but carborundum dust in the bore wouldn't have been good. I started by taking the valves out whilst it was held solidly down. We then put it in a steel drip tray and squirted it with new paraffin. This worked well and the debris shows that it was worth doing. After the performance with the broken piston ring, Dad went and bought a ring compressor. This worked well to start with. However, we met a snag in that as both ends of the tool were riveted to the tensioning mechanism, there was no way we could get it off! Then our pal, Dave who honed the bores originally, came up with this tool. His band wasn't long enough but I soon made up another and it did the job even better. After getting the rings in, I could remove the band as well! Both blocks on and reassembly has continued all day. The engine is now reassembled and we have changed the oil again. It was pretty black. We filled it with water and, interestingly, all of the flanged water joints were leaking all over the engine and these were joints we hadn't touched.. I put a spanner on the nuts and all of them moved by half a turn. This was a surprise but once tightened, the leaks stopped. Even the jubilee clipped hose joints remained tight so in the end, all was well. I had fitted my new petrol tap so Dad put a couple of gallons in and I gave it a swing. It fired on the second revolution, much to my surprise and ran on for a while. It sounded rough and smoked a lot but it was going. We stopped it after a few minutes and I tightened up a leaking oil pipe joint which had also relaxed like the flange joints. Very strange. I fitted the smallest of my new jets and swung it again and away it went. This time it accelerated a lot better and idles faster with the leaner mixture so a win all round and we are very pleased. The proof will be when we take it on the road but that is an adventure for another day. I am uploading a short and not very exciting film of it running at the moment and will post a link as soon as I can. Wings and rope hooks next! Steve


-
It started on the fourth compression without priming after sitting for ten months. I was very pleased! It then started on the second the next time and the first the one after that. Now I have to wangle one into the Thornycroft! All the soot was a symptom, I think. It started popping and banging for longer and longer periods until it was really warmed up. I suspect that it sooted up then. Time will tell! Steve
-
The last few times we took the Dennis out, it was running quite roughly and took an age to get warmed up. It has also been difficult to start and since I hurt my arm, I have been concerned about trying to swing it. I therefore thought that it was time I got a grip of it and sorted it out. First job was to try to work out why it was getting rougher. I suspected that it had been running lean so I took the carb off and this is what I found: It was much sootier than I would have expected so I wondered if the jet was getting choked. It wasn't solid with carbon but I gave it a good soaking with carburettor cleaner and also the ways and guts of the carb itself to clean it all out. I also checked the inlet joints whilst putting it back to make sure that they weren't letting air in. Hopefully, that would sort the rough running.# Starting these old engines is definitely a skill and hazardous at times as well. I absolutely don't want to go down the route of an electric start but thought I might compromise with an impulse starter. I had a rummage in the box to see what bits we have. An impulse starter is a rather clever device in the coupling between the drive dog and the magneto. It has a trigger arrangement which stops the magneto turning whilst it winds up a clock spring. Then, at just the right moment, it trips, releasing the spring and giving the magento a high-speed flick to give a really strong spark. The beauty is that I only have to slowly pull the engine over compression and not swing it at speed. Amongst all the bits, we had a complete anti-clockwise impulse starter which Father had obtained from a dealer in the US so I thought it worth trying to install this. First look at the magneto on the lorry and I could see that there were no holes to mount the trigger plate. However, our spare mag does have them and the taper and keyway in the starter matched the spindle. We were on! I pulled the mag off the lorry but not before recording the position of the distributor and contact breaker. Once it was off, I could make up an adaptor between the starter and the drive dog on the lorry. That was successful but I then found that the screw holes in the trigger plate didn't match the magneto so I had to make up a new one. That is the original on the left, a Simms pattern on the right which matched the holes but not the starter and the first part of my replacement. After machining it to shape, I case hardened the the actual trigger. It fitted! Final assembly and ready to refit on the lorry. I set the distributor position the same as the original and re-fitted the magneto. Then it was the moment of truth. The lorry hasn't run for nearly a year but it fired on the sixth compression with me just pulling it slowly round. Success number one! I then went for a test run around the village and it went like stink. Cleaning the carb out certainly made a difference and it was a real joy to drive. Now I need a free weekend and an excuse to take it out! Steve 😁


-
Hi Chris. This is what I have done although it is not very good, really. As Andy has suggested, I removed the plastic nut at the front of the tool and just mounted the tool through a steel plate. I turned up the steel collar because there was not enough thread in the original nut to get a good bite. The plate fits into my parting tool holder. The whole arrangement is not really stiff enough but it was good enough for cork. If I were doing it again, I would cut the thread in a piece of 1/2" bar and grip that in the toolpost after screwing the motor into it. The Dremel bearings aren't good enough for any sort of repeatable accuracy but it did the job I needed. Good luck with yours! Steve


-
Hi Errol. If you look at the Thornycroft thread, pages nine and ten, you can see what we did. If you pull the engine right down and remove the pistons individually, you won't risk any of your precious and irreplaceable parts. I used to keep a can of penetrating oil on top of the Thorny engine and give it a squirt every time I walked past. This did absolute wonders and we managed to break very little getting the thing apart. If you do that for six months or so, it really will make a difference. Good luck! Steve
-

HAPPY 100TH BIRTHDAY To my Albion Chassis No. 361A
Old Bill replied to lynx42 Rick Cove's topic in Pre WW2 vehicles
What a find! Soon be on the road now! Steve -
We have been plodding on this week. I really want to get on with the engine but living 200 miles from the lorry does make it very difficult! I have been amusing myself by turning up two new carburettor jets slightly bigger than the original but smaller than the one I made when we tried to run the beast. It is nice to get back on the lathe after all the heavy ironwork recently. The next item has been the petrol tap. The one we fitted was a simple tapered plug cock which looks almost exactly like the one in the parts book. Unfortunately, despite my lapping it in it leaked very slowly. If we were running the lorry every day then we wouldn't even have noticed but because we leave the vehicles laid up for such long periods, we would have noticed the loss. To get over this, I decided to make a new cock but with a cork lining. I tried PTFE on the Dennis but I have learned that PTFE swells in petrol and the tap seizes. I have a cork lined valve which will fit the Dennis so I copied that. First job was to turn up the body and machine flats for the bosses. These were silver soldered of course! I bored it out after soldering so there was no distortion. Then the spindle, a nice bit of turning. After drilling and tapping, the handle was screwed in. Now for the cork which came from a sherry bottle. I drilled it through at 23/64" to give a slight interference on the spindle. High speed and low feed rate is the secret here. Have you ever tried turning cork? It is evil stuff! I now resort to grinding it. I have made up a flat piece of steel which fits the nose of the Dremel and also the toolpost and, using a grinding wheel, can machine it at up to 0.010" each cut. It is quite accurate too. I Loctited a driving pin into the spindle. And after copious 3 in One oil on the cork, a working tap! Well, for a while anyway. I was lazy and used a normal nut and washer on the cork. This meant that all of the drive was transmitted through the peg and it tore the cork up. I therefore made a fancy flanged castle nut and machined another cork which was composite this time. Success! This weekend, I have made up the tailboard catches. They are not something sensible like a peg in a hole but rather fancy flip-over catches, bent out of 3/4" bar. First task was to make a bending jig. I heated the bar with the propane torch and it bent OK. The blacksmith's hearth would have been a much quicker heat source but that is in Devon waiting for me to build a blacksmith's forge. Another future project! The bosses were turned up, had a flat machined on them and were then silver soldered into place. The pegs were turned up and soldered into place as well. Finally, I turned up the pivots. These are bolted to the tailboard through the middle using a 3/8" bolt with the catches free to turn on them. Something else to fit once the engine is sorted. I have been very highly recommended to wash the grit out of the blocks and valves with plenty of paraffin. This is a very sensible idea but I will have to take the first block off again to do it. Oh well. Steve


-
Thanks Doug. Yes, it wouldn't have made it and we would have spent a lot of money for nothing. We did play the same trick with the Dennis though and got away with it! We have now set ourselves another deadline as we have promised to take something to the 'Tanks and Trucks' do at Bovington at the end of August followed by a road-run to the Great Dorset Steam Fair. That will be a 140 mile round trip so it would be nice to get a few miles under our belts first! We took the blocks down to Exeter to see our friend Dave who had very kindly offered to hone them out. I had never seen this done so it was educational as well. The honing head is made by Delapena and has an adjuster on the top to push the stones outwards. The result is quite a torque reaction which caused the drill to 'kick' as it went over bumps in the bores. It quickly settled down and Dave took out somewhere between one and two thou. The swarf was quite noticeable so it was certainly cutting! He worked it up and down the length of the bores constantly to give a spiral cut without circular grooves Once we got the blocks home, I set about cleaning and sealing up the crankcase starting with a coat of Hylomar on each valve follower. I don't want any more water getting in if we can help it. I also cut a thin paer gasket to go under each block. These were marked out by tapping around the edge of the block with a ball pein hammer. The second piston went back and we were ready to try to refit the block. I don't have any pictures of it at this time as we ran out of hands. Suffice to say that I got too enthusiatic and broke a ring which irked me in the extreme so we stopped for the day. Sunday morning when I had got my temper back and it wasn't so hot, we had another go and this time, all was well. We just used the chain block to lower the block back onto the pistons whilst I squeezed the rings in one at a time. The other two pistons were fitted, less one ring, and we are ready for the next time. The replacement ring turned up today, £20.10, so finishing the reassembly will be the task for the next visit down South. In the meantime, still plenty of bits to do! Steve


-
We have 1963 109 as well within the collection! I bought it about 25 years ago as that we needed something to tow the two Autocars around on a Trailer when we took them to "Meets". It is ex -RAF Regiment and had the equivalent of about 7K miles on the clock when I bought it - now reached about 27K only after all of these years.. Looking a bit shabby but dearly loved by us all! Tony
-
Thanks Chaps. Lots of food for thought there. We store them dry, generally, as we do very few miles and it reduces the amount of drips on the floor! The Dennis has been roadworthy for seven years now and still hasn't done 500 miles and the poor old FWD hasn't run at all for nearly three. All a bit sad really! I have spent the day working on the front wing irons. Grinding, filing and filling the same as before although the welding was very kindly done for us by Adrian. A very tedious job which I can now hand over to the paint shop. Steve

-
Hi Chaps. I have been sorting out all the things I put on hold whilst working on the lorry! However, I am getting back to it now. I am not good at instant decisions as I like to weigh the facts and listen to all of the advice I am offered. Even if I don't take your advice, I always appreciate it very much so many thanks to everyone for their suggestions. In the mean time I have been pushoing on with wing brackets. They are a horrible job and I shall be pleased to see the back of them. I have spent a lot of time filing a bit of shape into them. Then it was a case of drilling the bolt holes. Followed by a bit of filler to tidy them up. They are now in primer awaiting attention from the paint shop. Something else which didn't quite get finished off was the throttle pedal. Dad had cut it to my sketch but never quite got around to filing the section. In the end, this proved a blessing as I got it a bit too long and had to drill a second pivot hole futher up. Once trimmed back, the pedal was filed to an elliptical shape to represent a forging. Another tedious job! It does make a worthwhile improvement in its appearance, however. I have finally decided what to do with the pistons and cylinders. The cylinders are to be honed out by a further 0.002-0.003" to clean them up and increase the clearance and this should happen next week. I have been turning the pistons in the Myford to increase the clearance around the top land to 0.017" and that between the rings to 0.012" with the bottom section remaining with a 0.005" clearance. This will increase when the bores are honed. I have also taken the opportunity to increase the depth of the ring grooves by 0.020" and have opened them out by a whisper to make sure that the rings move freely. Following advice from here, I shall replace the compression rings on the two pistons which picked up as the originals were scored when this happened. I shan't trouble with the oil control ring. The pistons are all complete now and only await delivery of the new rings. Now I must return to filing wing brackets, the front ones this time. They don't get any more fun to do! Steve


