


flyingfleasteve
-
Posts
708 -
Joined
-
Last visited
-
Days Won
4
Content Type
Profiles
Forums
Gallery
Blogs
Events
Articles
Store
Downloads
Everything posted by flyingfleasteve
-
Restoration 4 - Matchless G3 Panel Tank
flyingfleasteve replied to flyingfleasteve's topic in Motorcycles
A few more bits on order, hoping to get the primary side back together in the next week of so. A few other bits and pieces done but progress has slowed up since I started marathon training 😬 A small anorak question, what size/ thread are the carb control cable adjuster nuts? They seem quite Peculiar to me…..
-
Restoration 4 - Matchless G3 Panel Tank
flyingfleasteve replied to flyingfleasteve's topic in Motorcycles
Thanks Ron. I am reliably informed that they are different depths for chain alignment. The mag sprocket is .576” and the cam sprocket .62” Best measure my existing to see what I have…… -
Restoration 4 - Matchless G3 Panel Tank
flyingfleasteve replied to flyingfleasteve's topic in Motorcycles
Thank you Ron! So I have the dynamo sprocket correct, I just need to check if the sprocket I have fitted to the magneto is correct or whether it’s the lower timing sprocket….. -
Restoration 4 - Matchless G3 Panel Tank
flyingfleasteve replied to flyingfleasteve's topic in Motorcycles
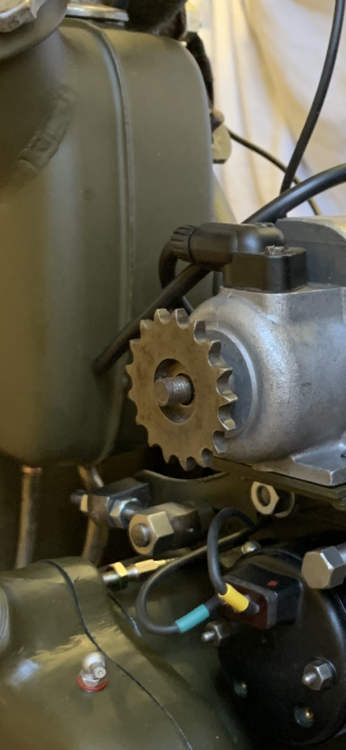
Things have been a little slow the last few weeks with other non Matchless related jobs needing attention. I managed to get a few minutes this morning to take a little look at the missing items left for the build and I seemed to have confused myself with the dynamo, magneto and lower timing sprockets. Currently I am one sprocket short which originally I thought was the lower timing one, but now I am not so sure, maybe I have fitted them incorrectly?

-
Restoration 4 - Matchless G3 Panel Tank
flyingfleasteve replied to flyingfleasteve's topic in Motorcycles
Thanks gents, perfect! I actually have the remains of now what I believe is the original petrol tap an balance pipe in the remaining ‘spares’ pile. I maybe able to salvage it...... Ron good to see you have some bling on you G3 (the brass inspection cover knurled nuts 😉) I am currently chasing down my next set of parts to get the engine wrapped up, mainly primary drive change, magneto chain and lower timing sprocket..... -
Restoration 4 - Matchless G3 Panel Tank
flyingfleasteve replied to flyingfleasteve's topic in Motorcycles
Looking good Lex! Out of curiosity have you any photos of the correct fuel taps and fuel line? I am going to make the fuel line and top rocker box oil feed line, am I correct in assuming the pipe is standard 1/4”? -
Restoration 4 - Matchless G3 Panel Tank
flyingfleasteve replied to flyingfleasteve's topic in Motorcycles
Il block it up now, whilst I remember! -
Restoration 4 - Matchless G3 Panel Tank
flyingfleasteve replied to flyingfleasteve's topic in Motorcycles
Thanks gents! Really helpful! Just to confirm, this is the hole I need to block up?
-
Restoration 4 - Matchless G3 Panel Tank
flyingfleasteve replied to flyingfleasteve's topic in Motorcycles
Thanks all. after piecing the clutch basket and center driver together I am not happy as the bearings appear a little tight and pinching in places. I suspected the central spacer, inside the ring of bearings, has warn slight and needs replacing giving a little more tolerance. With the clutch put to one side I have managed to remedy the warping to the carb block by splitting it from the lower section, heating with a few choice taps with a drift and hammer. Now that’s sorted I have cleaned it all up and popped it back together. Fully serviced its on the bike and ready to go. The slider and choke feel much smoother but the slider is now not quite as tight as I would like, I will see how it runs and evaluate it from there.


-
Restoration 4 - Matchless G3 Panel Tank
flyingfleasteve replied to flyingfleasteve's topic in Motorcycles
Thanks Ron! Can I ask, what is the general consensus regarding the fitment of new clutch plates, should they be soaked in oil first? -
Restoration 4 - Matchless G3 Panel Tank
flyingfleasteve replied to flyingfleasteve's topic in Motorcycles
Morning all! Yes we have discussed carbs before Ron......your totally right it has the drip hole in the flange. When I opened mine up to check it to my horror not even the slider would move up and down, the jet block has actually been slightly bent at some point and consequently pinching the slider 🙈 At this stage I don’t know if I can remedy it or whether it needs to be replaced... Ron I cannot quite make it out on the doc you have posted, which is the correct needle/length? Mine has no. 6 stamped in it? -
Restoration 4 - Matchless G3 Panel Tank
flyingfleasteve replied to flyingfleasteve's topic in Motorcycles
Hi All. So with all of this unpredictable weather a long weekends bike trip has been cancelled. This has given me some free time to really get stuck in and get the G3 towards the finish line. The engine build is advancing at a rate of knots with many components now fitted. Battery carrier now back on too complete with my home made strap nut and bolt. The original pushrods are past there best but I do have some later aluminium alternatives. Although slightly shorter there is plenty of adjustment to compensate for the shortfall in length but I am unsure if this is suitable? I hoped to be able to install the carb also but after buying a ‘freshly rebuild’ carb I quickly found out it’s in need of a full overhaul and many new part very disappointing! Next steps, clutch to go in and then order my next loads of parts.


-
Restoration 4 - Matchless G3 Panel Tank
flyingfleasteve replied to flyingfleasteve's topic in Motorcycles
Ron this is the puller I used.......very basic but it’s been a god send with this built, I would have been stumped without it https://www.ebay.co.uk/itm/283828524240 -
Restoration 4 - Matchless G3 Panel Tank
flyingfleasteve replied to flyingfleasteve's topic in Motorcycles
Thanks Lex. When I had the barrel bored I proved the piston with rings fitted to ensure correct sizing, 🤞 -
Restoration 4 - Matchless G3 Panel Tank
flyingfleasteve replied to flyingfleasteve's topic in Motorcycles
Today has been a productive afternoon after a few errors made last week. Whilst reaming the new small end bush I took my eye of the ball and over sized the hole 🙈 After taking a few days to obtain a new bush I today replaced it and reamed the new one with much better results! The piston now fitted I popped the newly renovated and bored barrel on and started work on the timing gears. The engine has been a labour of love but I am really starting to feel I am getting somewhere now! It just seams that every part needs work or felting 🙂


-
Restoration 4 - Matchless G3 Panel Tank
flyingfleasteve replied to flyingfleasteve's topic in Motorcycles
Thank you! -
Restoration 4 - Matchless G3 Panel Tank
flyingfleasteve replied to flyingfleasteve's topic in Motorcycles
Thanks Ron. I am pleased with the end result. I purchased the felts from AMC classics. They are notoriously difficult to located into place so I removed one of each of the bushes, located the felt and pushed the bush back in..... I can move the arms by hand easy enough, just a bit stiff. Probably because I soaked the felts first..... -
Restoration 4 - Matchless G3 Panel Tank
flyingfleasteve replied to flyingfleasteve's topic in Motorcycles
It’s getting closer Chris. I have now finally reset the bush distance in the rocker cover and put it all together. with the introduction of the new felt insets both rocker arms are a little stiff, I am hoping they will bed in once the engine is started?


-
Restoration 4 - Matchless G3 Panel Tank
flyingfleasteve replied to flyingfleasteve's topic in Motorcycles
A positive day today! 🙂 With some methodical workmanship I have now removed the old value guides and installed new ones. Valves now ground in and new valve springs fitted. Just some paint and the head is ready! The head has seen some extensive work and I am very pleased with the end result.


-
Restoration 4 - Matchless G3 Panel Tank
flyingfleasteve replied to flyingfleasteve's topic in Motorcycles
Thanks gents very helpful. Let’s see how I get on....... -
Restoration 4 - Matchless G3 Panel Tank
flyingfleasteve replied to flyingfleasteve's topic in Motorcycles
Hi all. so my new valve guides and drift tools have arrived ready for replacement tomorrow. The new guides are in the freezer over night in readiness. Is it recommended to heat the head and current guides before removal? Or can I attempt knocking them out without heat? With the head being cast am I correct in thinking the guide and head will heat at a similar rate so adding heat for removal may not help? -
Restoration 4 - Matchless G3 Panel Tank
flyingfleasteve replied to flyingfleasteve's topic in Motorcycles
That’s Chris. I have now ordered a set of replacement valve stems, just to be belt and braces. I have decided to give it a go myself, nothing like learning in the job 🙈 My aim this weekend is to ream the small end bush so I can fit the piston and barrel. A few more hurdles but it’s all part of the challange! -
Restoration 4 - Matchless G3 Panel Tank
flyingfleasteve replied to flyingfleasteve's topic in Motorcycles
Thanks Ron, I am not going to take any chances, I will replace both of them. I am just considering doing it myself or sending it to the shop 🤔 -
Restoration 4 - Matchless G3 Panel Tank
flyingfleasteve replied to flyingfleasteve's topic in Motorcycles
Thank you! Much appreciated! -
Restoration 4 - Matchless G3 Panel Tank
flyingfleasteve replied to flyingfleasteve's topic in Motorcycles
Hi gents. I think I know the answer to this, but how much play should there be in the valve guides/valves? I think my exhaust value is a bit sloppy and I am considering replacing the value guide. Is it a fairly straight forward operation to conduct?


