.png.13c2ec34f1c53365a25f5885333b02b8.png)
johann morris
-
Posts
602 -
Joined
-
Last visited
-
Days Won
33
Content Type
Profiles
Forums
Gallery
Blogs
Events
Articles
Store
Downloads
Everything posted by johann morris
-
Morning ghasp, The power plugs, like most of the rest, is home made but if you notice they screw to the front plate, as it didn't seem worth making them actually plug in. Yes the blokes details maybe useful, although I have bought a small CNC engraving machine so that I can do such things myself. It's a bit of a long winded process to program it and my mind is else where at the moment but in time I will get it going. Jon

-
Evening All, Would anyone perchance know the dimensions of tracks from a Russian BMP, pitch, width and the gap between the horns. I should be most appreciative if anyone could provide this information. Jon
-
.thumb.png.4854fbb26292d396a6b90659a3d1c4e2.png)
Military Land Rover 109 fitted with 2.25 diesel
johann morris replied to 67burwood's topic in British Vehicles
Thanks, any pictures of yours? -
Ebay uk. Any idea what colour green they were painted?
-
Here you go. The stamps are very hard to see clearly on the photograph but to the eye it looks like: BMB mk2 ? 1?53


-
Evening Enigma, I managed to get a helmet but it's been stored in a pile and although the advert didn't show it, it has a black ring around the crown. Do you ever repaint your shells, if so what colour do you use? The shell is dated as well as the liner. Regards, Jon
-
Military Land Rover 109 fitted with 2.25 diesel
johann morris replied to 67burwood's topic in British Vehicles
I bought a series 2a a few years ago, it was born as a petrol but someone had put a 2.5 diesel in it, I think it was from an LDV. Where I live it's all small roads with very steep hills, I hated it but thought that I would change it for a 2.25 Land rover diesel to keep it all land rover. It was a good engine, no smoke and on normal roads quite acceptable but around here, I don't think so. So I did what I should have done in the beginning and put a 2.25 petrol in pure silk. Noisy old diesels, you can keep them. This is after rebuild. Jon
-
And my wife has instructed me to tell you, that I made her a vegetarian quiche. Red Leicester pastry, with mushrooms, sugar snaps and sweet peppers, mixed with egg, pepper cream and more red Leicester topped with melted Cambozola. There, done as instructed. Jon
-
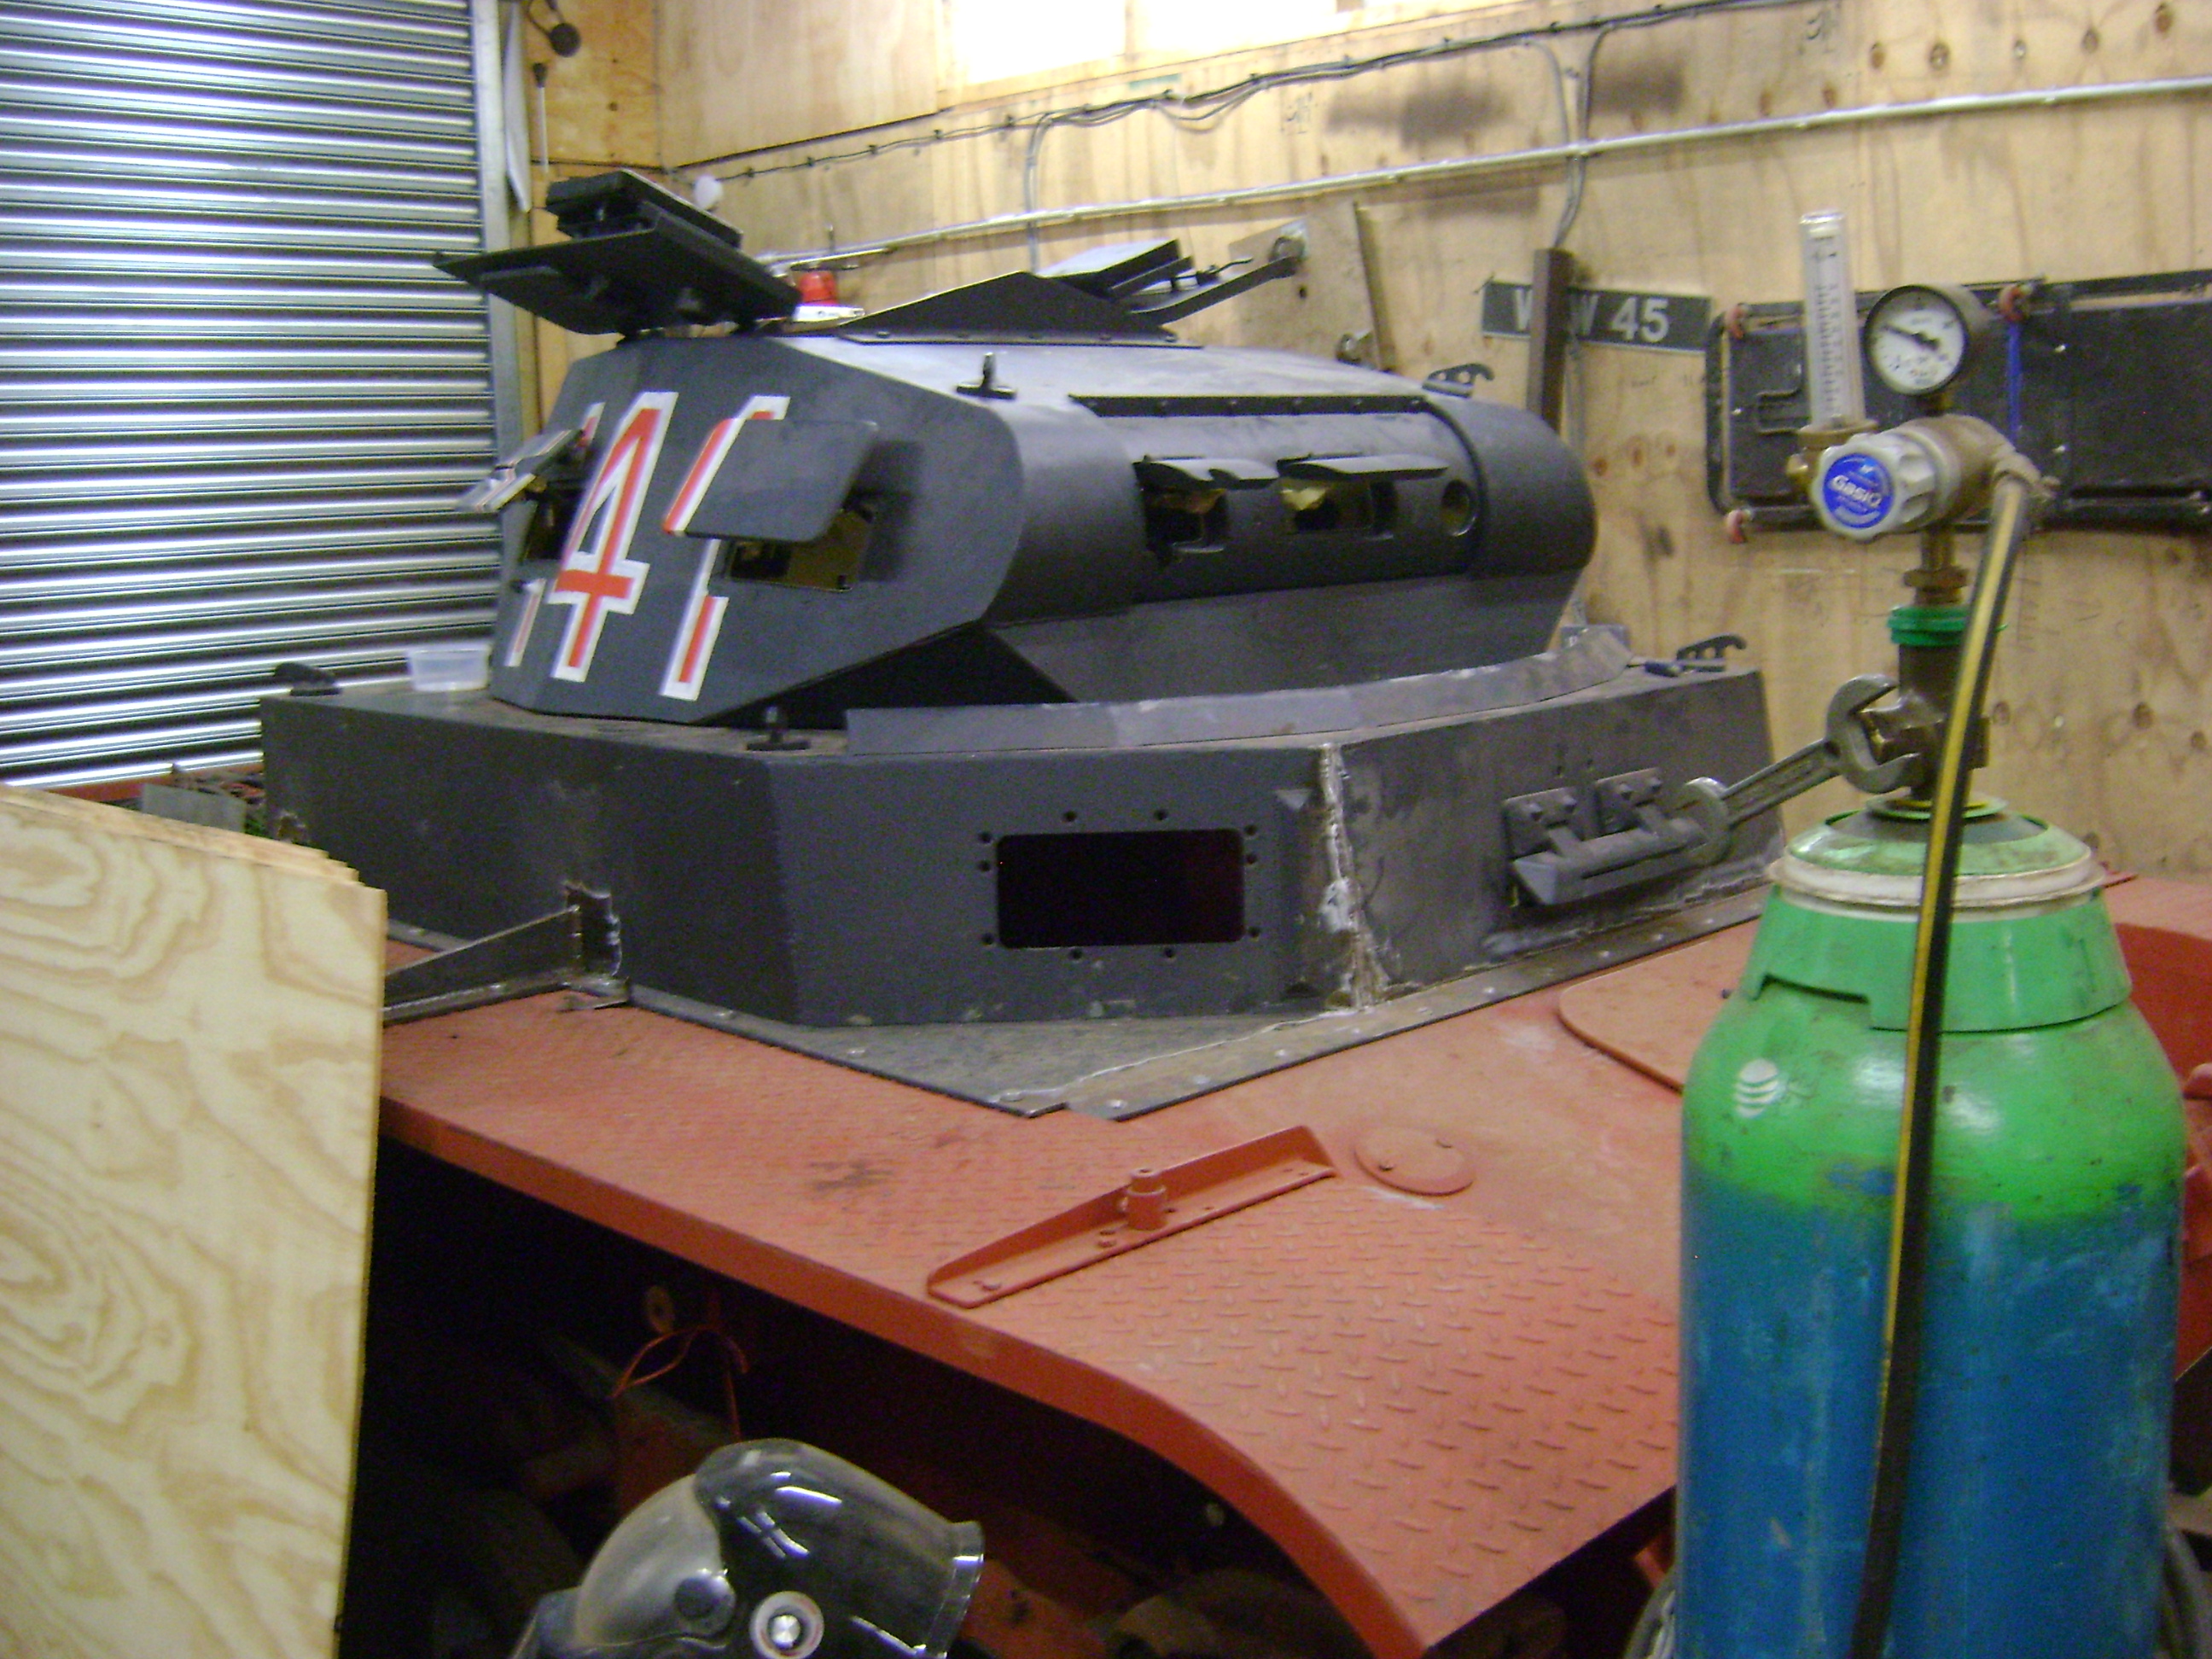
John seriously, I might need some help, thanks. Evening All, Forward, ever forward and to that end I have completed the support that connects the commanders seat to the rotary coupling on the hull floor. It can't be an exact copy of the original because I have had to modify it to suit my version of the electrical connection contained within. Now don't laugh, I don't usually show the pigeon poo pictures but I have made an exception, before grinding. After grinding. And after painting. The support is bent in this unusual shape so that it misses the radio operators leg when the turret turns and yes the space is that limited. That's all for now. As an after thought, I have Just constructed a lovely pie for tea. A layer of thick cut bacon, followed by a layer of mushrooms, then a layers of chicken, a layer of cranberry sauce, and finally a layer of sausage meat, with a nice thick chicken gravy poured over the top, topped off with nice red Leicester thick crust pastry. Bloody tasty, I can tell thee. Jon


-
Thanks John, although I don't read or speak German I have ordered a copy, my wife likes challenges, she married me! Much appreciated Lex, it might contain some interesting insights. Jon
-
Lots of thoughts but no solutions as yet. When the virus has abated and the world settles down, I will have to have them cast or find a set of originals . jon
-
Well you learn something every day. I am currently looking for a ww2 rac helmet but it appears that most have been converted by the reenacting community into para helmets. Jon
-
Lovely job but I hope that the RAC ones that you used weren't ww2 dated. Jon
-
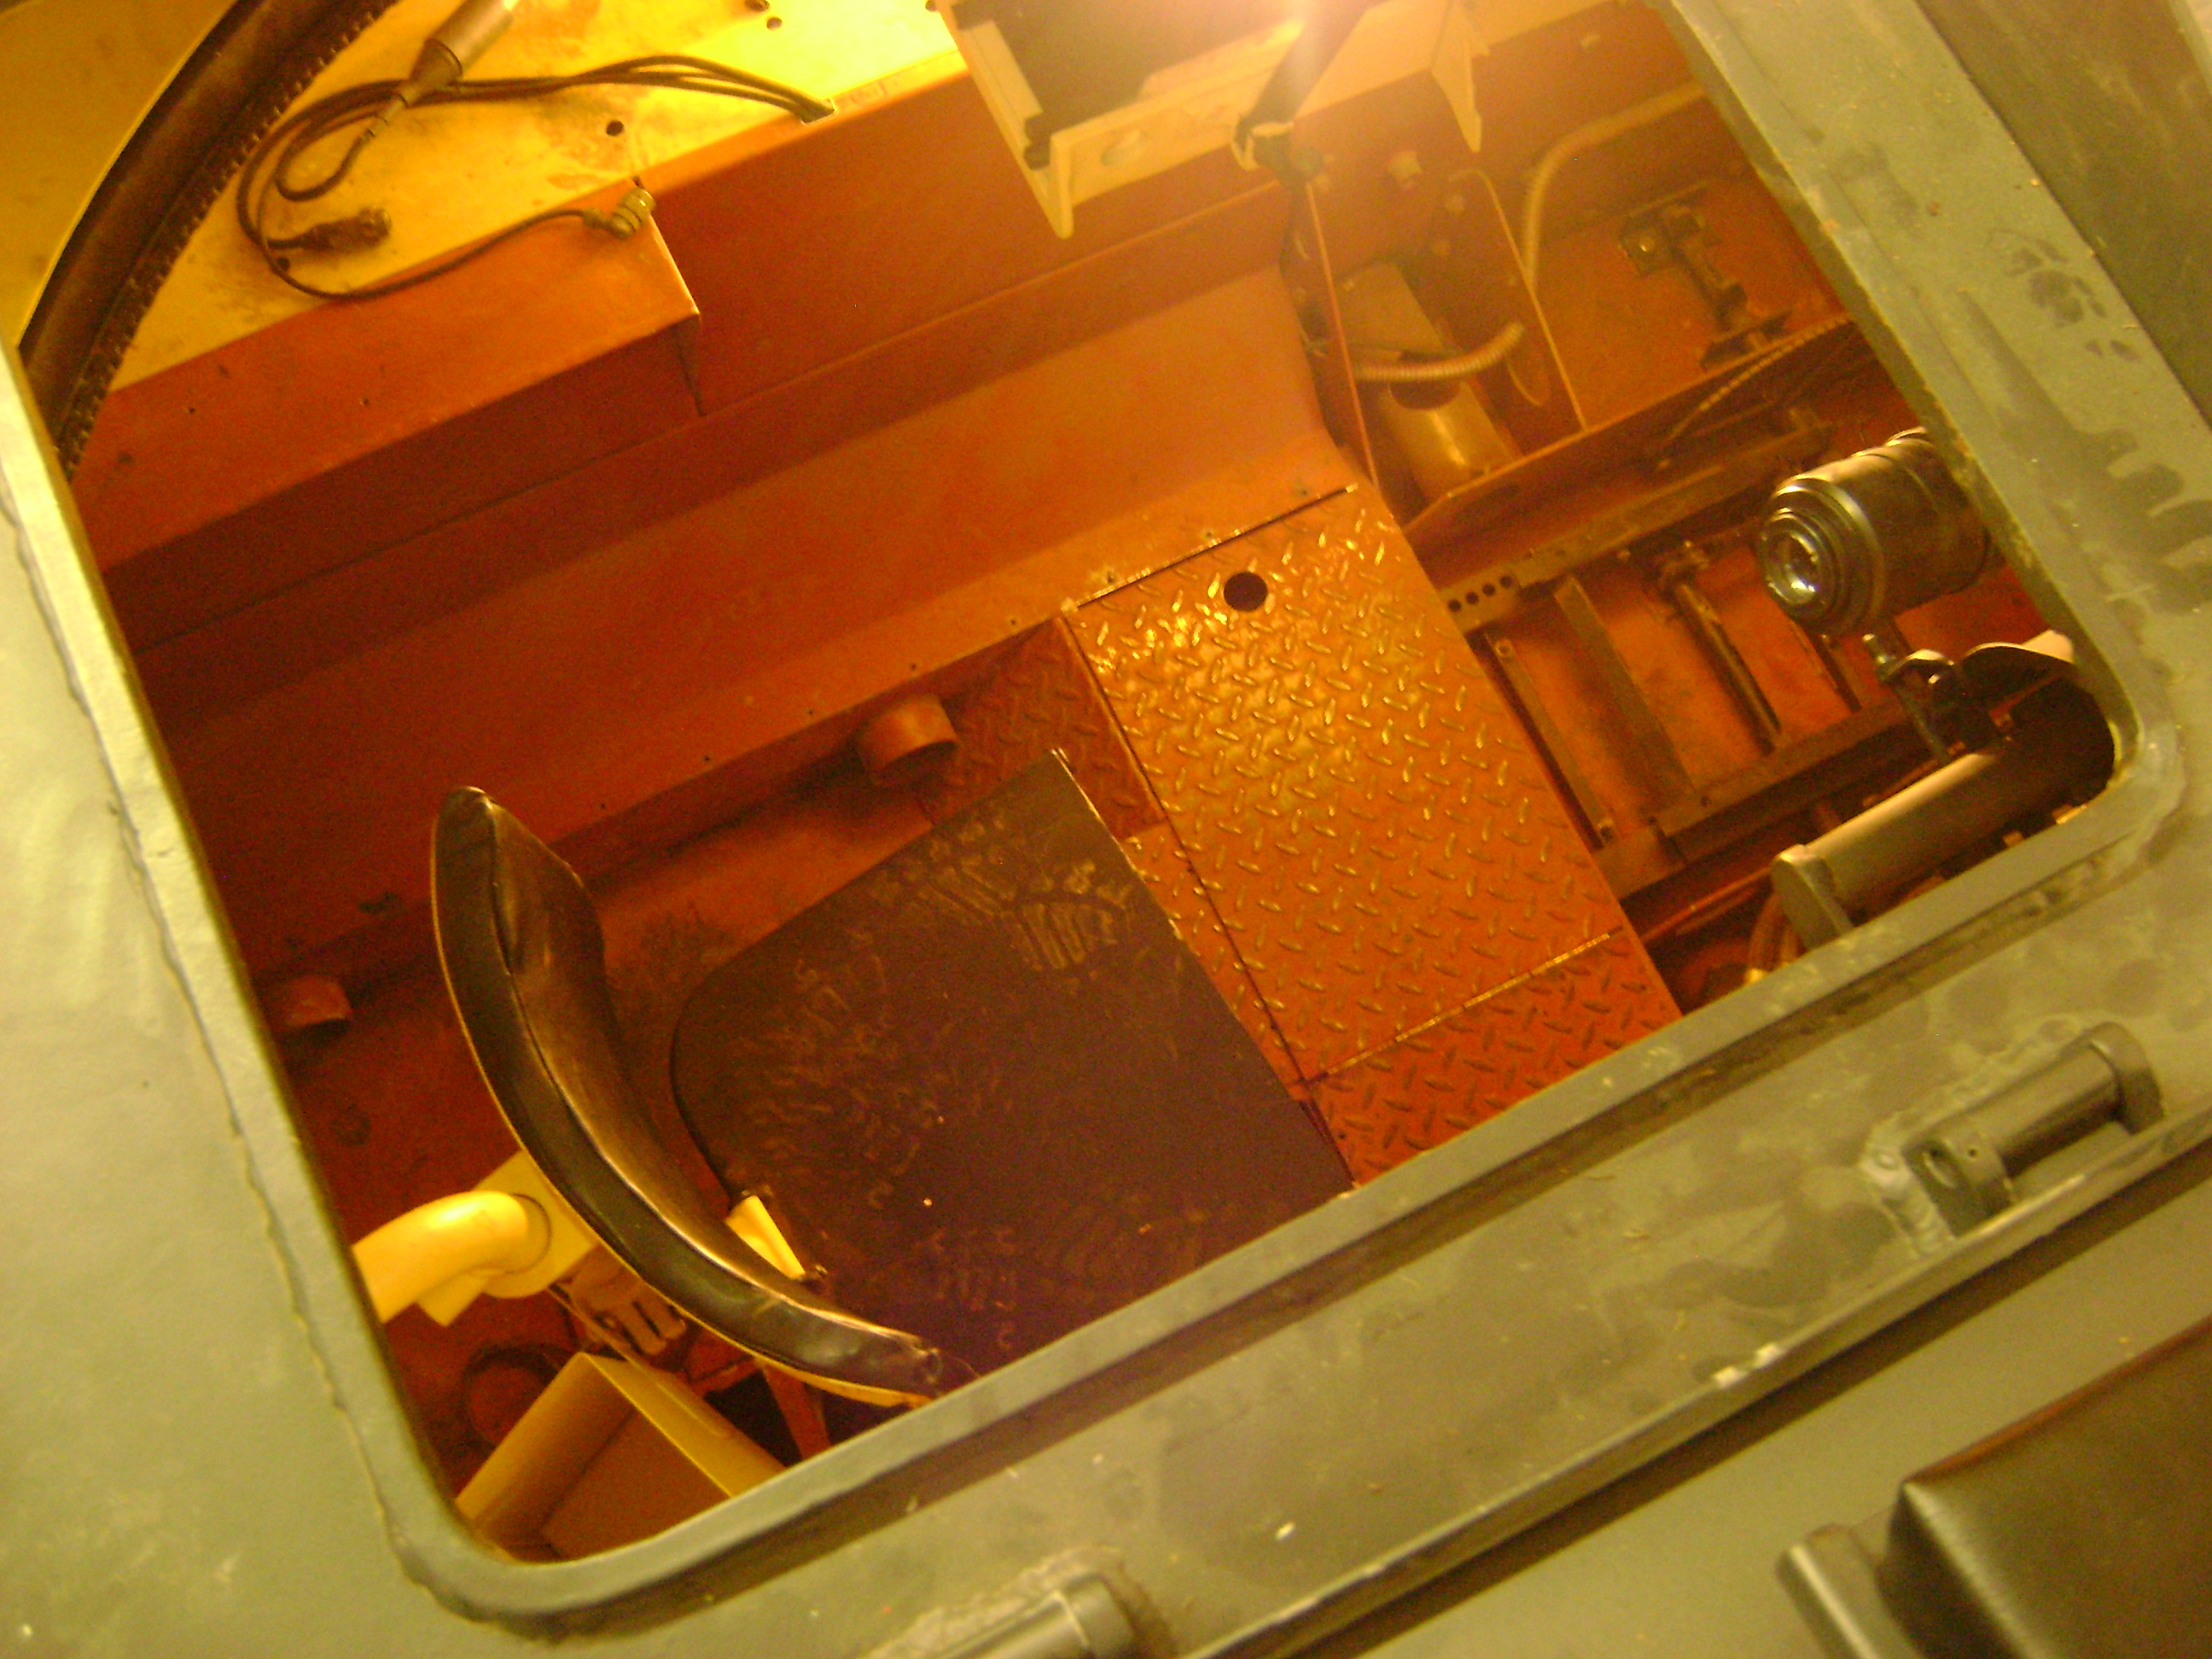
Evening All, It Took me most of Saturday to find the center of the turret ring on the hull floor and get the slip rig / rotary coupling bolted in place. Today, Sunday, we placed the turret on to the upper hull for the first time, progress me thinks. Then we took the CMP and Morris for a spin in the sun. The next job is to connect the commanders seat support to the rotary coupling. I shall endeavour to put a little more information in the next update. Jon


- 661 replies
-
- 12
-

-
Thanks again Funksammler, I am trying to be as faithful to a production C version but before the up armouring and the replacement of the clam shell turret hatches, as I can so 1941 era. I have to draw a line on how accurate it is going to be as it would never get finished and i would get bogged down in too much detail, so what you have given me is perfect thanks. The more detail that i put in the tank the more i realise how cramped it must have been. Regards, Jon
-
Didn't the edit button always live along the bottom of the page, in the end i gave up but my computer illiterate wife came along and said "what do those dots do". Silly boy jonathan. Jon
-
Thanks Funksammler, It did indeed answer all my questions and more, of course it created some more work but hell, i don't have much else to do, apart from.....................come to think of it, i don't even want to start listing it all. Jon
-
Does anyone know where the edit buttons disappeared to, or am i loosing it.
-
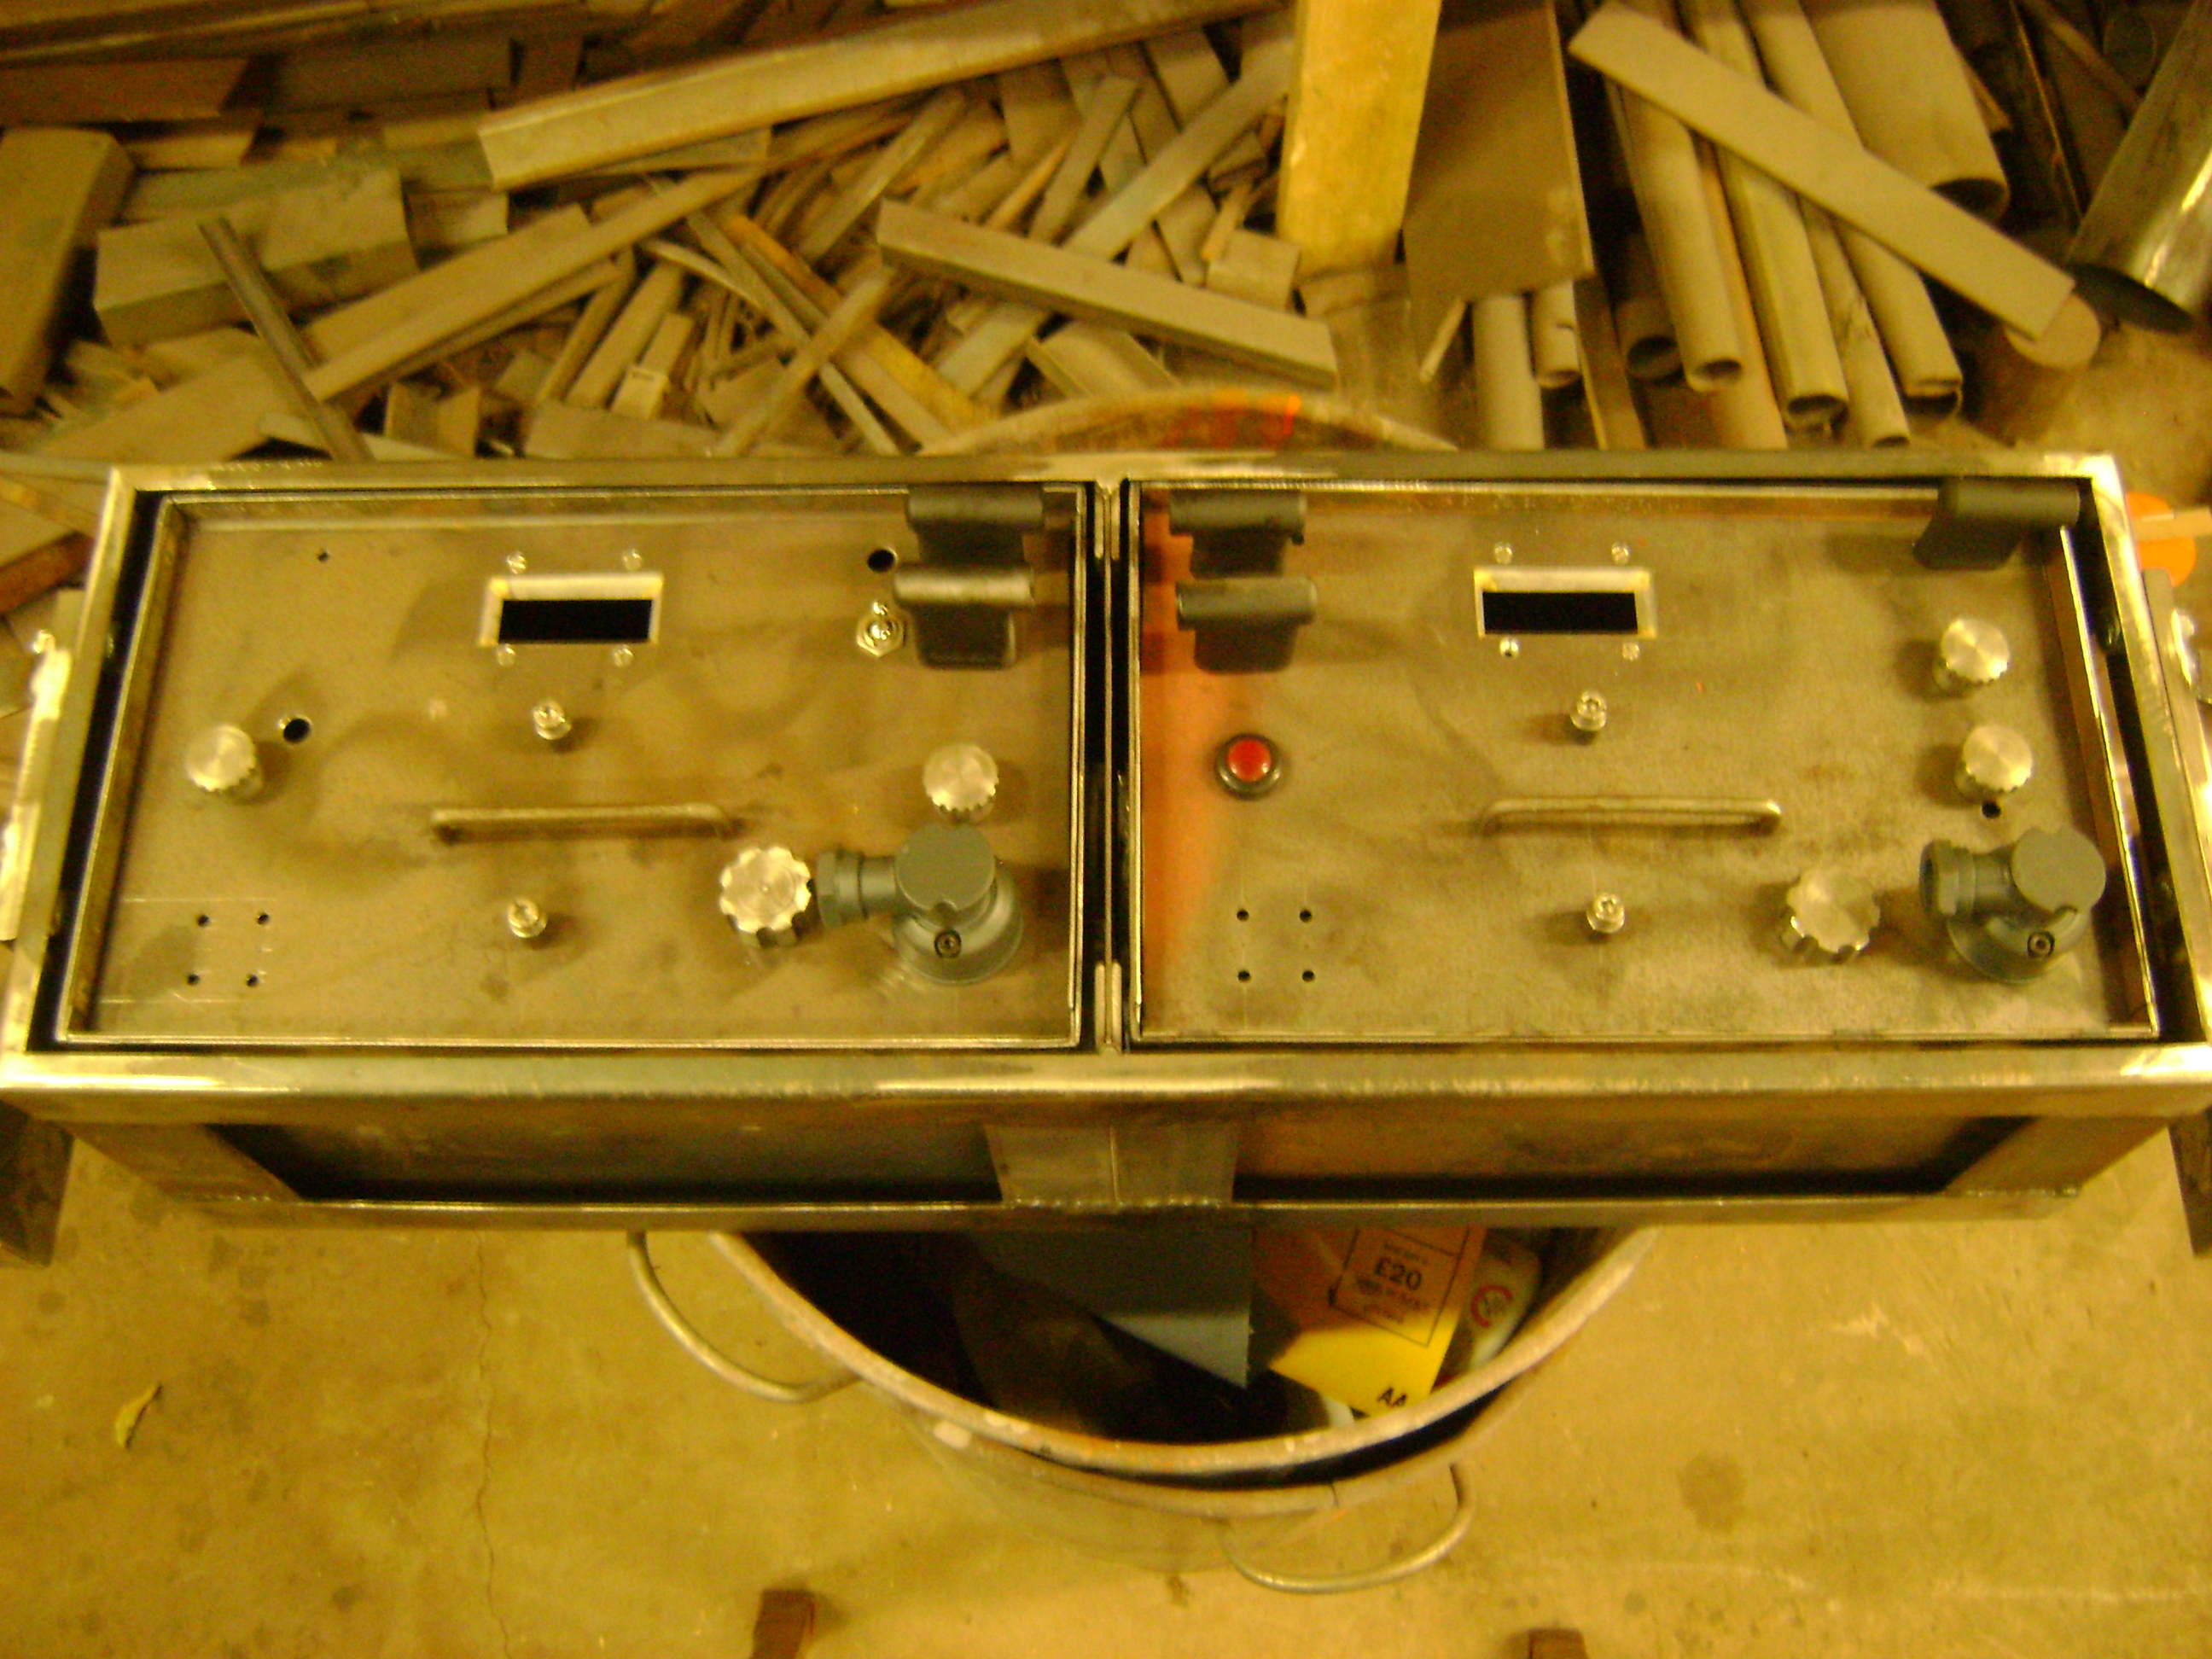
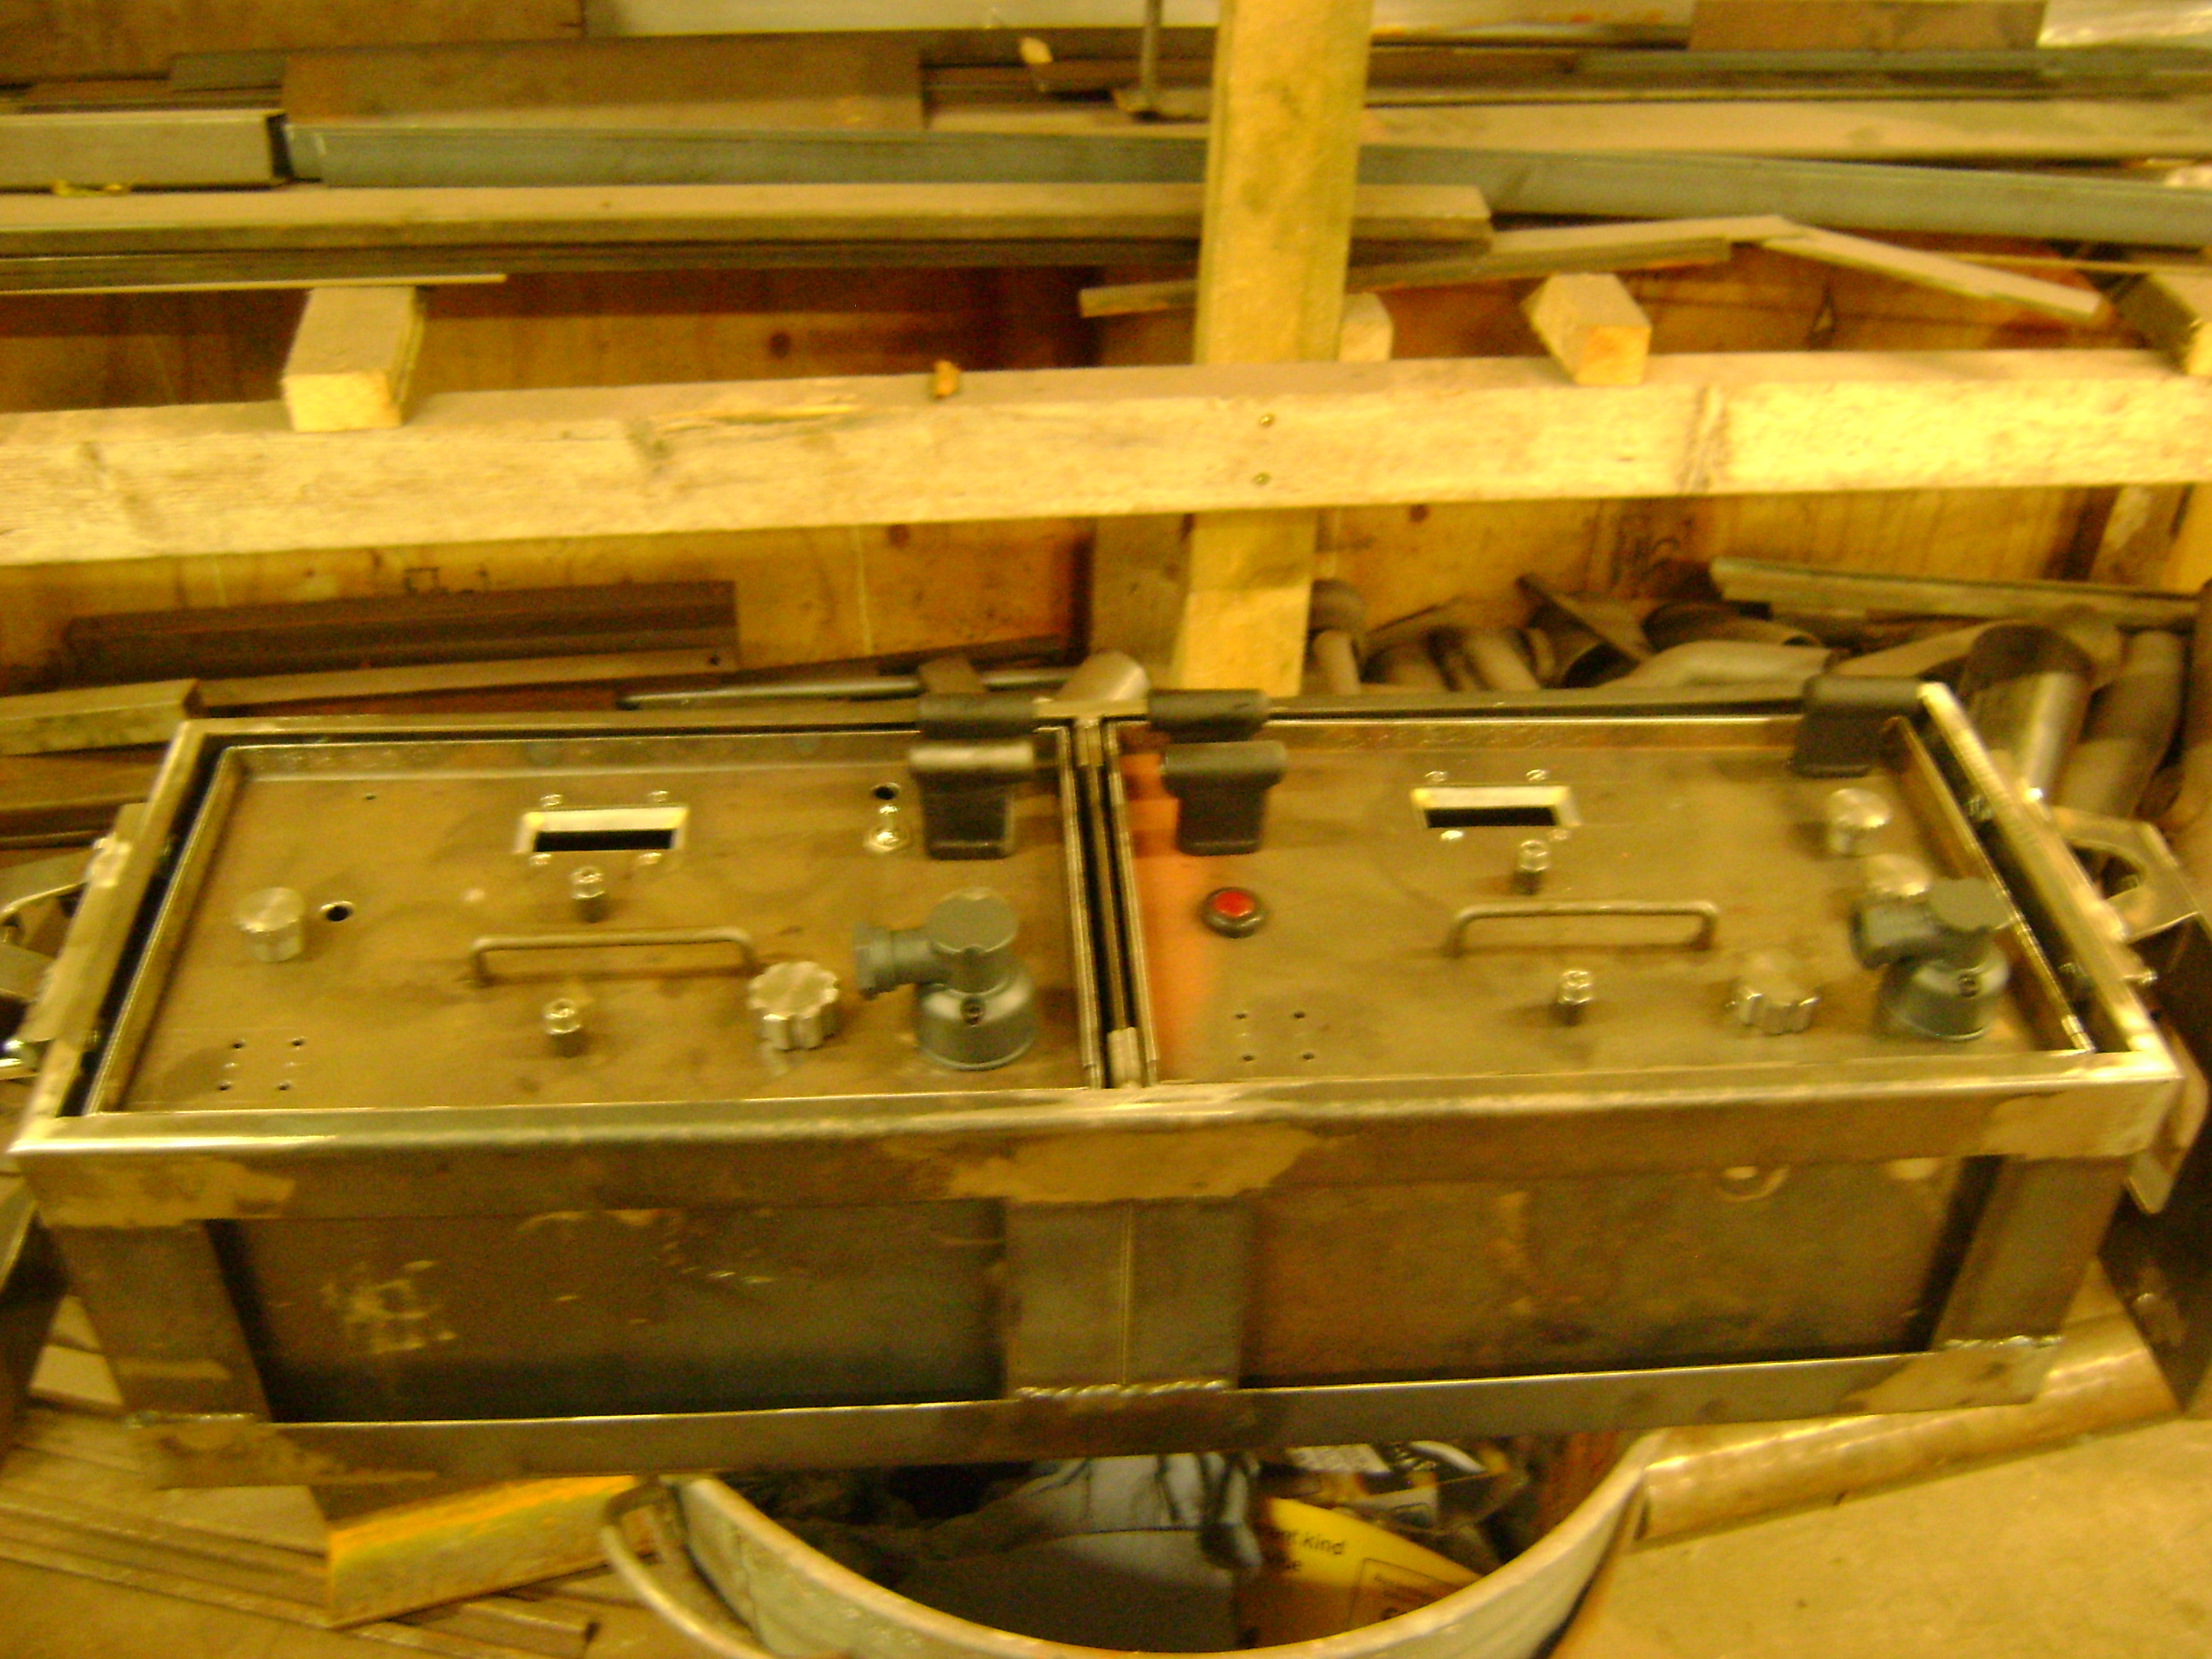
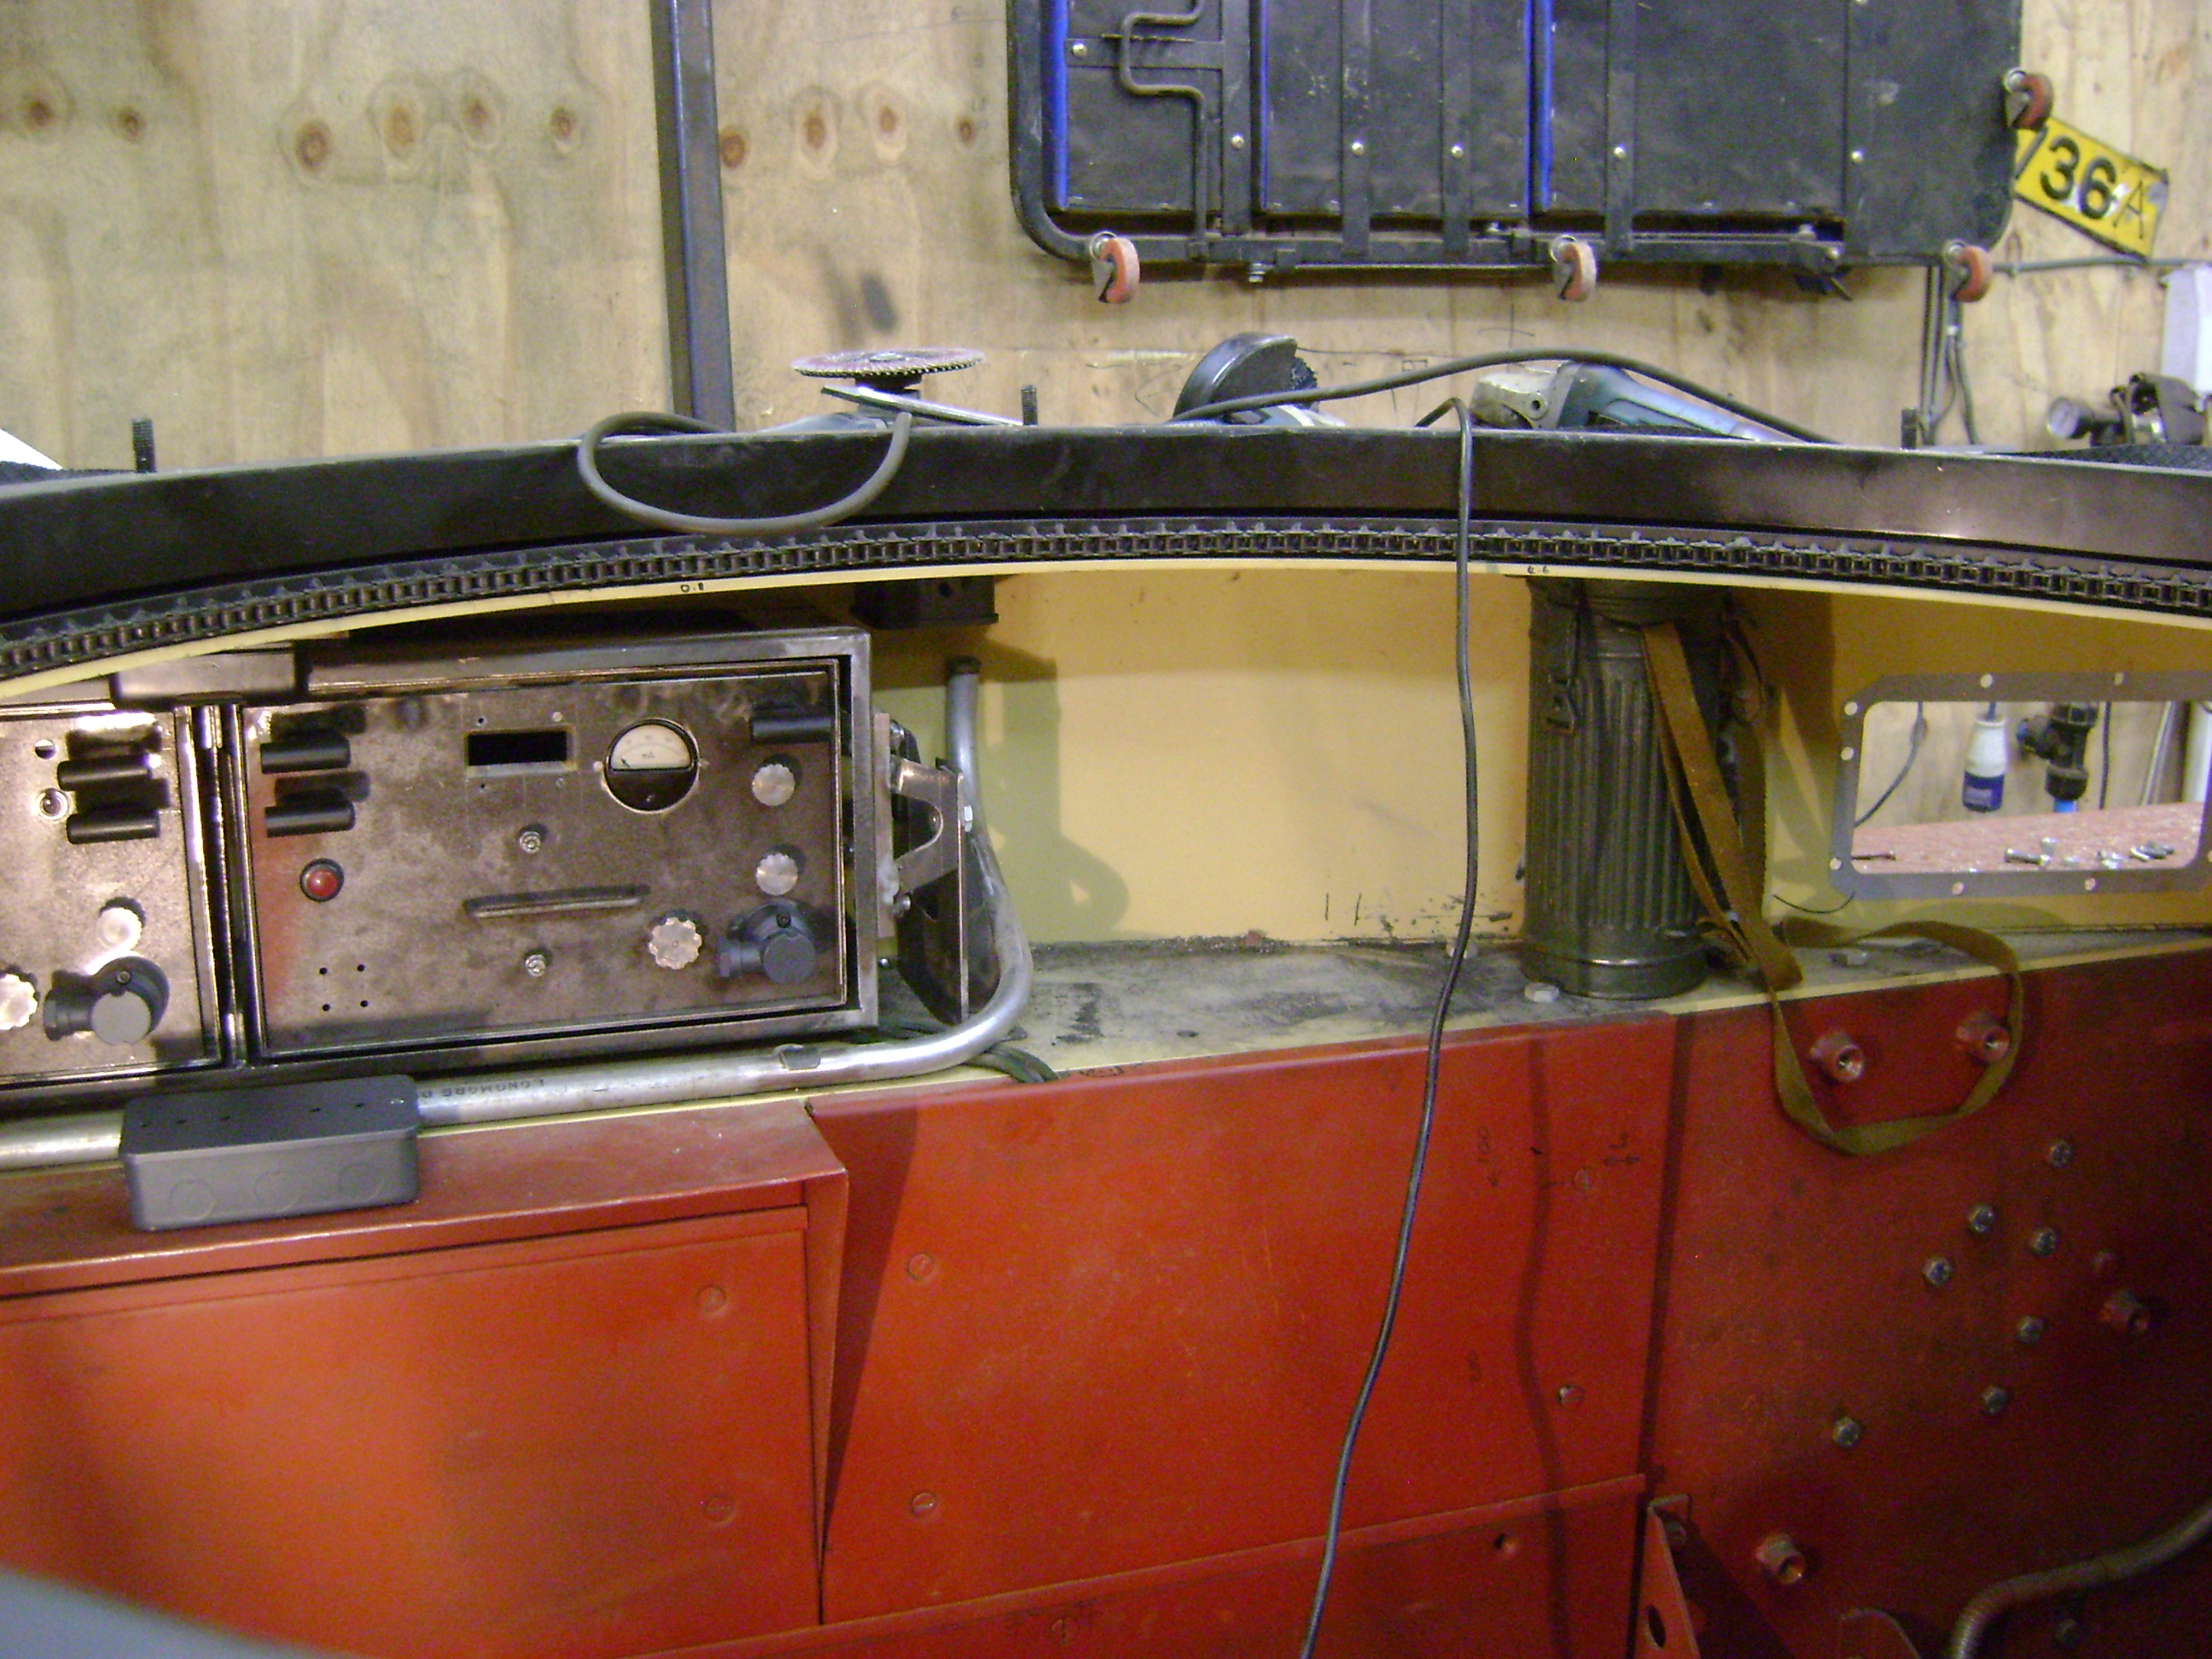
Evening All, It's taken me some time but i have managed to get around to fitting the clansman intercoms into the radio's and get the whole lot fitted in to the hull. Once you start on an area, you soon realise that there are a lot more components needed than first thought. The cable from the aerial to the radio travels from the isolator, (light blue) to a junction box (red), along conduit (green), to a second junction box (red) and then into the radio (yellow). On the roof plate there is a light (mauve) and a further junction box in front of the radios and then there are whole lot of clamps that need making to hold everything on place. There's still a lot of finishing to do but now that the complicated works done i can spend the cold evenings making the radio fronts look more like the originals. The one thing that I would love to know, is how and where all the wiring for the radio was run in the original tank. I have several diagrams showing how to connect the system together but non that show how it was configured in a Panzer ll or where the transformers were situated. I suppose i will find the answer in the end, after more endless hours searching the net. Jon


.jpg.69493e8d73728684639cb965ab879246.jpg)
-
Fantastic job, this is the part that makes all that hard work worth while. Jon
-
That's a grand looking vehicle and a really nice project. My wife likes it a lot. Jon
-
I took a car for an MOT the examiner failed it for a rotten brake pipe, i told him that i had just replaced it prior to the MOT he said in his opinion it was rotten. I took it home replaced it and took the vehicle back, it passed. I showed him the brake pipe that i took off and it was obviously new, his reply "i don't care". Took a land rover discovery to a different MOT station, it failed for a broken front spring. I replaced the front spring and returned the vehicle along with the unbroken front spring that i had taken off, the examiners reply, "well it looked like it". The most annoying failure was for the round reflector on the rear of a series 3 Land Rover because it was upside down, even through the writing on it was the correct way up. I undid the nut rotated the reflector so that the writing was upside down and it passed. You can't argue so why bother and i very much doubt if a complaint will help.
-
Errrr no, that's too advanced for me, they are fabricated, turned, milled or hand filed. Jon
-
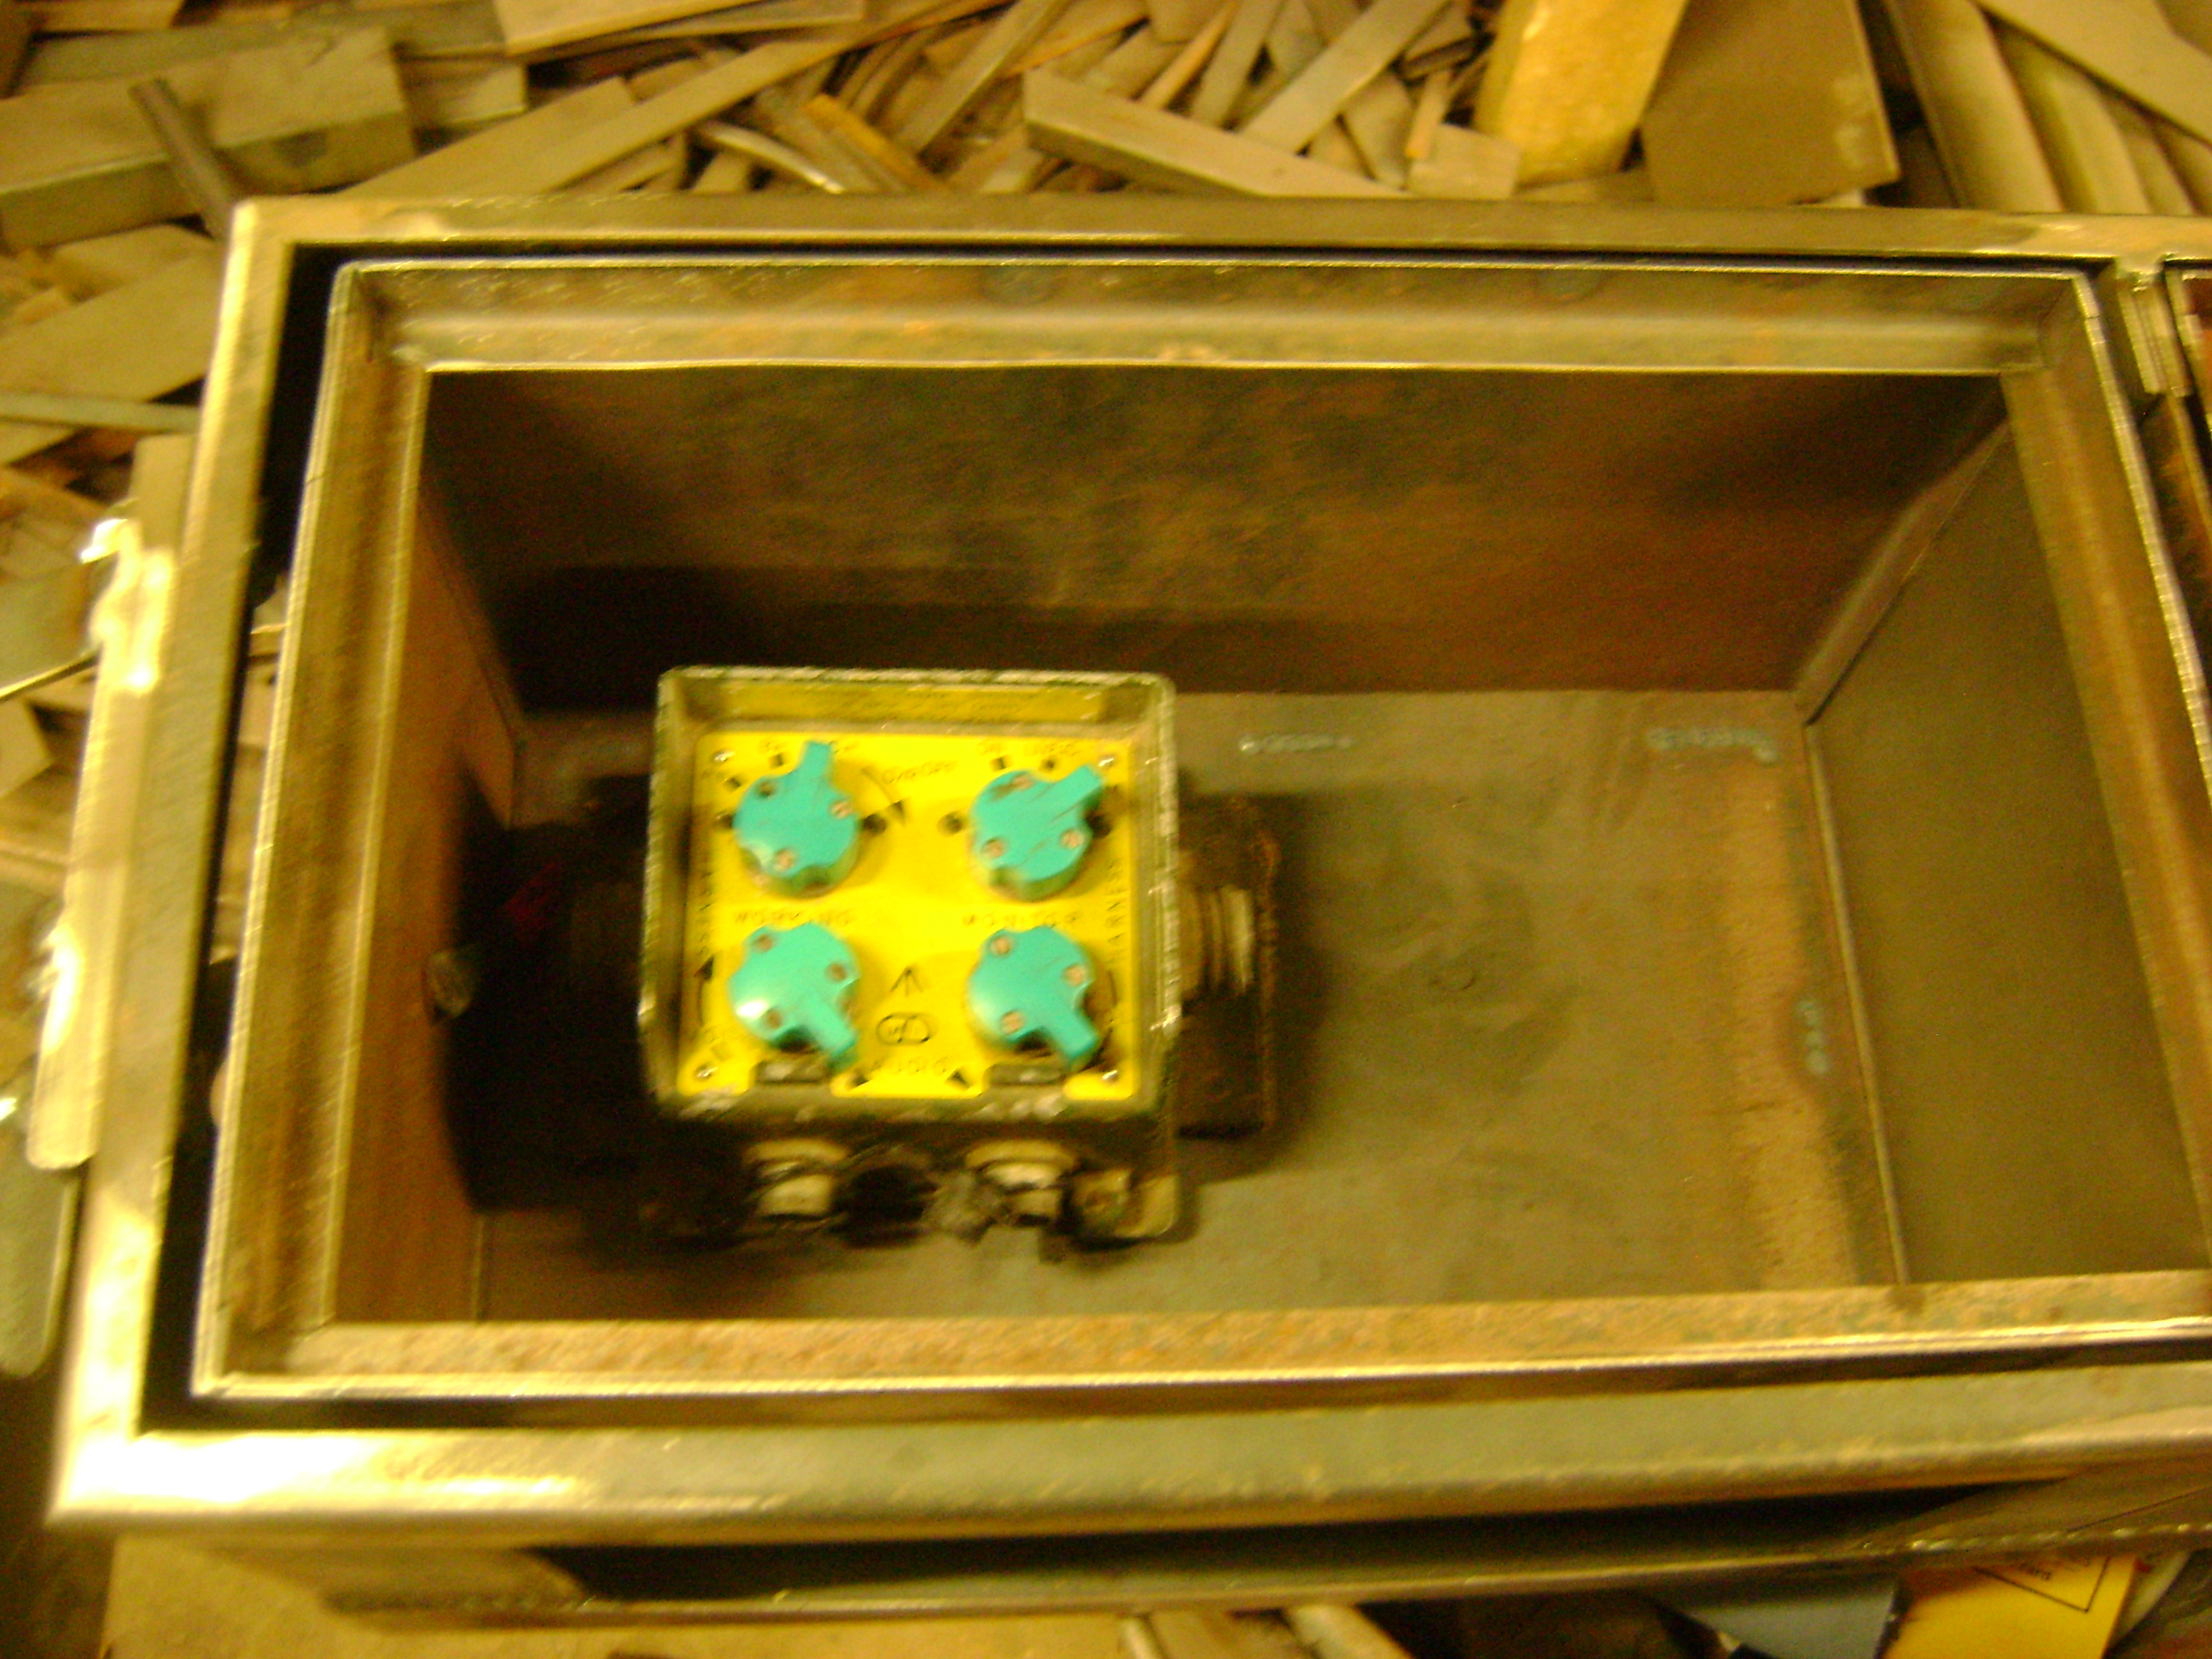
Evening All, At last some time to spend playing with me little tank. As stated before, I am going to be using Clansman intercoms in the tank and the ideal place to hide them is within the radios. I have an original radio but that is of no use as i don't want to ruin it by ripping the innards out, so i have been making a repro set. The radios were housed in the aforementioned frame on the inside of the hull on the right hand side, viewed from the front of the tank. The radio consists of two units side by side. So the task in hand is to try and recreate these units but with hinged front plates so that there is access to the Clansman boxes inside. Obviously i am not going over the top with them, as they just have to look the part but still it's a time consuming process. One of two power plugs next to a picture of a real one. The units are not finished yet but this is it so far. And that's it for now. Jon
.jpg.48c25ef6114c26f8268f6432fe293a4d.jpg)


-
I personally don't have a problem with replicas as long as they are not portrayed as originals. I think that anyone who puts the effort into restoring anything is worthy of praise, the only exception, in my mind, are those who pay to have the work done and the then tell everyone that they restored the item themselves, why not just be honest. As for not using the correct thickness of steel, sometimes there seems to be little point, unless it can be seen and the in a lot of cases it can be packed out to look correct if you are using thinner material or ground back, if it is slightly too thick. If you take my Panzer 2 for example, what would be the point of using the correct thickness steel, apart to help rigidity, it only adds weight, increases cost and adds stress to the the running gear, apart from which even if I were to use the correct thickness steel, it still isn't armoured. I could of course spend a fortune on original fittings but why bother, it is after all a replica and everything that I produce is copied or built to scale. Apart from which, the whole project was purly an engineering exercise, for my own pleasure, to see if I could produce the components at home. If you have the ability, motivation and the imagination, build what you like but like what you build and when you have finished, take satisfaction in what you have achieved and don't worry about the rivet counters, most of them have neither the ability, motivation or imagination to start, let alone finish, a project. Jon
.thumb.png.4854fbb26292d396a6b90659a3d1c4e2.png)


.jpg.69493e8d73728684639cb965ab879246.jpg)
.jpg.48c25ef6114c26f8268f6432fe293a4d.jpg)