


67burwood
-
Posts
931 -
Joined
-
Last visited
-
Days Won
29
Content Type
Profiles
Forums
Gallery
Blogs
Events
Articles
Store
Downloads
Everything posted by 67burwood
-
“ when you start one of those jobs and half way through you say WHY!! “ Due to the general poor weather I decided to tackle a small in door job, the battery tray from the passenger side had suffered badly along with everything else on the passenger side A fairly straight forward job, or so I thought 🤨 I decided that the original was to far gone to save and so set about building a new one. One sheet of steel and measurements taken from the original tray. Mistake number 1.....complete school boy error!! , I didn’t measure the opening in the floor..... the new floor I built🙄 funnily enough it wasn’t the same size as the old tray. After folding and then straightening many many times It started to look like this Spot welded for neatness. Mistake number 2....who knows what I was thinking 🤔, it didn’t FIT trying to be too millimetre perfect I didn’t allow for the folded ends!! bodywork adjustment tools required Now it fits🎉 before and after.


-
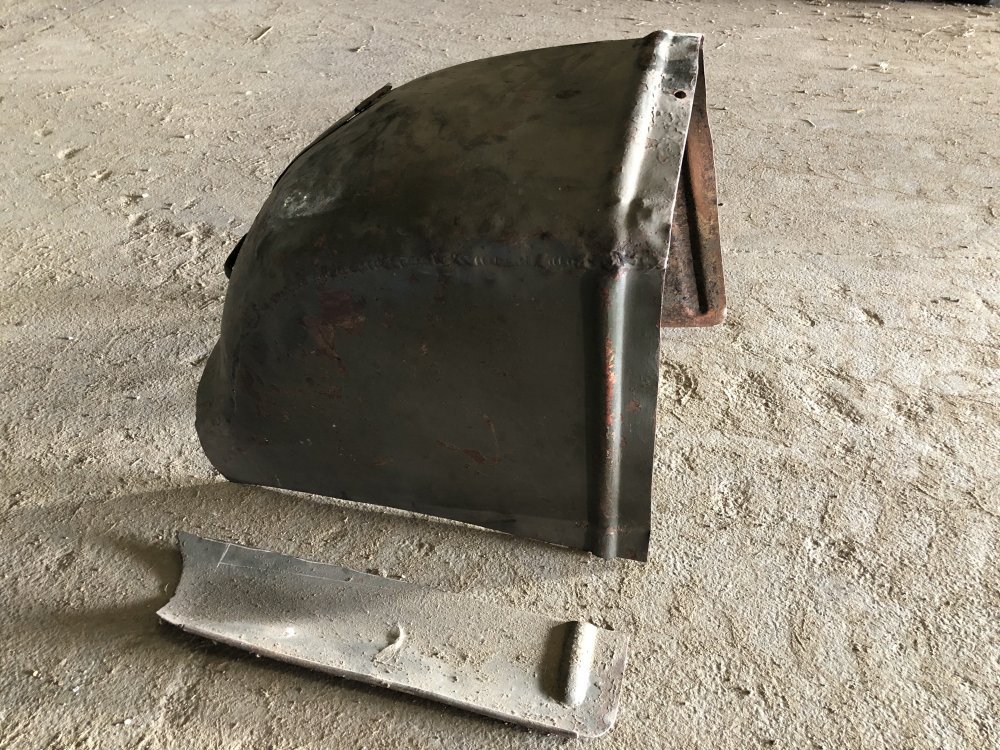
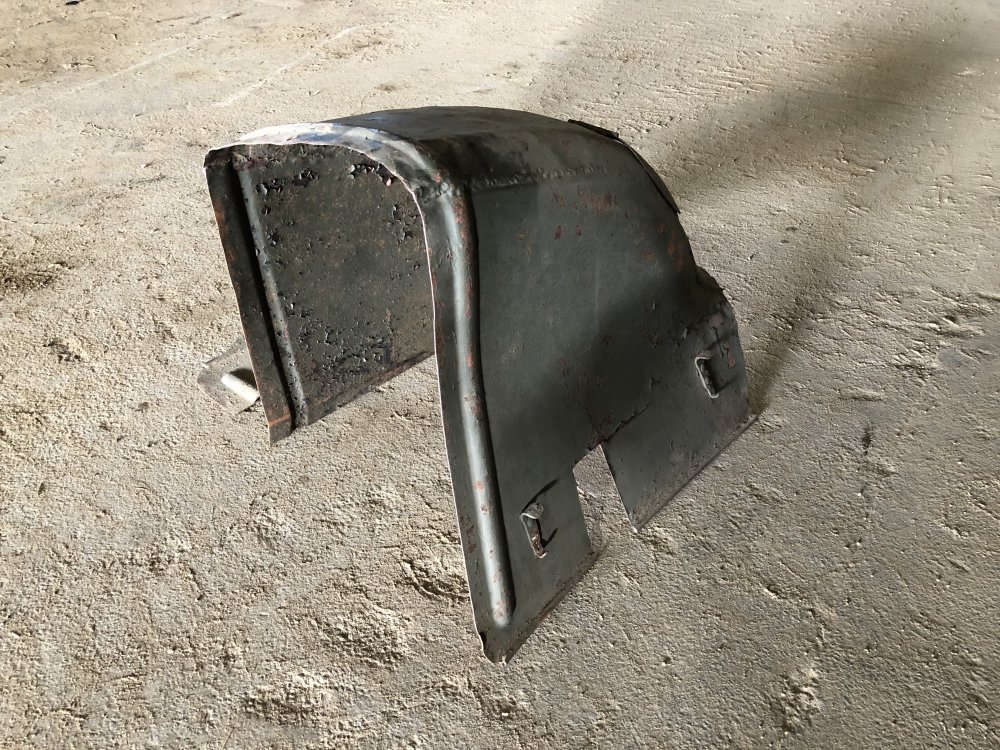
Pictures of the engine cover courtesy of Tom Watts.


-
I think shaping it might be a problem, it’s safe to say mine might have a few right angles.
-
Hi Richard and Duson I am already on the case, I messaged Tom yesterday hopefully I’ll receive some pictures soon.
-
As soon as I have some pictures I will post them to compare.
-
Thank you for the picture but that looks the same as the WOT8 the wot6 instrument cluster is on the drivers side and the engine cover more of a tunnel
-
Yep, your right it’s completely different
-
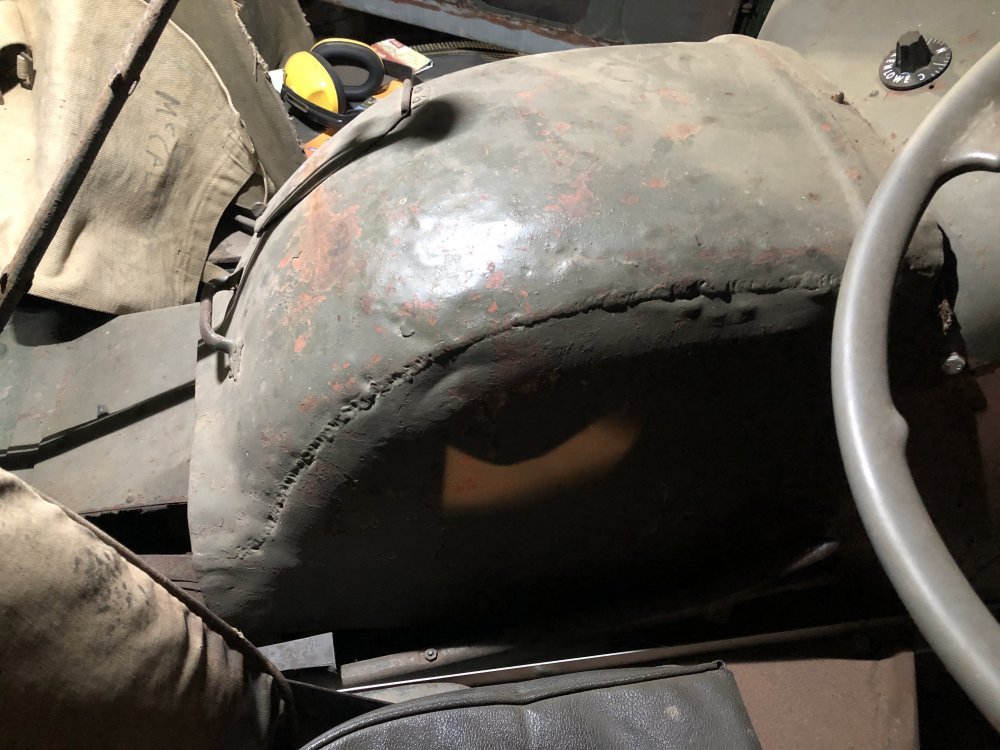
At the moment I have no idea what it looks like or if it was fitted to any other vehicles, I’ve been in contact with a chap via MVT who’s got a wot6, he’s going to take some pictures ( hopefully soon ) to give me an idea.
-
I know this is a long shot but does anyone have an engine cover for my Fordson wot6....? Thought I would ask before I start to make one just incase there’s one gathering dust and long forgotten in someone’s garage 🤞
-
I know this is a long shot but does anyone have an engine cover for my Fordson wot6....? Thought I would ask before I start to make one just incase there’s one gathering dust and long forgotten in someone’s garage 🤞
-
Thank you for all the help, all information has been greatly appreciated.
-
Hi Chris Thank you for all the information, so basically I need a brown square with the number 67 but it’s unlikely that as infantry they had any Jeeps.
-
But!! There’s still the question of what the colour name is for the green square...
-
Well.....it’s all become clear now!! Next time the wife starts World War III over too many projects I will grab some toilet roll, dig a trench and study British unit markings 😂😂
-
Just found this.

-
The dial markings and bezel look very similar to Jeep or dodge but neither had a rev counter, is it worth googling US ww2 vehicles with rev counters?
-
Slowly but surely it’s coming back to life, more paint definitely needed.


-
Is it just me or are British ww2 division markings and unit insignias Difficult to understand!! ( it’s properly just me 🙄 ) I’ve recently decided to put British markings on my gpw, I’ve chosen 78th battle axe ( no particular reason ) I wanted 38th Irish infantry Brigade but from my research they used the 78th insignia on there vehicles, I’ve gone with Armoured infantry and want to put on a green background and 61 as pictured below Question is what colour green do I need and more important have I got it right or just completely wrong!! All opinions and advise welcome

-
I’ve not had any sand blasting done yet, it’s all been stripped with woven pad preparation wheels, wire cups, blood, sweat and tears......😬 I am bit worried that if I get it sand blasted there will be nothing left to copy.
-
It’s thin metal welding time!! again🤨 Had a few small repairs to carry out before the panels get painted Bottom end of an engine bay panel, obviously a weak point as it’s been repaired before. Second up was the passenger seat, this had suffered due to the canvas roof cover rotting away and leaving it open to the elements. Frame repair was straight forward enough The seat base was slightly more work!! It would be much easier just to replace the base but you would loose the pressed shape of the panel, so trim the edges and get welding. A bit of filler, fettling and sanding Not quite invisible but once painted and covered with a seat cushion it will definitely do the job.


-
Hi Richard I’ve thinned it with Xylene, its most likely a reaction with some old paint but it was very quick to occur, it just started to bleed through as soon as the primer hit it, no pickling just started to run red.
-
Now it’s a bit cooler I took the opportunity to do some more preparation work I planned a marathon secession of paint removal and priming 🙄 oh joy!! I sorted out various panels from the engine bay, seat mounts, grill and pretty much anything that looked straight forward ( for a change ) And so it began, gloves, mask, ear defenders, armed with preparation discs and wire brush cup. Finished at last, slightly dirty and garage needs a hose out but done. Primed with grey oxide something reacted with the primer on a seat mount, not sure what but will investigate later. The badge came up well after several layers of paint were removed.


-
“ The Forgotten War “
-
Please post your pictures celebrating VJ Day ( in the rain )

-
I believe Jeep finder buy there stock from AMD, hence the similar pictures but higher price, I can definitely recommend dealing with Mike and Anthony at AMD.


