


guy66
-
Posts
758 -
Joined
-
Last visited
-
Days Won
6
Content Type
Profiles
Forums
Gallery
Blogs
Events
Articles
Store
Downloads
Posts posted by guy66
-
-
some extra work on the tailgate, tomorrow I will make the step that is attached to the hatch and fitting the chain for when the tailgate is half open. The spring that helps to lift the hatch is working very fine!
Made also the little hooks to attach the cord of the tarpaulin,
and rear lighting is in place but need to connect this lot.
Guy


-
My progress on the QL for this week!
Did some spray work, rear mudguards, front wheel's, rear hatch hinges and the supports for the rear lights.
Fitted the wood to the hinges and now I can start on the two lock plates for the rear hatch.
The WD tax disc holder is also back on his place and as we don't have to show are road tax here in Belgium I have a sticker in it from the local ex para-commando group where my dad is a member of.
 :laugh:


-
Hello,
The right gear change pedal for a 3hw is very difficult to find, but you can always mount a civilian type on to the gearbox.
The difference is that a civilian gear lever has a round extension to put a rubber piece over and the military bike has a complete metal lever .
Guy
-
Excellent work again Guy! Can I ask you what type of wood you are using; it looks really nice!
So, D-day 2014, can we admire the truck there?
Alex
Hello Alex, I don't really know what kind of wood my carpenter have me, but I was asking for hard wood and this was the wood I got.
For sure it is hard and I think it is tropical?
Yes looking really forward to D-day 2014, but think I am not the only wane on this forum.
Guy
-
Made the wooden side sections for the underside of the cargo body, now that everything fit I will remove them and machine these bits a little bit because originally thy are not plain.
The re-enforcements for the rear wheel arches are also ready and can paint these bits.


-
Hello.
The 2 main differences between a 3sw and 3hw frame are the fitting of the side stand.
On a 3sw this fitting is bolted and on a 3hw it scold be welded.
There are also differed forks used on these bikes.
Guy
-
This week I had a very nice present from Jarek Leoniec from Poland.
Jarek is a plastic model kit designer with IBG models and one of his last models was a Bedford QLD. The model was send to my for free as the designer fond a lot of information and pictures in my restoration threads that served him so well in the design of this kit.
Thank you very match Jarek with this splendid model, butt now I will tray to finish the 1:1 scale model.
"It is really nice to make contact via this forum to such a bunch of dedicated people"
Guy


-
great job!!!!
Could you tell me dimensions of the boards thickness and height?
many thanks
Hello Radek.
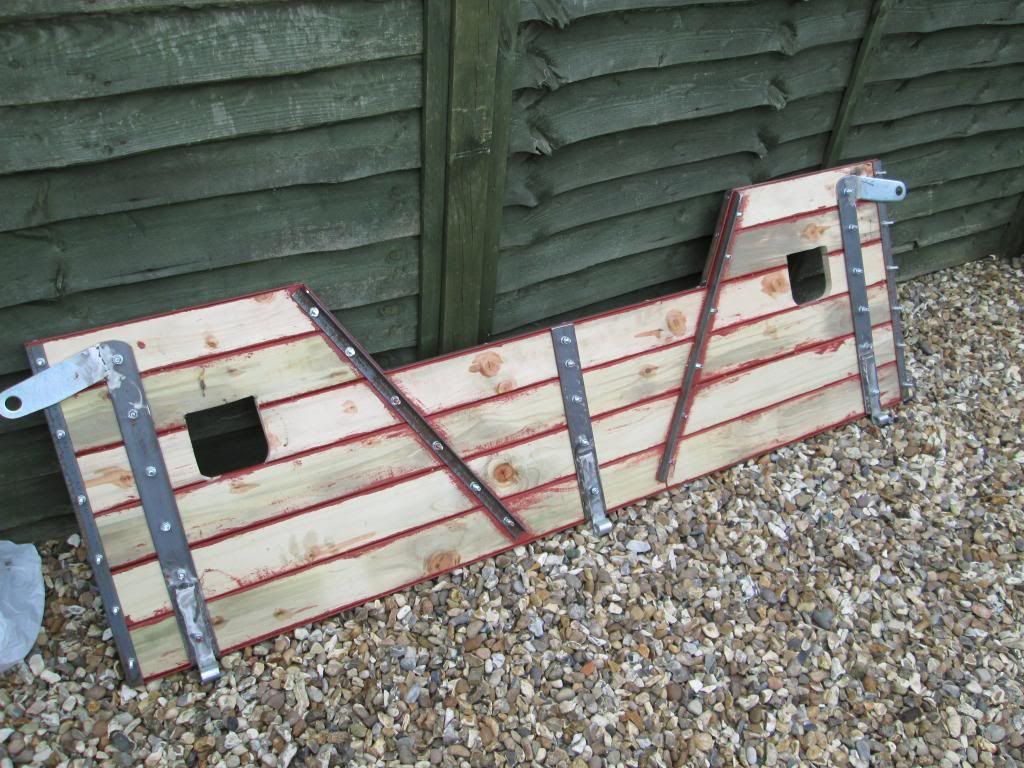
Here some dimensions for the woodwork on the back of the QL.
The thickness is 2.7 cm on all the boards (think that this is a standard size as the floor boards have the same thickness).
There are 5 boards on a rear hatch,
-Underside is 11cm x 2m22cm
- The 3 middle boards are 14.5cm x 2m22cm
-And last top one is 5.5cm x 2m22cm
All these board together make a total hight of 60 cm.
Hope you can do something with this information (the dimensions are taken from a genuine QL rear hatch!)
Guy
-
Very nice work Niels. I recognise al these rot spots on your QL and some are really very difficult to reach and repair!
It is always better to do your own repair work and hives you more satisfaction wanes the end result is ready, "YES I DID IT"
I am working on the canvas bits for are QL's at the moment!
Guy
-
I was just wondering if you finished the QL restoration and if you have any more pictures?
best regards,
james.
Hello James.
We are still working on the QL but we are almost there!
Now we are really finishing of with al the details, rear of the cargo section, tool boxes, interior canvas bits and putting the roof and doors back on.
This is the plan for this year and next year I will made the cargo box hoops and have it covered with a big piece of canvas.
If you need some extra pictures just contact me, Guy
-
Tailgate done, all bar a few details.
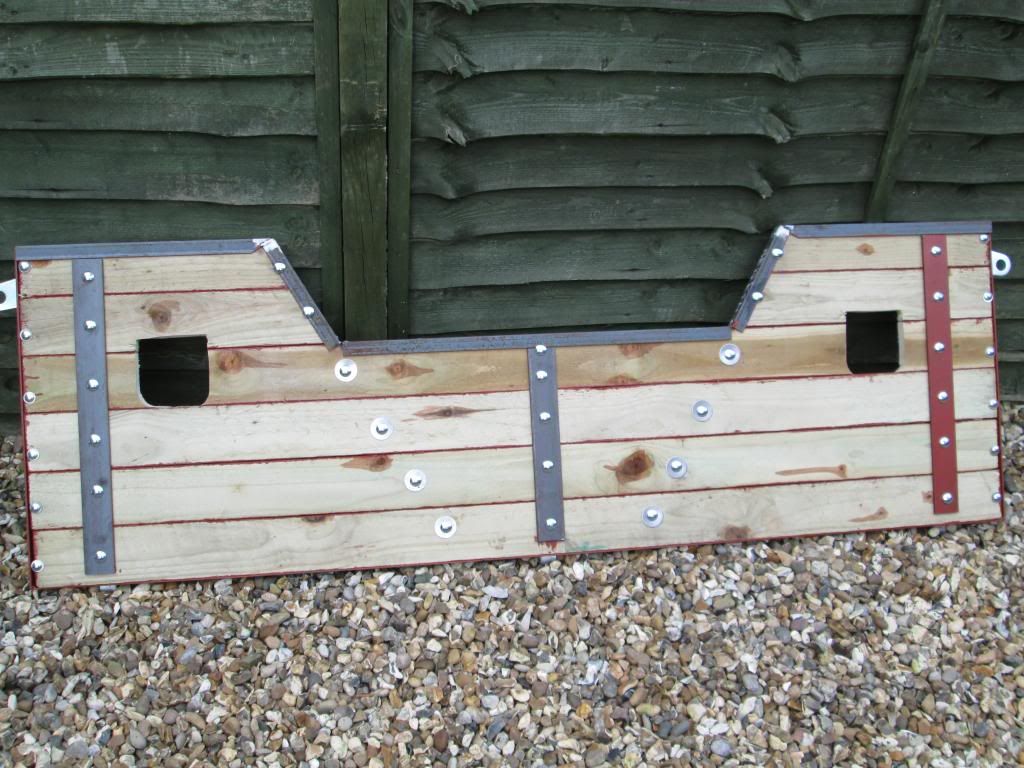
Hello, just one question. What's the red stuff between the planks?
Guy
-
Hello, some woodwork on to the hinges, now I will bolt this lot together and ad the reinforcement strips and need also to make the lock plate.
Some bits on the lock plate are in wood and strengthen with sheet metal plate.


-
Just made the rear hinges for the cargo hatch and received my wood for the hatch.


-
Rain, snow and high winds. Noting will stop us to get this QL ready!
Just made the 4 mudguards for the rear wheels and covered the rear wheel arch in the cargo body with some wood.
The side planks on the wheel box are new but the top planks are from the original floor.
Guy


-
Hi Danny
Nice restoration, as I can see on one of your pictures the Bedford has formation signs from the brigade Piron.
Has your MV served with this brigade are is it only because the last Belgian owner gave put these signs on.
Keep up the good work and on this forum you will find a lot of information.
Guy
-
I am brooding my spectrum Ron and I think it is a little bit your fold, al these bikes in your collection give a bad influence on my interest in only triumph wd bikes.
But one ting is for sure, like mostly overhead valve type's.
Guy
-
[ATTACH=CONFIG]73882[/ATTACH]
Our 1942 Ariel W/NG, complete with Mrs M............the W/NG is called "Nancy" as that was the name carved into her bakelite steering damper by the original rider during WW2..........had this machine for nearly 20 years now, found in bits in a coal shed in Kent and restored by me (twice now) since acquisition..........:-D
Very nice bike, one of my favourites. Overhead valve and the signature from Edward Turner, very nice!
Guy
-
Hello Niels,
The complete set, spring and link comes from a military bedford MK are MJ model.
It is the same set up as a QL and easier to find.
And the pictures from the original
brake cylinder inspection cover that I copied.

Guy


-
Now that the cargo body had al the side plates back in place I did put the petrol tank and a piece of petrol pipe back in between the cargo section and cabin.

And the rear floor is also back in to place and hopefully for good. The top floor has a coat of black paint on it as a sort of primer, the underside is in the colour as the rest of the QL.

Copied the brake master cylinder inspection hatch in the floor.

I will paint the complete inside of the cargo section, floor and also a extra coat of paint on the inside side plates to get rid of al those shiny new bolts and nuts.
Guy


-
Hello side sections of the cargo body are in paint and fitted. Now I can start on the floor!:-D

Started also to make the rear mudguards from a very bad sample and making plans for the side toolboxes, the biggest problem on the toolboxes is the cross stamping on the side plate of such a box!
Guy


-
Hi Guy my C8 & QL steering wheels are green, did you choose black or is that the colour yours was ? and why is the horn button hole so large as mine is not much larger than the nut, is yours a later wheel ?
The steering was as it came with the QL, the horn push is a rubber piece that holds the centre horn push.
This rubber piece is hold in to a sort of clip that slips in to a grove in the steering wheel.
On my restored steering wheel I had to make a sleeve with a grove to fit the rubber and clip from the horn push.
The steering wheel was well restored but the centre hole was not up to the standards of the rest of the restored steering wheel.
But the centre hole on the picture is almost the same size as original!
Guy
-
This is my restored steering wheel Ian.

Restored by steering wheel restorations.
-

Hello Bill, on the pictures you have the replacement filter from John Morter.
It is a 2 piece tube that you can fit a cartridge filter inside.
( the right hand filter on the first picture is the original filter)
Guy


-
While waiting for some better temperatures to do some spray work I made the top wooden planks for cargo section.
Next week the weather forecast announces higher temperatures, the spray gun is ready!!!!


Bad news for my rear hatch woodwork, the carpenter had some time back a motorbike accident and is back in hospital for some extra treatment.
I need to wait a bit for the rear hatch planks and will tackle some other work for the moment.
Guy


Bedford 28hp fan belt
in British Vehicles
Posted
Hello, I have a industrial belt on my QL and tomorrow will have a look witch size it is.
Guy