


mike65
-
Posts
1,111 -
Joined
-
Last visited
Content Type
Profiles
Forums
Gallery
Blogs
Events
Articles
Store
Downloads
Posts posted by mike65
-
-
Hands up all those who would like to see some pictures.
No Ok fine I will not bother then.
Mike
-
Had a great day and have to say that my favourite vehicle running round the airfield was this:
Hope you all had a great day.
It did not run very far but they were still grinning.
I believe they recovered it later with a Militant
Mike

-
After a while I noticed the door.
I would say Series 1
Mike
-
Is it £18.50 entry if bringing a vehicle??
Neil
I believe you can turn up on the day and get a reduced entry.
Maybe worth a phone call.
Mike
-
Arnie
Apologies for delay.
Thus is the anti-vibration mounting for a 353/DMU (well one rail)
I am led to believe this is what was used in armoured vehicles
Install kit was NSN 5820-99-794-2635
Was checked in CES P45411-1 (whatever that one is) back in 1990.
Mike

-
Will be up there with the 109 FFR if it survives a trip to Dunsfold on the Saturday
Mike
-
Well the paint has dried so I did a bit of refitting.
Decided the grille would be black.

The plastic protection has made it back into the radio battery box

The tilt rope loops on the tub have been modified somewhat over the years amd most look like this.

Made a stat and replaced the drivers side front one. The others are going to be a bit more challenging to line up and refix.

Mike
-
Out of curiosity - what about noise level and ear protection when using a needle gun/scaler?????
Yes can strongly recommend ear protection for yourself and most of the road.
-
Should he not be taking up gliding as there is less to break.:-)
Mike
-
They are out there and not always at high prices.
It may be worth trying the amateur radio circuit as I have found some "cheaper" stuff at them without the ebay "rare" premium.
http://www.vmars.org.uk/da/122954
Mike
-
Good to see it has made it into the open.
More on the aircraft here
http://hmvf.co.uk/forumvb/showthread.php?25594-spitfire&highlight=spitfire+844
Mike
-
Hi Mike
Its all going into a FV432.
Arnie
Well in that case this maybe of interest
www.ferret-afv.org/manuals/clansman_wiring_harness_and_control_boxes_description.pdf
I have an anti-vibration mounting kit will get part numbers later
Mike
-
What are you installing it in?
TThere are a choice of mounting bars.
This is one type. http://www.ebay.co.uk/itm/CLANSMAN-MILITARY-ARMY-RADIO-MOUNTING-BRACKET-PRC-353-AND-321-/330927135253?pt=UK_Collectables_Militaria_LE&hash=item4d0ccb5a15
Also can be mounted on single rails on a plate with anti-vibration fixings.
Definitely a coax and other cable fro 353 to ARFAT and ARFAT to TUAAM
Need to look up cable numbers as I am also missing a second set.
Mike
-
Well strange things happen and it appears we had a Bank Holiday weekend with no rain.
So between gardening (after all it is a bank holiday) and better than watching paint dry
I managed to paint the front part of the chassis and have a go at spraying the replacement bonnet, wing and the radiator surround.
Needs another coat but that can wait till next time we have no rain.
Mike


-
Congratulations.
Luckily the club house has just had a new wine delivery.
Mike
-
Looks like a P51 Mustang to me.
They did a whole documentary on doing that with a Spitfire from Duxford to the USA was very interseting.
http://www.channel5.com/shows/monster-moves/episodes/episode-2-333
Mike
-
Hey I didn't know we had a bowling green! But I reckon it won't look the same after that bar gets liberated and taken for a midnight spin...
The blue bands indicate it is a very hot curry sauce and was about to be loaded onto the delivery system

Mike
-
Hendon also has 3 aircraft on display as recovered
Gladiator, Halifax and Hurricane.
I feel that they serve as a reminder of the reality of the times, far better than a nice shiny factory fresh restoration.
Mike
-
There are some interesting bits on the BBC on how they hope to,lift it and stuff
-
Well its a bank holiday, yippee!!!!
So a bit of truck time
In the last instalment I found that the channels for the radio would not fit.
So it was cardboard template time complete with 2 rivet holes to align cut to suit

Guess what turn it upside down and it does the other side
So out with the grinder and both sides adjusted and fitted

 That done its time to put everything else back.
First job was the dexion, now standard 109 dexion is too long for the top so it was measure twice cut once time.
About 12mm was removed from each end.
Bottom rail fits fine.

Of course being a bank holiday weekend you have to stop for this.

Luckily it did not last long so then it was fit the table brackets, with the help of the wife, as I do not have Inspector Gadget arms.
Luckily she knows how to hold a spanner in place even if she was wearing the wrong shoes for climbing into the back of a 109.
Table , battery box in and radios installed so I could fit the bracket.
Need another now for the DMU, decided they look good in line.
Room on the left for a 521/322 when finances allow and I van still have the 351/352 on the right.

Not content with that I got round to changing the manky alternator and fan belts.
-
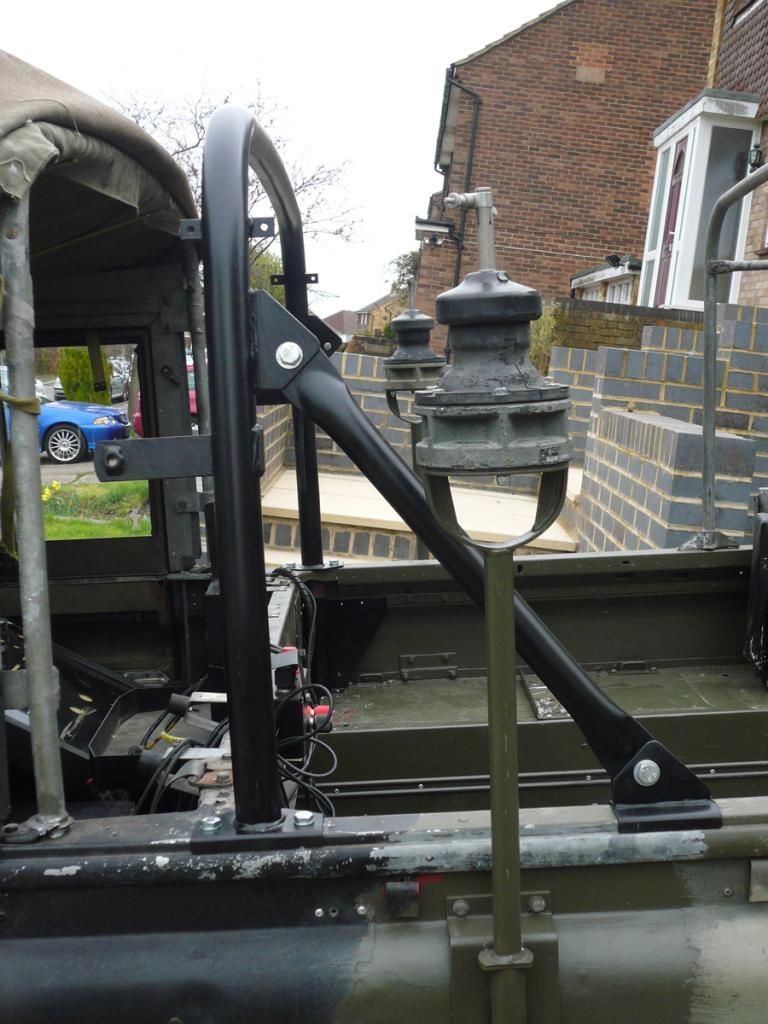
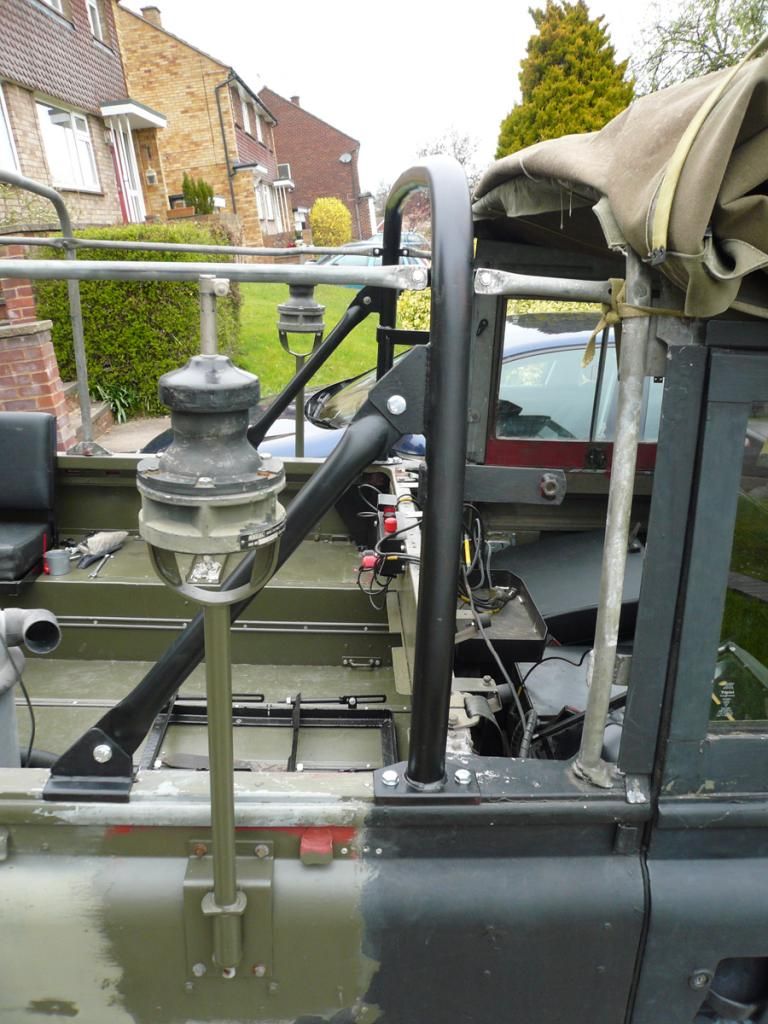
The sun was out on Sunday so took the opportunity to get topless (on the truck) and fit the roll bar.
OK I am lying I actually started on Wednesday after work
Not the easiest job, as I had to remove the dexion and radio gear, the radio battery box, radio table and its mountings.
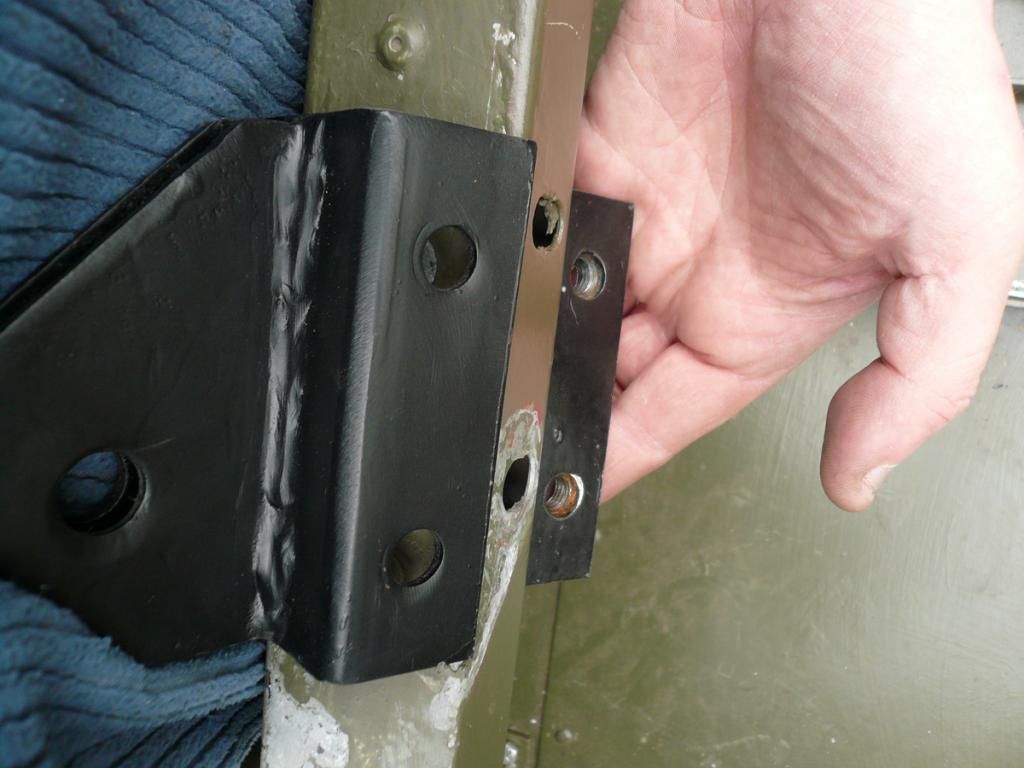
First things first. The bar does not fit in these holes, no surprise there then
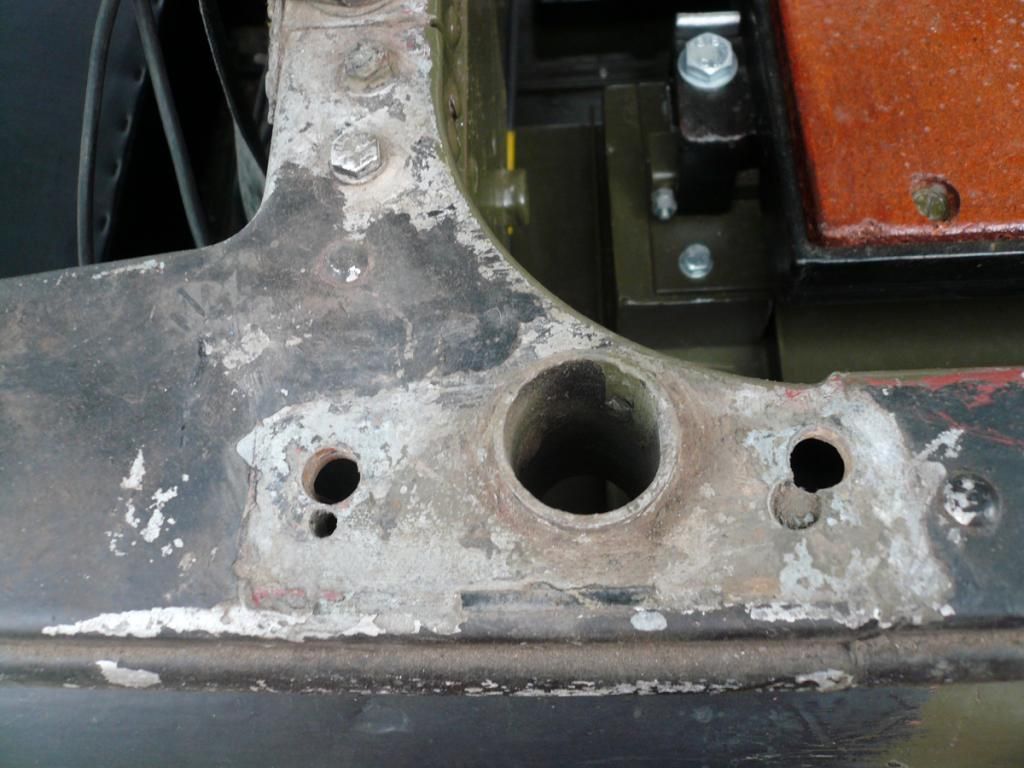
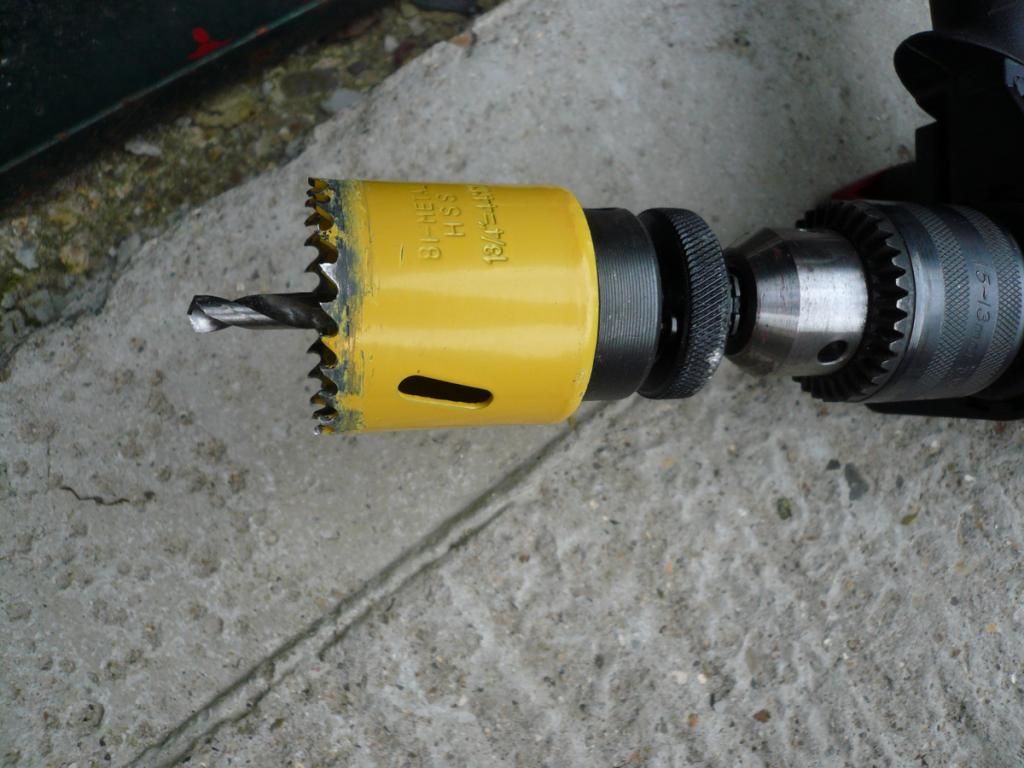
Drilling the hole is easy I have one of these, however I have a hole where the pilot hole needs to be.
So I had a cunning plan and made a template from some scrap tread plate
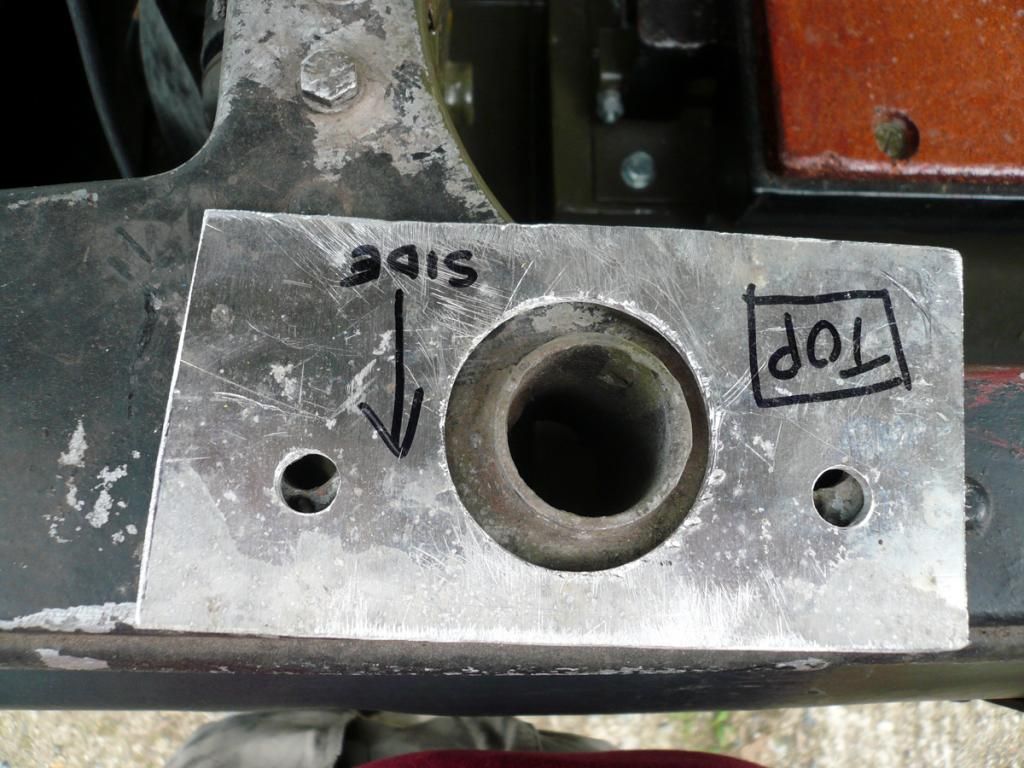
Well that fits the roll bar but the bolt holes are different, never mind tape measure to check and G-clamps will hold it.
That worked, spot the handy pen line of bulkhead under, other marks cut away.
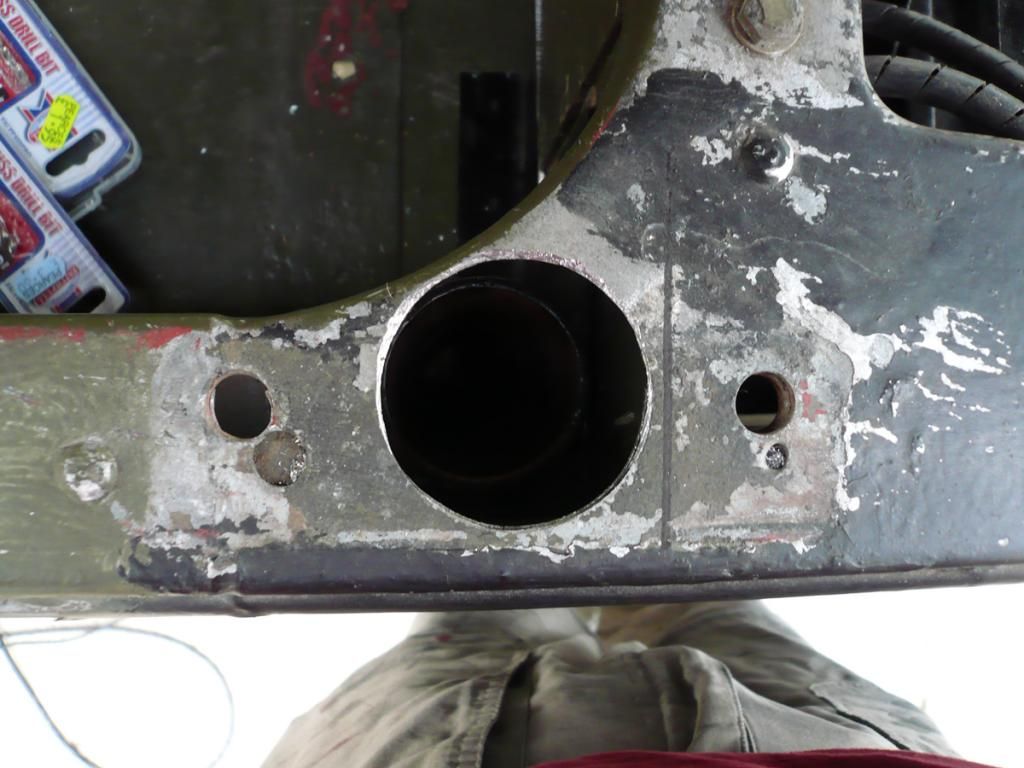
The observant will notice the change in sides.
Next locate the lower reinforcement supports, slight modification to avoid the seat belt reinforcement plate.
Following advice from elsewhere I have not fixed them in place.
Mind you one side dropped on perfectly and the other need the use of a medium sized persuader and bit of wood
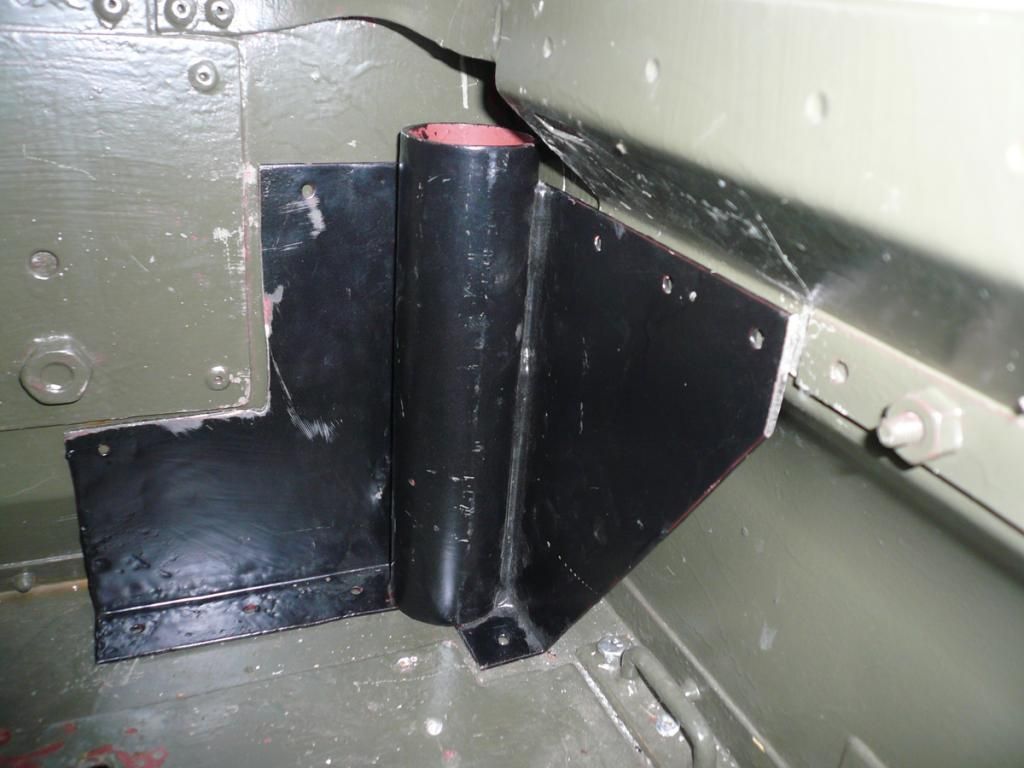
Roll bar is then dropped in and pushed right into the corners and bolted in place
the diagonal brace bracket lines up perfectly with some holes already there, lucky me.
That all bolted in the strengtheners are drilled and riveted Hey presto a roll bar
Now to put the hood sticks back, oops they do not fit.
Never mind nothing that cannot be fixed.
Measure twice and cut twice (about 2 inches to loose)
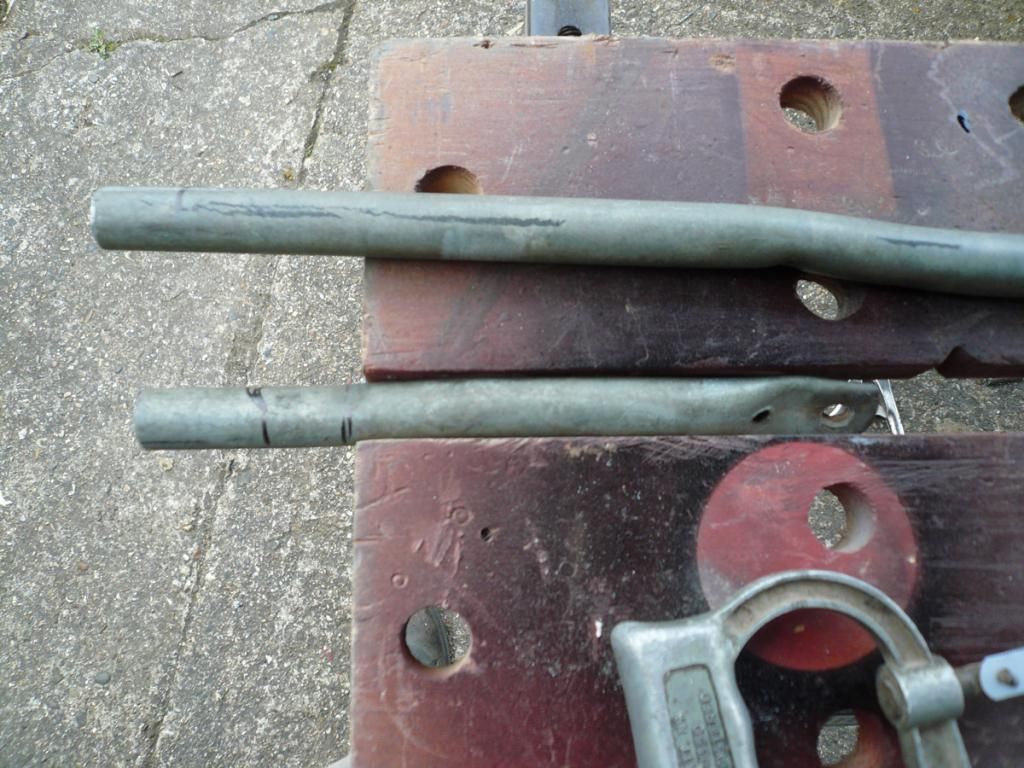
Apply some heat (paint stripper gun) place on anvil (shaftless sledge hammer head) and whack it with a hammer till it is flat. Applying more intermittent heat.
Grind end to make tidy line up drill hole and then bolt in place. Job done
Next job put everything back in.
Ah now the radio mounting brackets need some adjustment.

That's for the next episode
Mike
-
OK you have had some sensible answers and now for the stupid questions.
No offence meant but I had a couple of friends who spent 2 hours trying to get a just serviced mini working only for me to point out the rotor arm was in the top of the socket set.
I work with a tester that lights up if there is a current. It is simple like me when it comes to electrics:D
You state you have power to the headlights. Is this at the bulb?
If yes, is there continuity through the connections.
Have you tested the bulbs? Have seen failed fuses and bulbs where the break is not clearly visible.
I have also been known to test using a meter set to volts if the simple test does not help.
That was how I traced my headlightproblem down to some fool connecting the wires wrong and earthing back via the dip circuit.
Mike
-
Have you checked the mare's nest of wiring behind the instruments? That can cause a lot of spurious warning lights.
Neil
I will second Tony on that one. You have had ithe dash panel out on a few occassions to sort your fuel gauge.
As I have done this a few times it is very easy to dislodge or even break a wire at a connector in there.
Mike
-
http://www.geograph.org.uk/photo/1700262
Any idea which model LoL , the pre-pro original Range Rover ??
A 2 wheel drive one
Mike


IWM Duxford Military Vehicle Show
in The meetings log and photobook
Posted
Changed my mind you can suffer them:-D
Thought I would try some black and white
Despite the first being colour it actually black and white
Mike