


welbike
-
Posts
1,279 -
Joined
-
Last visited
-
Days Won
10
Content Type
Profiles
Forums
Gallery
Blogs
Events
Articles
Store
Downloads
Posts posted by welbike
-
-
Ok, I do have a frame, but it needs work, will dig it out after my holliday, and make some pictures.
Thanks,
Lex
-
 1
1
-
-
If you're selling, or want to do a swap, I have a 1939 Royal Baby, without engine, may have a wartime one, will check.
Cheers,
Lex
-
Adam, message me here with you emailaddress, I think if you click on my picture/username you wil get the info. or on the little enveloppe top right.
Lex
-
Let me know if you need some detail pictures, I have the original glass negative of this picture.
Cheers,
Lex
-
Thanks, it is what it is, but I have some of these boxes, I will check if they have markings, but they were overpainted, and used untill the 50's but now I can check in the right spot.
The paper lables were printed in red I believe.
Cheers,
Lex
-
Do you have a clearer picture of the wooden boxes markings please?
Lex
-
Nice find!! I could use one for my Norton!
Lex

-
Truck could be a Crossley?
Boat also enlarged, but don't see a second lorry? (ah behind the boat!)
Lex


-
1
-
-
Fast forward to 2021, and I just got an original batterybox top in, very happy with it, but probably too rusty to use as is??
Repro top will be going to the US it seems.
Lex


-
1
-
-
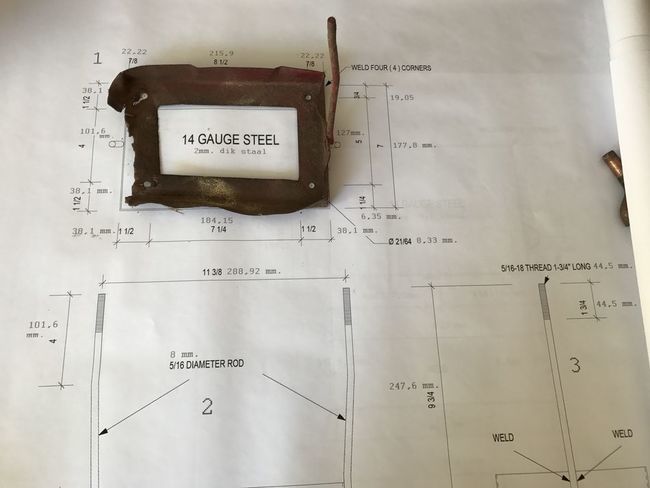
Ok, I'll make a little update, as I'm far behind here! this was April 2018.
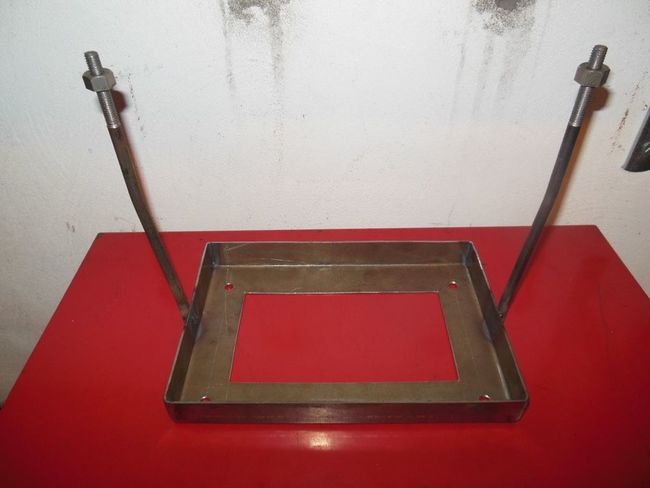
Here's what was left of my battery box, checked it on the drawings, that I had scaled up:
And then had one made by a friend, came out very nice!!

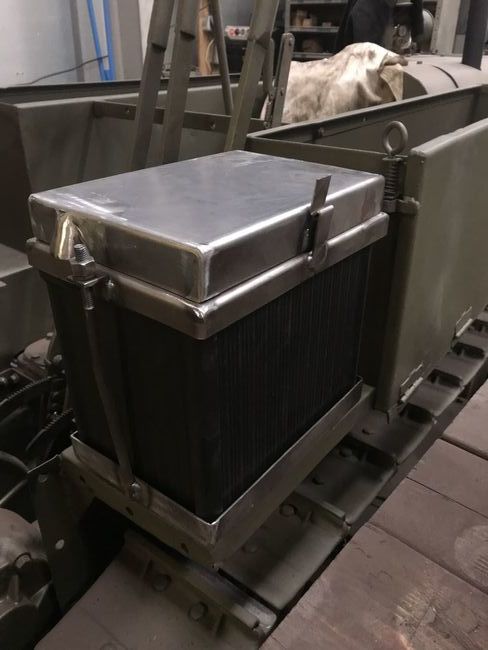
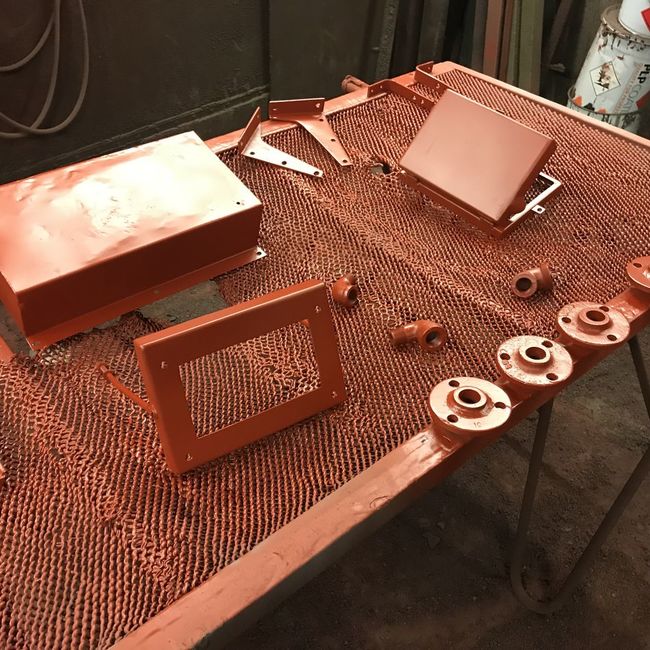
And painted;
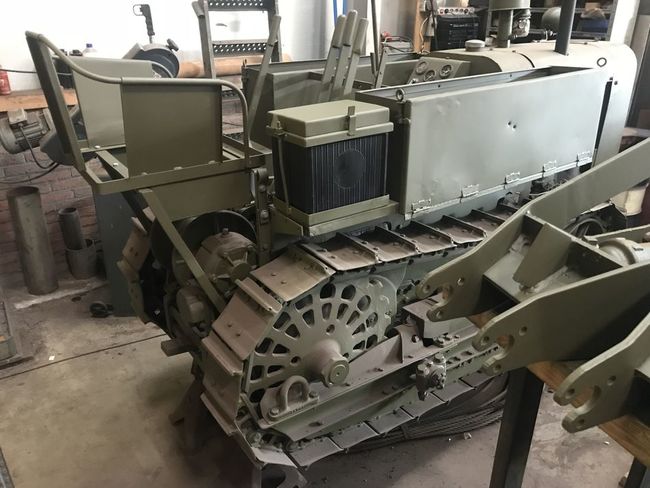
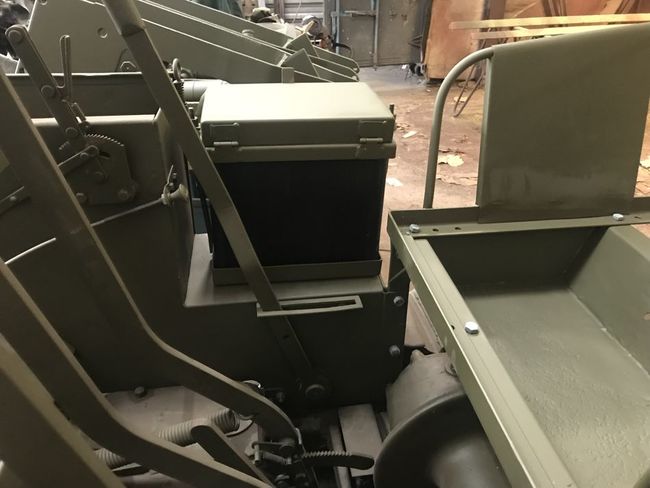
So for now a repro seat installed, original still needs more restoring and painting, and canvas upholstery to be fitted.
More in the next post.
Alex
-
2
-
-
Super!! keep them coming! any unknown motorcycle pictures?
Like this one, at Malo st. Bains, a Norton Big 4 outfit, from my collection.
Lex

-
9 hours ago, Ron said:
Yes that's the one Steve.
Actually Lex when Martyn did mine, he had no idea about this until I gave him a copy of the document.
Ron
Ok, mine was done by him at least 10 years ago, so it will not have it!
Just bead blasted the body, and will assemble soon.
Cheers,
Lex

-
Ok, I have found a Jet block with the hole, but will strip the carb that is on the bike now first, that was done by Martyn, so it will be plugged up already!
But better make sure the carb is 100% as it's a real pain to remove once the tank is on the bike Steve!
Cheers,
Lex
-
Thanks Ron, I will check my jet blocks. I always boil the body in water for 10-15 minutes, then they will come out easily.
Lex
-
Yes, I agree with Ron, but it also depends who the supplier of the plates is, and what material they are made off. Re. the carbs, I have found 2 numbers for the G3WO, 276B/1J and 276/400R, the last number is also a postwar M20 number, strange! And what is the exact difference in the jetblock? have some NOS ones, and like to fit the right one.
Lex
-
Nice work! Some people tend to think, putting in new gaskets, makes the carb "overhauled" I am just getting a carb ready for my G3, as the one on it, the top thread is stripped, and the ring keeps coming off.
I found a replacement body, so not too difficult.
Lex
-
1
-
-
No, sorry, just one! and not me, but Tibo, ex BEF M20, saw use with the Germans, contract C5610, extremely nice running bike, I wouldn't mind one of these!
Lex
-
Yes, I saw it late last night, but been away all day, buying more bikes!
Will see if I can answer tomorrow.
Cheers,
Lex
-
Nice work Steve! and indeed a nice puller, I found one of these for magneto bearings, works a treat!
Also something I always warn people about, to check the piston ring gap, sometimes when the cylinder is bored, and the right size for the piston, the rings are too tight, and when warm, it will seize the piston, have had it a couple of times that the machinist didn't check that!
Lex


-
Ok, the size of how much the guide should stick out is again in the Standards book, 1/2 and 5/8 , the 5/8 ofcourse, because of the special spacer, that is in my scan of the P/L above.
Cheers,
Lex
-
I haven't changed the guides in a long time, so can't remember but I think they did not have a ridge to stop them from going in too far? do you have the special spacer under the exhaust valve spring cup? there is a manual somewhere, that says, how far to press them in. Re. removal of the old ones, it might be better to machine them out untill wafer thin, and then just pull them out, or break them, then, no material from the head will be removed, and the new guides being too loose.
Lex
-
Yes, '46-47 AJS by the look of it, numbers will confirm.
Lex
-
1
-
-
Ok, that didn't work on my phone!
Lex
-
Here some more pictures; Spares (cornucopia-enterprises.de)
Lex


Restoration 4 - Matchless G3 Panel Tank
in Motorcycles
Posted
Well, I was under the impression, that only early G3L's had that system Ron??
Lex