Great War truck
-
Posts
4,969 -
Joined
-
Last visited
-
Days Won
28
Content Type
Profiles
Forums
Gallery
Blogs
Events
Articles
Store
Downloads
Everything posted by Great War truck
-

WW1 Peerless lorry restoration
Great War truck replied to Great War truck's topic in Pre WW2 vehicles
The next task was the front axle, but the U Bolts we had (even the best set) we decided were too far gone to use so we have parked the axle for now and will get a set of bolts made.


-
WW1 Peerless lorry restoration
Great War truck replied to Great War truck's topic in Pre WW2 vehicles
A bit more progress over the weekend. The Peerless is fighting back again so we didn’t get as far forwards as we would have liked. The first task was to put the back axle on, using the engine hoist to life it into position. Unfortunately it didn’t seem to fit and then we realised that there should be a mounting plate on top and rubber block underneath. Looking in the spare parts drawer Steve pulled out an axle with the remains of springs still attached. Taking an angle grinder to that he soon produced a very tired but serviceable pair which he now fitted to the axle. A few hours later on while rummaging in the spare parts box for something else Dad found a much better set which were cleaned up and fitted to the axle. This looks a lot better but we could not do the axle up tight as we required a deep socket which we did not have.


-
Hi Al Sorry for the slow reply. I have been distracted by other trucks. I had heard that there was a Riker over there but it had been "crushed", I think was the words used. How much actually have you got and what do you need. As you know these things are quite rare but occasionally turn up in the strangest of places. I have been talking to Bridgeport and they have scanned some documents for us and have been incredibly helpful. The British army always referred to them as Locomobiles (even after they had changed to Riker) and the US Army always as Rikers. Ideally, what would you like to restore yours as?
-
WW1 Peerless lorry restoration
Great War truck replied to Great War truck's topic in Pre WW2 vehicles
Started on the Rear Brake linings. The steel "arc" which goes between the lining and the Brake Shoe is described in the Parts Book as the "Hub Brake Shoe Liner". Each of the linings is riveted to one of these and then later that riveted assembly will be bolted to its appropriate Brake Shoe with Csk Screws which are to be deeply countersunk in the lining. The first step today was to line up the linings on the liners in their correct places - so that they can be drilled through and held temporarily in place with nuts and bolts. Those will be replaced individually, one at a time with countersunk copper lining rivets later.

-
Getting in and out of the back of these old trucks is not as easy as it looks. For that reason many photographs show a ladder (sometimes improvised) lent up against the back. Workshop trucks were issued with two ladders. We decided to get an old length of wooden ladder for easy access to the Thornycroft. It had been used previously for decorating purposes and was splattered in paint. I was going to give it a coat of paint but was told that I should not do that as ladders were not supposed to be painted as it would prevent any damage to the ladder from being spotted which might result in a possible accident. Any thoughts anybody?


-
WW1 Peerless lorry restoration
Great War truck replied to Great War truck's topic in Pre WW2 vehicles
All the Brake Band Linings have now been received, cut to size and radiused and ready to fit. On the previous lorries on which we fitted new linings, the linings were rivetted directly to the Shoes but this arrangement is slightly different from that where the linings are first of all rivetted to a 3/16" thick steel arc and then in turn the lining with the steel arc are held in place on the shoes with 3/8" Csk steel screws, slot nutted on the inside. Temporary nut and bolts will be used to hold the lining to the steel arc prior to final orthodox copper riveting of those two parts together..


-
WW1 Peerless lorry restoration
Great War truck replied to Great War truck's topic in Pre WW2 vehicles
And then there were two!
-
WW1 Peerless lorry restoration
Great War truck replied to Great War truck's topic in Pre WW2 vehicles
That's the first of the two Caps - now finish the second one!


-
WW1 Peerless lorry restoration
Great War truck replied to Great War truck's topic in Pre WW2 vehicles
Started the final machining up the first of the two Radiator Filler Caps


-
WW1 Peerless lorry restoration
Great War truck replied to Great War truck's topic in Pre WW2 vehicles
The Brackets to hold the Radiator are sprung - the old springs are past it and new ones have just been made for us by The Tested Spring Company Ltd.


-
WW1 Peerless lorry restoration
Great War truck replied to Great War truck's topic in Pre WW2 vehicles
The two embryo Radiator Filler Caps have been separated from each other today - the tops machined and overall thickness taken down to the finished size. All to do now is to machine the top 3/8" thickness to "Hex"


-
WW1 Peerless lorry restoration
Great War truck replied to Great War truck's topic in Pre WW2 vehicles
Screwcut the second of the two Radiator caps which is still back to back with the first one. They are now ready for separating with the Band Saw and then each Cap can then be completed The tops will have a "Hex" milled on them.


-
WW1 Peerless lorry restoration
Great War truck replied to Great War truck's topic in Pre WW2 vehicles
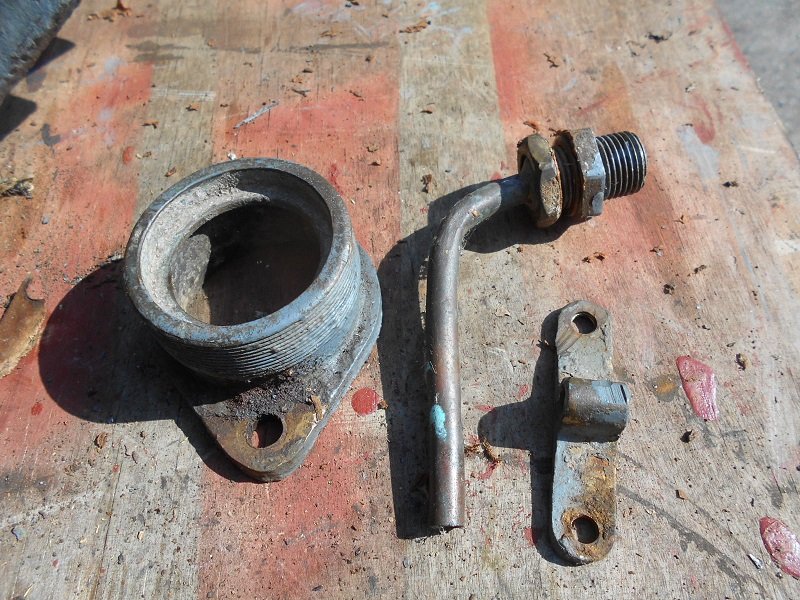
Took the Radiator Filler Cap and Filler neck off the second Radiator today - usual expected fight with it to get it off - especially with the cap from the neck! Gave it an initial clean up to see what we have there - and as we anticipated the Cap does not appear to be an original one and is made of some kind of light alloy. It was cracked or split in two places where it could have been over tightened in the past. Gave these bits a further clean up and was pleased to find that this second neck will screw half way easily into the newly made cap for the other one but the thread on the neck will want some further work and cleaning.


-
WW1 Peerless lorry restoration
Great War truck replied to Great War truck's topic in Pre WW2 vehicles
We need two new Radiator Filler Caps - one was missing from one Radiator and we suspect the one on the American Radiator is not "Peerless" and has come from something else. The Filler "necks" are good enough to use again so it is just the caps to make. One piece of bronze required, just long enough to accommodate both caps and with enough to hold on to so that they can be machined back to back with enough to hold on to whilst they are machined one at a time. The thread is nominally 2 1/2" x 16 tpi but we did not notice initially that the "necks" were tapered - about 8 thous from top to bottom of the thread so cutting the thread was a little more difficult than first anticipated. The first cap now screws down easily after some subsequent "adjustment" but tightens up comfortably as it reaches the bottom of the male thread. Now has to be reversed it in the lathe - do the second one -part them of and machine the big "hex's" on the tops.


-
I would say Dennis too.
-
WW1 Peerless lorry restoration
Great War truck replied to Great War truck's topic in Pre WW2 vehicles
We didnt just go down to Devon to get Ella to fit the springs, but it was dads birthday and as social distancing allows it was good to be able to go and see the parents and give Dad a birthday present. He normally says dont get me anything , but this year we had something special to give courtesy of forum member Chris. Chris informed me of an original Peerless name plate which had come up on E Bay. It's only description was "WW1 relic" so I would never have found it without Chris's help. I have been sitting on it for about 4 or 5 months so was pleased to give it to him today. The plate is flat and is therefore off the rear cross member and we have been searching for about 28 years and this is the first rear plate we have come across. It is quite corroded and has been nicely repaired with filler. I am not sure if it is good enough to fit on the Peerless but we can definitely use it as a pattern. Painted up it will look nice on the wall. Thanks again Chris

-
WW1 Peerless lorry restoration
Great War truck replied to Great War truck's topic in Pre WW2 vehicles
I think that you are probably right. Despite her slight frame she is very strong, just the sort of person we need to help put the axles and wheels on. She seemed to enjoy herself as well which was a bonus.


-
WW1 Peerless lorry restoration
Great War truck replied to Great War truck's topic in Pre WW2 vehicles
Very fortunate to have some additional muscle in Devon for a few hours today following the easing of the lockdown and Tim and his daughter Ella between them hung the Back Springs whilst they were here. That was all successful and it was a shame that they could not have stayed longer as they could have also put on both axles and Front wheels as well!


-
Sorry for making you pay so much. That was me.
-
WW1 Peerless lorry restoration
Great War truck replied to Great War truck's topic in Pre WW2 vehicles
A bit more painting today.


-
WW1 Peerless lorry restoration
Great War truck replied to Great War truck's topic in Pre WW2 vehicles
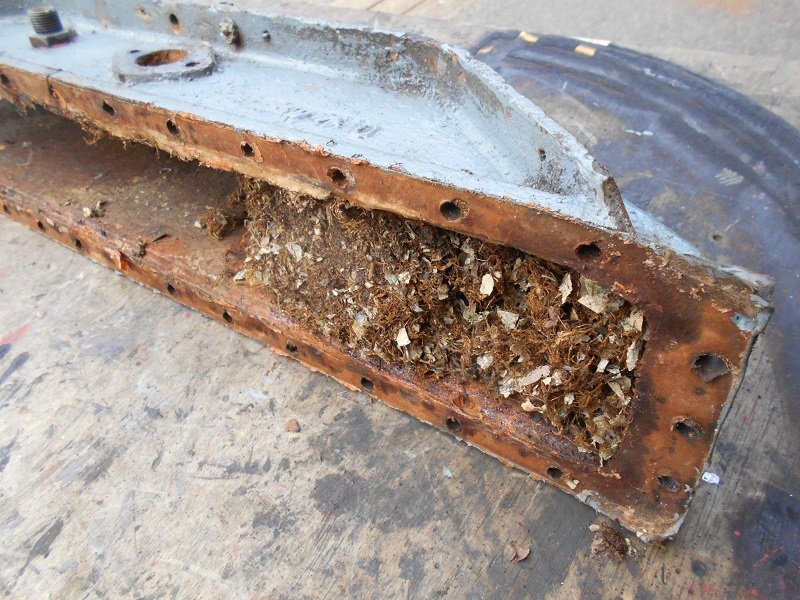
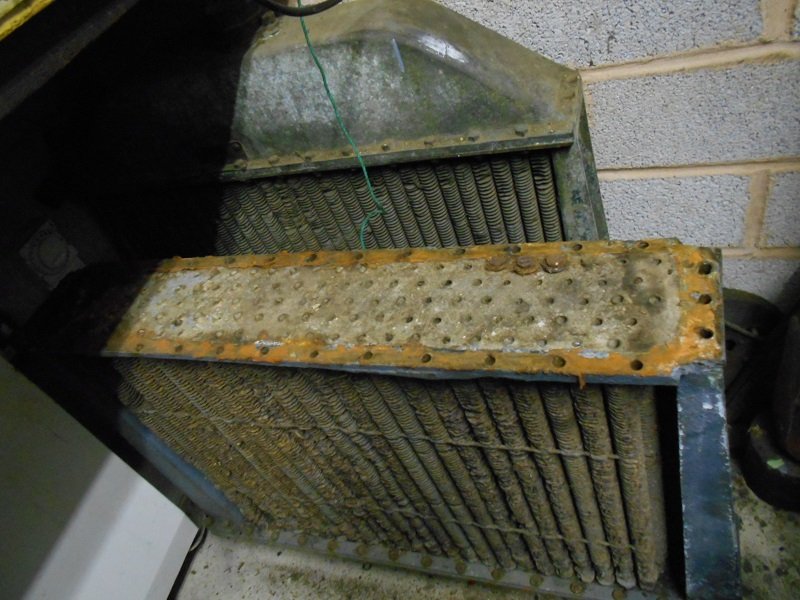
More stuff back from Sand Blasting. Although the Radiator Top Tank is deeply pitted, it does not seem to have gone right through.


-
WW1 Peerless lorry restoration
Great War truck replied to Great War truck's topic in Pre WW2 vehicles
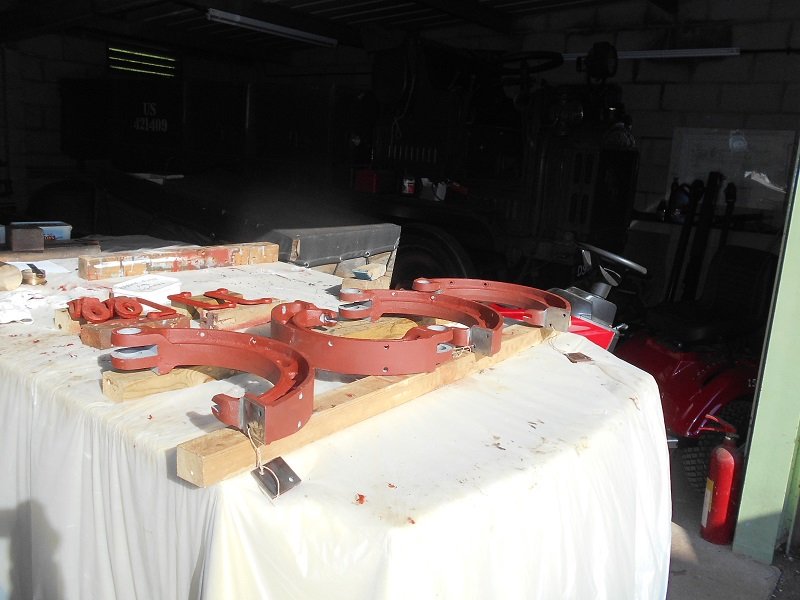
The Steel Spacer Pads have been removed from the bottoms of the Brake Shoes and the old screws removed from the Brake Shoes with threads in the shoes cleaned out. The painting of the last batch of bits has been completed and they are reading for fitting when the time comes

-
WW1 Peerless lorry restoration
Great War truck replied to Great War truck's topic in Pre WW2 vehicles
Cleaned up the Radiator Filler Neck with a wire brush and then Kettle de-scaler - which worked very well. Took the pads off two of the Brake shoes - the easy ones - where the others are very mangled and will call for more work. The thread on the csk screws holding the pads on are 5/16 x 20 another unexpected thread and some replacement csk screws will have to be made as I do not think that they are a commercial item.


-
He has a Peugeot too!
-
WW1 Peerless lorry restoration
Great War truck replied to Great War truck's topic in Pre WW2 vehicles
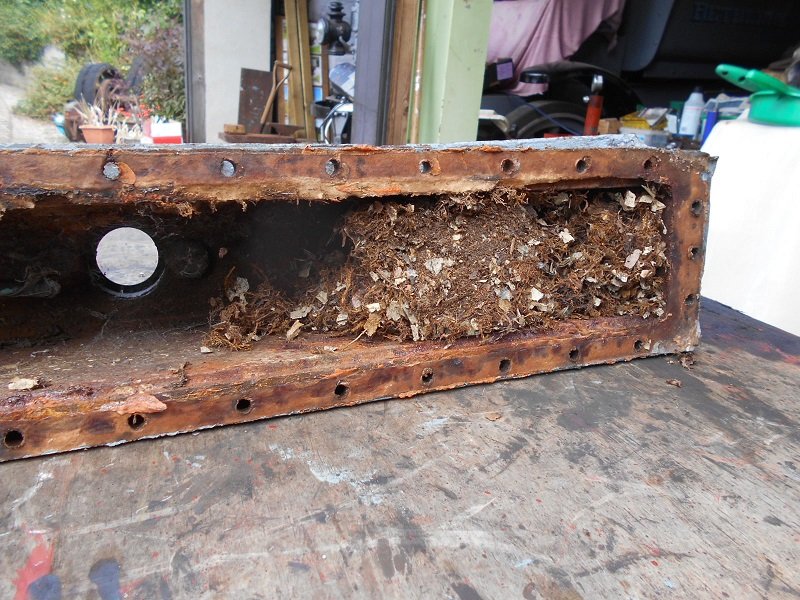
Top Tank of the Iron Radiator now removed - after the usual fight with rusty nuts and bolts. Looks as if a mouse has had a nest inside it at some time. The fittings removed from it and put to one side. It was painted over at some time without any cleaning or de-rusting done so it looks very sad. If the core of the Californian Radiator is sound, we shall probably use that one - decision on that when that one is stripped.