


Great War truck
-
Posts
4,969 -
Joined
-
Last visited
-
Days Won
28
Content Type
Profiles
Forums
Gallery
Blogs
Events
Articles
Store
Downloads
Everything posted by Great War truck
-

WW1 Peerless lorry restoration
Great War truck replied to Great War truck's topic in Pre WW2 vehicles
We have been looking at the front wheels of the Peerless. They do appear to be in rather good condition. The paint will need chipping off and cleaning out the hubs will take a bit of work but hopefully not too difficult a job although maybe rather time consuming. Sorry Dad..thumb.JPG.2c4778375dd02b415affe9ba2bb8e095.JPG)
.thumb.JPG.4cf9a73a8fe87c8a3c9869e38acbf2c8.JPG)
.thumb.JPG.bfa166386929a2870d735069bf70c72e.JPG)


-
WW1 Peerless lorry restoration
Great War truck replied to Great War truck's topic in Pre WW2 vehicles
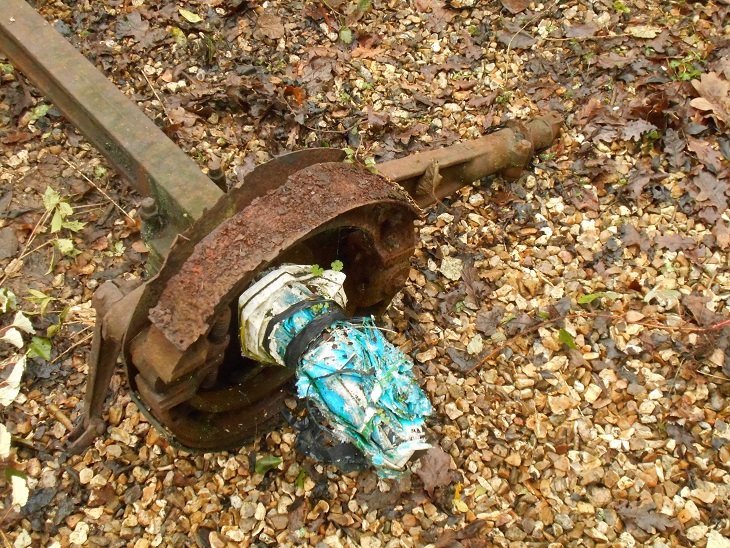
A few weeks ago (January 6 to be precise) I posted some photos of the front axle we were considering using. It was complete but in fairly rusty. Steve had a poke around in the stores and found another one which was in much better condition complete with steering parts and perhaps an easier proposition. He and Dad have taken this apart and have put it in the pile for sandblasting. The kingpins seem to be in good condition which is excellent news. Something else we dont have to make.


-
WW1 Peerless lorry restoration
Great War truck replied to Great War truck's topic in Pre WW2 vehicles
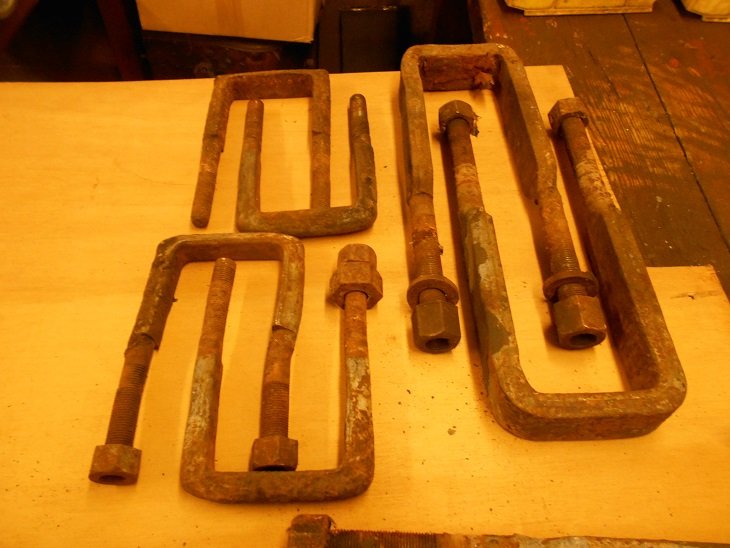
Second coat of "green" on the Spring U Bolts. First coat of grey undercoat on the Fly Wheel. All the nuts for the U Bolts cleaned up - again the thread on the front ones is unusual at 5/8" x 16 UNS the rear ones are 3/4" x16 UNF.


-
WW1 Peerless lorry restoration
Great War truck replied to Great War truck's topic in Pre WW2 vehicles
And while we are on the subject of lamp brackets, we are undecided which lamps to put on the Peerless. We have a nice set of Miller headlamps and either P&H, Adlakes or King of the road side. Looking at this photo of the Peerless recovery truck which we intend to recreate, I dont recognise either the headlamps or the side. The side looks a little like an Adlake but is not. Any thoughts anybody please?
-
WW1 Peerless lorry restoration
Great War truck replied to Great War truck's topic in Pre WW2 vehicles
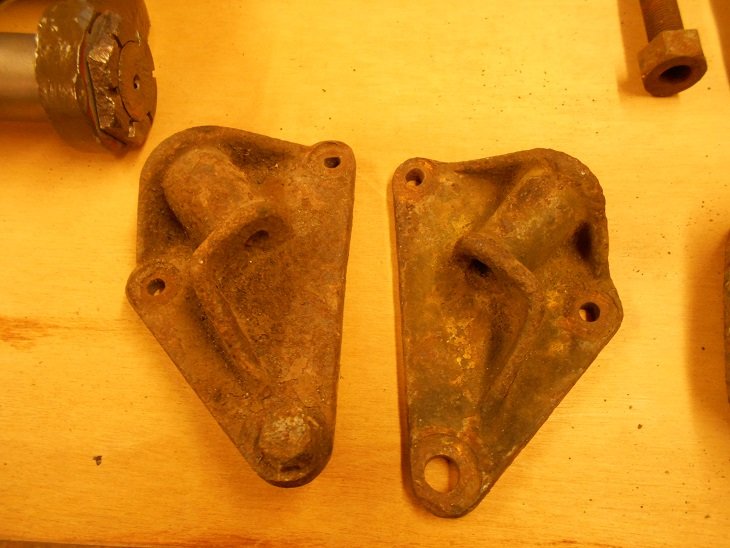
The front springs have gone off for a rebuild and should be ready in a month or so. Dad is continuing to work with the shackle pins, shackles and nuts for both axles which are now nearly ready. He has dug out the head lamp brackets which now need a good clean. He has also pulled out the spring U bolts some of which are looking rather tired. However, I think we have some in stock so we just need to dig out some better ones.

-
New WW1 Wagon, Cart and Vehicle Data Plate Website
Great War truck replied to Hamble's topic in Pre WW2 vehicles
Here is an original A Type body plate built by International Harvester but fitted to a B Type body on an FWD Model B.
-
New WW1 Wagon, Cart and Vehicle Data Plate Website
Great War truck replied to Hamble's topic in Pre WW2 vehicles
Yes, that would make sense. Thanks. -
WW1 Peerless lorry restoration
Great War truck replied to Great War truck's topic in Pre WW2 vehicles
We probably wont disassemble them. I dont think there is a need to. We did it previously on another truck and painted all the leaves, but the paint got squeezed out and it looked a mess. We have not lubricated the leaves either. I dont think there is a need. No hard and fast rules of course. With the chassis being prepared for blasting Dad made up some wooden plugs to protect parts we really dont want sand in. While talking to the sand blaster he had two more shackles blasted. A bit worn but better than the others.


-
New WW1 Wagon, Cart and Vehicle Data Plate Website
Great War truck replied to Hamble's topic in Pre WW2 vehicles
Here is another. Ordnance 5 ton artillery tractor. Armour by Diebold. Running gear by Reo.


-
New WW1 Wagon, Cart and Vehicle Data Plate Website
Great War truck replied to Hamble's topic in Pre WW2 vehicles
Three more from our 1918 US FWD Model B truck. The FWD data plate and the Ordnance plate are from the scuttle. The Ordnance plate was only fitted to US Army vehicles. The British FWD did not have them. A replica of an original body plate made International Harvester. This was fitted to the outer front panel of the body. Interestingly, the original one this was copied from was a B Type body but the plate states it is an A Type. A mistake in selecting the correct plate or just out of B Plates when they stamped the number?


-
New WW1 Wagon, Cart and Vehicle Data Plate Website
Great War truck replied to Hamble's topic in Pre WW2 vehicles
A great idea. Here are a couple. One of mine and a friends. I know nothing else about them.

-
WW1 Peerless lorry restoration
Great War truck replied to Great War truck's topic in Pre WW2 vehicles
Always planning a few steps ahead we will be looking at getting it on to wheels this year (soon I hope). It was time to rummage around in the stores for a pair of axles. They were rather buried in other stuff so it took some effort to find them. The first back axle we picked out had the bearing surfaces protected but everything else was rather corroded and would take some time to disassemble. Time is always against us so we rummaged around until we found a second back axle in much better condition and completely disassembled already. The front axle we elected still has the wheel hubs in place but is quite corroded. A bit of work will be required to bring that one back to life.


-
WW1 Peerless lorry restoration
Great War truck replied to Great War truck's topic in Pre WW2 vehicles
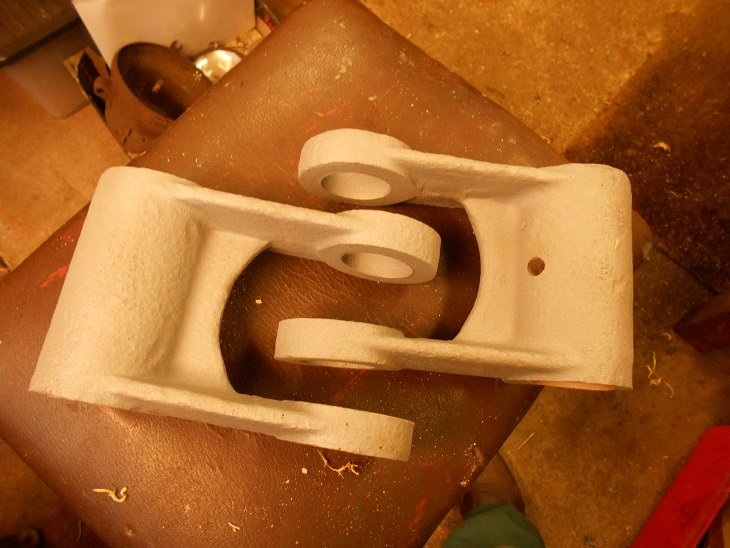
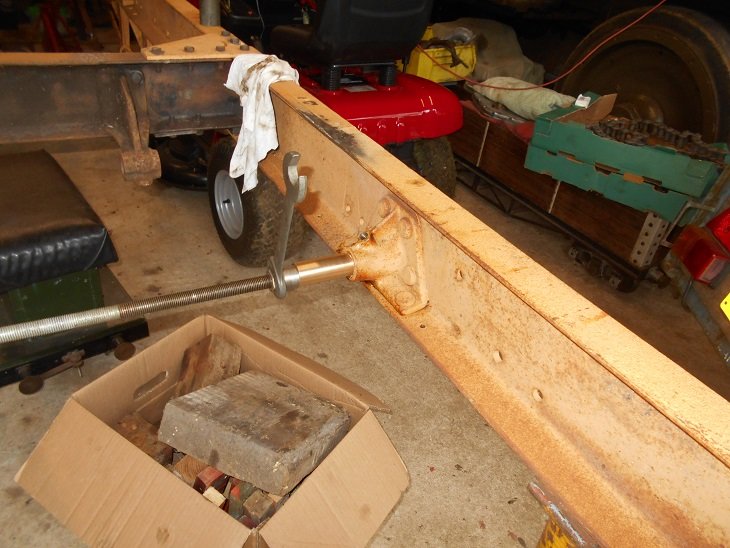
The machining of the replacement bronze bush for the front spring shackle and pressed in successfully. The other corresponding front shackle pin bush is sound and does not need replacing. Dad test fitted both front spring shackles to the chassis and all satisfactory but still has to drill through the new replacement bush to accommodate the Greaser,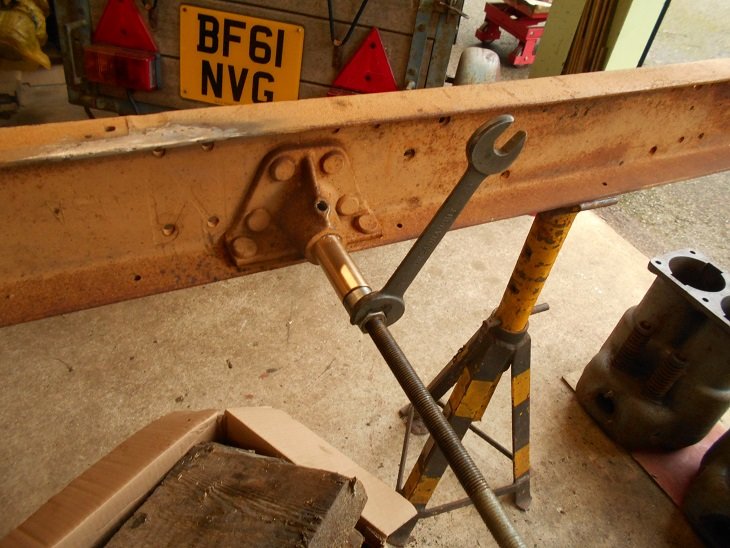


-
WW1 Peerless lorry restoration
Great War truck replied to Great War truck's topic in Pre WW2 vehicles
Dad chopped up the old tyres and bands today for recycling. Interesting to see that on the insides of the bands was some writing (tyre size). I dont remember seeing anything like that on any previous bands.


-
WW1 Peerless lorry restoration
Great War truck replied to Great War truck's topic in Pre WW2 vehicles
Yes, you are quite right. They still wash up.
-
WW1 Peerless lorry restoration
Great War truck replied to Great War truck's topic in Pre WW2 vehicles
A Genie! Gosh that made me laugh. Nothing quite so exciting really. Here is a picture of the store room.
-
WW1 Peerless lorry restoration
Great War truck replied to Great War truck's topic in Pre WW2 vehicles
Now that the Thornycroft has gone, one of the aims for this Christmas was to straighten the Peerless chassis. It was well jammed in behind the FWD so we had to get that out of the way first. Although it is very rarely used I am pleased to report it started on almost the first swing. We then had to move all of the junk that has built up around it and then with an engine hoist controlling the lift we gently dropped it to the floor. We then rearranged the strop on the chassis and moved the Peerless across the floor, brought the FWD back in and then eyed up the chassis. Straightening the chassis - tricky or difficult. What do you think?


-
From its new home we put the canvas up and then took it out for a drive. It went very well and we managed to stop for a few photos. We then tucked it away in a shed tall enough so we dont have to take the canvas down. A very successful day.


-
As we are about to make a start on the Peerless chassis we had to make room in the shed. A friend has kindly offered us storage for the Thornycroft so in the most horrendously wet day Steve loaded it up and took it to its new home. Sad to see it go.


-
WW1 Peerless lorry restoration
Great War truck replied to Great War truck's topic in Pre WW2 vehicles
Dad has been painting the flywheel:


-
Obituary - Deryck John Newshamm - "Degsy"
Great War truck replied to Canuk 109's topic in MV Chatter
This is such sad news. I so very much liked Degsy. Like many others I only met him the once but would always have interesting interactions with him on the forum. He will be much missed. -
WW1 Peerless lorry restoration
Great War truck replied to Great War truck's topic in Pre WW2 vehicles
All Shackles, Hooks and Shackle pins - now cleaned or replaced with the exception of the one Shackle that Steve took away to press out the old warn bronze bushes (now done) ready for fitting. Steve will bring that one missing Shackle with him back to Devon when he next comes down for new bronze bushes to be made and pressed in.


-
WW1 Peerless lorry restoration
Great War truck replied to Great War truck's topic in Pre WW2 vehicles
Finished. Here are the new ones alongside the originals.
-
WW1 Peerless lorry restoration
Great War truck replied to Great War truck's topic in Pre WW2 vehicles
Wow. £295. What a bargain. The first batch from the end of the war were offered at £400 and they had not been reconditioned. Dad has not been able to find any reusable (or reconditionable!) front shackle pins so has been making them. Still a lot to do though - the caps to be silver soldered on and machined to correct final profile. Feathers to be made and fitted.


-
WW1 Peerless lorry restoration
Great War truck replied to Great War truck's topic in Pre WW2 vehicles
and even more:


.JPG.d54e939fe84c08d2ba6105616ffcb658.JPG)
.JPG.f534891514acb4fae30608511876540e.JPG)
.JPG.2d02bb94ed1a8c779fef024518dc1765.JPG)


