


peter75
-
Posts
394 -
Joined
-
Last visited
-
Days Won
2
Content Type
Profiles
Forums
Gallery
Blogs
Events
Articles
Store
Downloads
Posts posted by peter75
-
-
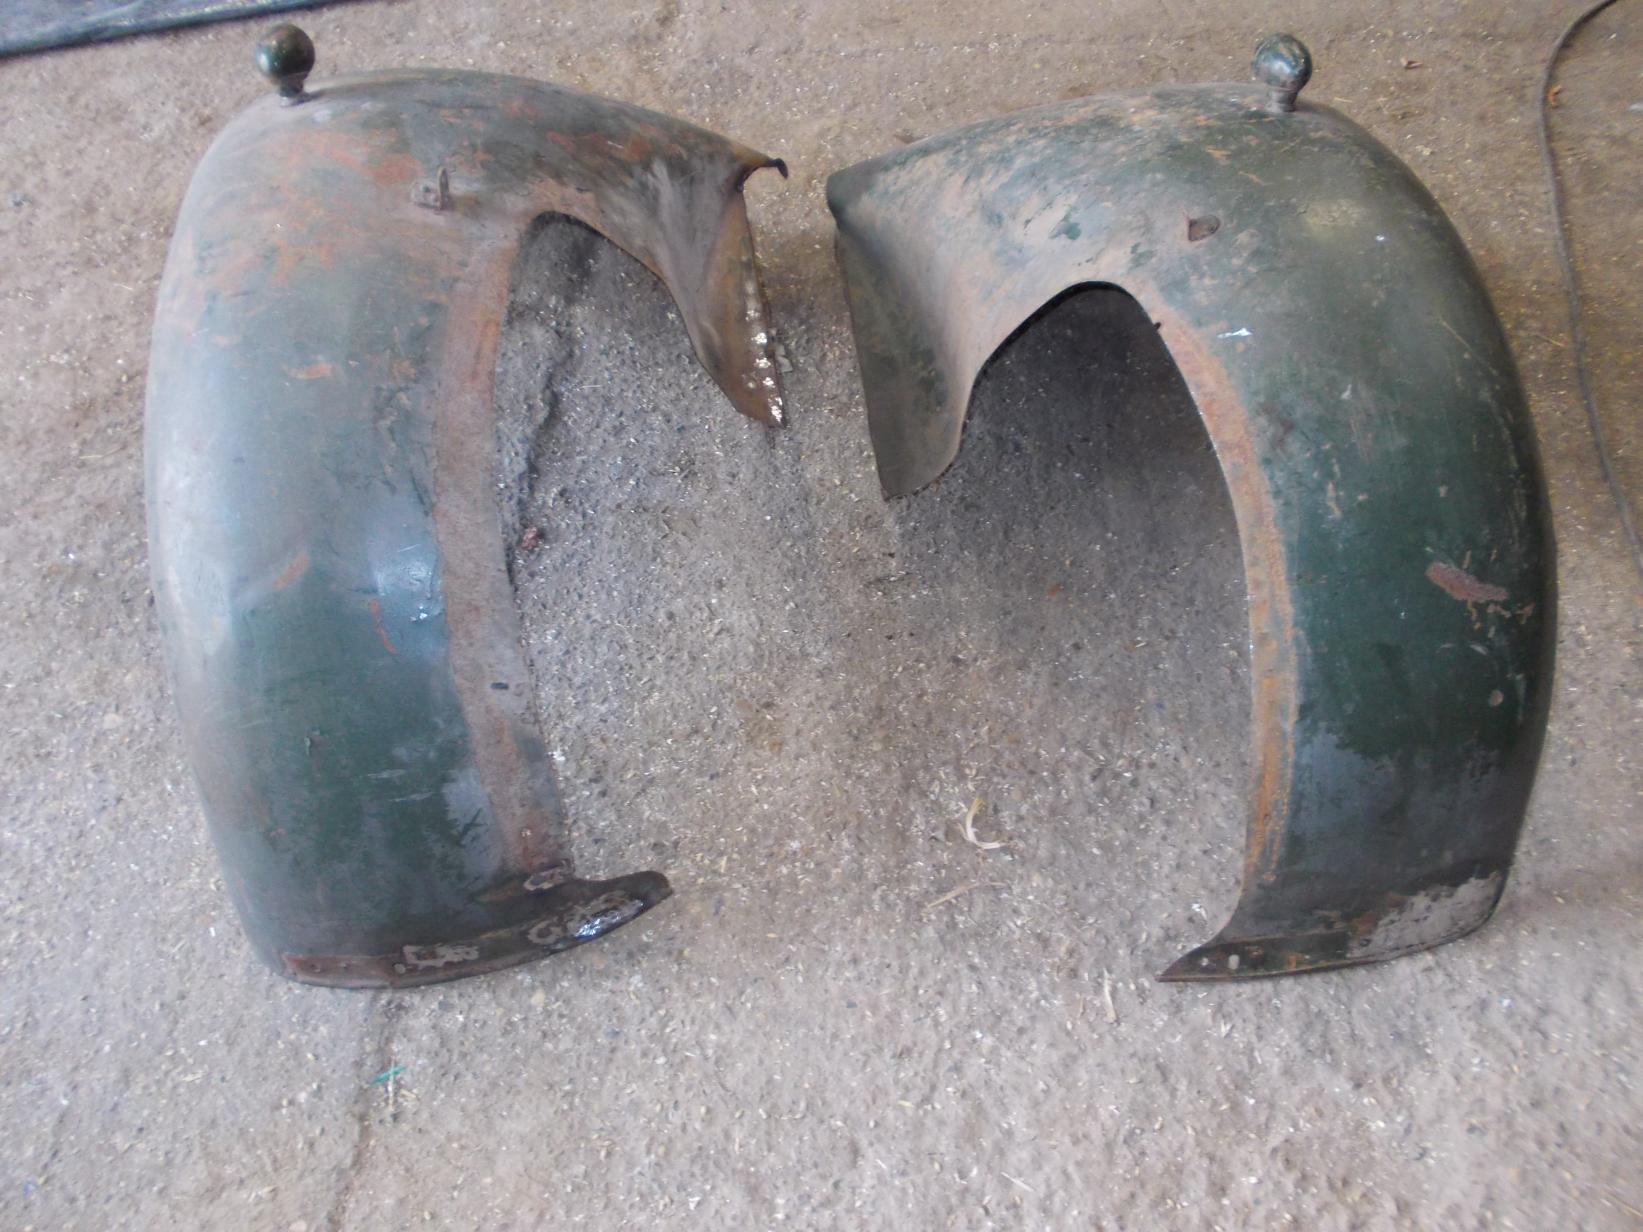
I picked up a few more parts last night, I got a pair of bonnet side panals as I think the ones that came with the truck are post war,

I also got a jerry can holder and oil can holder,
Peter.
-
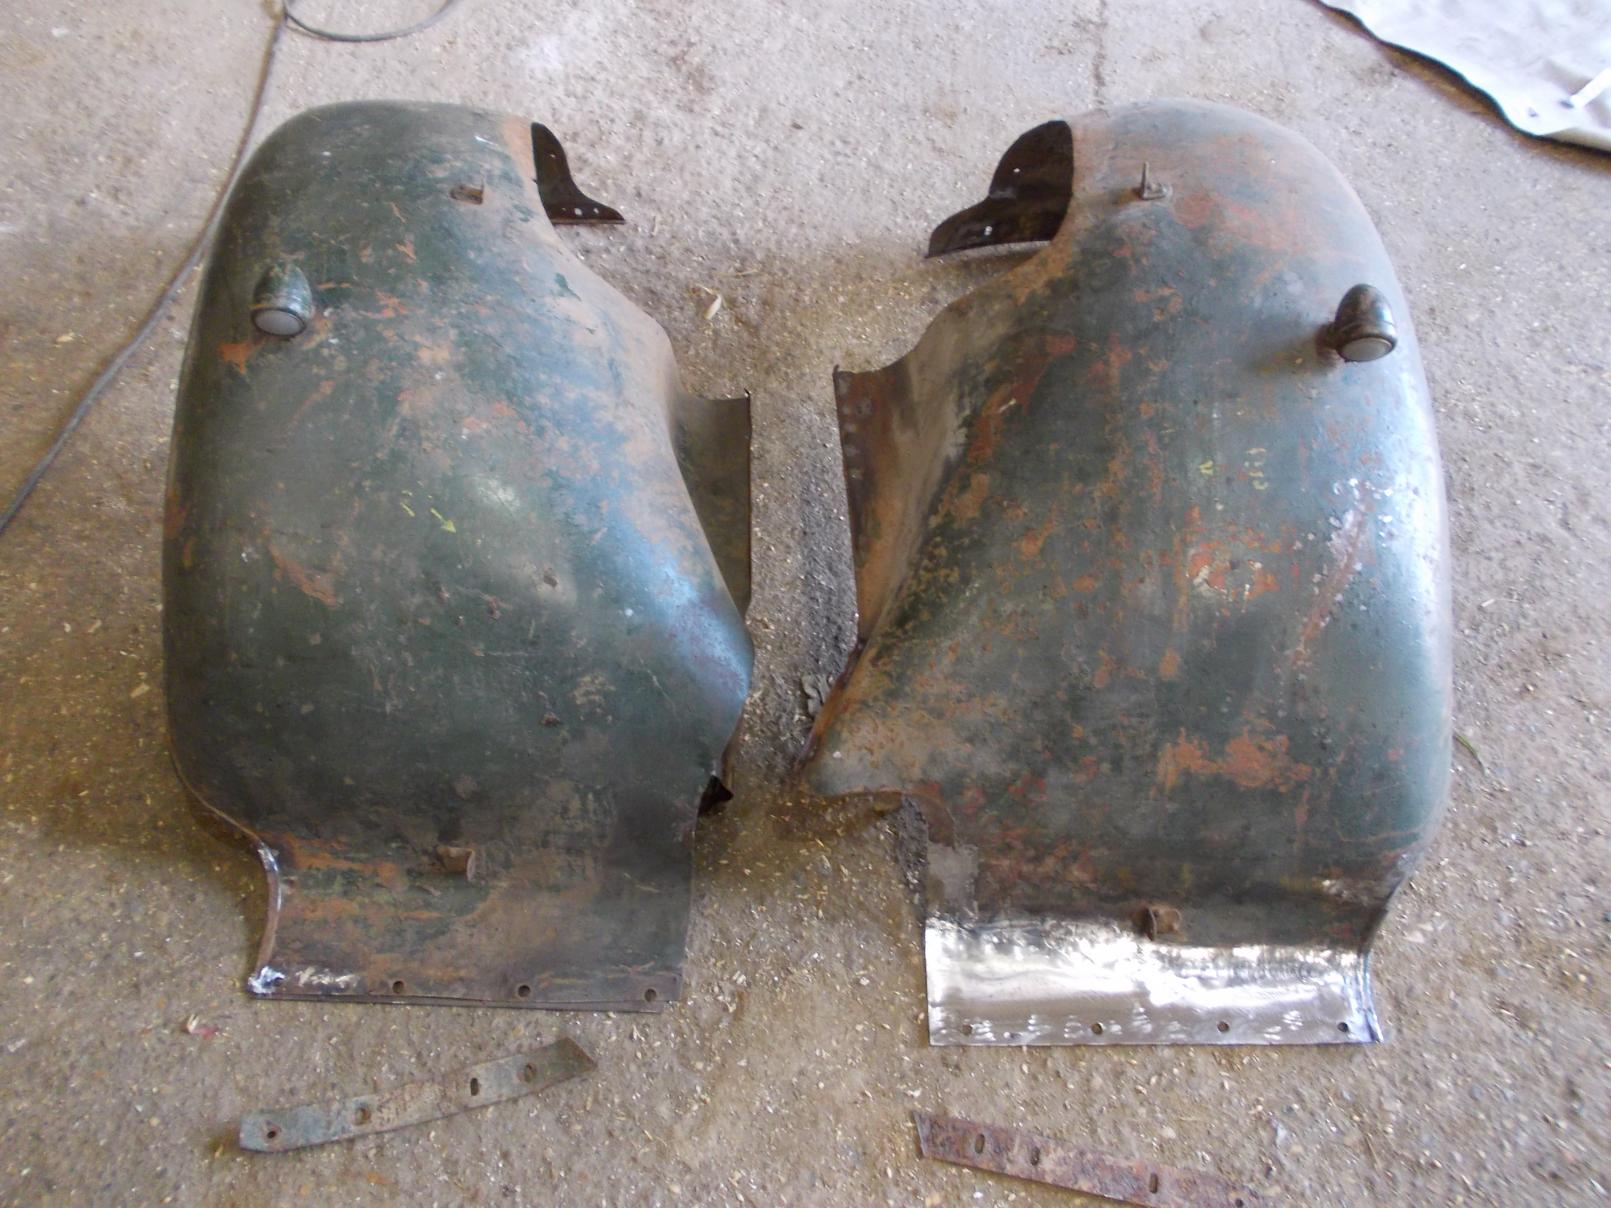
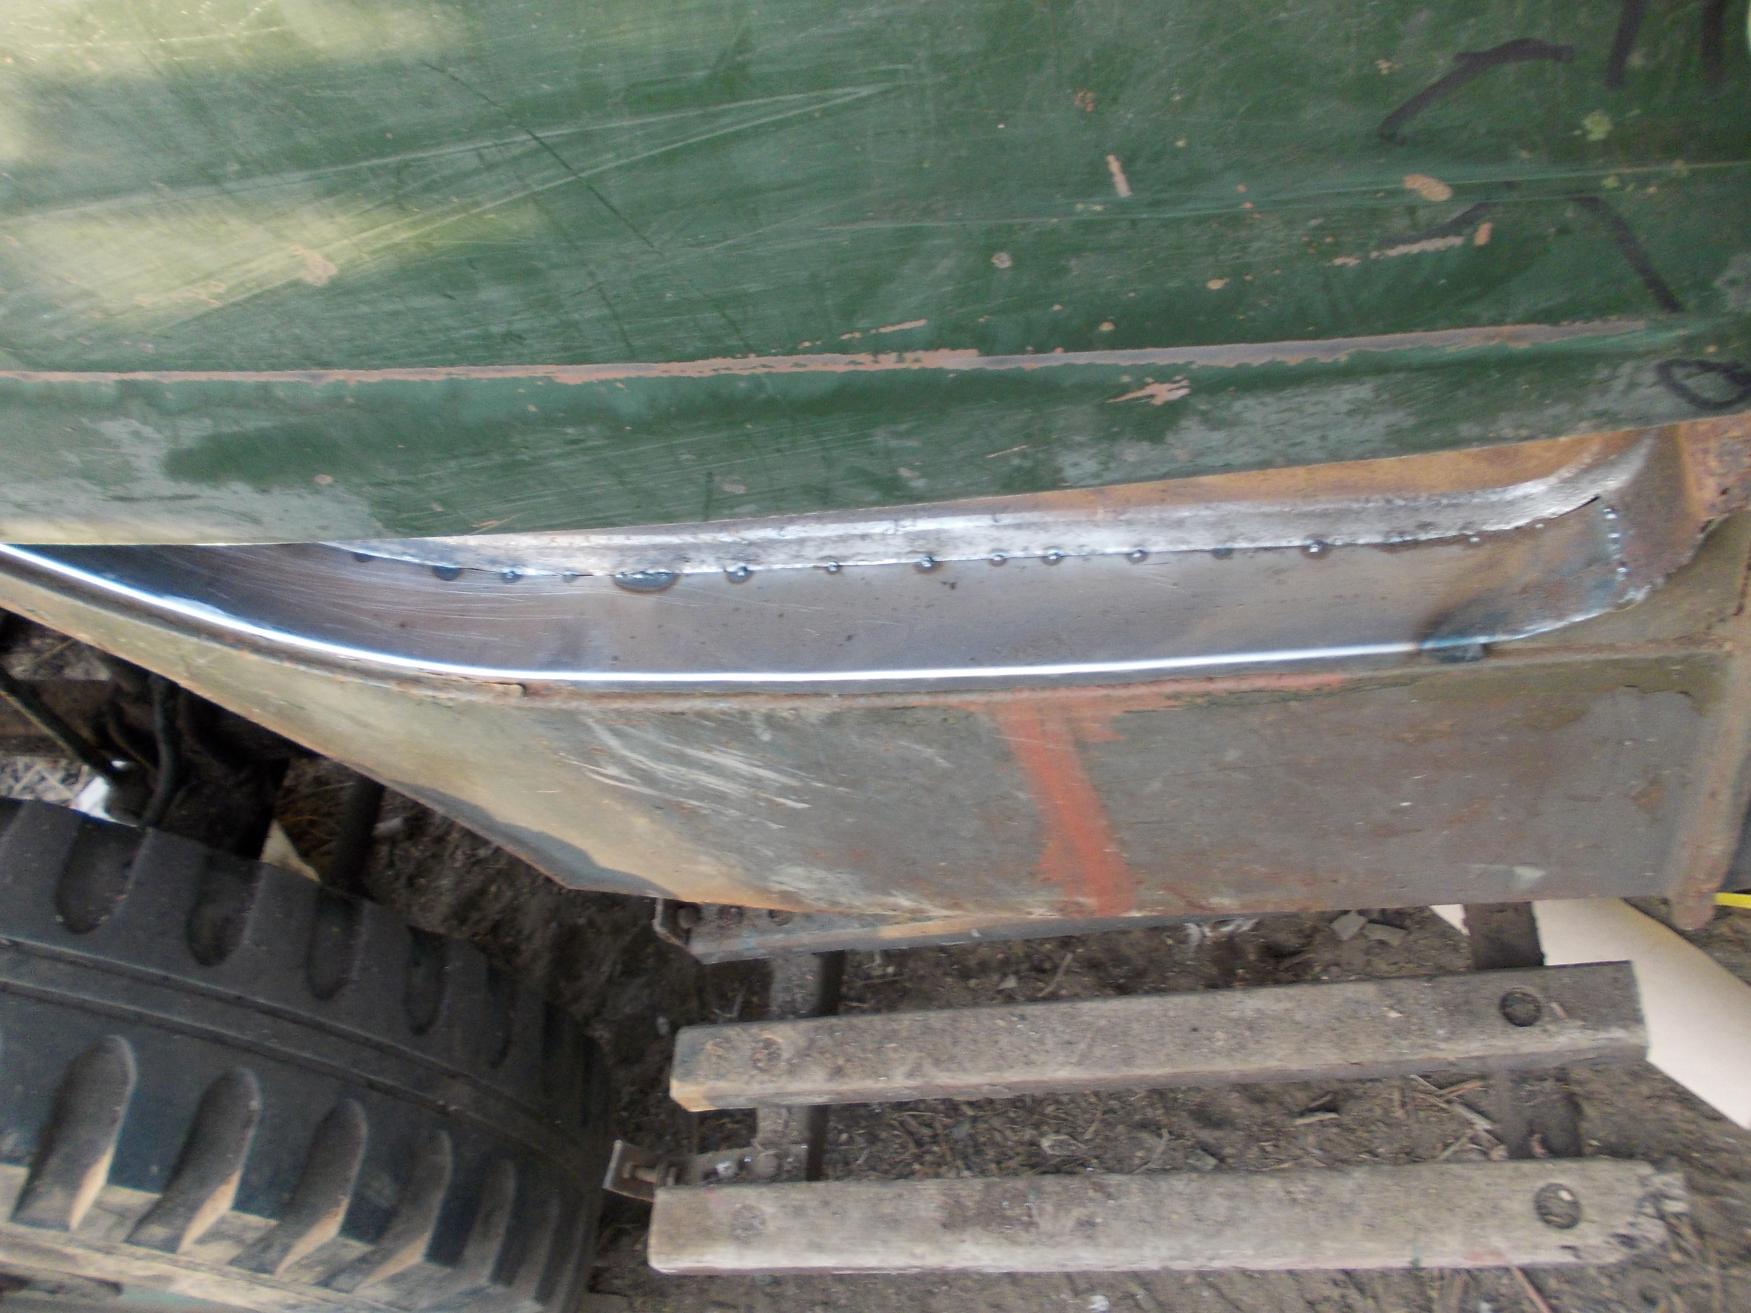
I removed the front bumper and pressed it straight.
I then straightened the front wings and welded the up, this took almost 2 days to get them something like.
Peter.


-
I have got a rotten origanal as a patten and I am building a new body when I have time. you are welcome to mesure it, also I can press the ribs in the doors and side pannals.
Peter.
-
Thanks Tobin,
Some one from the BBMF thought they may be De Havilland as well.
I am going to offer the parts to a local museum.
Peter.
-
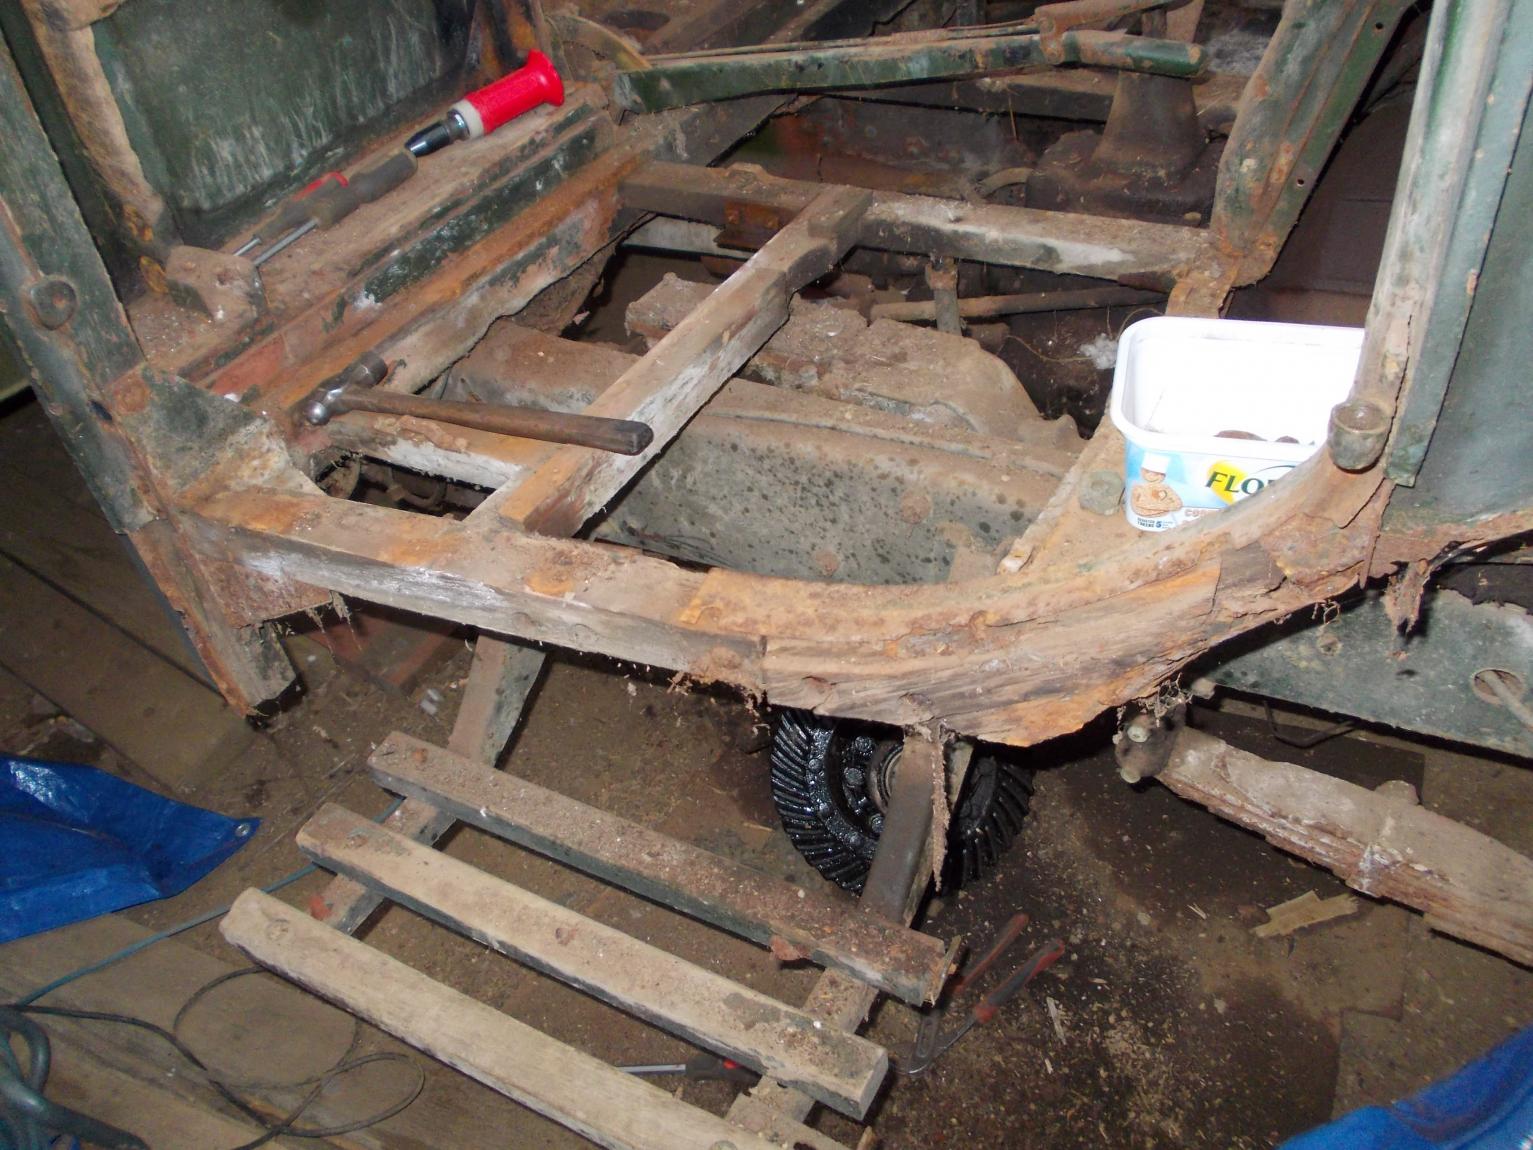
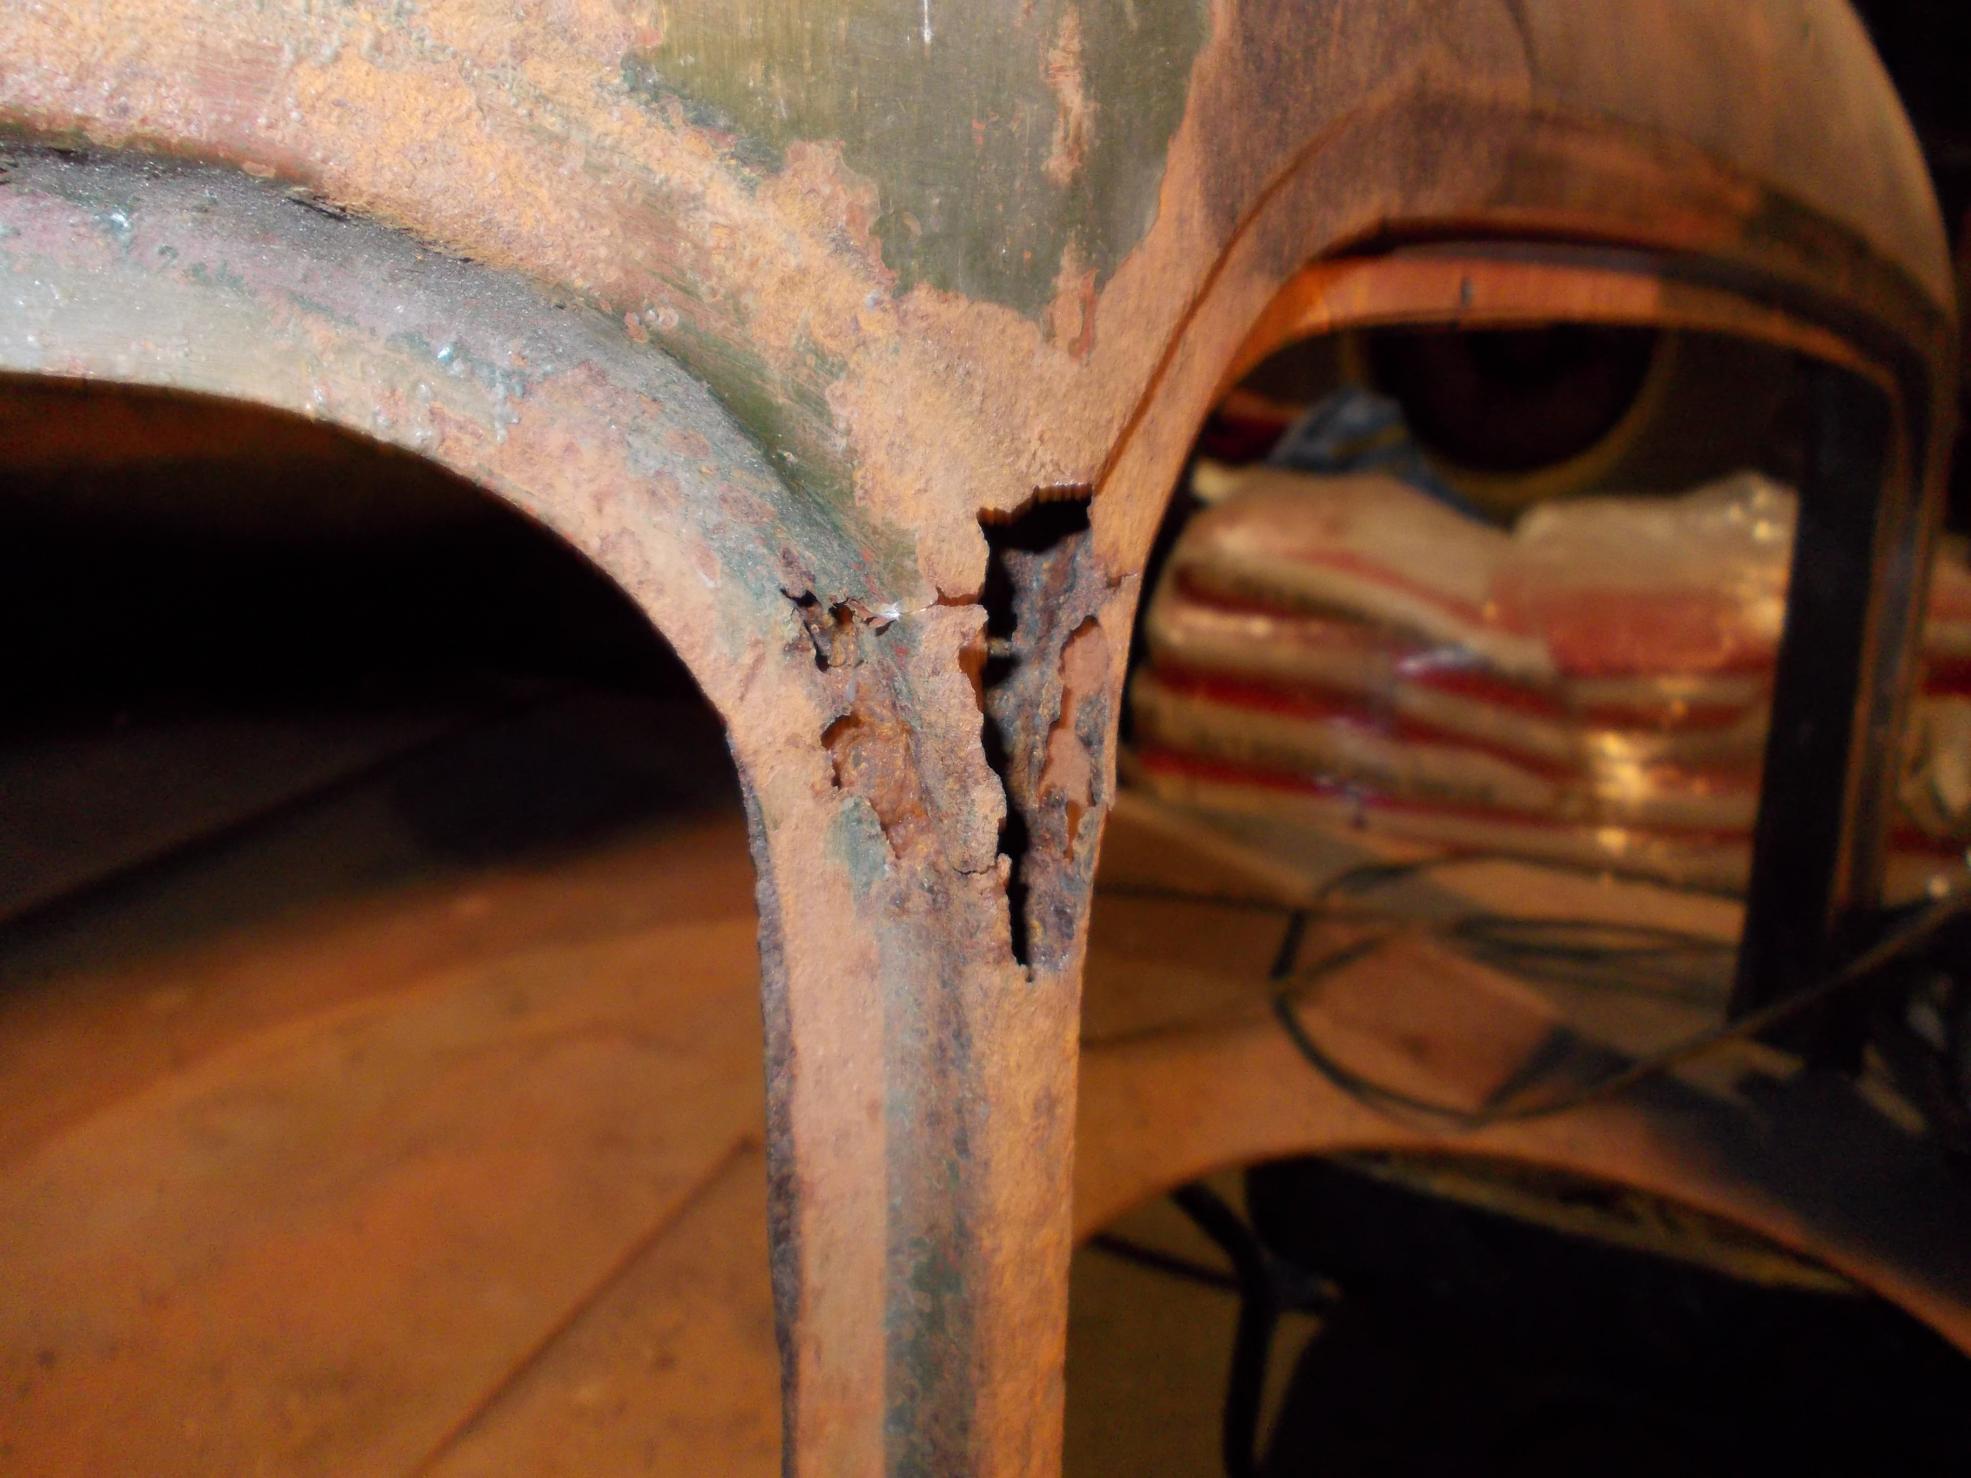
I finished removing the back wall of the cab and the wooden floor frame today.
The cab is a lot worse than I ever thought. All the wood will have to be replaced. The right hand side of the bulk head where the floor frame bolts to is rotten and the left hand side is cracked almost right through.
I got the new ash wood the redo the cab frame, I was hopping to reuse some of the frame but had ordered enough to replace the lot. A friend is going to start on the wood work next week.
Peter.


-
The part N,o, is, G001947 1SS1 73155 D/BR,
There is also DHP212 in a circle.
Peter.
-
I ran out of mig gas today which put pay to my welding job so I continued stripping the OY cab. I removed the left hand floor plate and battery box. Then removed the panels below the doors and unbolted the wooden floor frame from the bulk head. I have just got to remove the hand brake and rear cab mount to free the bottom half of the back panel and floor frame of the cab.

Peter.

-
try again


-
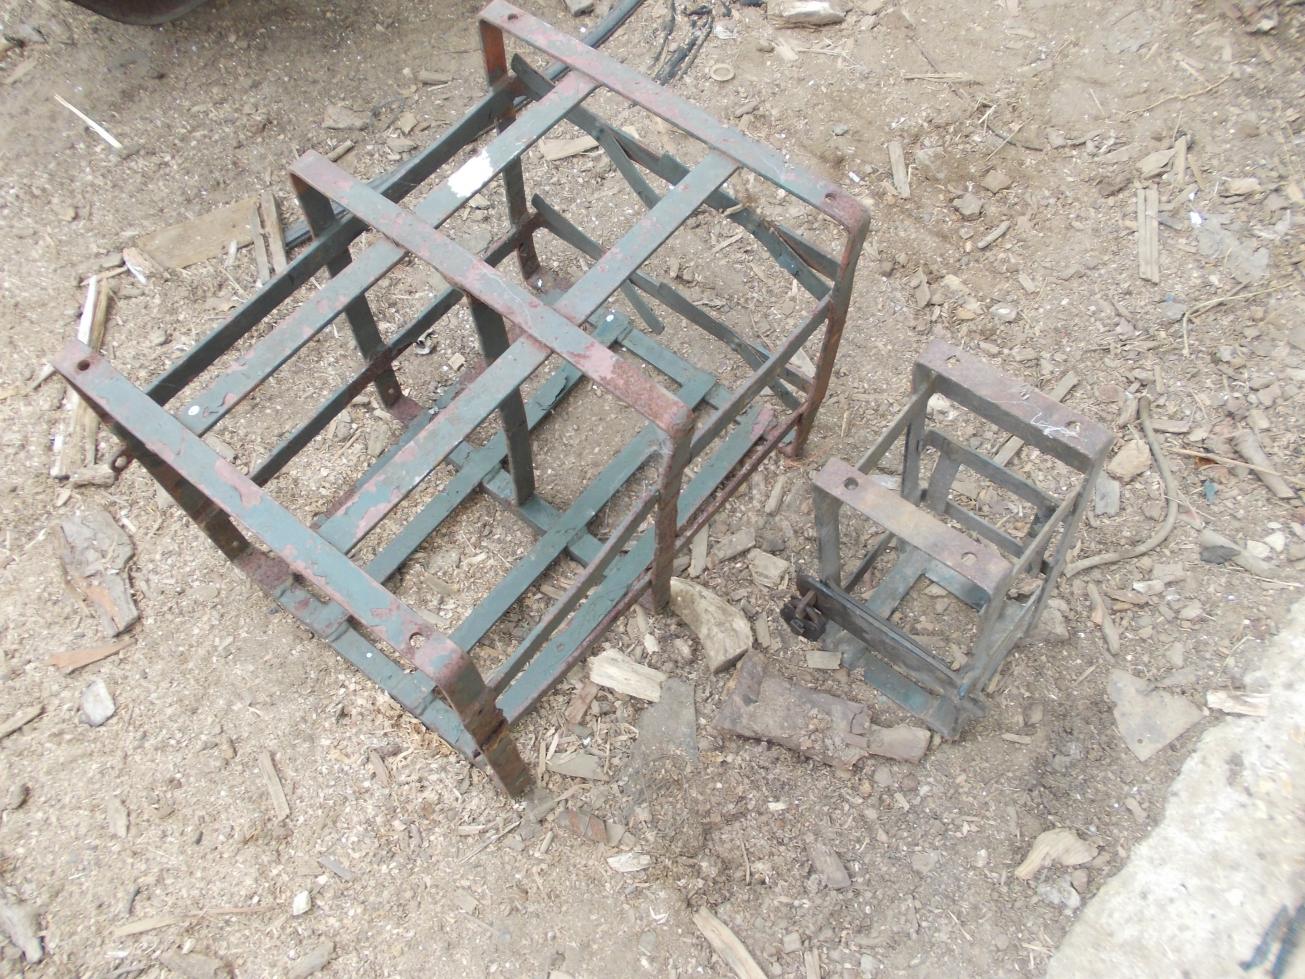
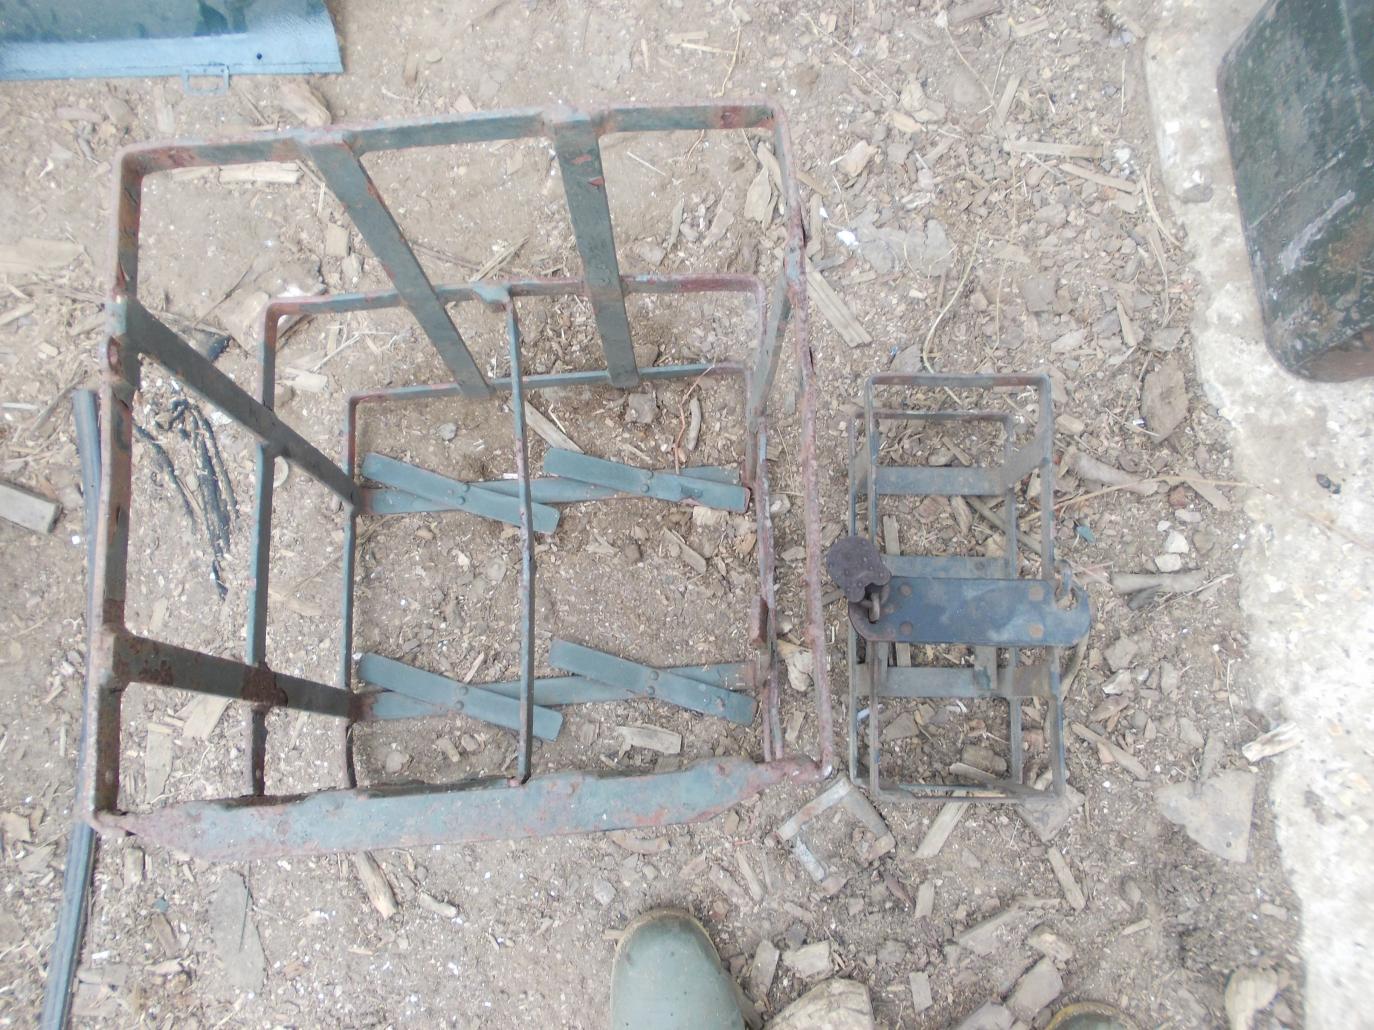
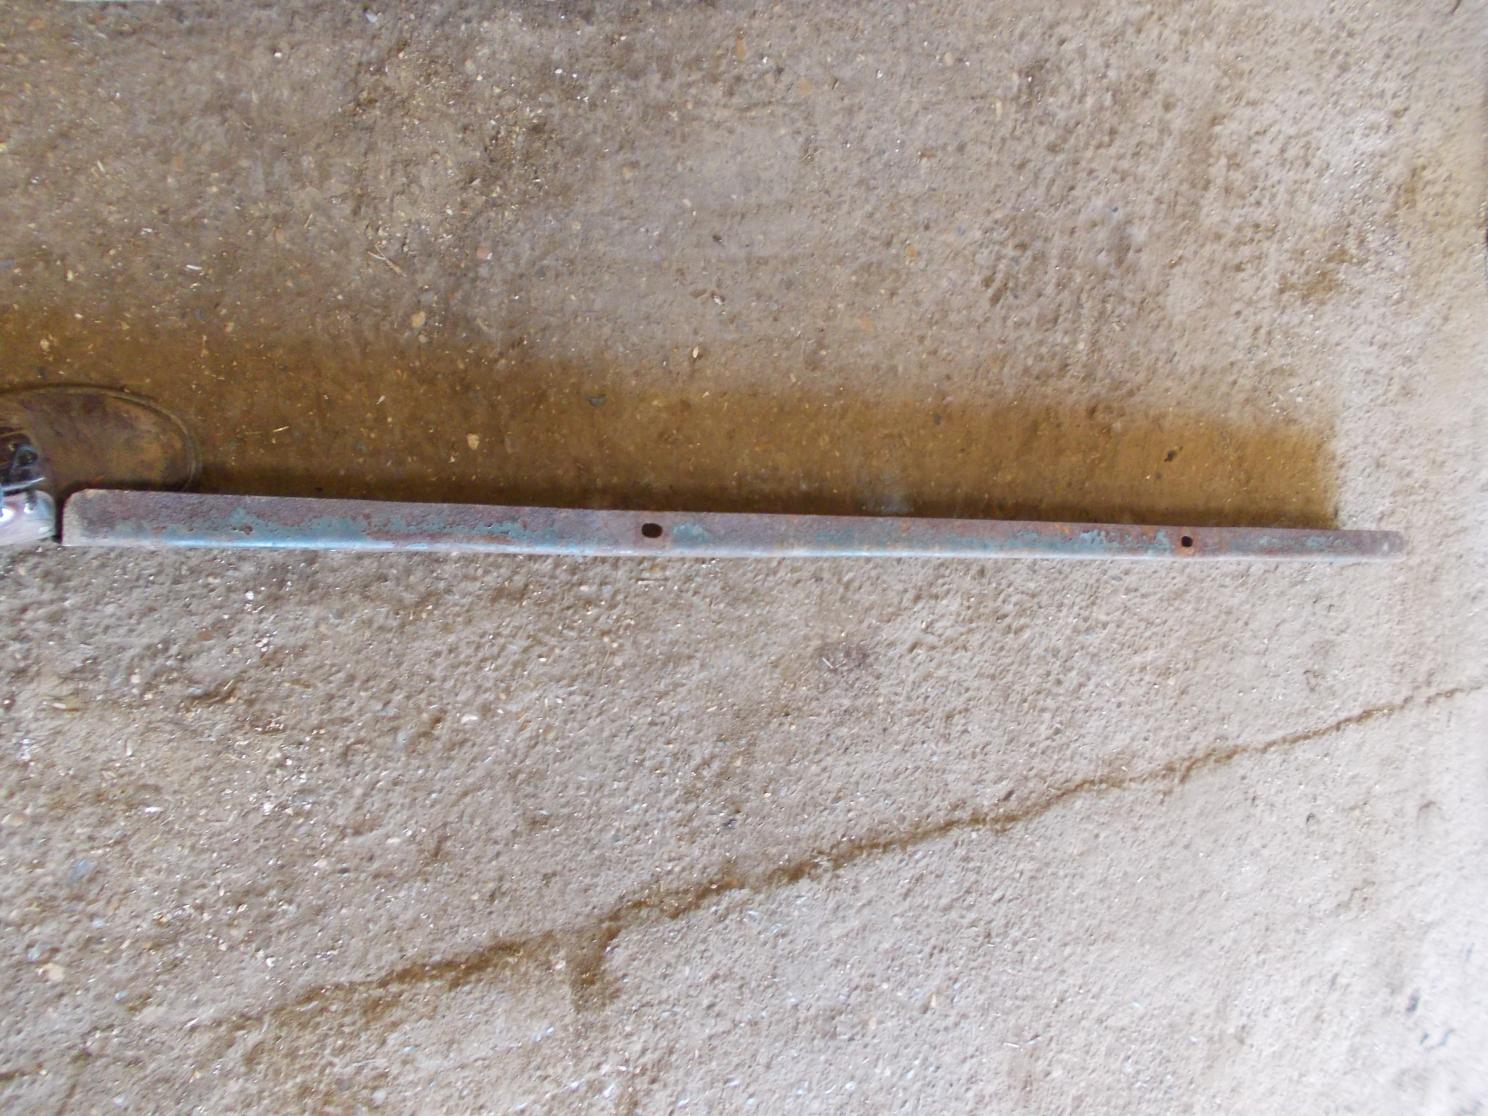
Has any body any idear what this part could be?
I have 4 of them which were found in a shed with a lot of other AM stuff about 20 years ago.
[ATTACH=CONFIG]103077[/ATTACH][ATTACH=CONFIG]103078[/ATTACH][ATTACH=CONFIG]103079[/ATTACH]
Peter.
-
Not a lot going on at the moment but I have collected some more parts.
.jpg.2a824c13c3b5139758291789ec436e00.jpg)
I have now got all the parts to finnish the tail gate.
I got a top half of the drivers window frame which I hope to cut down to replace the bottom of my window frame.
I also got a compresser for the gearbox.
Peter.
.jpg.355a3da8500c3468e587f4aa2e4bcb39.jpg)
-
The armoured windscreen is now sold.
Peter.
-
Scout car.
Thanks Adrian, I can decide what to do with it now. It came with a job lot of bedford parts.
Peter.
-
White halftrack armour is slightly wider than scout car. Measure the overall length at the top (widest) and that will tell you.
Value? What buyer and seller agree......
The armour is 159.5cm across top and I have found a part N,o, 580-7-1615 1024.
Peter.
-
I got an armoured windscreen today and I think it is a wight M3 halftrack or scout car? Are they the same? what is it worth?

peter.

-
I can not see any thing listed in the OY parts book about first aid kit or brackets although things like pick, shovel and wire cutters are not listed but the clips are.
There must be another kit list covering all trucks with things like the pick, shovel, toe ropes and any thing not supplied by Bedford for the Bedford trucks.
Peter.
-
This is a new idea I not heard before,
part N,o, 7055820, clip, wire cutters.

This is from a copy of a march 1944 OY parts book and is the only part N,o, I can find to mach the mystery clip. my 1944 wire cutter are a perfect fit in both my OY and QL .
Any thoughts?
The OY also has the half round wooden block on the cab floor in the back right corner, could this be for a tin of engine oil. I have been told that oil was supplied in round tins?
Any thoughts?
Peter.
-
Still looking for drawing / photo of wheel brace
Nicky
This is a picture of a QL wheel brace, I think the OY, MW has the same ends but a single right angle bend.

Peter.

-
Hi Pete, it's Tim here from Metheringham, keep up the good work, it's coming together mate!
HI Tim, thanks and I here you got the matador back home, will have to pop over and have a look.
Peter.
-
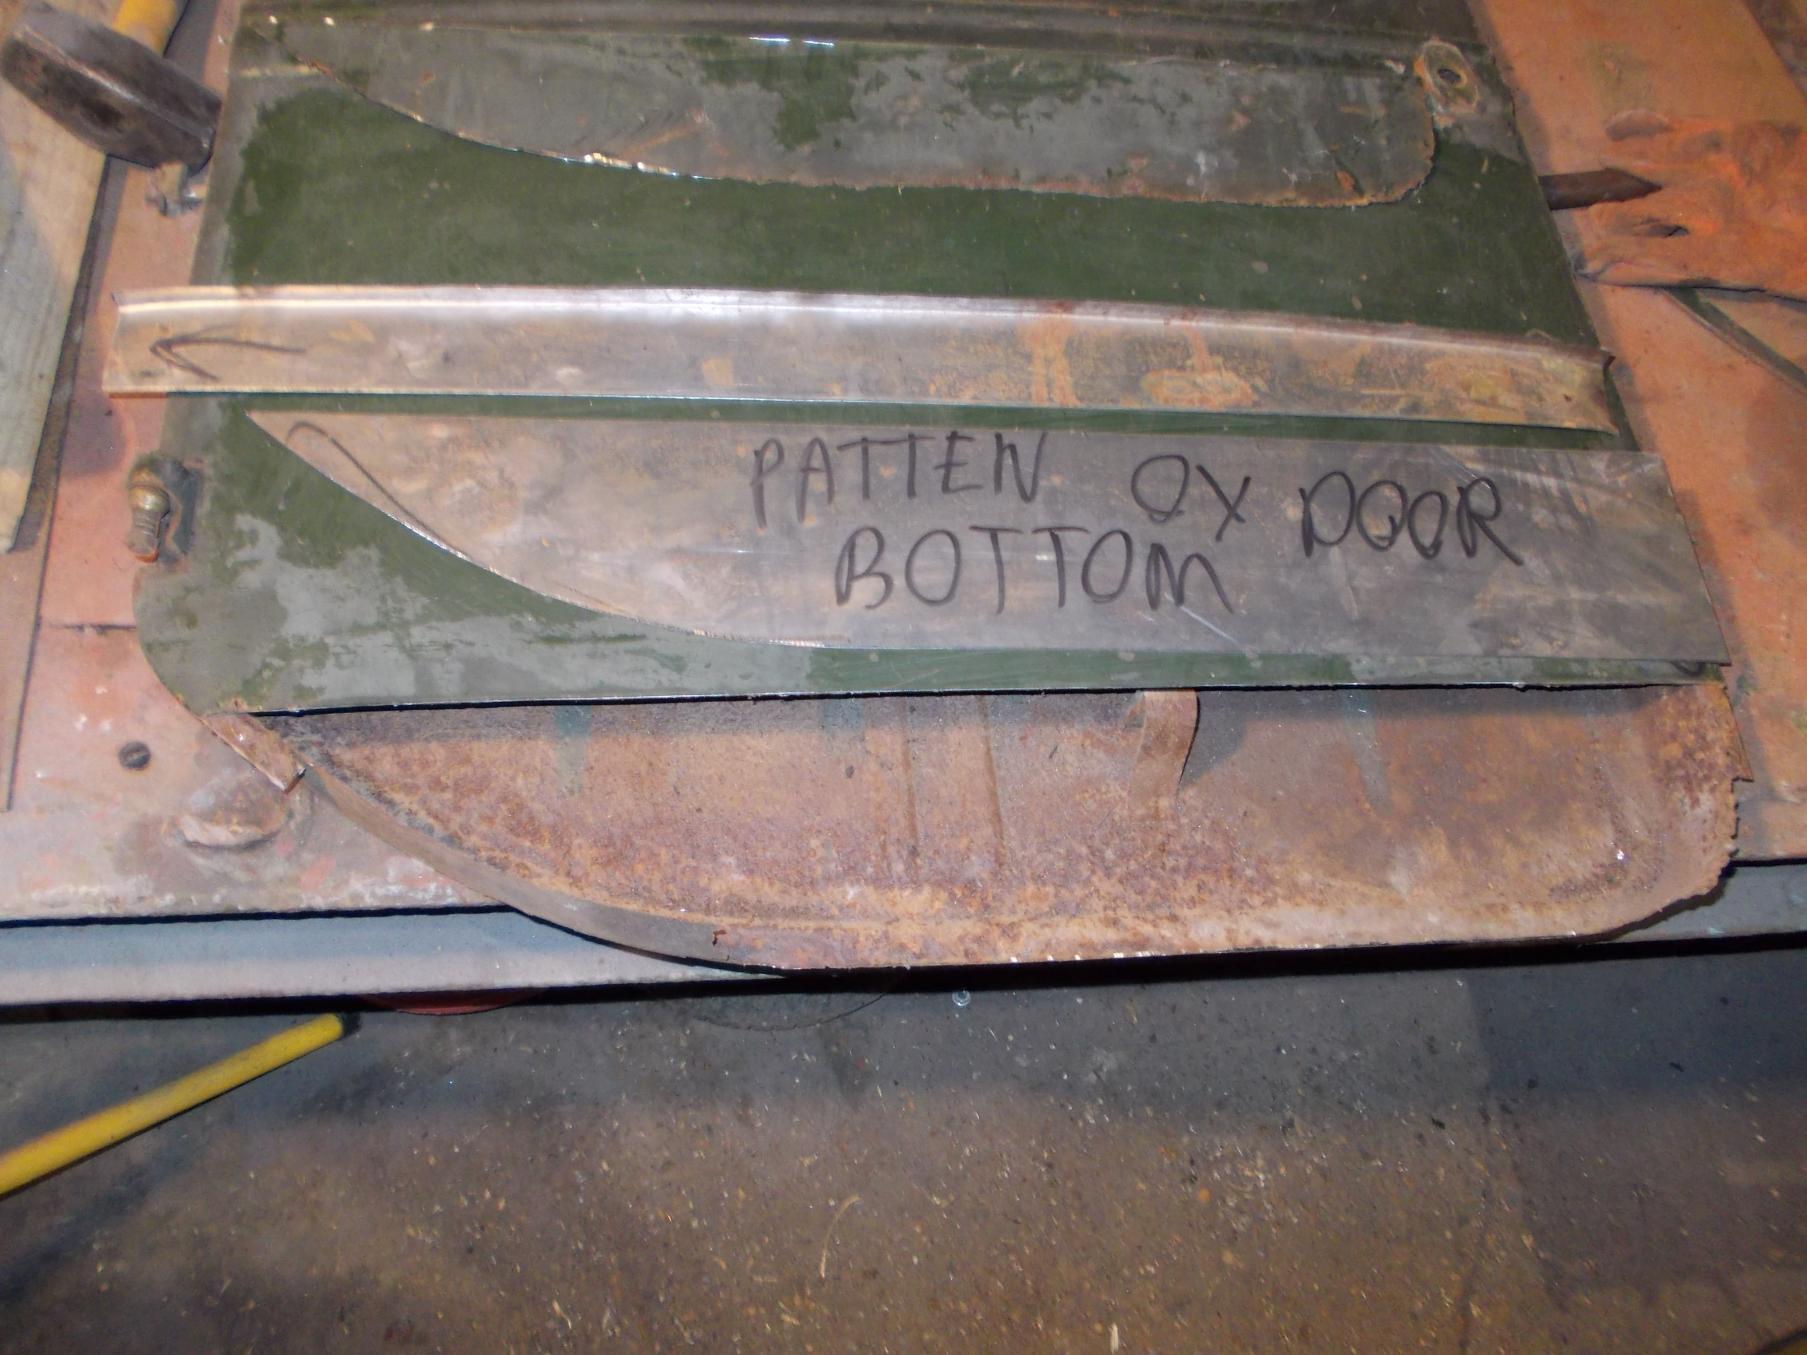
well the weather has slowed me down but sill progressing slowly.
I have got the bottom of the left hand door done apart from the skin, I might get some one to tig weld the skin.
I have got pattens made that I will use on the other door so it should save some time.

Peter

-
Your restoration is looking top notch, Peter! Fantastic attention to detail! Where are you based?
Just one thing on the Jack... Is it not the Britool / Ern Lake type of Jack you need for the OY? The 4 ton type? of the same design as the one you gave pictured earlier in the thread?
You may know more than me on this...
If you look at the hand book there is a very good line drawing of the tool kit and it shows a shelley DL jack. also the measurements that guy sent me for the base plate match the floor plate. The jack in my picture is a 2ton MW jack to show the position of the jack and a bit of fun.
I may be wrong, dose anybody know what is correct or did they use what was available?
-
Great job pete,
your works outstanding, look forward to some pictures of the QL haven't seen her in ages!
Hi Bill, I will start the QLT as soon as the OY is done. I am just collecting parts and making contacts at the moment. the only work done so far is the rear body frame as the body I got as a pattern was past best and I had to unload off the bail trailer for harvest and I was worried it would drop to bits. I am looking forward to starting it especially as there is very little welding to do to the cab. when I get started you will have to come and have a look.
Peter.
-
I hope to start repairing the doors tomorrow.
I have striped one of the doors tonight which went well, I had not done an OY door before but a mate had told me how to do it.
most of the bottom edge has either rotted away or is very thin. Also I will have to work out the curve where the door skin meats the bottom edge.

Peter.


-
I have finally got the top half of the cab welded ready for shot blasting.
I have had to remove and repair the bar between the windscreens which was very rotten. I have replaced the back plate and repair the front bit. To do this I have had to refit the cab roof twice.
I have also done lots of little repairs which has taken a lot of time.


Peter.

-
Hi Pete
Are they for sale and if so how much do you want for them?
Best regards
John
Hi John,
P,M, sent.
Peter.


.jpg.2a824c13c3b5139758291789ec436e00.jpg)
.jpg.355a3da8500c3468e587f4aa2e4bcb39.jpg)


1944 Bedford OYD
in Blogs of MV restorations
Posted
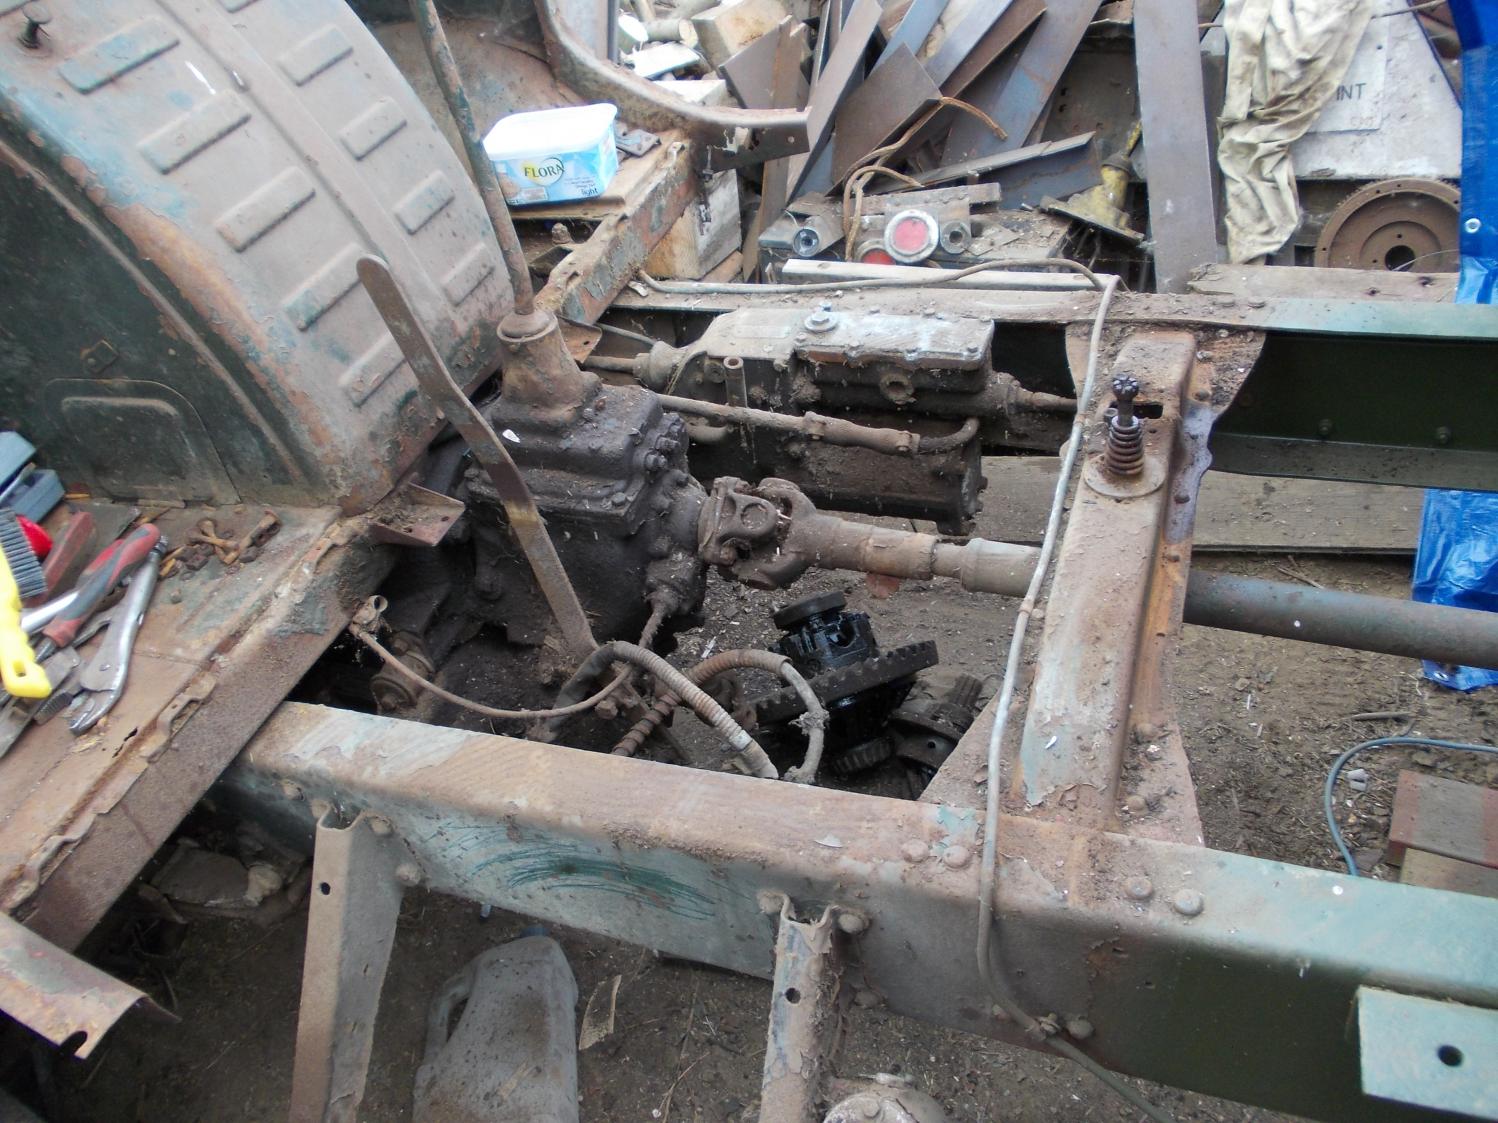
After I had got the bumper and wings sorted I test fitted them and then removed the front panel and radiator,
I then removed the air cleaner and disconnected the bulkhead. The steering wheel would not move so I got a length of tube that fitted over the threads and gave it a belt with a hammer knocking the wheel on tighter but this was enough to brake the seal and the wheel came off with a hit with a rubber mallet without damage. Andy and Rob came over last night and helped me lift the bulkhead off.
Today I pressured washed the front of the truck down and removed the engine and gearbox and then wash them again.
Peter.