


robin craig
-
Posts
3,691 -
Joined
-
Last visited
-
Days Won
2
Content Type
Profiles
Forums
Gallery
Blogs
Events
Articles
Store
Downloads
Posts posted by robin craig
-
-
Great question, it is a common one asked by newcomers to the Ferret world.
The basic concept that I am led to understand by those who told me is that the two tubes are supposed to expand and make a tight fit but still allow for hull flexing.
Frankly it is old technology if you ask me and in today's world if it were designed all over again I think you would find a stainless flex piece in it's place.
I have seen and experienced mechanics refusing to issue a safety inspection certificate because of the leak and I have always argued that the flow of air is through the vehicle out of the back and the engine decks are not sealed so the idea of being overcome by exhaust fumes is not one that I see as very credible.
I think Ferrets are long enough in the tooth now that those tubes have lost their ability to fit properly and I have seen many attempts to fix them that do not work. I think it is a question of returning things to their original fit tolerances or a work around.
I am no expert and don't claim to know everything, it is just my view. Others will be along soon to offer their 2 cents worth
Robin
-
Andy, the trick with the wood is the choice of the wood to begin with, poplar and bass woods are great for painting, close grained and very much knot free.
A coat of varnish first seals the surface and your away to the races.
Robin
-
As others have said, congratulations.
There must be a story about the tyres.
When it is all set up and warmed the engine will run very much smoother.
So, apart from camera person, what other roles have you applied the teenager to successfully?
Keep posting, great shots
Robin
-
Here are a few pictures, nothing earth shattering but its keeps the subject alive.
Robin


-
Having just been involved in doing this job, taking an engine out, the advice contained here is very very useful and thanks Timbo for posting it and thanks to Sirhc aka Chris for his comments and directions.
If you do not take the alternator (or generator in military speak) out before doing the engine then it makes life tight and people very grumpy.
An engine leveler is a big help as it gives you a much finer balance.
The outer bellows on the exhaust are sharp edged and we took the exhaust and silencer off the hull above the collared joint so we could get things moving, we had trouble with the split pins and rather than break anything we went around the problem.
I like the idea of using straight water on start up to check for leaks, then replace, that is smart.
The engine comes out exactly as Tim describes but man oh man it is tight, an inch or two extra would be nice.
I have some pictures to follow and some more info
Robin
-
Glad to see you finally made it here Steve.
Just assisted in pulling the engine from a Samson today.
As you mention your videos I took the liberty of showing the link.
Robin
-
Andy,
Have you considered having shells made in wood on a CNC unit?
We did some 76m ones in bass or poplar, turned out quite nice.
Robin
-
Dear Matt,
Welcome to the forum and love the project. I am assuming that Australia is home?
I love how a younger generation is involved, supervised by the 3 wise men!
What is the intended end status? Do you have a turret?
Will watch this with interest
Robin
-
Interesting mastery battery switch Chris.
I have always held that the right side (as reference by the driver seated facing forwards) is the main and the left is the reserve.
That is my opinion, it is worth 2 cents but there you go.
The biggest problem is really a question of housekeeping. If you look at them as a left and right and not reserve and main then it makes a difference
I think that too much fuel is in many of our vehicles and they do not do enough miles and folks do not switch the tap on a regular basis.
Frankly I hold that using one side on the way out and switch to the other on the return trip and keep it filled with stabilised quality fuel is one way or de-commission the OEM tank and run from an auxiliary is the other option.
Chris I will email you privately about a little project I have going that may help
As long as you know where the fuel comes from you are ok.
Have a look at this
http://www.ferret-fv701.co.uk/useful_info.htm
Robin
-
I guess it worth pointing out a minor detail but a very important one at this stage.
The gearbox and the transfer case both breathe through the dipstick shaft and careful cleaning of the gallery and the holes is important otherwise you potentially can pressurise the cavity. I have seen some units where the dipsticks are almost welded in place with all the gunge around the head.
The dipstick is actually a pipe and the head has a cross hole under the cap where it vents.
Robin

-
Talk about the original shoot and scoot capability!
Robin
-
There are some nice Land Rover parts folks up at Rovers North in Westford, Vermont.
They will have the kits that you can use for a rebuild. They might be a touch expensive compared to the UK suppliers but it will be next day delivery for you.
If you have any problems their tech guru is Les Parker, a fine unflappable northern ex pat Brit.
Regards
Robin
-
So, on Wednesday with a newly made plug by our demon machinist locally we went about pressure testing the fluid flywheel as per the manual, which if my grey memory serves me right as 40 psi for 15 minutes.
We really feel that the modern dynamic seals have come along way from the 1950 and the back up washer is overkill nowadays, as I have said before, time will be the test.
I am delighted to say that all went well and we are thoroughly satisfied with the parts installed.
We have since filled the unit and mated the gearbox up to the engine again and intend to run up the engine next week in the shop before putting the powerpack back in. We suspect some carb issues may arise and want to deal with them at that point.
We have completed our end user agreement paperwork so we can buy some of the consumables for the project, yes, Ferrets are such dangerous machines and my signature on a piece of paper ensures that I am a good boy. Dont you just love governments.
In and exciting parallel activity, we are forging ahead with the design for our B series spin on oil filter adapter, our engineering boffin has come up with some design notes and now it is down to making a drawing and talking with the machinist. There is also a fuel filter project along the same lines happening.
Forward progress.
Robin


-
Go to a real parts store not a retial store and 24 volt stuff is very common.
I have a whack of headlight bulbs around here somewhere if you are short, will make a good deal on them.
Great to hear of your getting your going
Robin
-
What an absolute gem that is, the pto cover is still on. It is like a time capsule. Looks like a wipe over with a diesel soaked rag would make the vehicle look new again.
How wonderful.
Robin
-
We have been dealing with this issue at work over the last year.
We have tried legal disposal (expensive + time consuming) and burning (think plumes of black smoke and fire brigade response) and in the end our mechanic has recommended we fill our shop runabout truck (Dodge Ram 1500 ) with 3/4 of a tank of fuel from the petrol station and then add an amount of the stale fuel to that. He says that because the shop truck is not carburated but fuel injected it can deal with variations in quality much better and so over a period of time we have rid ourselves of the junk fuel.
We did strain he fuel through a very fine filter to ensure no sediments were present.
We have had no ill effects and our problem has evaporated at no cost.
Robin
-
Quite a surprise, when you consider I live in Eastern Ontario in Canada, I found this the other week.
It is quite modern, at least by the date on the tag.
It is going to a friend who has lots of sand thingies so it should be useful.
Any comments on the item and the variation on the DPM is welcome
Robin


-
Did anyone ever come across the missing dimensions in these drawings and what about the missing pictures, can anyone replace them?
Robin
-
Welcome to the forum Dave.
Love old military Land Rovers, I am currently trying to find a left hand drive Series 1 military here in North America so I can restore it.
Regards
Robin
-
Tim,
I think there is a point to which hunting for parts and shipping them becomes ridiculous and overly expensive for no reason.
I will however say that as a precaution to an over enthusiastic future owner down the road a few years hence I will be stamping the hull plates with "repro" and the year made. I am a little fussy about that.
What have you had to make?
Robin
-
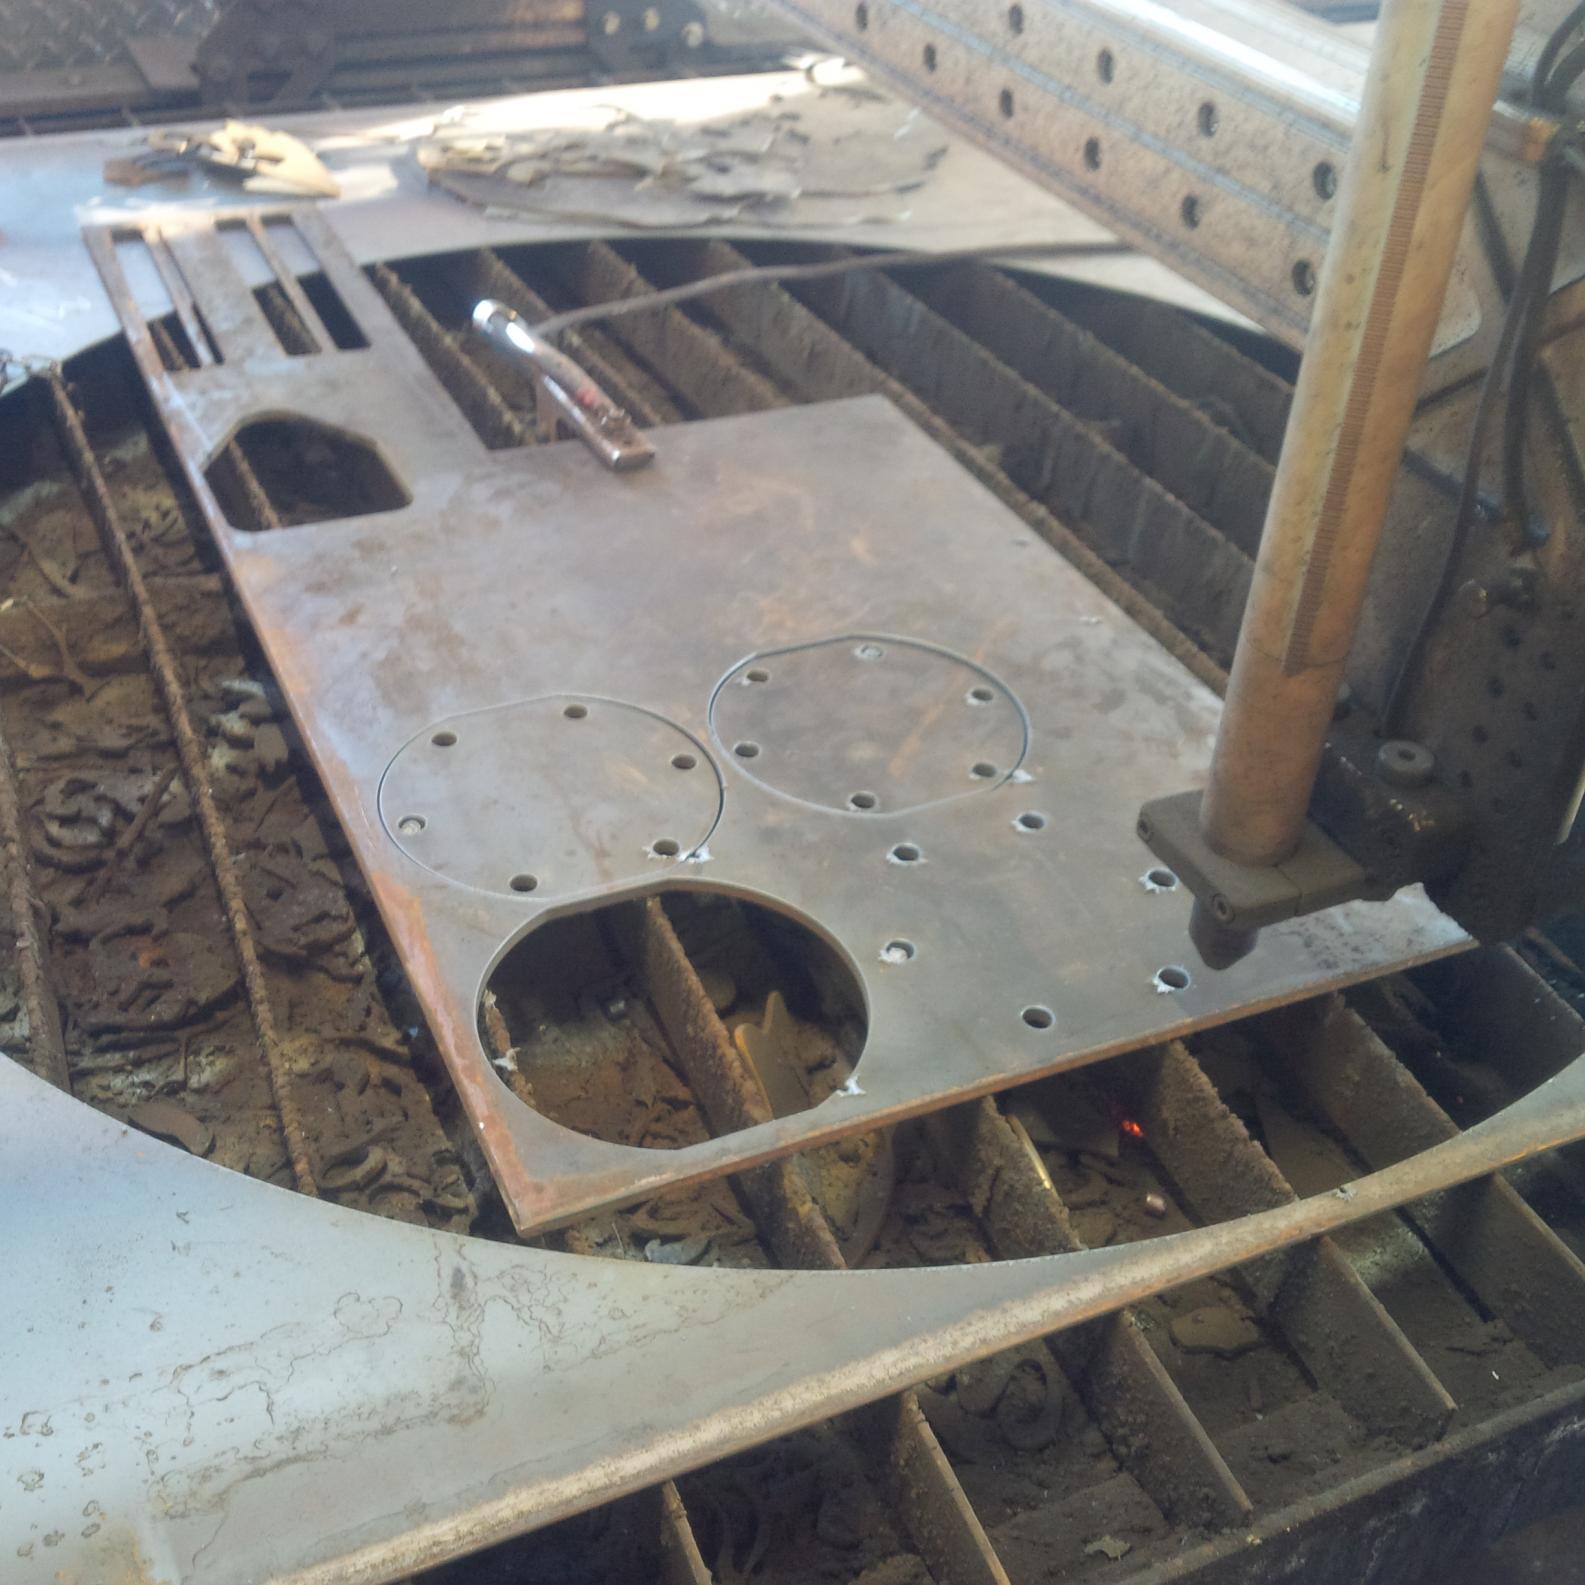
Here is an image of the top and underside of the cages, hope it helps.
Also I just had some access plates made locally on a CNC plasma table. Here are the raw pieces before cleaning up and assembly.
Robin


-
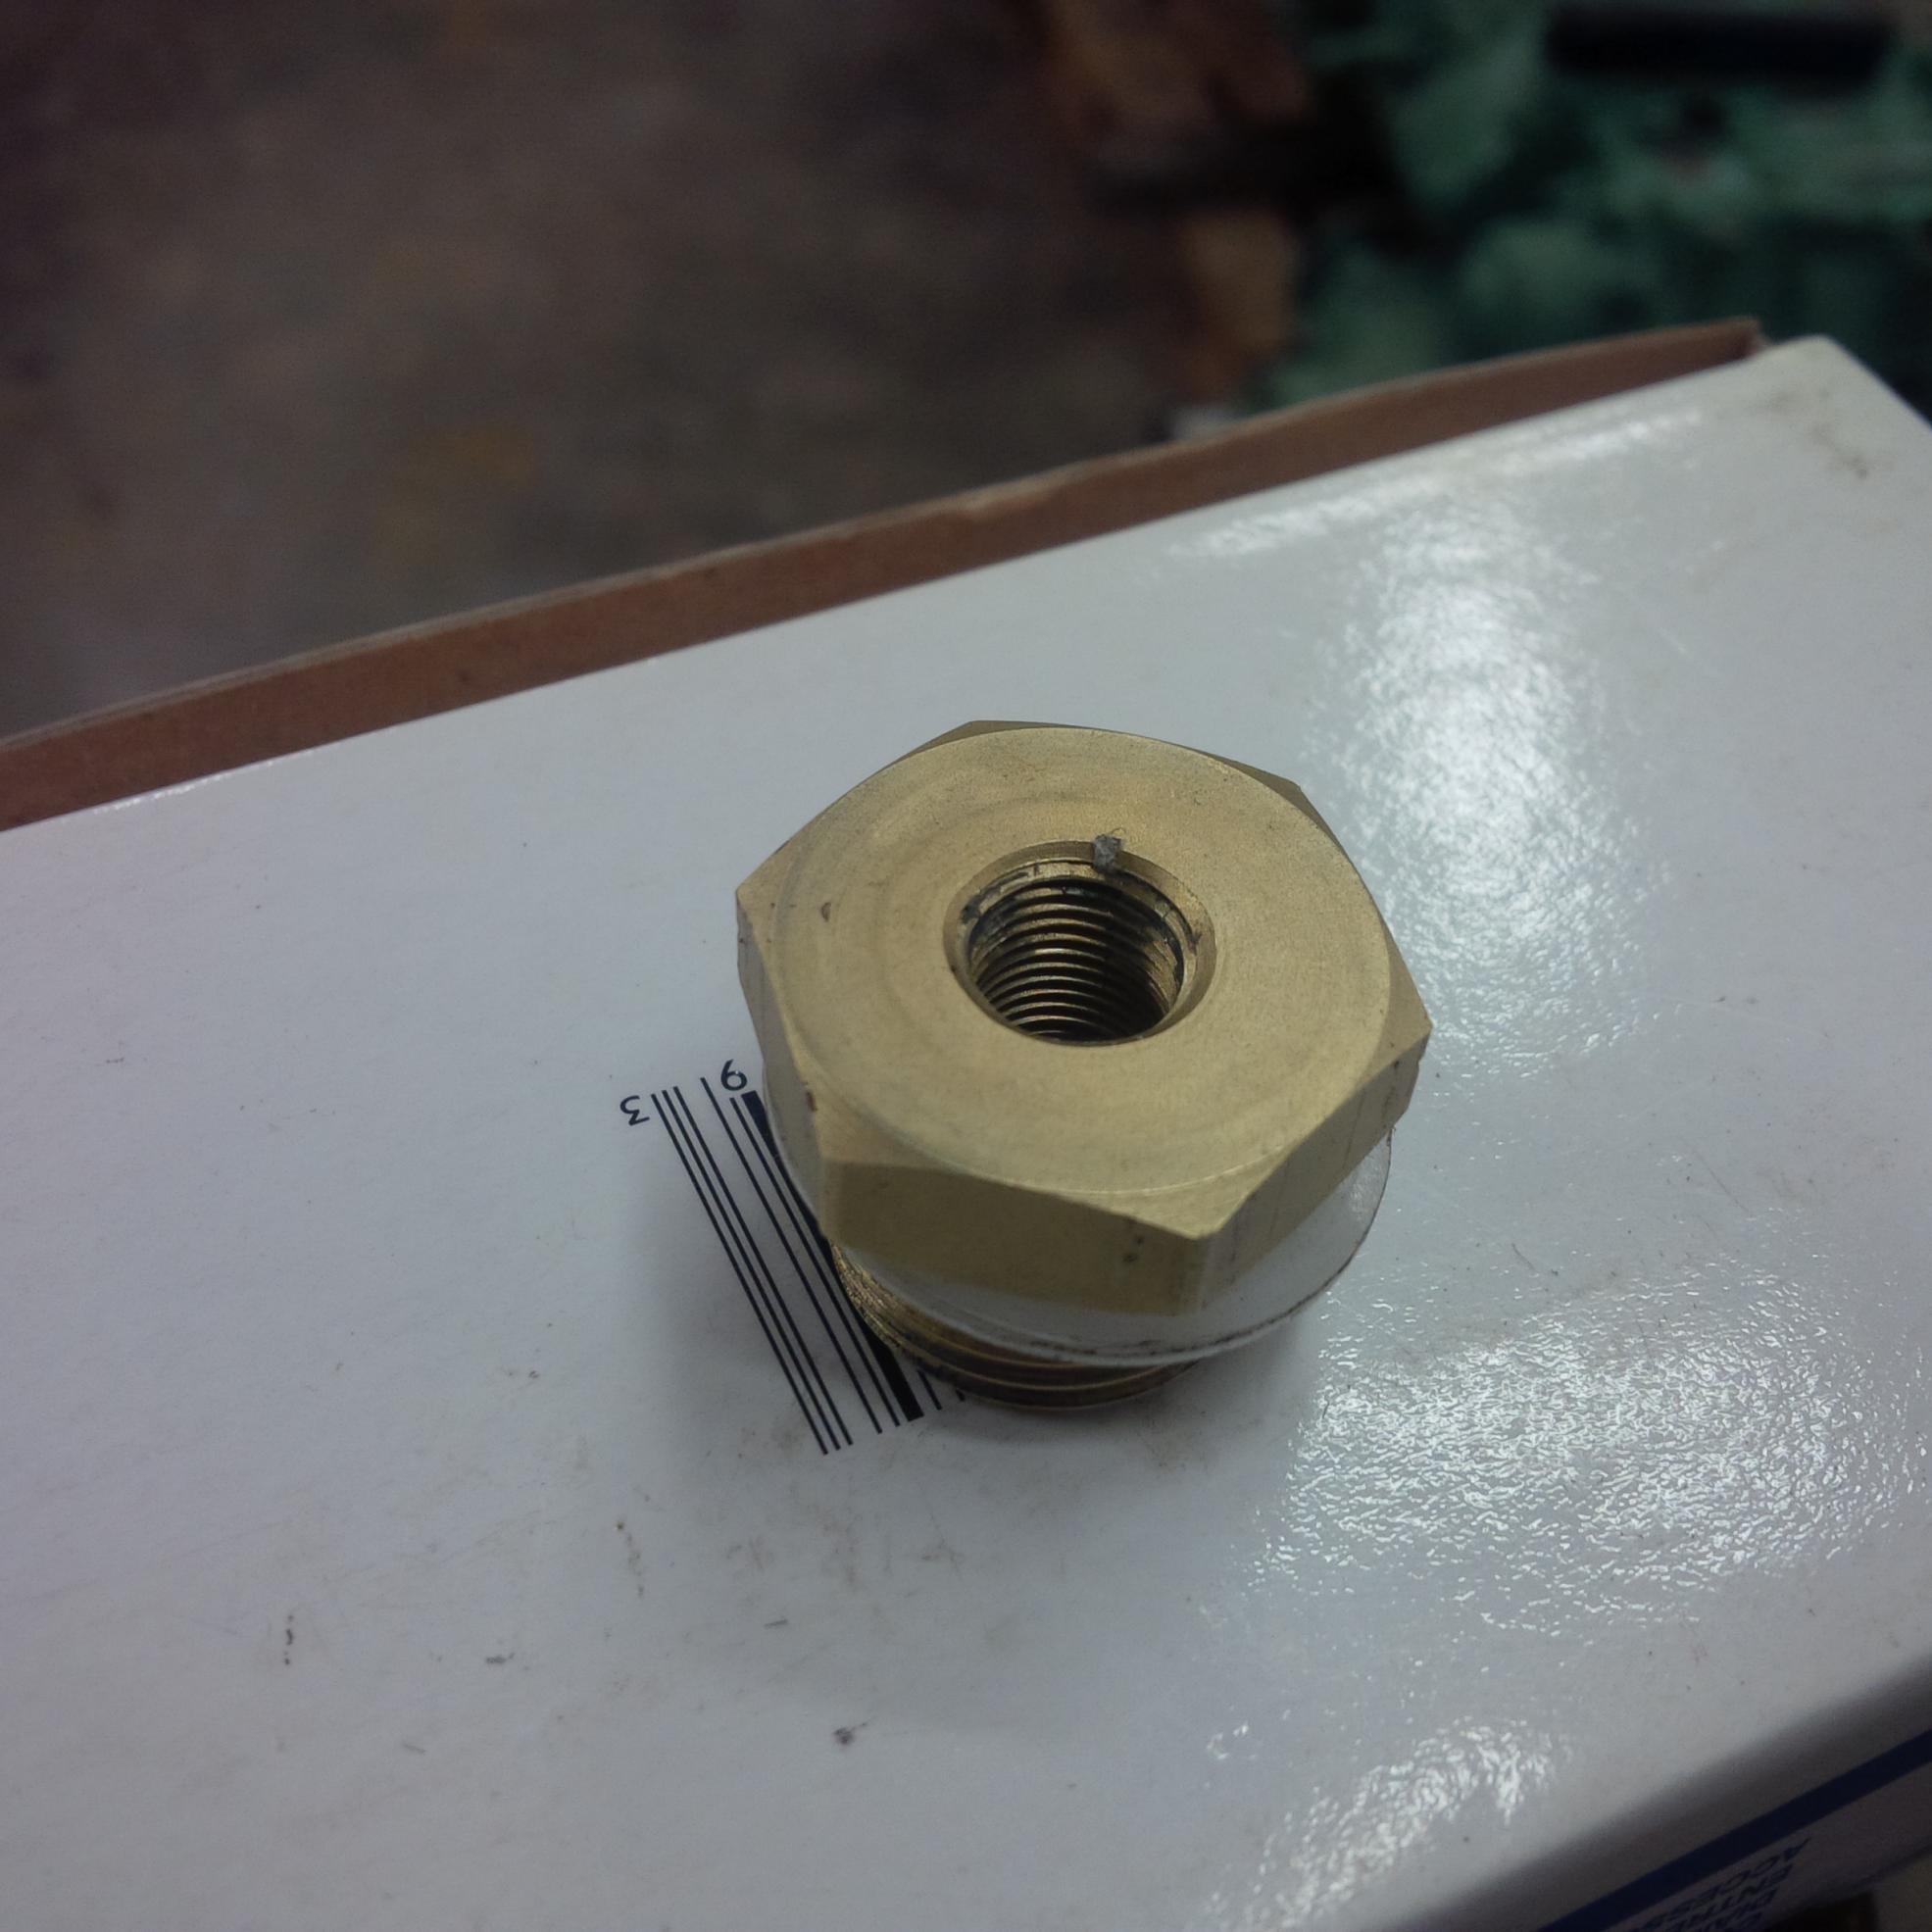
Dear David,
Good question you ask. The new cage is made in two pieces and the four tabs hold the centre portion in place. There is a rim around the new piece that I grind off to make the bottom flush.
This is what makes the original design weak as the sides can bend outwards if enough pressure is put on a spanner / wrench. The downfall of the original fasteners is that they get liberally hosed with paint and gum up badly.
The opening on the underside is generous and I ensured that the new item was centred in the opening and that the nut has plenty of slop to allow for the tolerances needed. It drives me potty seeing fasteners missing and a vehicle looking incomplete.
I will use something on the threads before we go back together.
Robin
-
Yesterday I stick welded in the new cage nuts, a better design and I am happy with the items sourced. If critical we could remove them down the line and weld in exact copies if they were available.
I used a stainless to mild steel electrode in case there was a high carbon issue, weld flowed nicely.
Happy camper.
Robin


-
Wow, now that is what I call a set of rubber boots!
What is the plan for it?
You are barking mad, just like me, wonderful!
Robin


It's here! (Bedford RL)
in Transporters & Wreckers (All Nations)
Posted
So,
if the conversion was done by Vass does that mean it is an ex MOD vehicle or Home office?
If so is there a new category we should have at shows "was a military vehicle now repurposed"?
Great stuff
Robin