


andyroo
-
Posts
207 -
Joined
-
Last visited
Content Type
Profiles
Forums
Gallery
Blogs
Events
Articles
Store
Downloads
Posts posted by andyroo
-
-
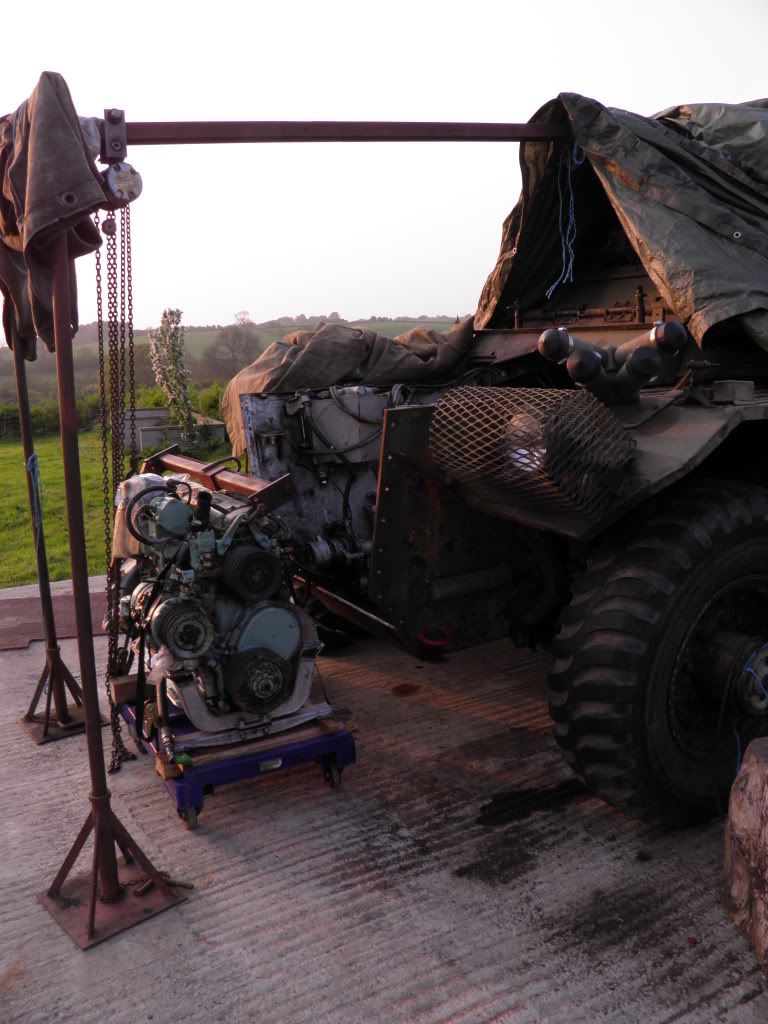
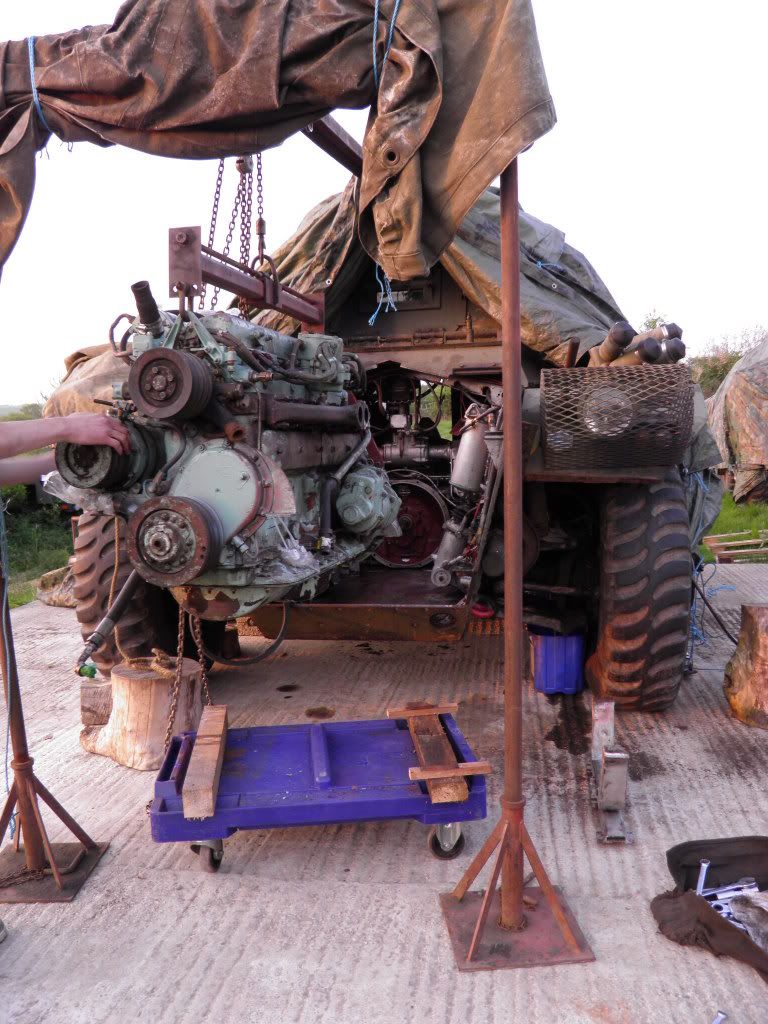
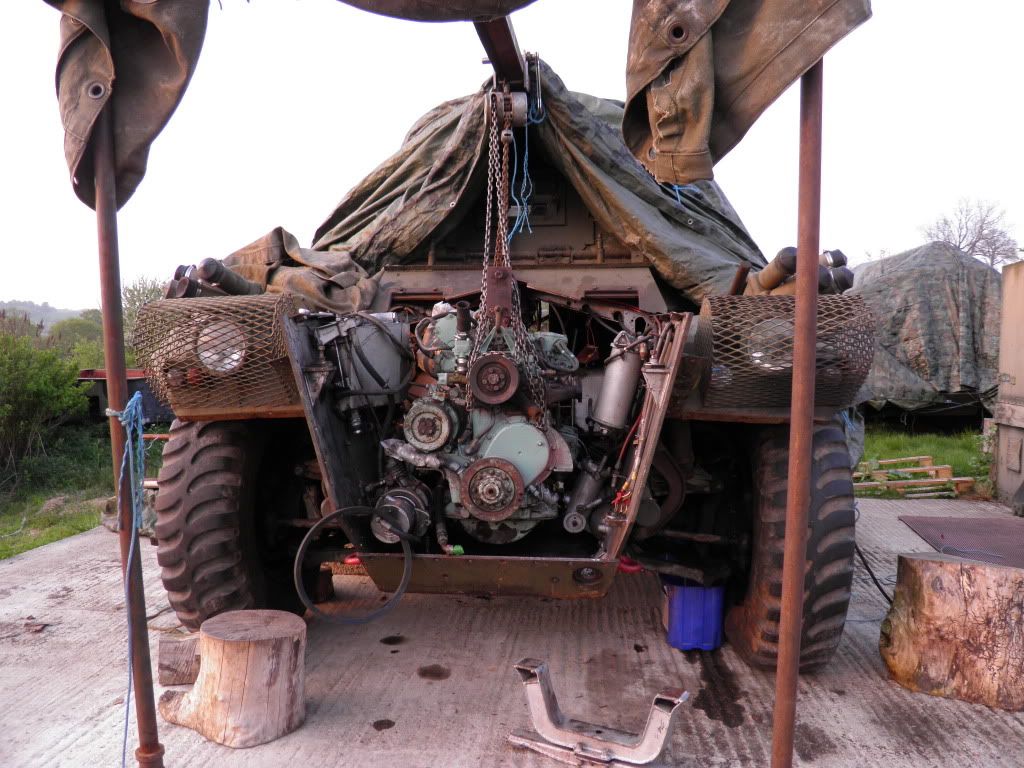
I had thought of an RSJ resting on the turret one end and a suitably braced Acroyd at the other and a chain winch on a dolly, but that means having a big long (say 10 foot) heavy lump of metal high up, A) get it there safely, and B) keep it there safely and C) I'm underneath it for a lot of the time. With an engine crane of the right size, I can organise it so I am never underneath the big heavy thing (large lump of metal in the sky or big heavy engine).
!
Hi Simonm,
See post http://hmvf.co.uk/forumvb/showthread.php?21162-Saracen-problems-Feeling-quite-depressed-(&p=258380#post258380 post 28.
You'll see how I get my engine in and out. The RSJ is ropped to the turret. I use a 1/2 ton winch which copes OK but is near its limit.
Andy
-
When I replaced the broken studs on my Saladin, I used high tensile stainless screwed rod cut to length and TIG welded them on. So far, after arround 4 years they are still OK.
I would sugest you do the same. UNF stainless rod is available, but you need to specifie high tensile.
I found a selfemployed guy that could do the TIG welding on site. I had everything prepared before had so that the time was a quick as possible. From memory it was a mornings work for him.
Andy
-
The correct oil for the Ferret fluid fly wheel is OEP220 (that's what it says on the October 1984 Servicing Schedule!) and EP90 (easily available) is the same stuff.
 you may as well fill it with simifluid grease then...............
Use ISO10 or failing that ISO15 hydrolic oil
Andy
-
So converting inches to millimeters is easy.
Now the tricky bit the bottom (beneath the ply) is sheet steel described as 18 BG MS PANEL
Mike
Mike,
To be precise
18 BG is 18 Birmingham gauge which is 0.049" thick. Almost imposible now to get.
18 gauge is 0.048" thick. Most companys only stock 1.2mm
18 SWG (standard wire gauge) is 0.048" diamiter.
Andy.
-
Androo the carbon discs in the pile are quite brittle & are under considerable tension from the force of the solenoid altering their resistivity & in turn regulating the field winding which controls output. So once a stress line develops a spreading crack is inevitable sooner or later. One doesn't know whether they have previously been dropped & ageing takes its toll when it is put to work.
Clive,
That explans why my pannel was working when I removed it and dose not work now. Its not easy to remove and put back. You need four hands but only two will fit arround the battery box. I used my foot to take the waight, but after a minute it starts to get heavy - then you drop the pannel
Bet thats damaged the carbon discs.
According to Richard who dose my electrical testing, there are nasty chemicals in the pannel somwhere so be wary when taking to bits.
-
I dont know what it is with this charging set up, but I'm on my 4th or maybe 5th pannel and 2nd or 3rd generator in my Saracen. The carbon pile regulators have gone in all the pannels that have gone wrong. Any idea as to why?
-
The tax disc in the windscreen is a compleate wast of time as the police check the computer
even when a valid tax disc is on show. Takes less than a minute to check tax, mot and in-suwer-ant.
Most classic car owners I know place a period tax disc in there car for the show. So joe public
has no way of knowing if its taxed or not.
In fact, untill this thread croped up I'd neaver even consided that any classic cars at a show may not be taxed.
-
New powervalve arrived this morning. Packing up work at 3 to go and fit it. Took two hours to get the old one out last night. The old one will be stripped down and serviced. Rang Banister who informs me he has no spares, only compleate units. So will have it to bits and see where i go from there.
-
Bob,
I had a play arround with the brake system last night. The front brakes work fine. The center and rear brakes come on and off at random with no one opperating the foot peddle. Even with the engine switch off. Reading the drivers manual, the power valve operates the front brakes indipendent of the center and rear. I have a power valve unit on its way from Banisters. Should have it Thursday. Fingers crossed should be working come rain or shine or snow Thursday evening.
Andy
-
Last week I did my annual change of a few brake seals on two of the wheel stations on my Saladin. Front right and centre right.
This week I now have another problem. The brakes are staying permanently on, but only just. Any one have any ideas what may be wrong?
I’m suspecting the power valve unit, but would welcome some more experienced advice.
I need to have it mended for Friday!!
-
Done several weekend shows and slept in the back of the Saracen. You can just get two hammocks slung from the front side hatches to the back doors with the aid of ingenuity. However, if (more like when) you have too much to drink in an evening and need to get out quick in the wee small hours, you have to go though the turret. Early in the morning the dew makes the roof very slippery so you land on the ground quickly
Its also gets very cold......
-
I would not advise buying NOS. I've had a lot of problems in the past with belts that have been in starage for 30/40 years. At best they last a year. Better to buy new.
I get all my belts from BSL ( http://www.brammer.co.uk ) in Derby. They do the correct length for the Saracen including the hard to get belt for the hydrolic pump.
-
That box fits on the edge of the oil cooler and holds 2 spare spark plugs.
-
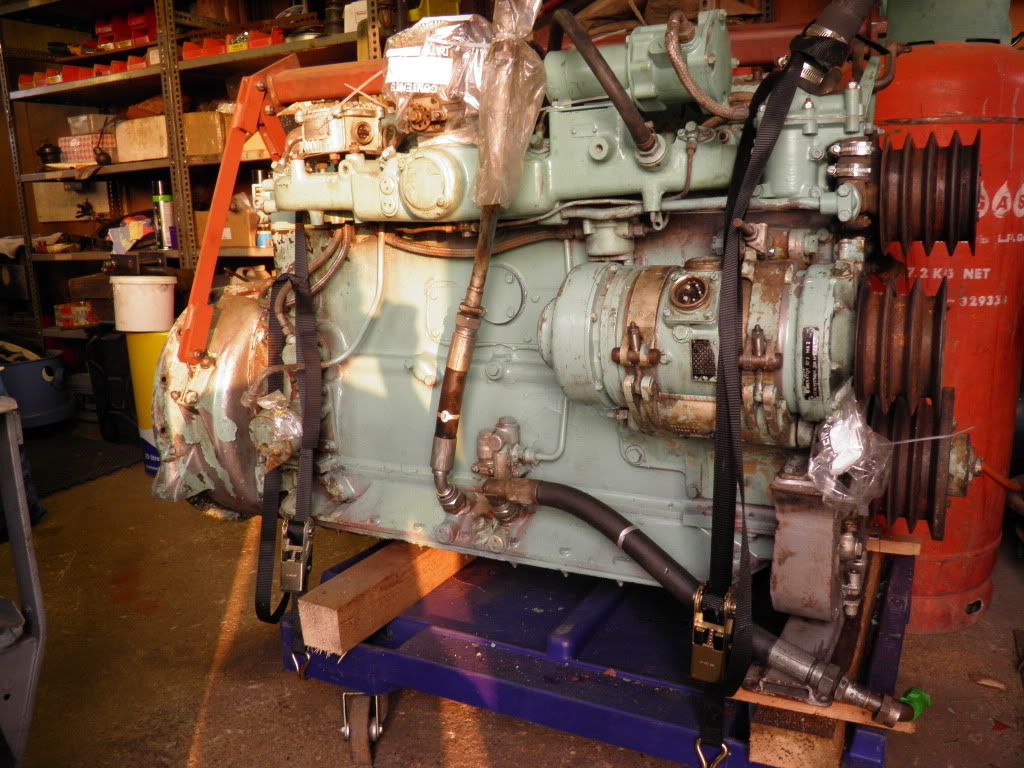
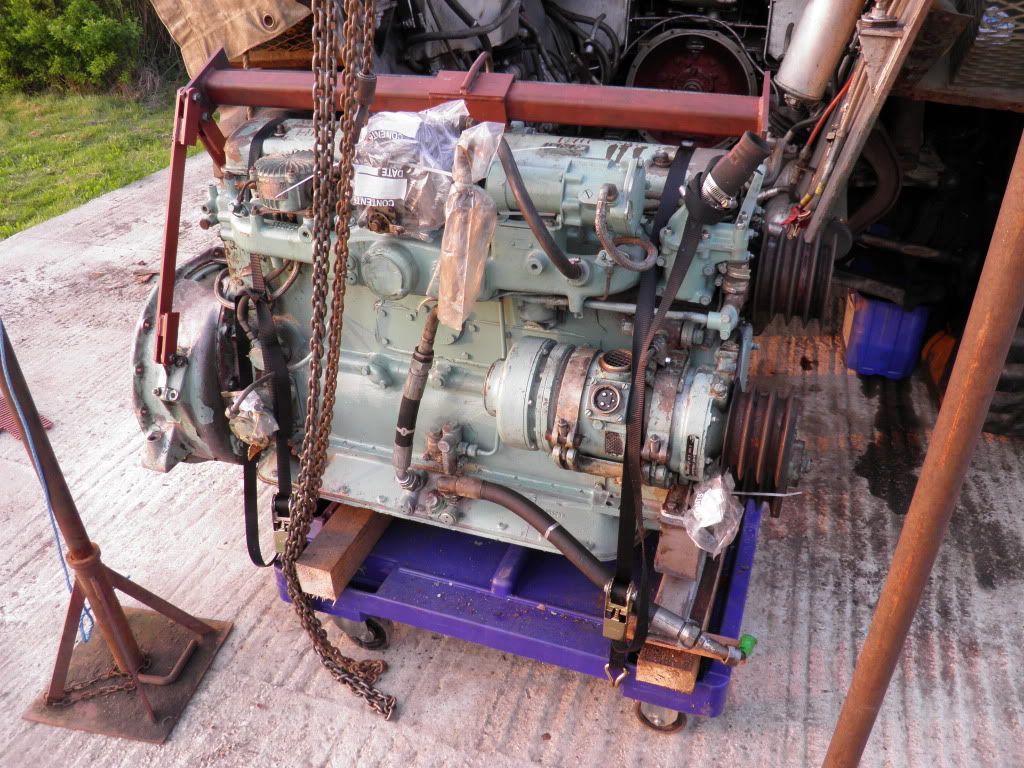
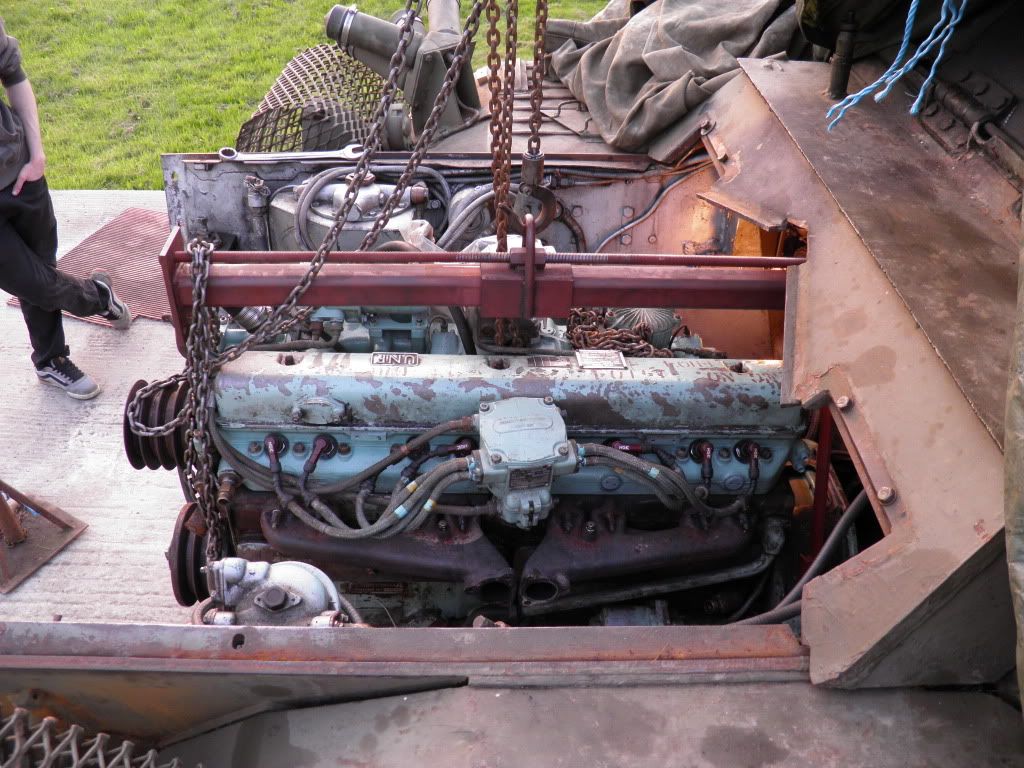
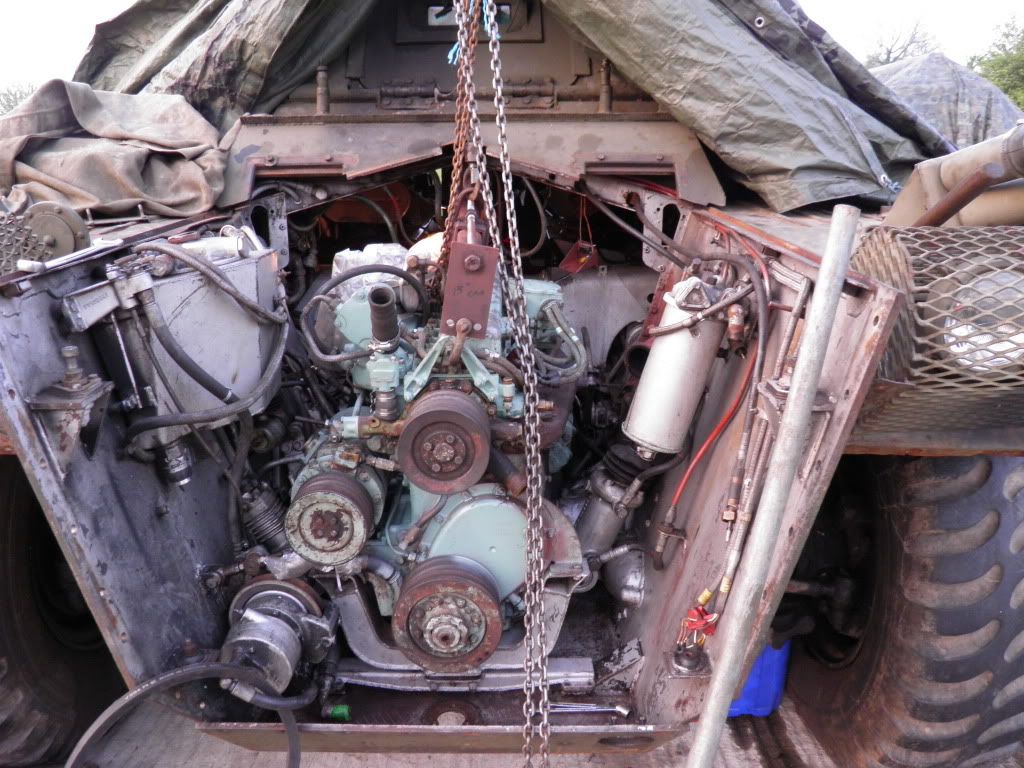
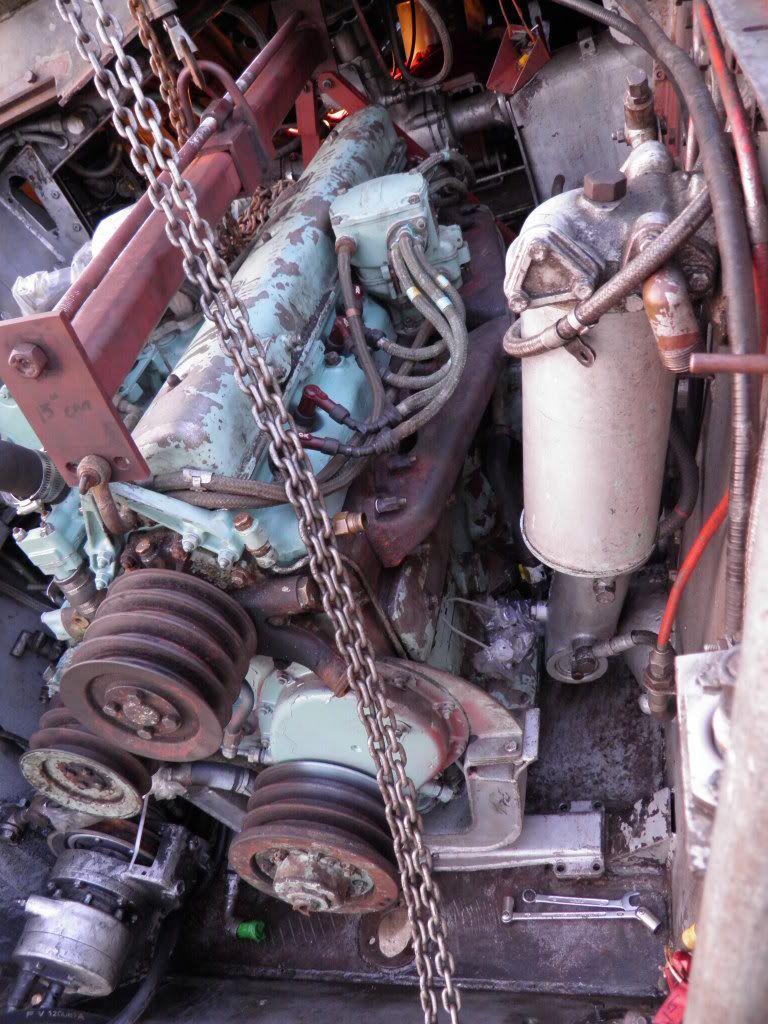
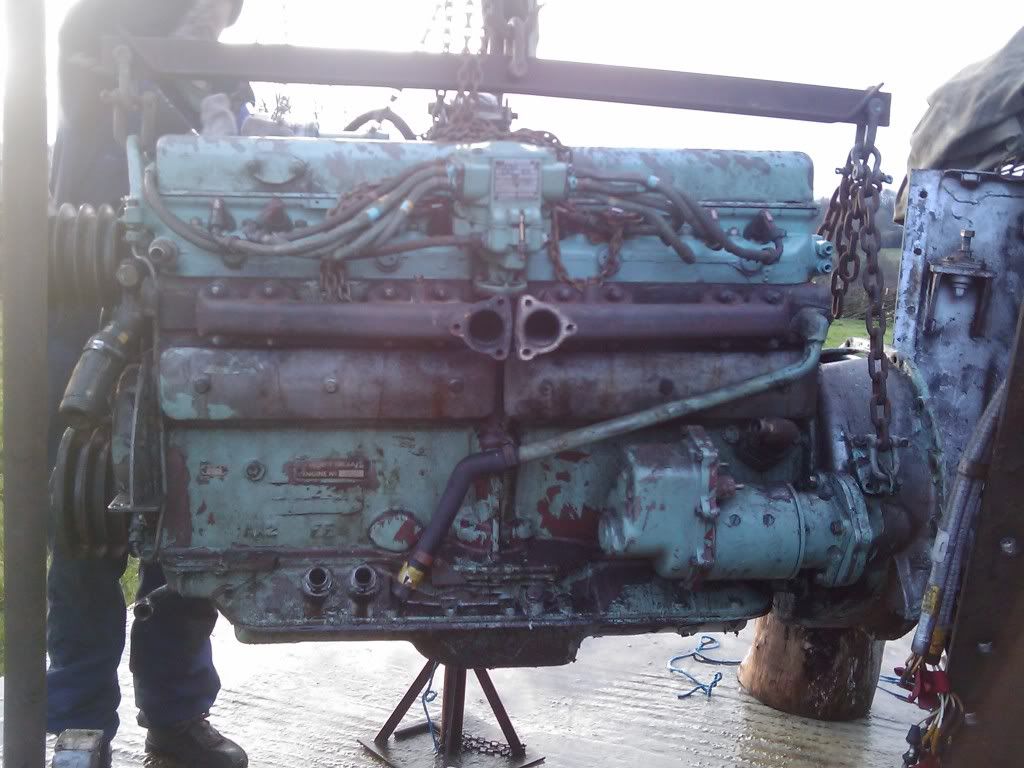
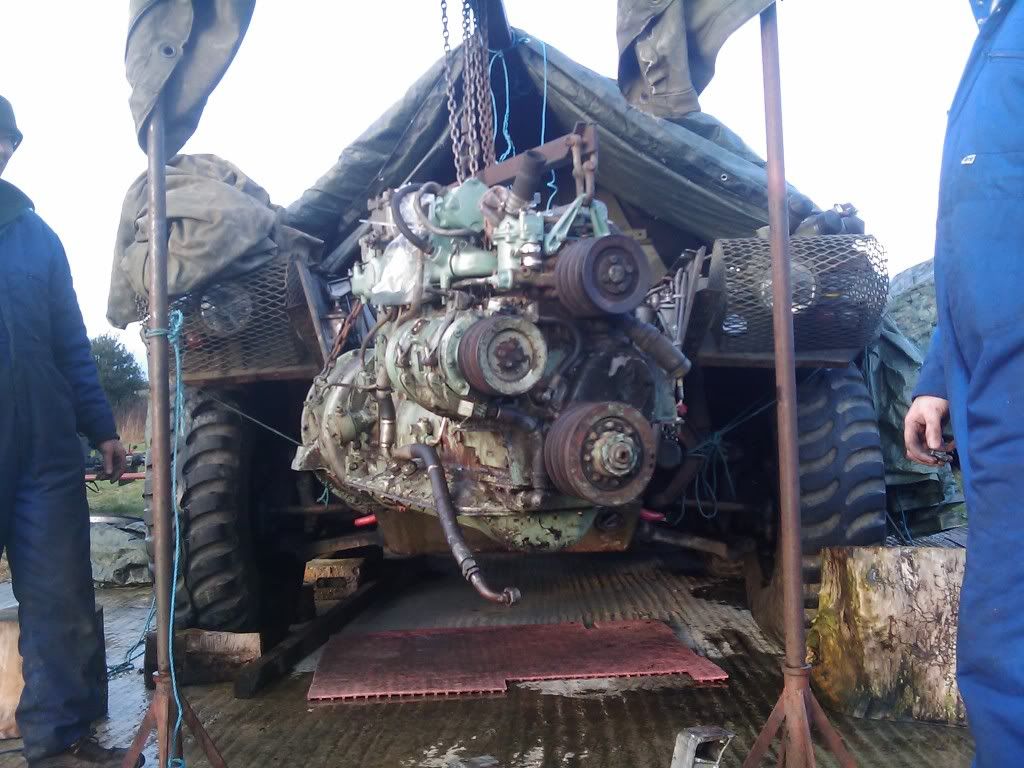
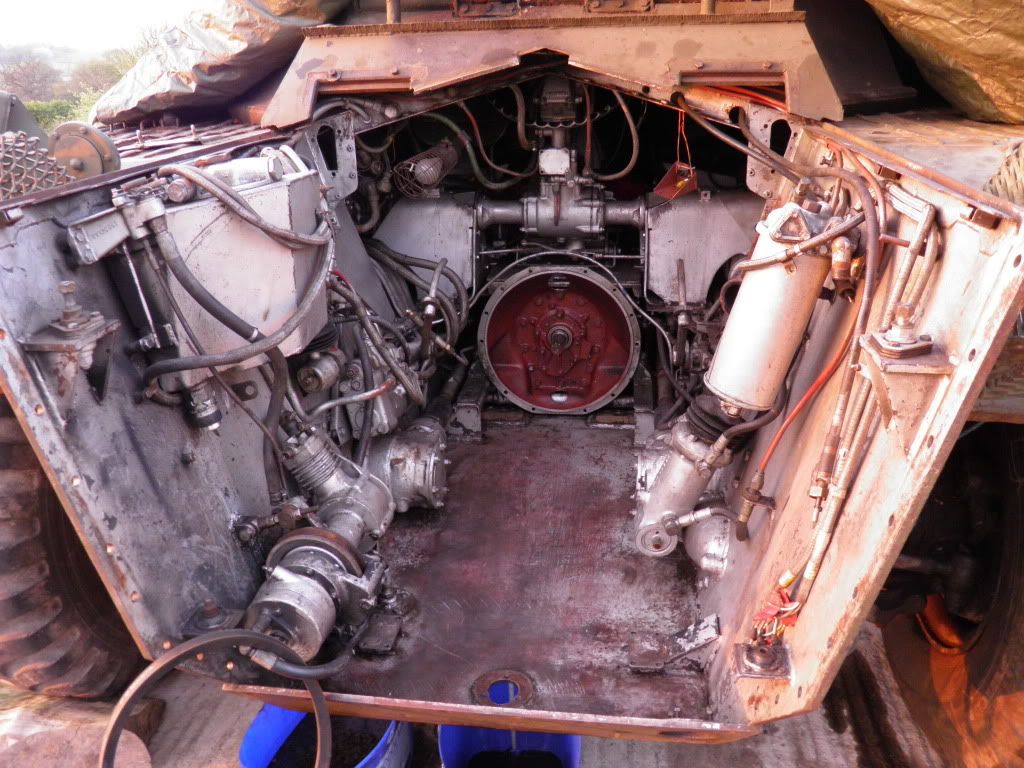
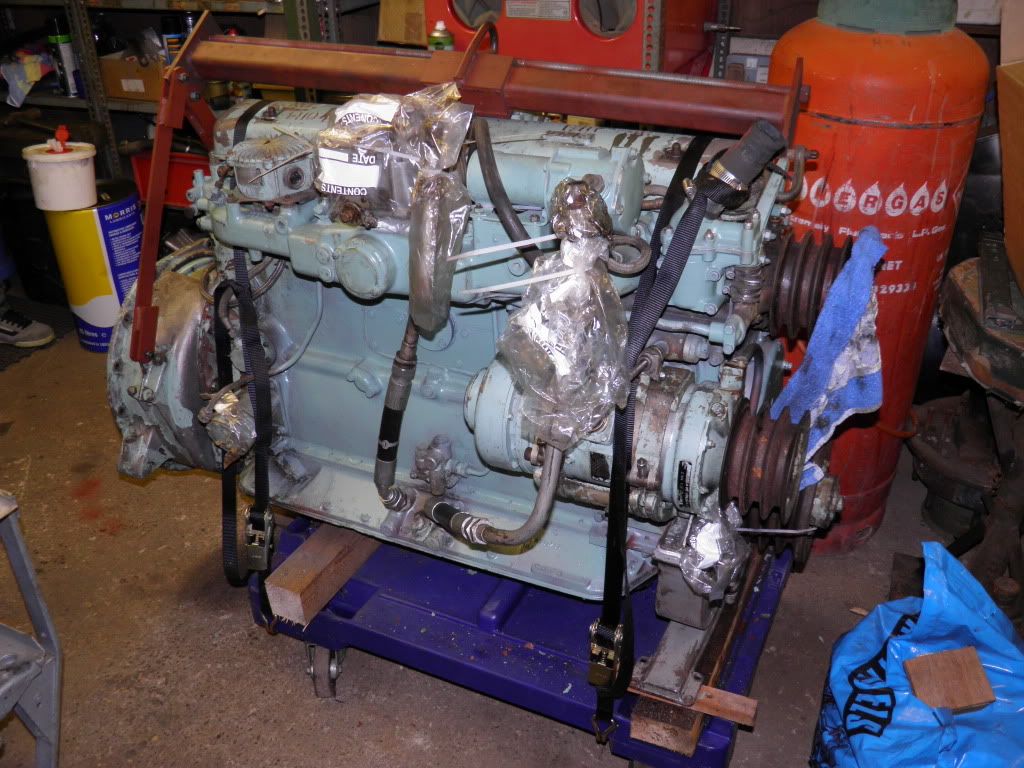
Tonight we got the engine in. All done in arround hour and half. Still a lot of jobs to do though be running it up.
'deliberate' mistake rectifide.

-
Hats off to you!!! I am in agreement with an interesting repair, let's hope it lasts!! Maybe expand on the unbolting procedure, please?
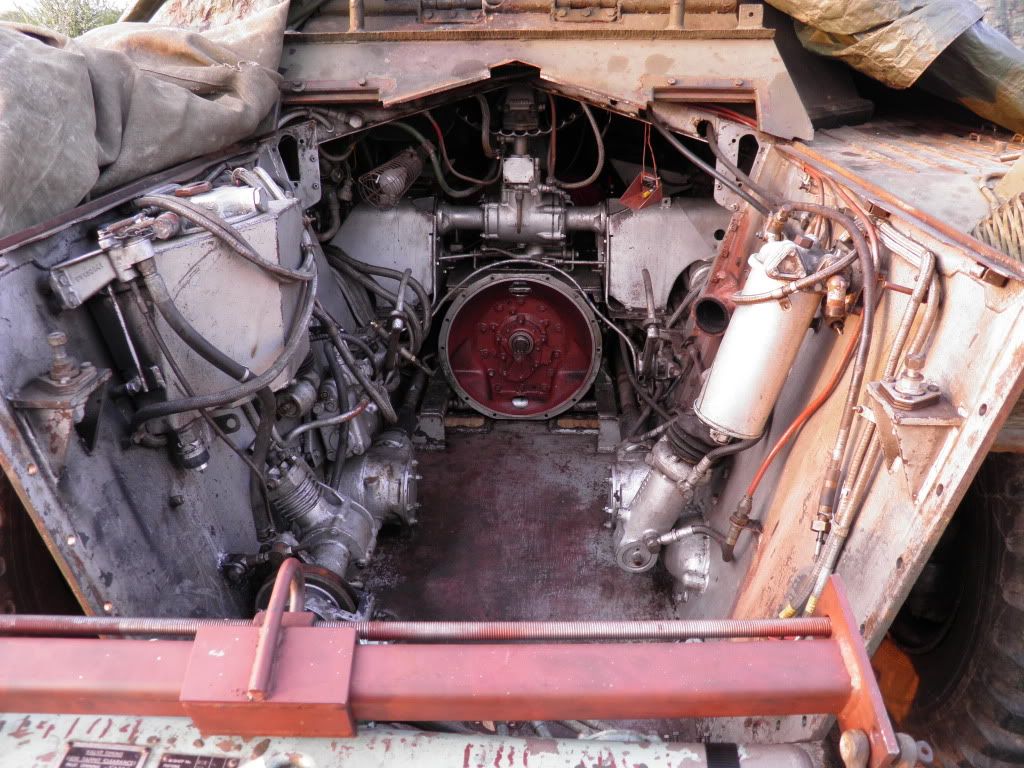
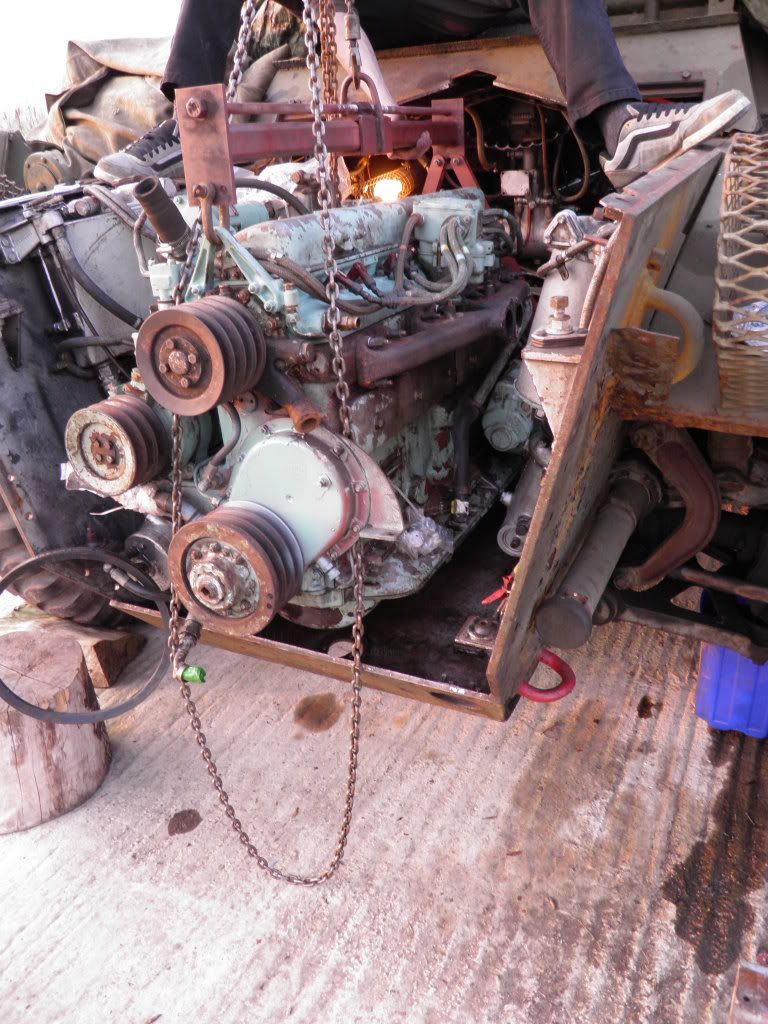
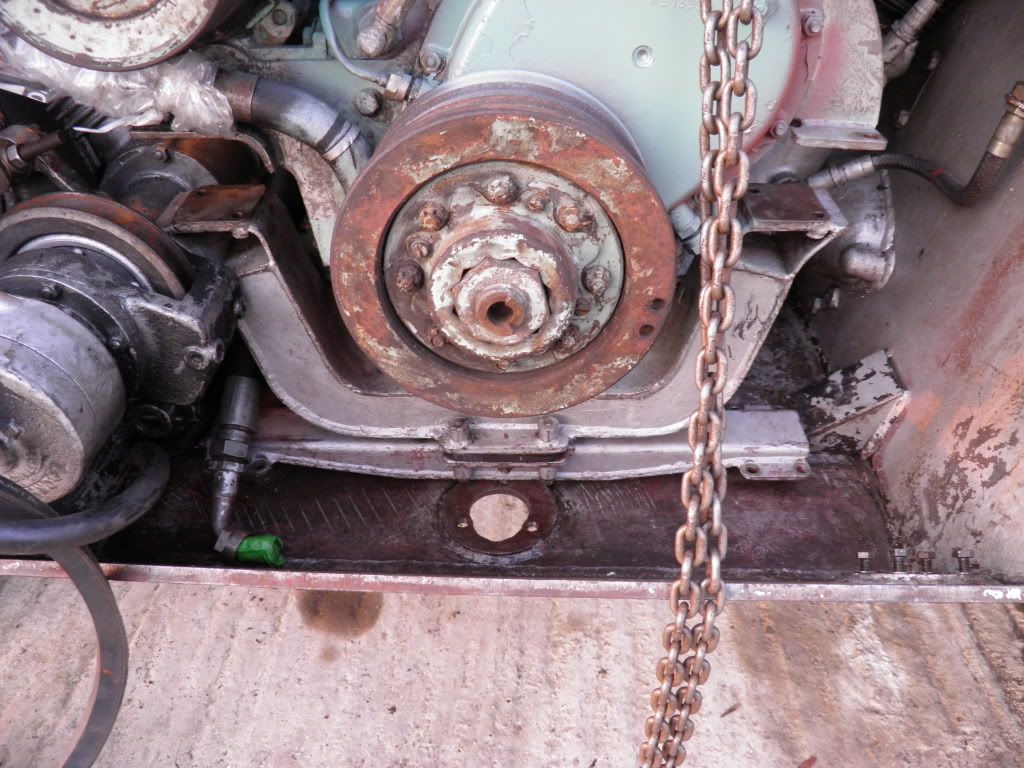
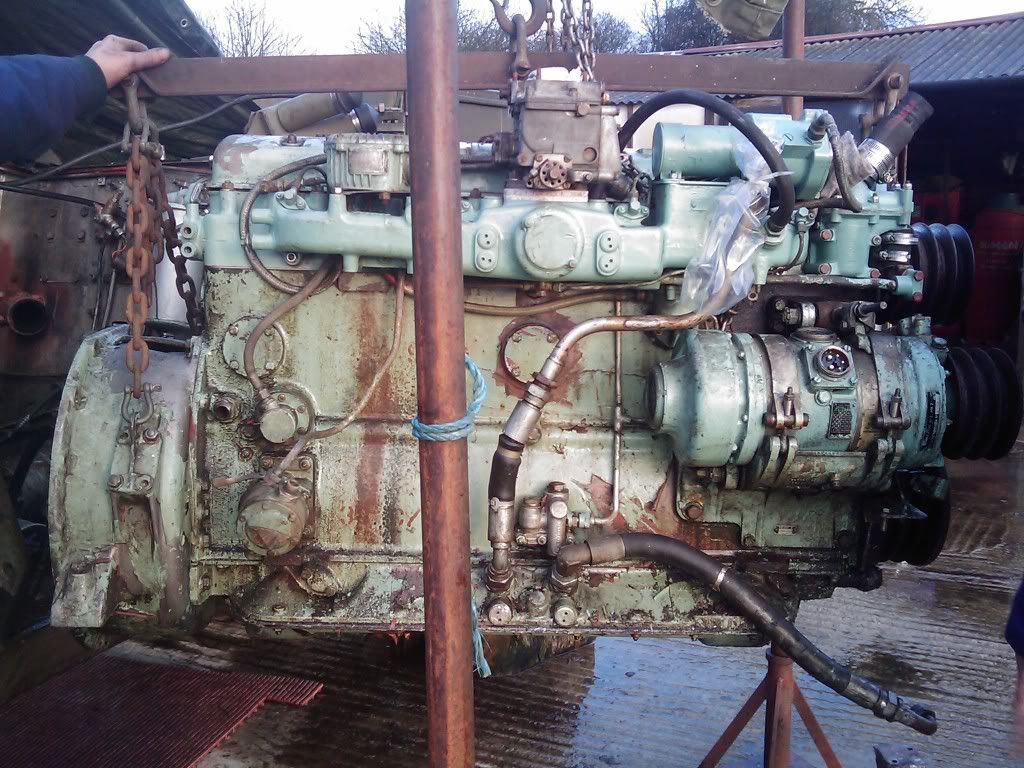
Montie, The worst bolts to undo are the 4 bottom ones on the bell housing. You accsess them from under the vhiecal though the rectagular holes. You can get 1 hand in and a spanner - thats it. You cannot see what your doing, its all done by feel. You will most likely need two spanners though to undo the nuts and hold the bolt head.
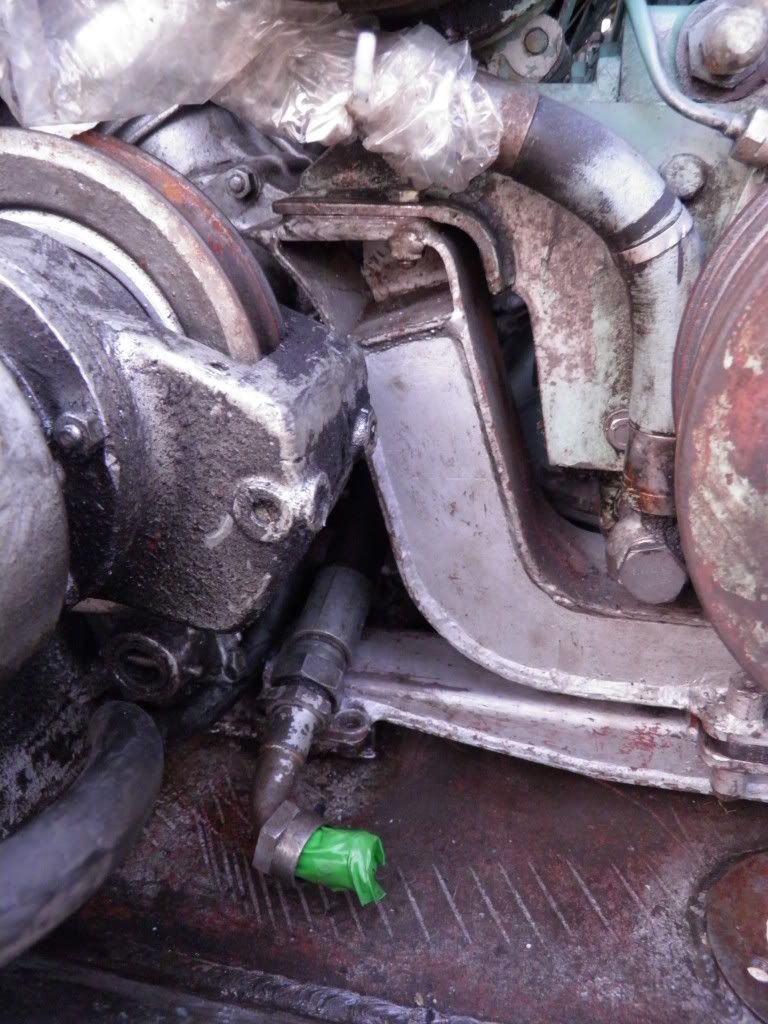
The next one is the outlet pipe from the oil tank. Best done with an open ended ratchet spanner.
Then you need to undo the 4 bolts on the left hand side of the engine mount. Two under the hydrolic pump, two under the generator. I had to disconect the oil return pipe on the geny to get at one of the bolts. Small child required here as small hands are very usefull. Remove oil pipes going to oil filter, cover holes to stop stray bolts/washers/small parts falling in. You can just and I mean just remove the pannel that the steering collum is supported on. Steering collum dose NOT need removing.
Before you get to the engine though, you need to remove the battery tray, radio tray and the two pannels where the peddles are. The bar that supports the engine covers and electrics (lable up the wires) need also be removed.
I use a hand winch to lift the engine for one good reason. If it wont lift, something is holding it, stop and investigate. A fork lift or powerd winch will have your engine out in no time, together with broken fule pipe or wiring loom!!
Whail your at it, take lots of photos. No one seems to have picked up on my 'deliberate' mistake

-
....impressive work, Andy..... I've not yet seen an engine-out shot in close up... quite helpful... would you have a copy of the field repair/instructions for engine/fluid flywheel replacement, that you could post/copy for me, for some beer tokens?...._ as I have a lovely new flywheel to replace my nasty old leaky one....:-D
Thanks for the comment Oily. I dont have any EMER's at all. Just trial and error. However being mechanicly minded helps. And some very good friends

Will try to explain flywheel in your thread Oily.
-
Wow, good job, very interested to see how the repair lasts.
Thanks for the photos
Paul
I hope the repair lasts for ever. She has done less that 10 miles since the last time the engine was out. See post above.
-
Dear Andrew,
never saw the original post but have just seen the pics uploaded today hence the late interjection.
Sorry to see your woes, is it too fresh to ask how she cracked in the first place? I'm thinking the anti-freeze mix was not right.
I have had spectacular success, despite the nay sayers, in welding cast engine blocks. Obviously there is a lot of stripping which you have avoided by going for a mechanical route.
Good luck mate
R
Thanks, luck is alway is short supply.
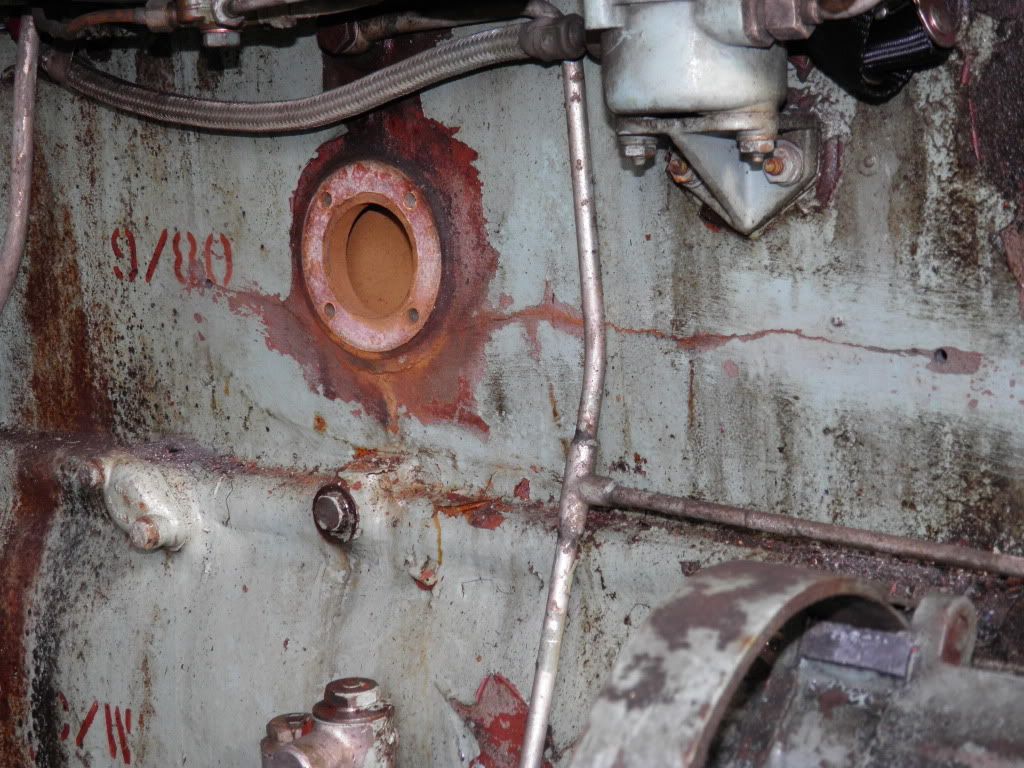
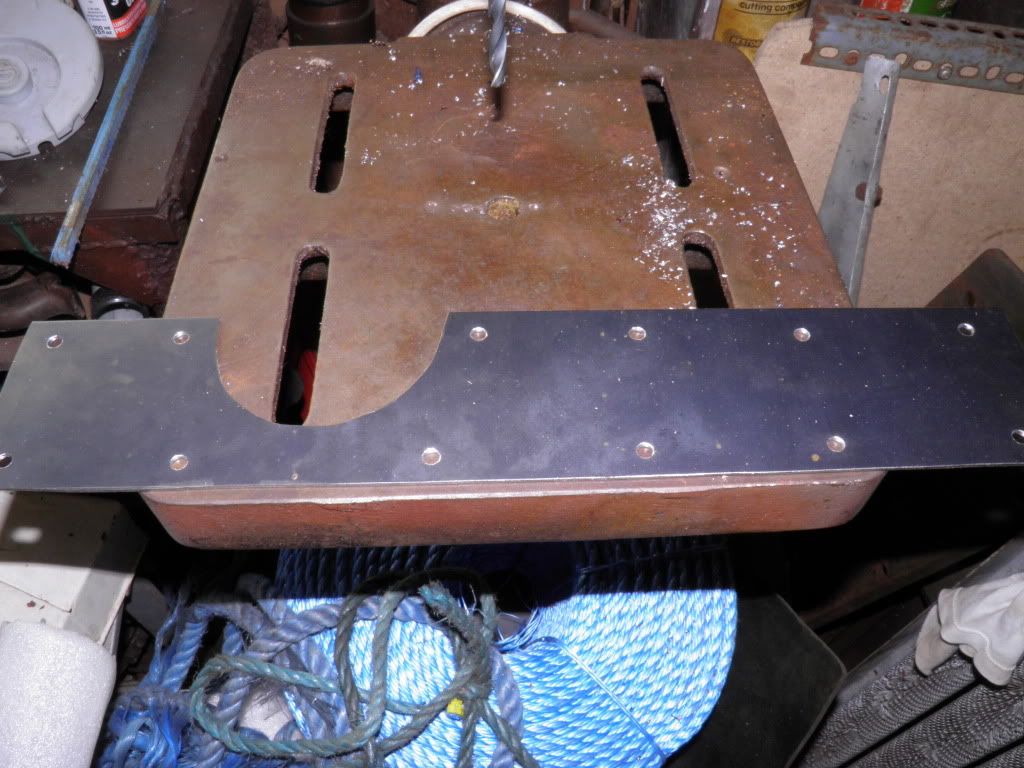
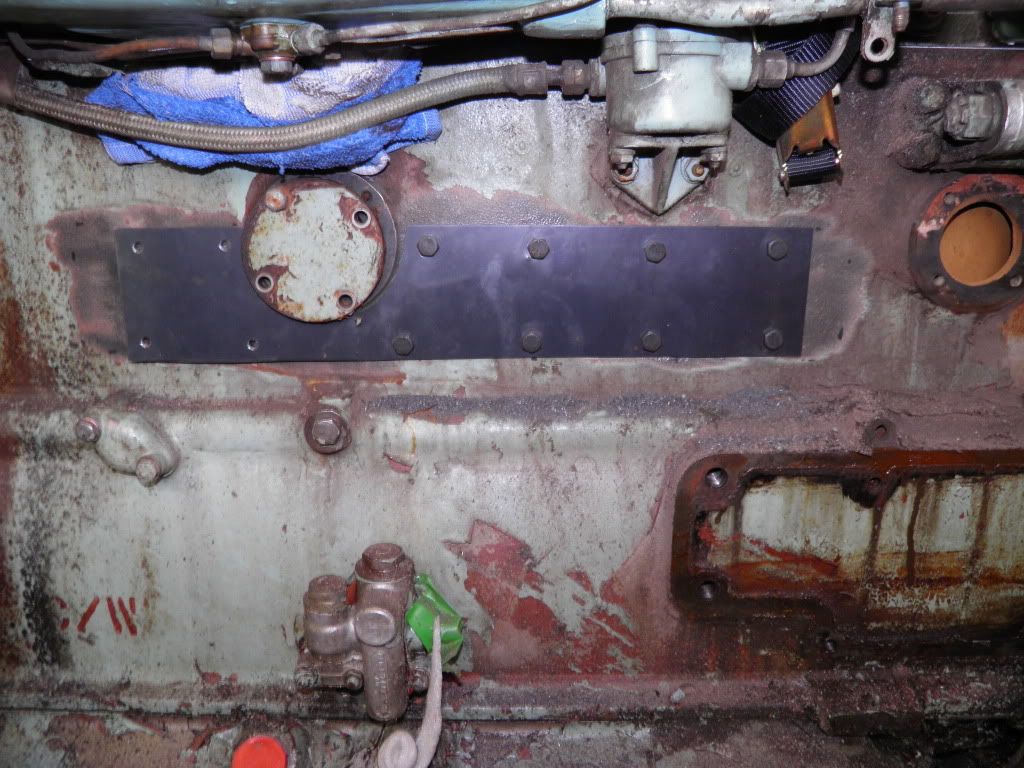
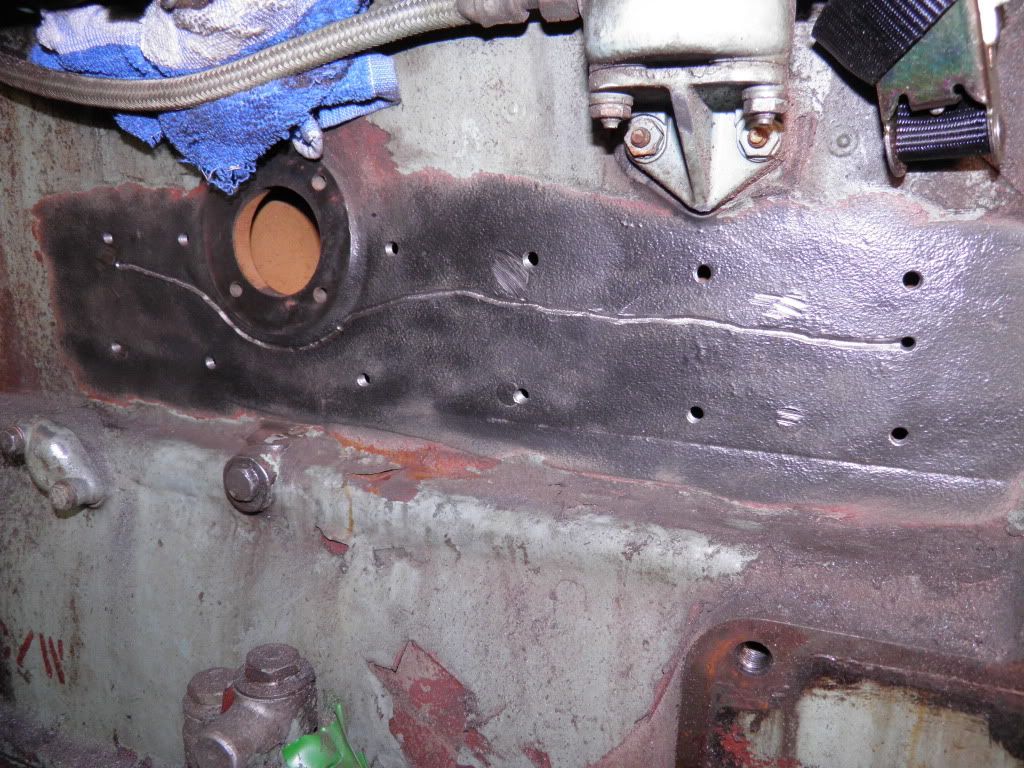
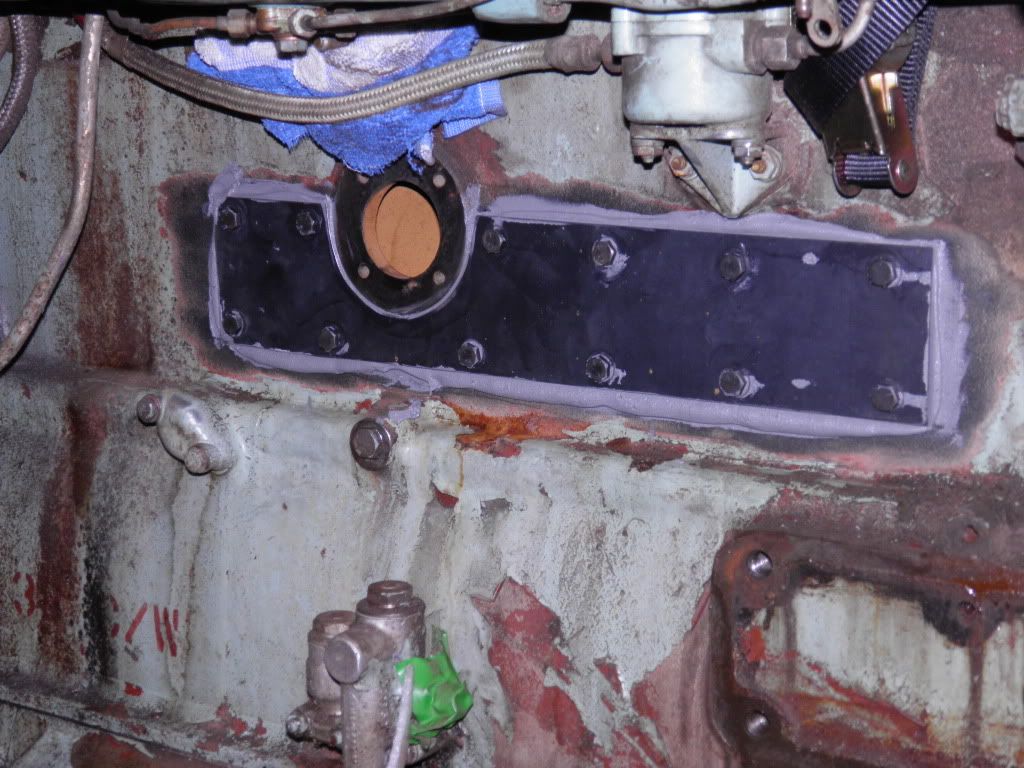
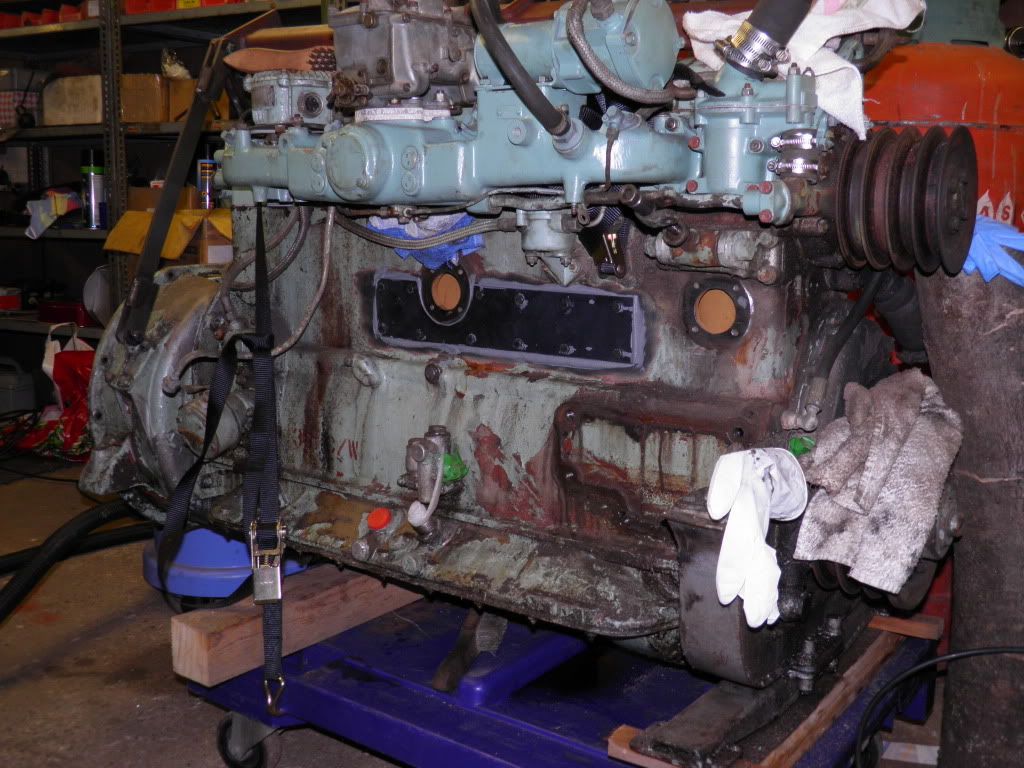
It all started a long time ago. 2 studs that hold the exhuste manifold on broke due to age and rust. Simple job, remove maniflod, remove studs and replace. However, removing the manifold broke a few more studs. So I made up a drilling jig and set too drilling to broken studs out (I think 7 in total). This is not easy with the engine in the engine bay. I got a few holes in the wrong place. Carl and I wipped the engine out and I finished the job of. Whail it was out we did the exhuste tappits as its much easier. I had to use thread inserts for a few of the studs. Also, I replaced all the studs with stainless ones. Engine was duly refitted and without realy testing it we set of to Cromford Steam fair. Just got onto the A38 and she boiled over. Managed to get of at the next exit and had my brother tow it with the Saladin.
The exhuste studs all thread into the water jacket. Coolent had leaked along the threads. Took some figering out that that was the problem, made worse because of the wire inserts. Got arround the problem by makeing sholderd studs and counterboring the exhuste manifold to take the sholder. Also coverd the studs with Foliac Maganeze.
Test run seemed to confirm that all was OK. Then came winter and I'd compleatly forgot with filling and emptying the coolent system so many times to put in any antifreeze. Hense cracked block.
-
February time we got the engine out and in my shed. After a closer look at the crack I decided that as the engine ran and pulled very well I would attempt a repair.
Spent an age searching motoring forums for information on repair methods.
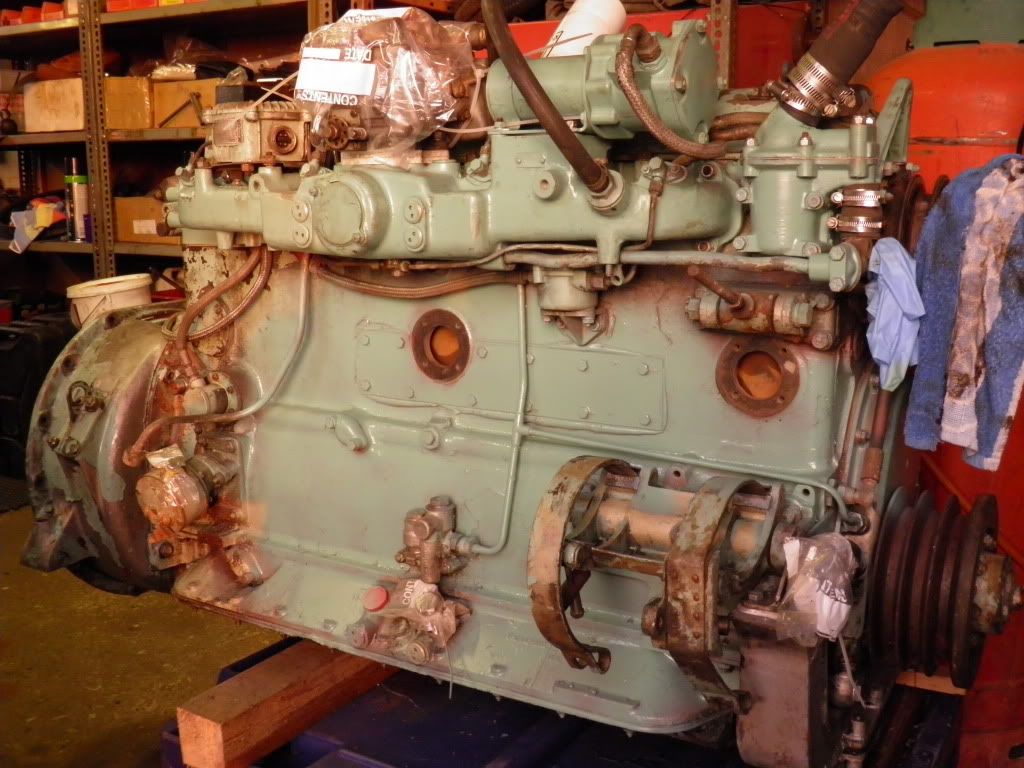
Welding cast iron in my opinion is out. Metal stitching means stripping the engine down. In the end I went for cast-iron metal filler from Belzona 1111. I have not been able to find one bad comment about the product. (Well, only the price).
The photos should be self explanatory.
As of tonight, the engine is ready to be put back in. We are getting good at this, as this will be the third time

-
Its a few years since I last went to Chaswater. In fact it was before it was redevoloped. Maybe next year........
-
Hi Tom,
I'm one since November 2010.
Andy
-
Is argon suitable for charging accumulators? have plenty of it.
Its what I have always used. No problems todate. Used it for the past 15 years.
Andy
-
A few years ago, I took out one of the accumulators out of my Saladin and down to work to recharge.
Brain must have been switch off.
Turned on the regulator which was at 600 psi.
Oil at 600 psi hitting the cealing makes a mess. A big mess. Took days to clear up.
Lesson - empty the oil out first.
Andy
-
When working on armour, tie each tool to a langth of string.
Andy
Saracen Accumulator Charging
in British Vehicles
Posted
Ian,
3/8 x 20 gauge copper has a pressure rating arround 30 psi higher than your hydrolic system is running at. I tried copper in my Saladin. Although it didnt fail, a got talking to a speialist in hydrolics who gave me pressure ratings for copper and steel pipes. So to be safe I bought a replacment steel pipe from Binister's.
Andy