


BenHawkins
-
Posts
861 -
Joined
-
Last visited
-
Days Won
3
Content Type
Profiles
Forums
Gallery
Blogs
Events
Articles
Store
Downloads
Posts posted by BenHawkins
-
-
It was then possible to fit all the leaf springs.

I moved the bushes and spring over from the old starting handle housing and fitted a new (longer) shaft. It will need trimming to suit once the engine and radiator are in place.
Finally we put the dash in place and drilled the fixing holes.

-
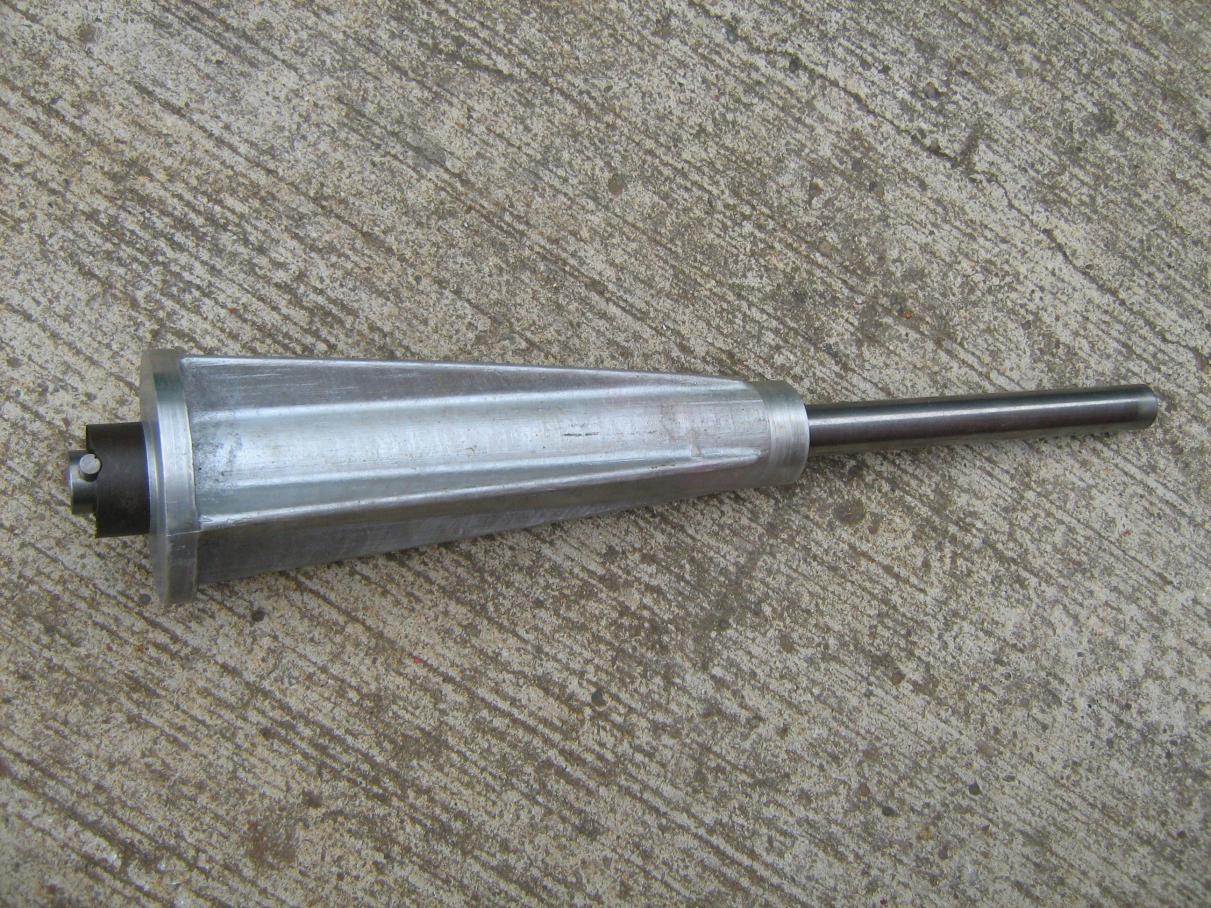
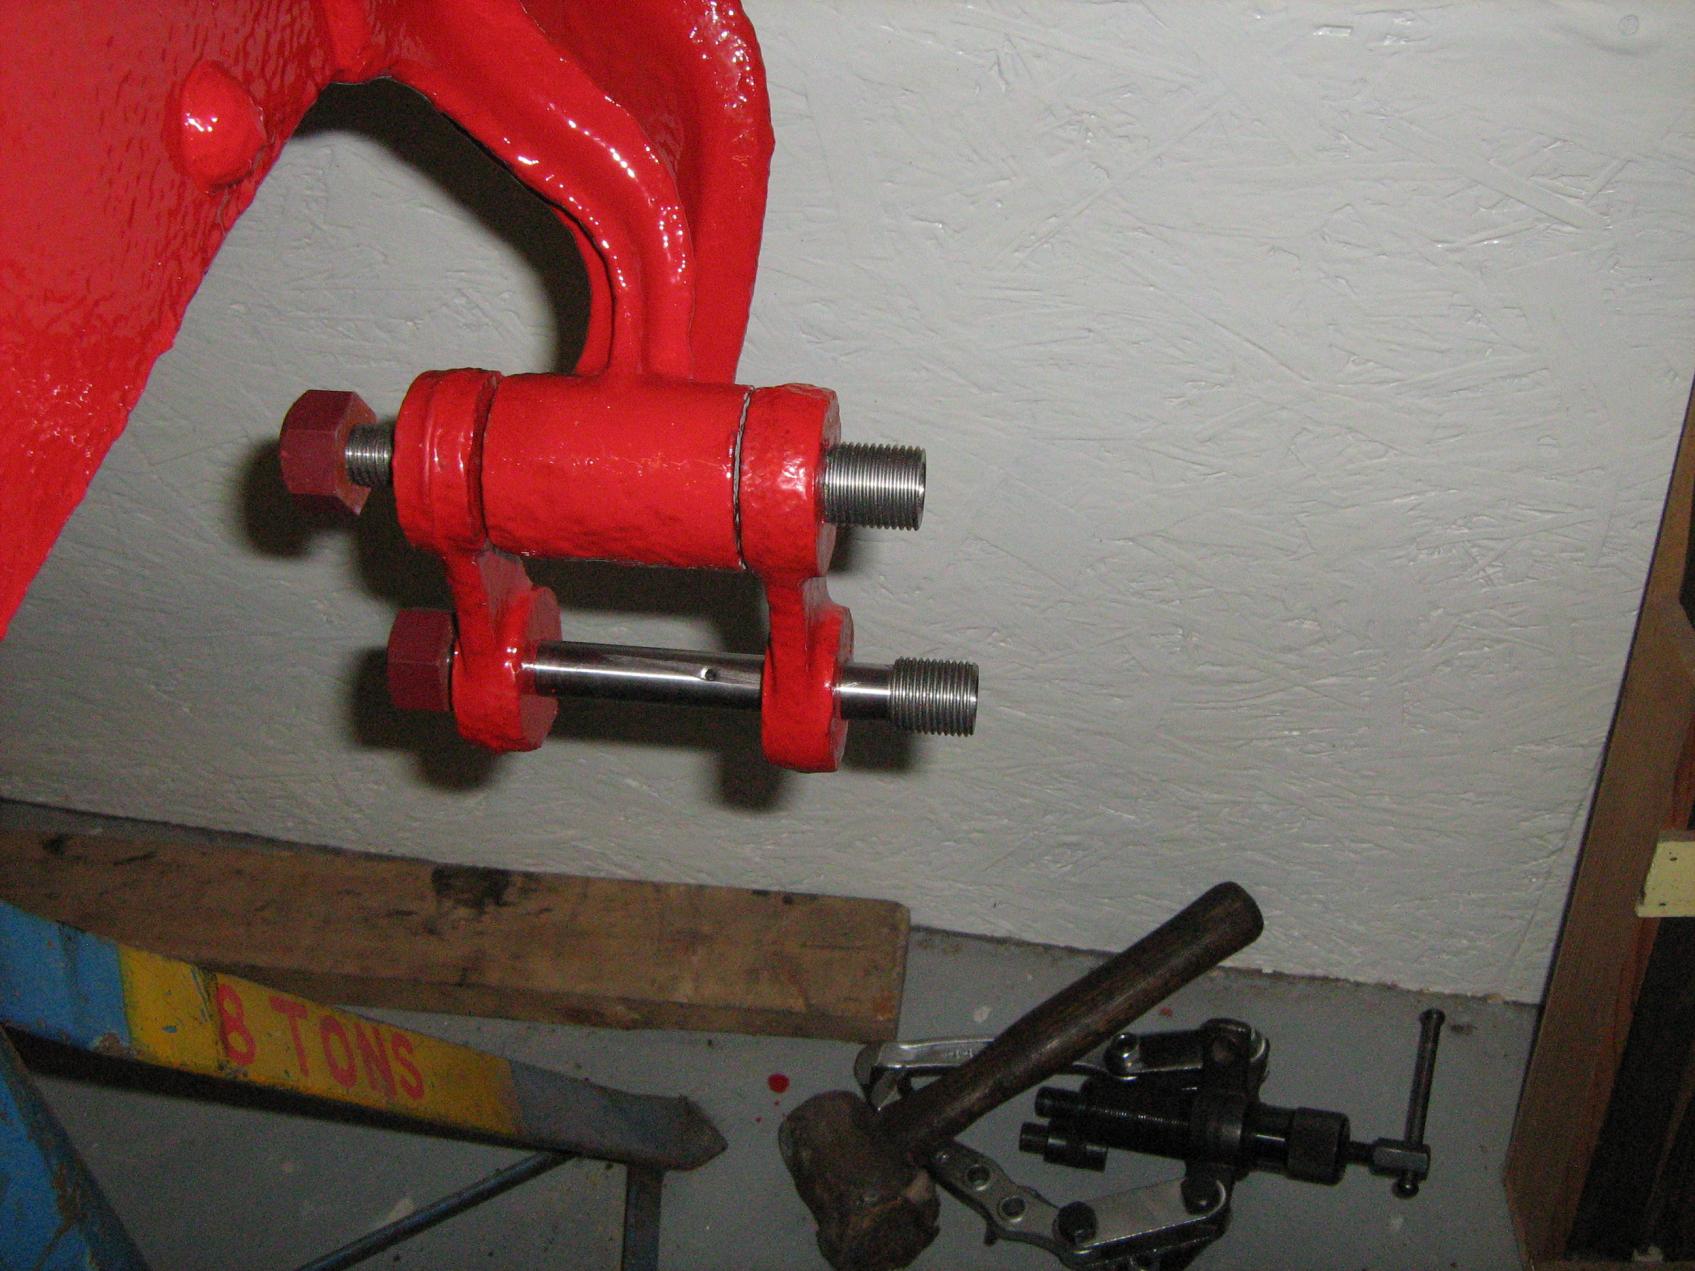
I found I was still short of a pin for one of the rear springs. I started by turning down a piece of EN24T and cutting the thread.

Then cut it approximately to length with the power hacksaw.

I then drilled a 1/4" hole down the centre (approximately half the length), tapped 5/16BSW x 1/4" deep and fitted a 5/16BSW plug before facing off to length.

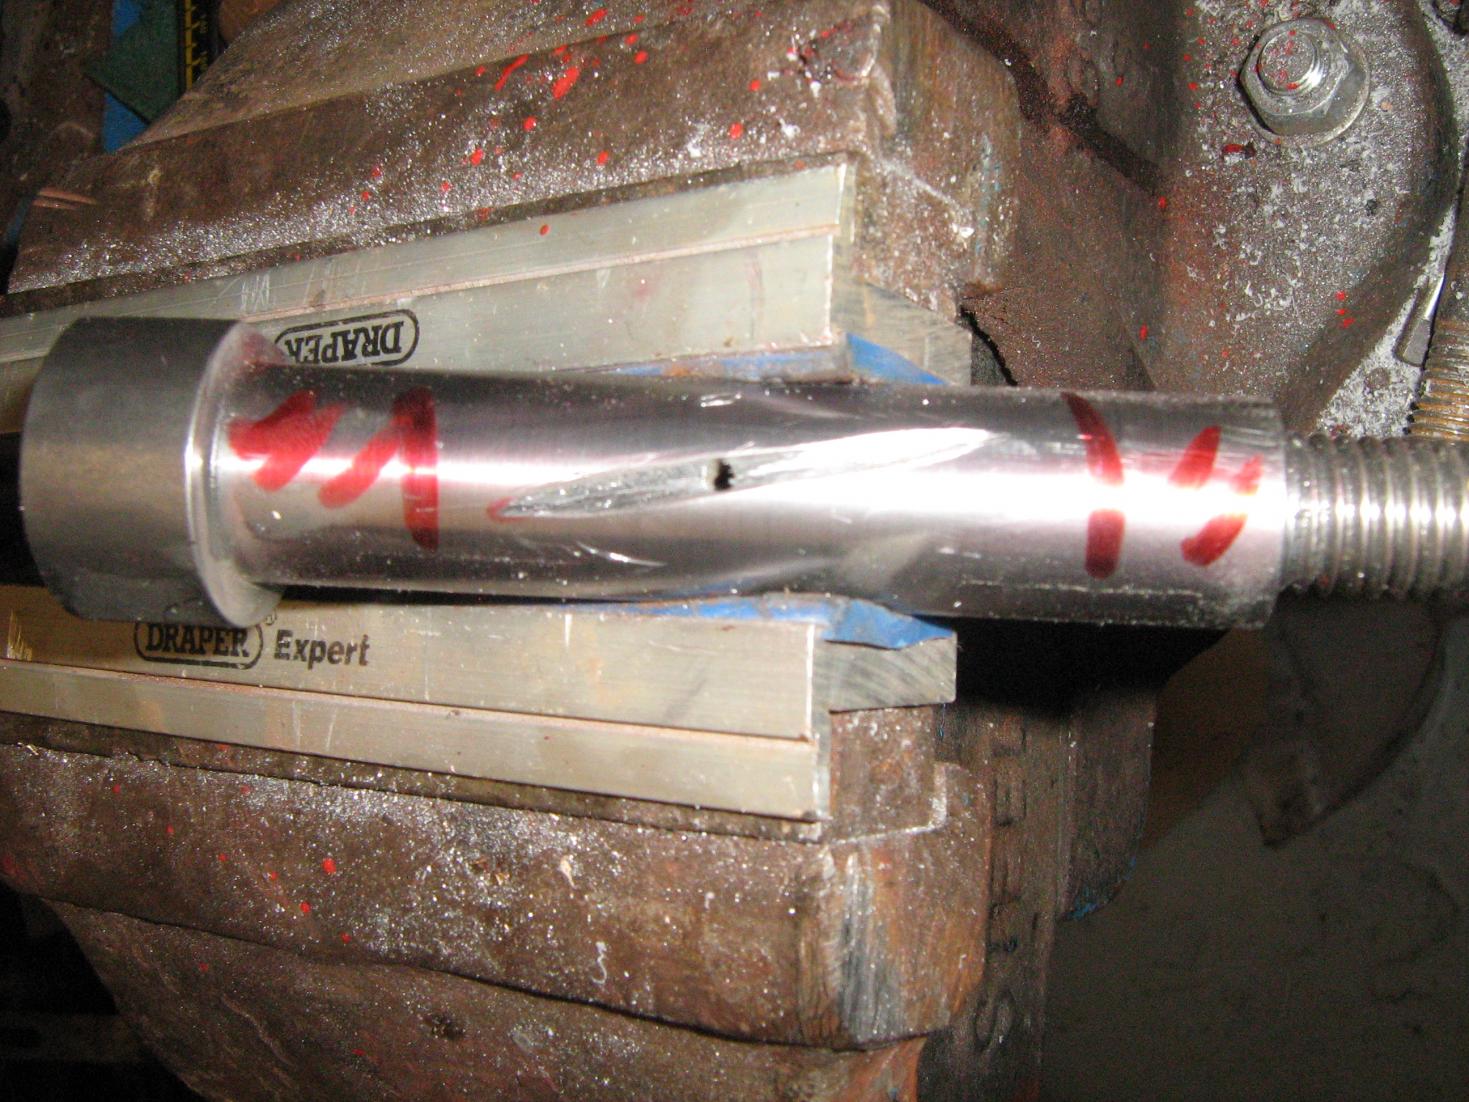
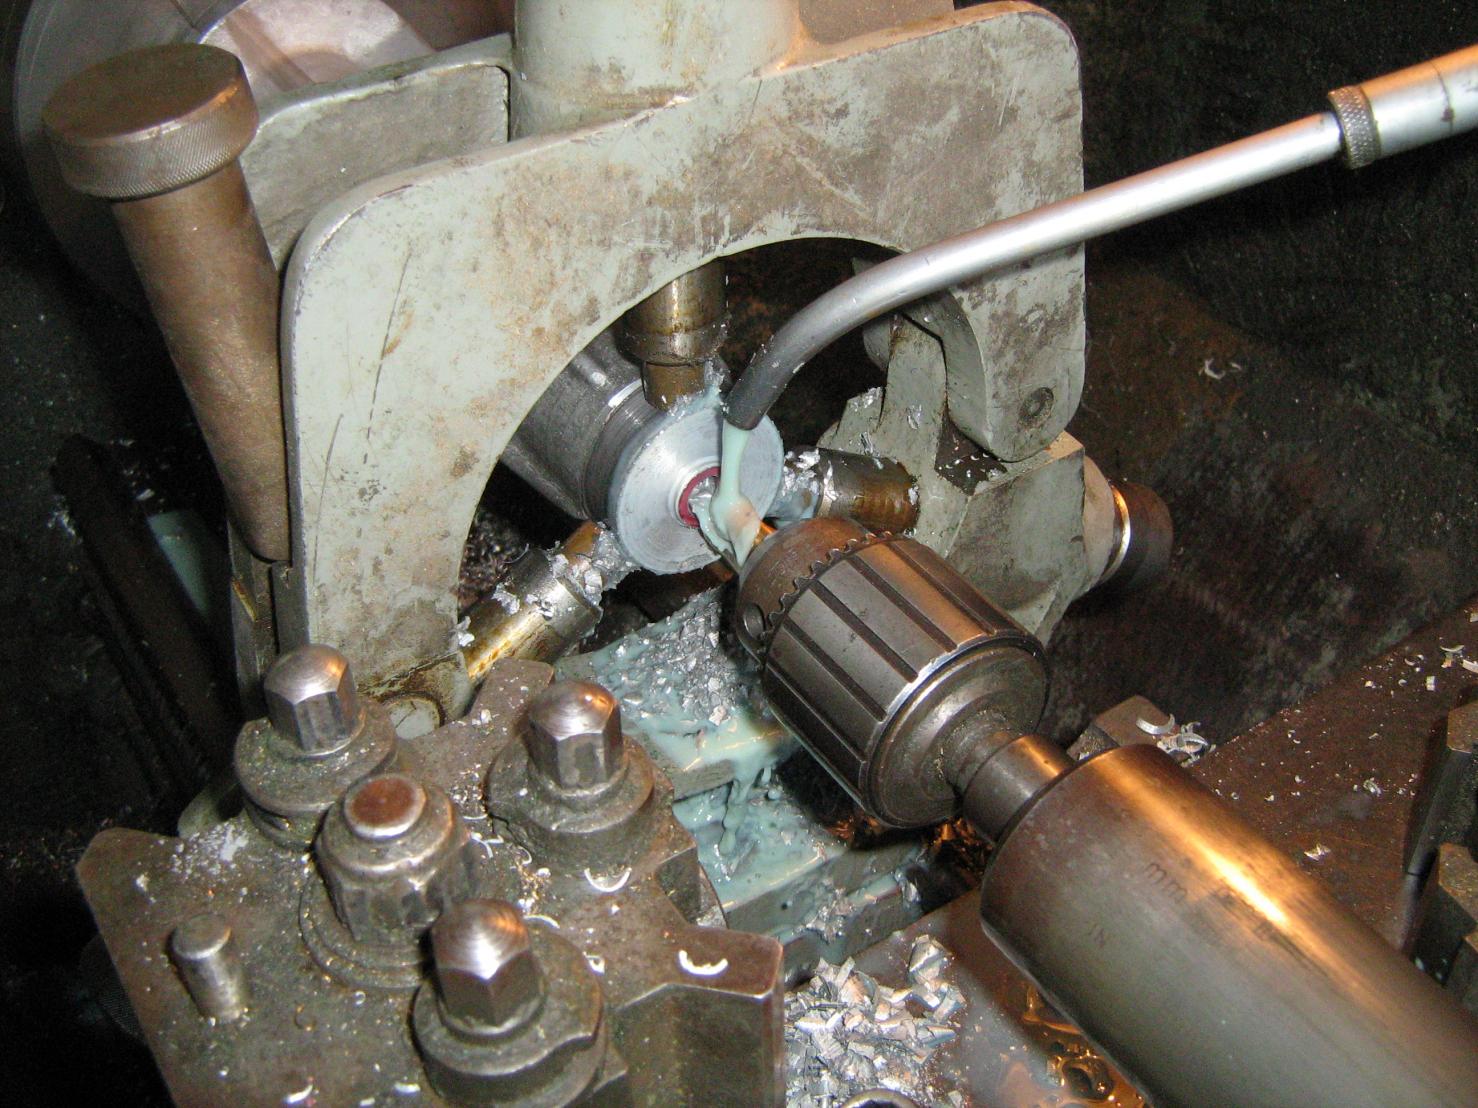
Cross drilling using a vee block mounted in the tail stock ensures the holes are always on the centre line. I use this tool quite a lot.

Filing the groove.
And finally fitting the anti-rotation dowel and priming the ends.

-
Can the lamps be re-assembled other-handed?
Challenging but not impossible. It would require reversing all the folds and the rolling for the hinges.
-
Well done, we look forward to seeing it at some point over the summer,
Ben and Sarah
-
I had the gusset plates laser cut for the false frame that supports the engine and gearbox.

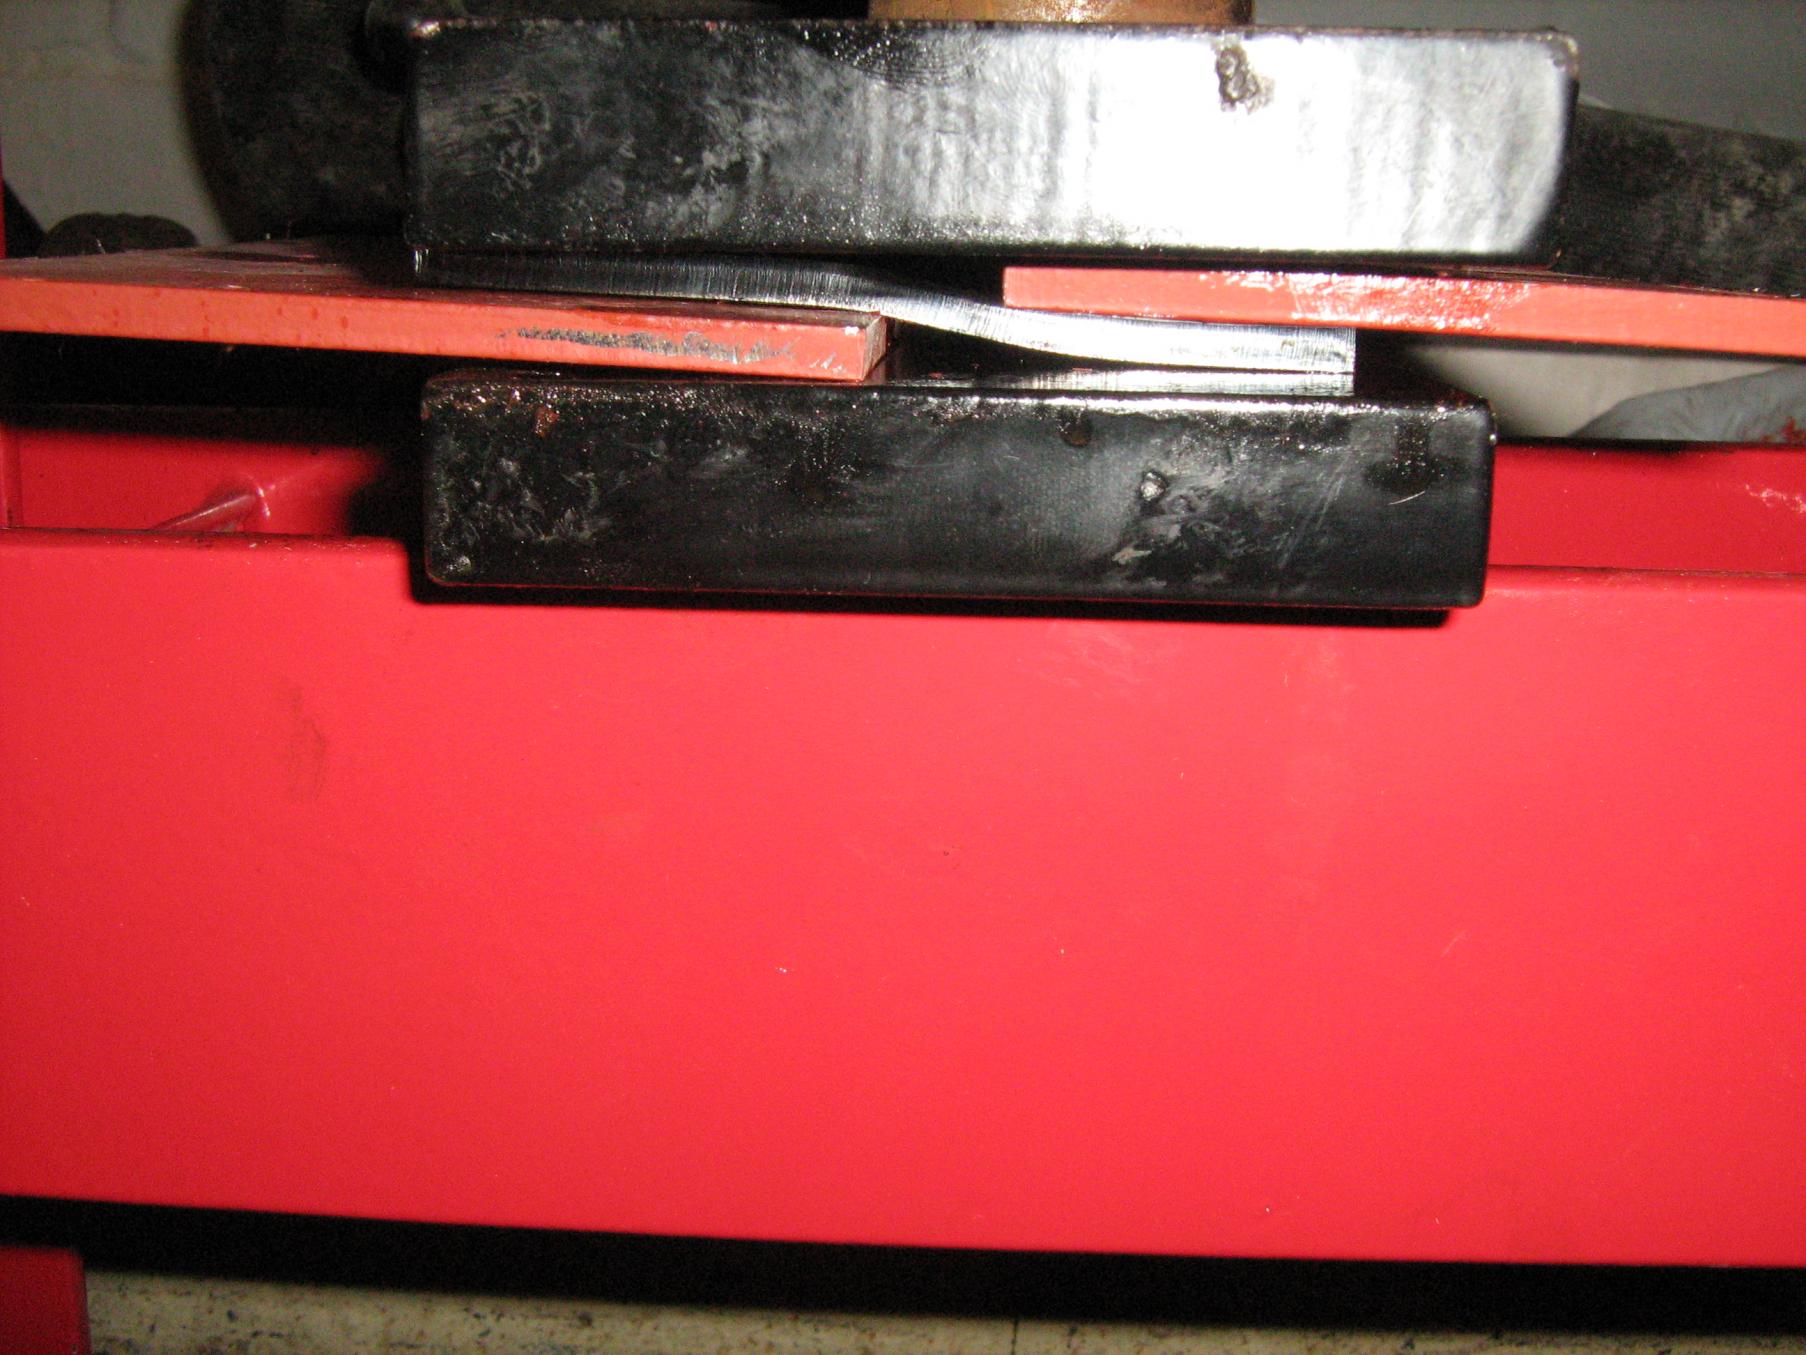
The first job was to joggle the plate. This was done by pressing it between two thick plates in a hydraulic press and using two thinner plates of the correct thickness to give the joggle distance (the red ones).
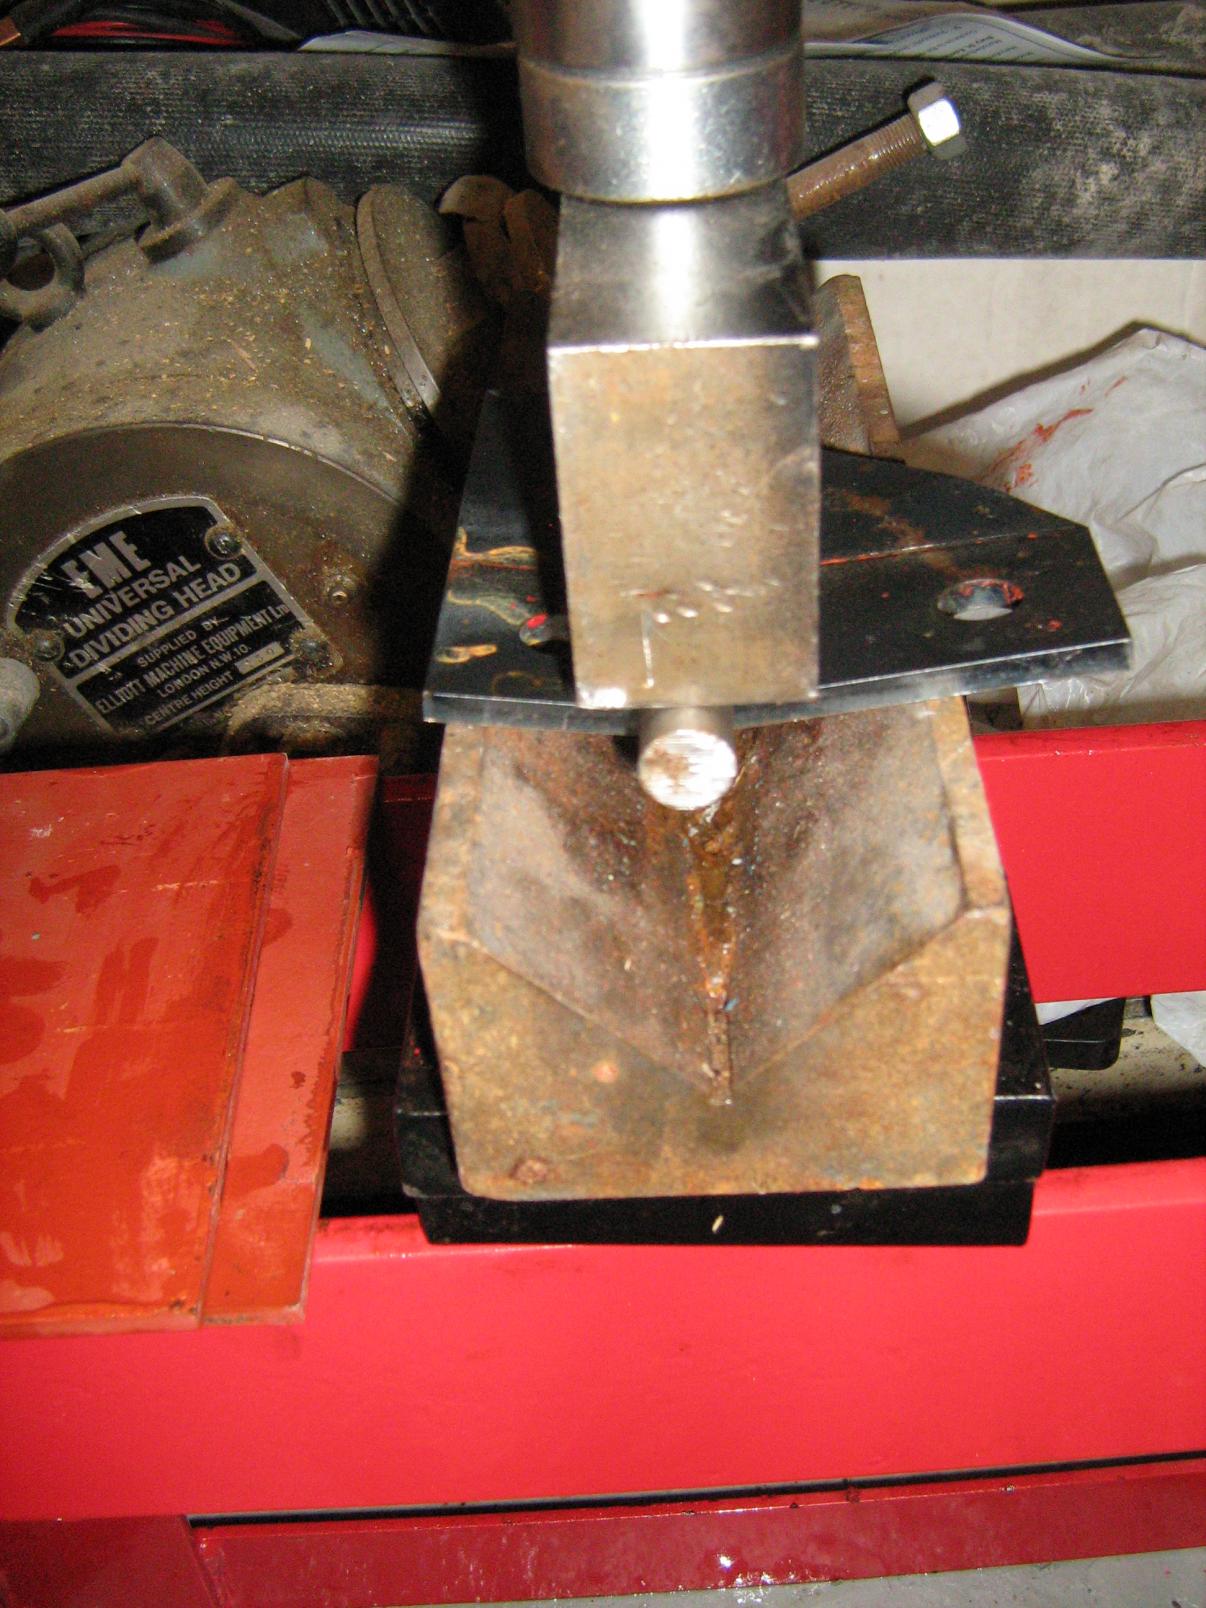
The finished shape is rather complicated as in the other plane there is a joggle and a radius. This was achieved by using bits of rod and a vee block (again in the press).
There were a few trial fittings against the chassis along the way.

Then a quick blast before priming to help the paint stick.

And finally fitting to the chassis.
-
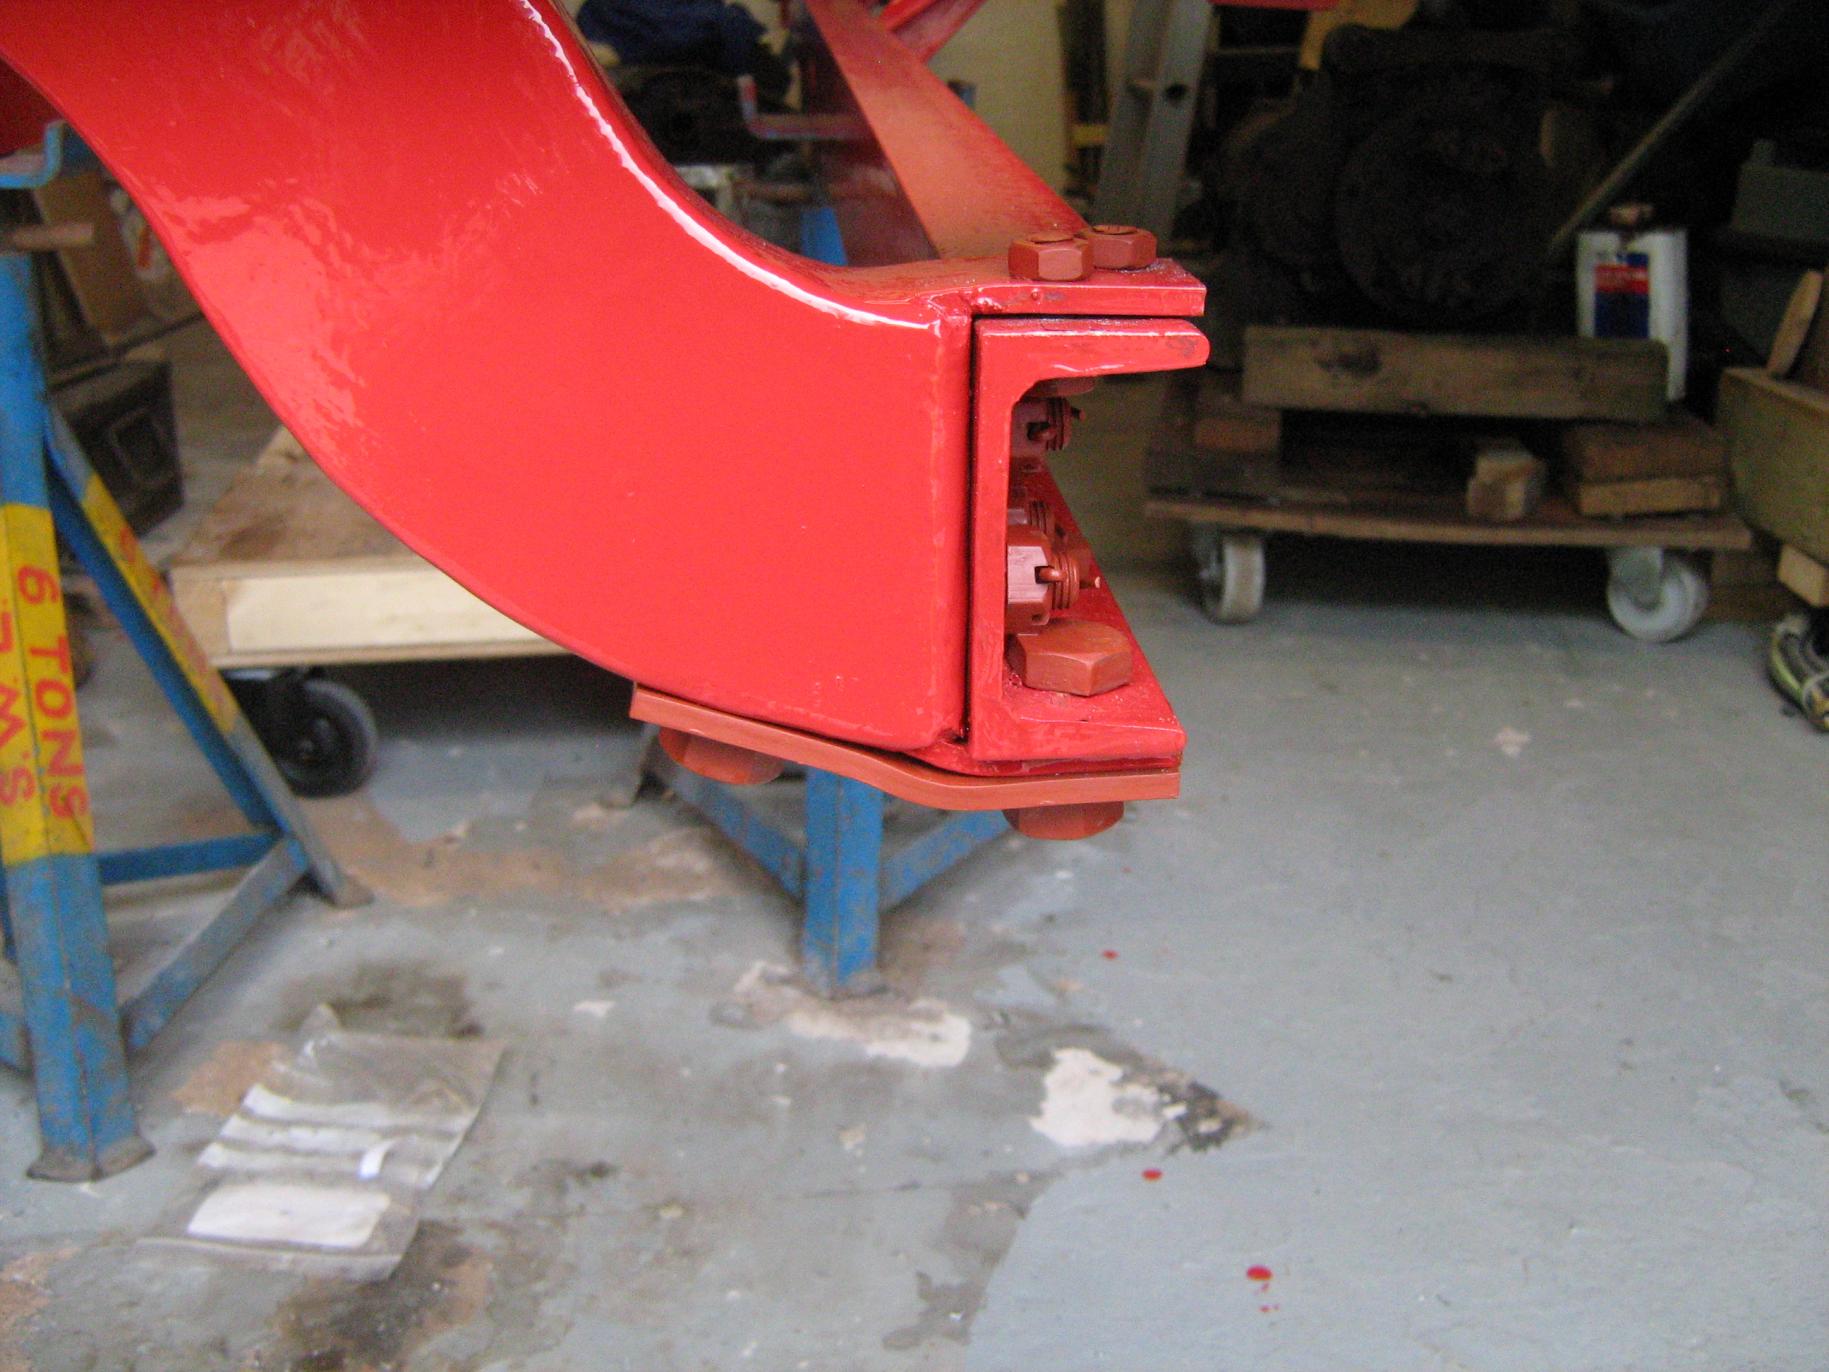
I turned some more suspension bushes from some phosphor bronze bar ends I had purchased for "scrap value".

Then fitted them, using the hydraulic puller to force them in.
The bores closed up a little so I had to use a 5/8" reamer before the new shackle pins would fit.
-
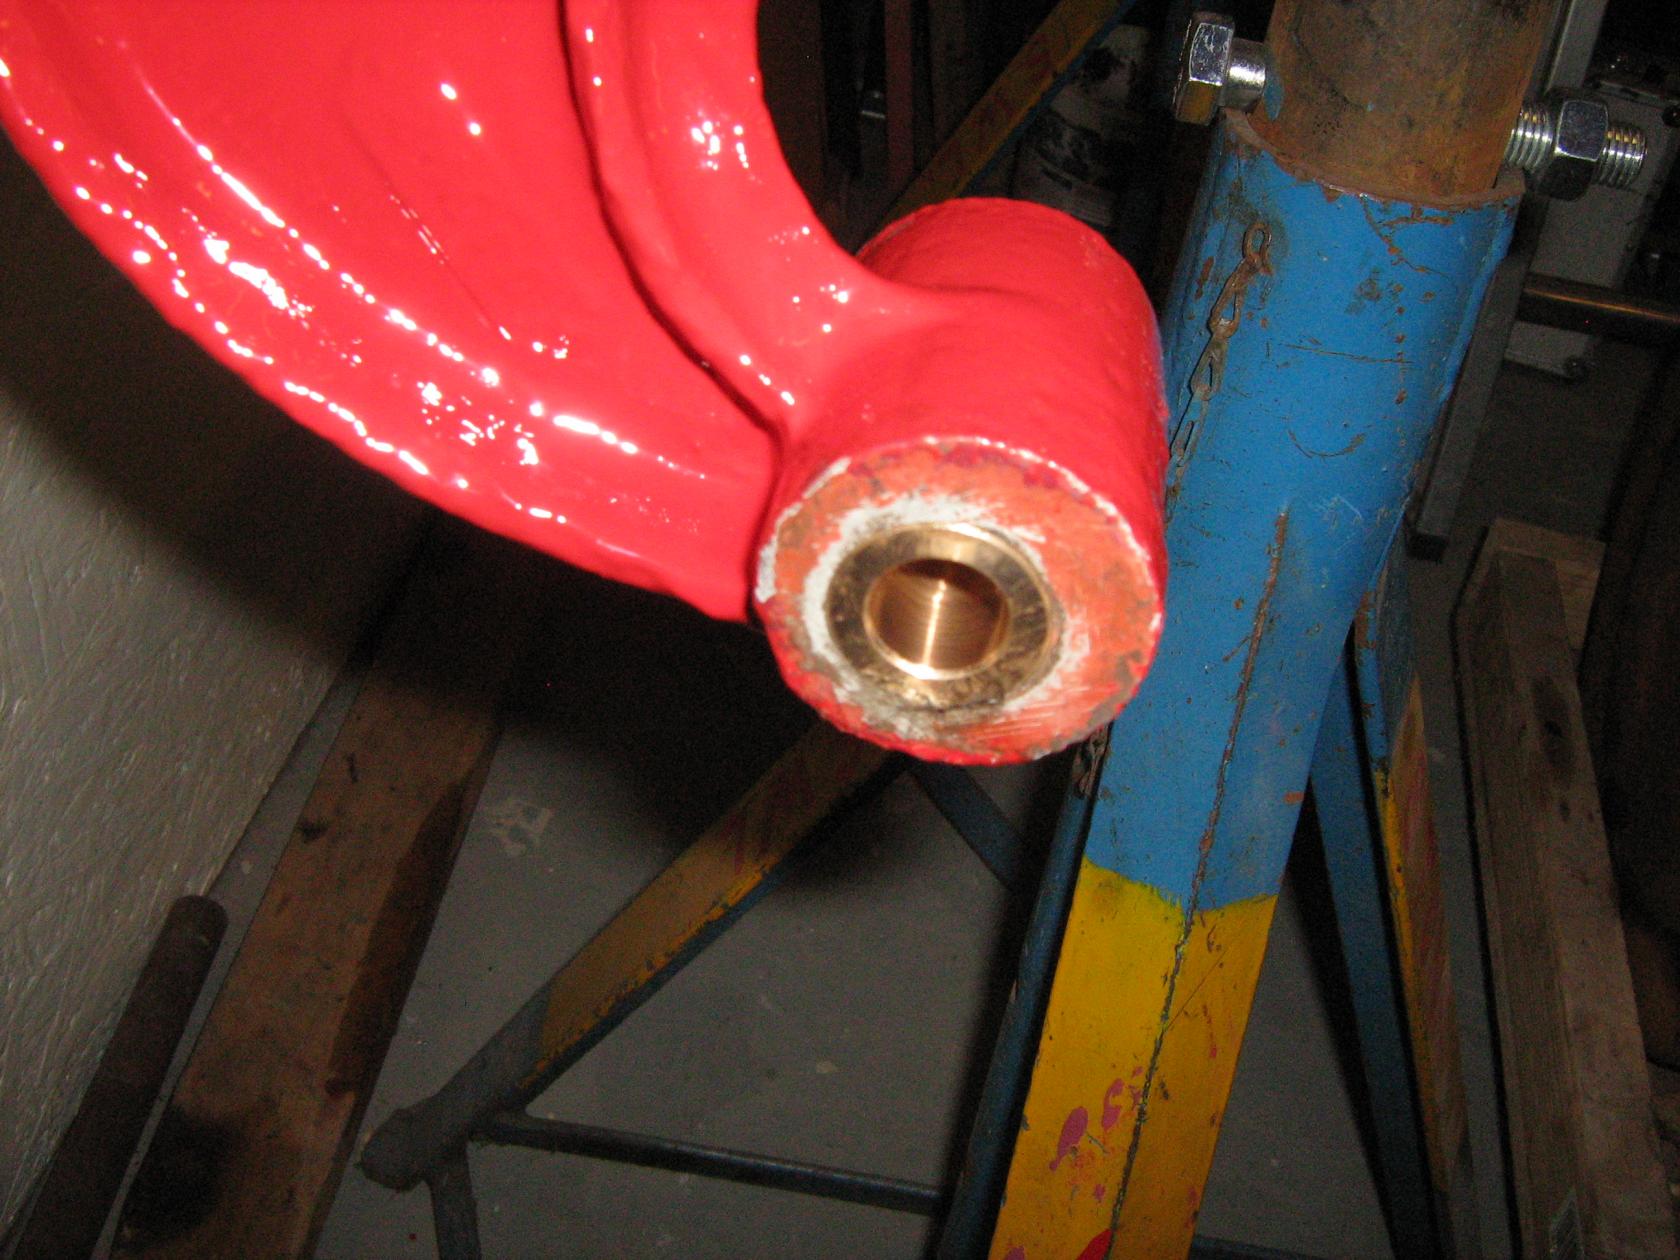
I marked some centres on the starting handle boss then centre drilled by hand followed by turning the two ends between those centre drillings on the lathe.

Then using a fixed steady I could use the lathe to drill the middle out.
Followed by boring the ends out to accept the bushes from the shorter original boss.

-
If that is you not doing very much then there is no hope for the rest of us when you get going!
Steve, I meant we had not done anything interesting (mostly painting and gluing) rather than that we hadn't done anything!
I glued the two parts of the pattern together, applied some filler and gave it a sand. Then glued a fillet leather around the inside; pressing it down onto the glue with a fillet rubber (fancy name for a ball on a stick)

I decided to give pattern paint a go for this job.

-
At Beaulieu on Saturday I purchased a George Grou rear lamp. This sort of completes a set of lamps as used on this lorry originally (one has the CP&Co asset tag).

Unfortunately there are two right hand front lamps so I now have two incomplete sets of CP&Co lamps. We will have to see if the correct lamp turns up before an engine!
-
Another week with nothing too exciting on the engineering front.
I had some parts being laser cut for other projects so had the bonnet side plates cut and folded at the same time. These make up the gap between the bonnet and chassis and will need some further trimming and drilling. I have since blasted and primed them.

Each of the rings I had machined for the brake drum is a slightly different size to give the relief angle so it will pull out of the sand. After some filler and sanding it should make a smooth taper.

I ran round the penultimate ring with a radius cutter in the router to give a smooth transition to the outer flange.

I could not get the worn bushes out of the rear spring hangers so I resorted to cutting most of the way through with a hacksaw so they could close up a little.

I then pressed them through with the hydraulic puller.

Finally the chassis had a second coat of paint.

It should get interesting again when we start bolting things back on.
-
we dont do `em cold.....rivets work on contraction see....
and i dont know where 19 tons has come from for hot setting......
you needs to get it white....it`l set lovely then ...without much force at all....
The 19 ton figure came from rivetsinstock.com but seem to correlate with figures from the Heritage Railway Association. I just think 5/8 rivets are a bit too big for my DIY abilities (and speed of handling axles/hot rivets).
The other advantage of going to the steam railway workshop is seeing what other toys they have available.
-
Router or laser?
I recall that the ThrustSSC project used CNC-machined MDF profiles for the mound for their carbon fibre shell.
It was a CNC router. I could certainly make good use of one but they use a fair bit of space.
-
make up another rivet out of some bar end.
get it white with the bottles and use the press to set it in....
Thanks for the suggestion and yes, I had considered this. However the oxy-acetylene I have access to is around a 15 minute drive from my press, but which time the rivet may have cooled down!
But being serious when I looked into it the suggested load for hot heading a 5/8 rivet was 19 tons (44 to do it cold) and a little more than my press can manage.
Certainly happy so give smaller rivets a go.
-
I have been getting on with a number of boring jobs whilst work is quite busy. Mainly getting bolts ready and cross drilling for split pins as well as getting some top coat on the chassis. Looking forward to getting some parts bolted on properly.

Rings of MDF were cut for me to assemble into a brake drum pattern.

Today we started loosening the nuts on the gearbox. I didn't think any of the fasteners would want to move but quite a few are now loose. It will get daily oiling until they all free off but I will not dismantle it until most of the other parts are bolted back on (partly to prevent confusion and partly because I have run out of space).

-
The original radiator had horizontal tubes, the aluminium tanks on each side of the radiator had baffles to arrange the tubes in series.
As these could be fitted in to the same sheet of MDF as the brake drum rings for the 1914 Dennis they didn't cost any more to have made. There are still some other parts needed for the radiator sides but they are easier shapes to make.

Hopefully we will glue all the bits together soon so it will make a bit more sense!
-
The brakes have been very stubborn to get apart. The greasers had been removed many years ago so water was getting into the pivots. I had been applying oil for some time but the crank did not want to come out and I had to resort to the hydraulic puller.

The pivots on the other side were also rusted up for the same reason. These have very small heads so there was no chance of rotating them to free them up.

Lots more oil, heat from the propane torch and 10 tons from the press got them to move.

Now need to repeat for the other side.
-
I have paid to have the front axle chilled iron blasted. I can blast the small components myself with alumina grit but the size and getting the rust off from the gap between the two channels would have made it very difficult for me. 20 pounds well spent in my opinion.

Then I gave it a coat of paint. Hopefully I can arrange a convenient time for Severn Valley Railway to replace the missing rivet for me.

Many of the smaller components had a top coat of paint this week.

-
The light dry evenings this week were perfect for cleaning up the back axle casing with a combination of different wire brushes in the angle grinder and drill.

I then gave it a good scrub all over with Jenolite and a Scotchbrite pad.

Followed by primer.

And then started on the top coat.

-
It was great to see the spinning worked. I now know how to do the brass ones for the 1914 Dennis. I machined the ones for the 1908 from a solid bar (after failing to spin them) but it was quite wasteful.
Ben
-
I checked with Steve, the king pin cover is too small for the Thornycroft.
-
I visited my friend Mick to collect some BSW and BSF bolts from his stocks. These will be very helpful in putting the rest of the truck together as my boxes were nearly empty.
Mick had found this kingpin cover for me but it is a little too large.

He kindly let me have a pair of number plates. It would be great to put the original registration on them but unfortunately I don't know what it should be. It was probably an R prefix as it was Chesterfield based and from other vehicles registered at about the same time it would have been around R2000.

There was also a Whittle drive belt that seems to just about fit the fan hub.

I also collected a box of Hardex350 hard facing rods. It is tempting to try to use these to build up the worn kingpins.
-
New centre bolts for the rear leaf springs machined from bar and primed.

Blasted, primed and undercoated hub caps.

I have been trying to catch up on painting so not much else has happened in the workshop.
-
I was at my friend Micks on Sunday and at the back of one of his shelves we found these magneto retaining straps. He kindly let me have them to add to the kit of parts.

-
It is looking great. Good luck with the flywheel and engine.
Ben


1908 Dennis Truck
in Pre WW2 vehicles
Posted
I glued a rectangle of MDF on to the back of the previously cut radiator profiles. Then used the router to trim them to size and add a radius.
Then glued the other layers together before applying filler.