


marvinthemartian
-
Posts
565 -
Joined
-
Last visited
-
Days Won
1
Content Type
Profiles
Forums
Gallery
Blogs
Events
Articles
Store
Downloads
Posts posted by marvinthemartian
-
-
Someone has to look after the old girls. They do seem to be decreasing in number slowly.
-
Well I found 5 hours today to escape to the workshop, decided to get started on the Martian, and started with an easy job! Unfortunately I forgot a real camera so its all crappy phone camera shots today...
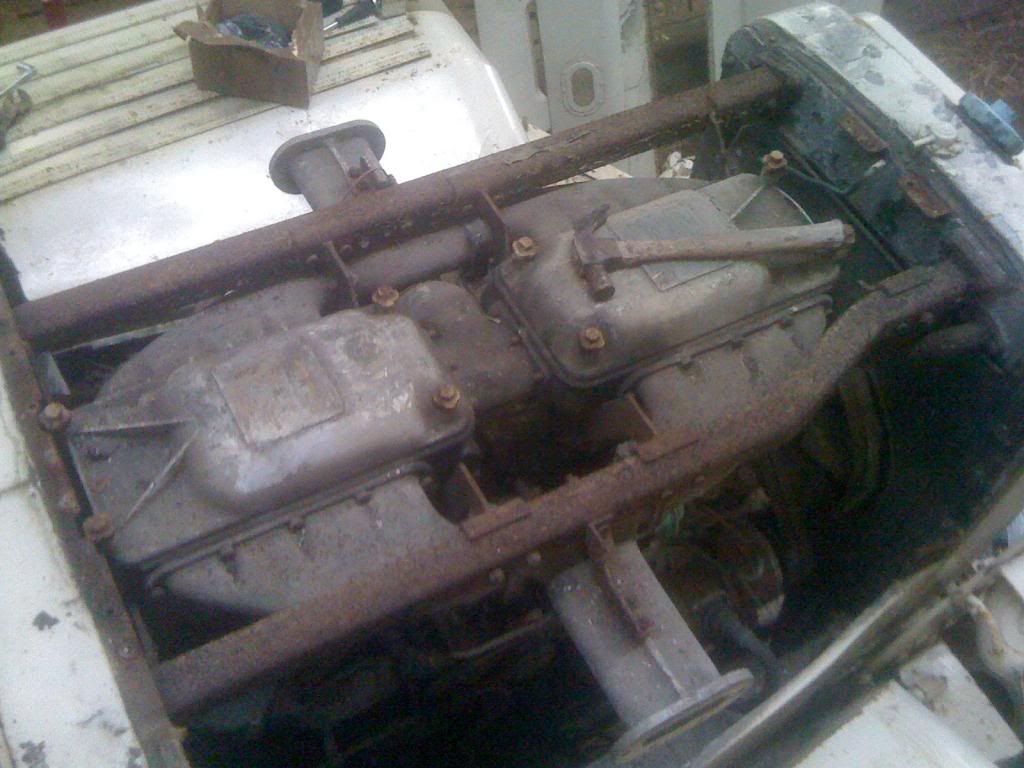
My Martian has unfortunately had a crane fitted, this required an Austin 4cyl engine, gearbox and big hydraulic pump to be mounted in the cage under the drivers side. It was blocking access to the steering system so it had to go! In due coarse the rest of the crane will be taken off as well.
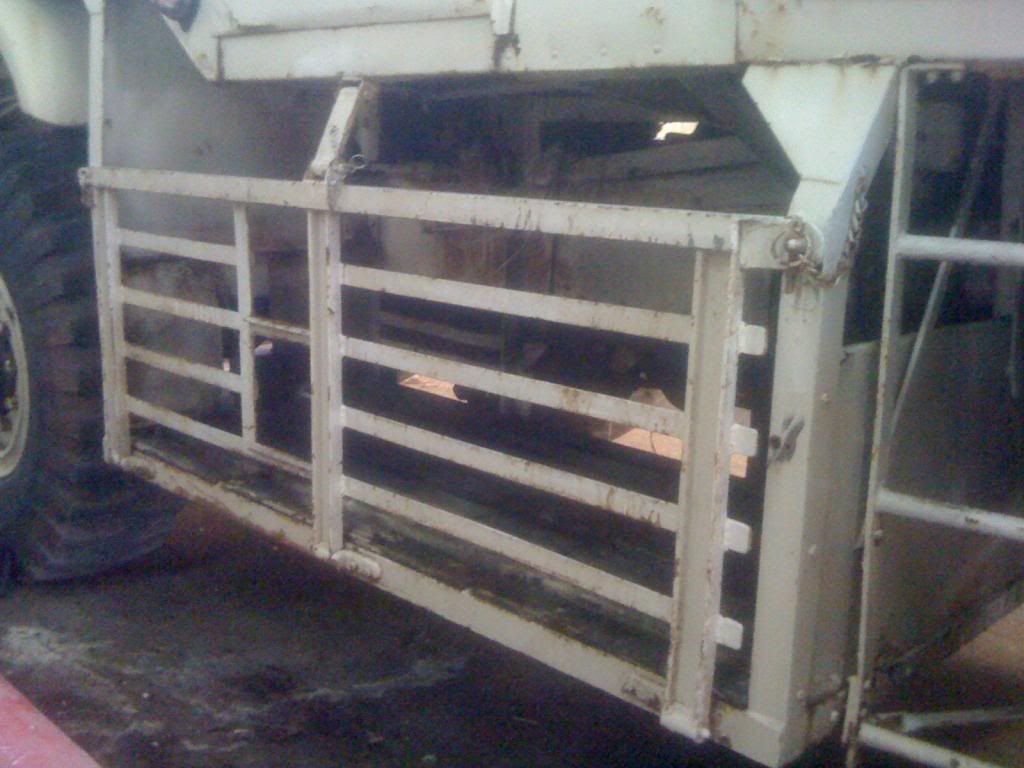
A nice empty cage!
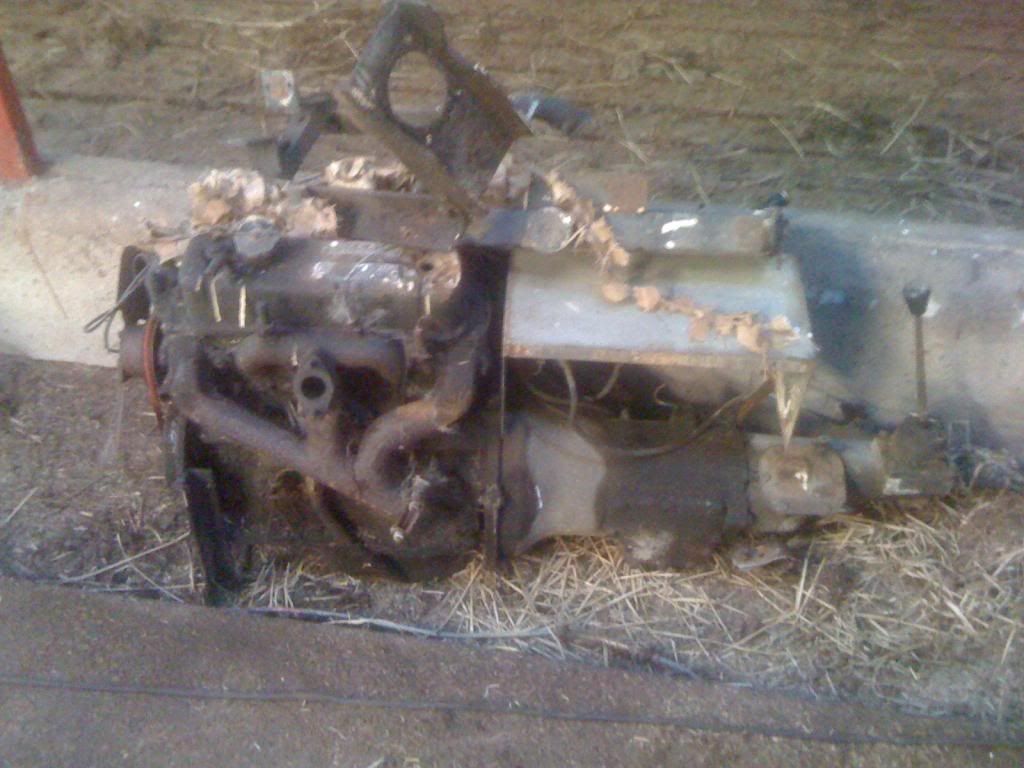
A pile of crap waiting to meet its maker, anyone want it?!
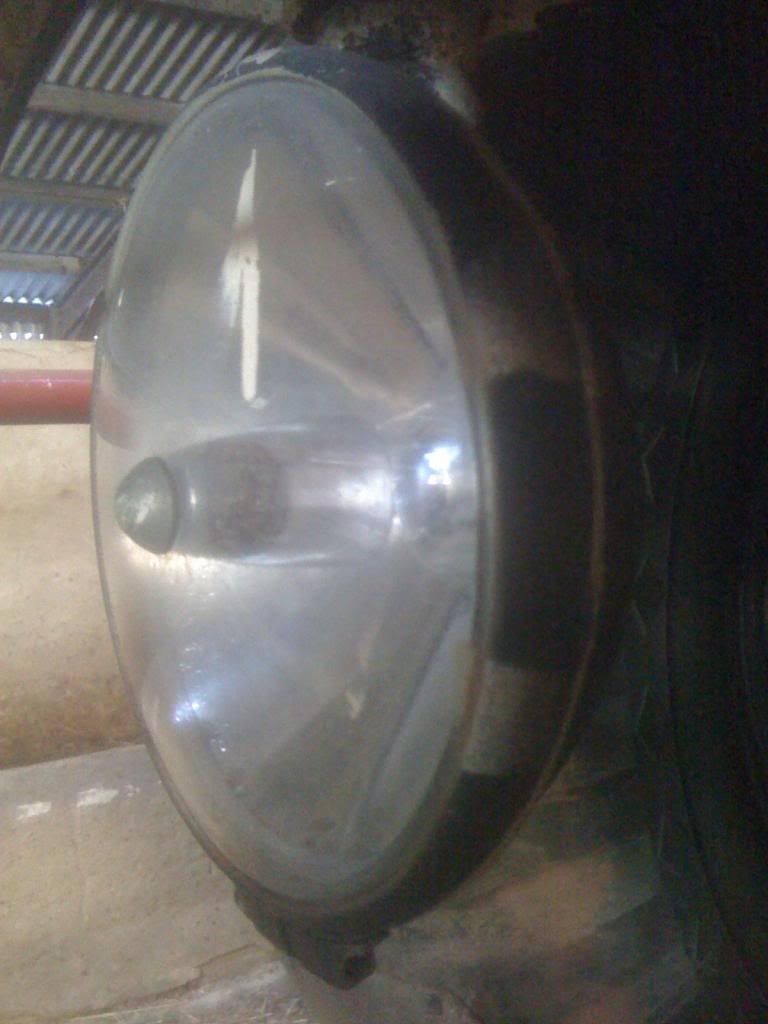
Next up was the headlights, I wanted to see if they used standard 7" units as the chrome isn't very reflective any more! They look like a standard unit so that's good news!
Standard BPF units, with FV number. Presume civvy units will fit.
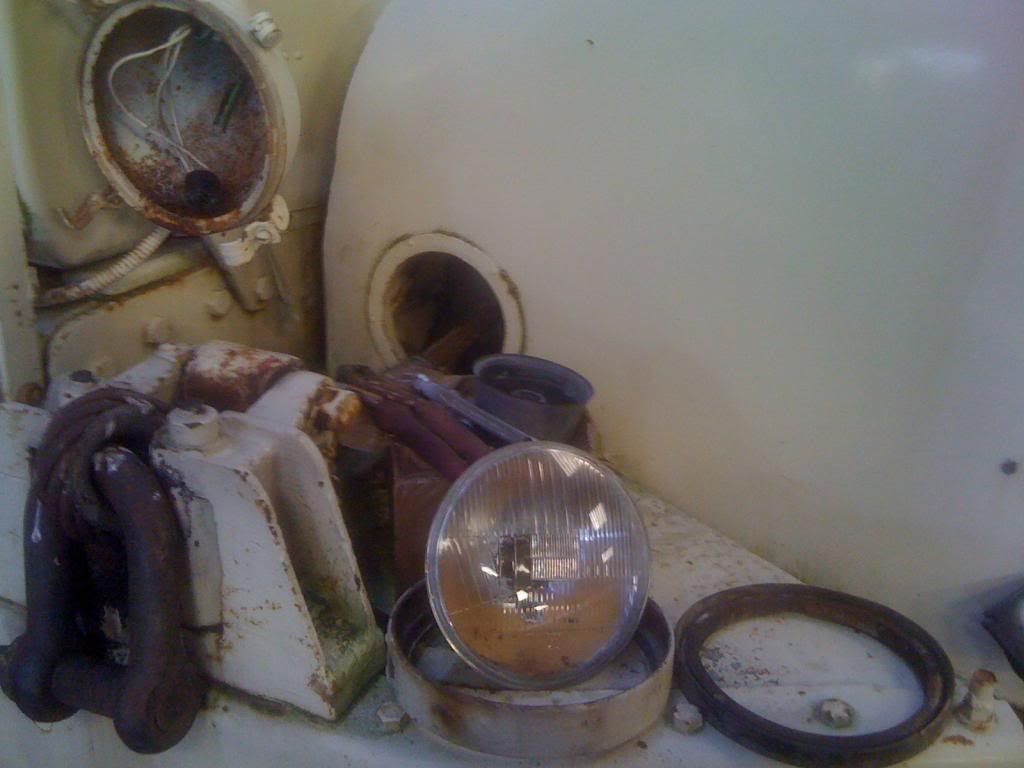
Next up was to check out the spotlights under the bumper, I think there are supposed to be some under there but these don't look heavy duty enough to be original? They do look old though....
No spotlights originally, headlamps should be mounted below the bumper behind 2 rather large guards, and repositioned either side of the radiator for cross country work.
Next up was an epic voyage from the back to the front of the truck underneath! Dodgy wiring does my head in so I'll be completely re-wiring the lights, I did however carefully remove the old wiring so it could be restored and put back. For now I'll be happy if the lights work reliably!
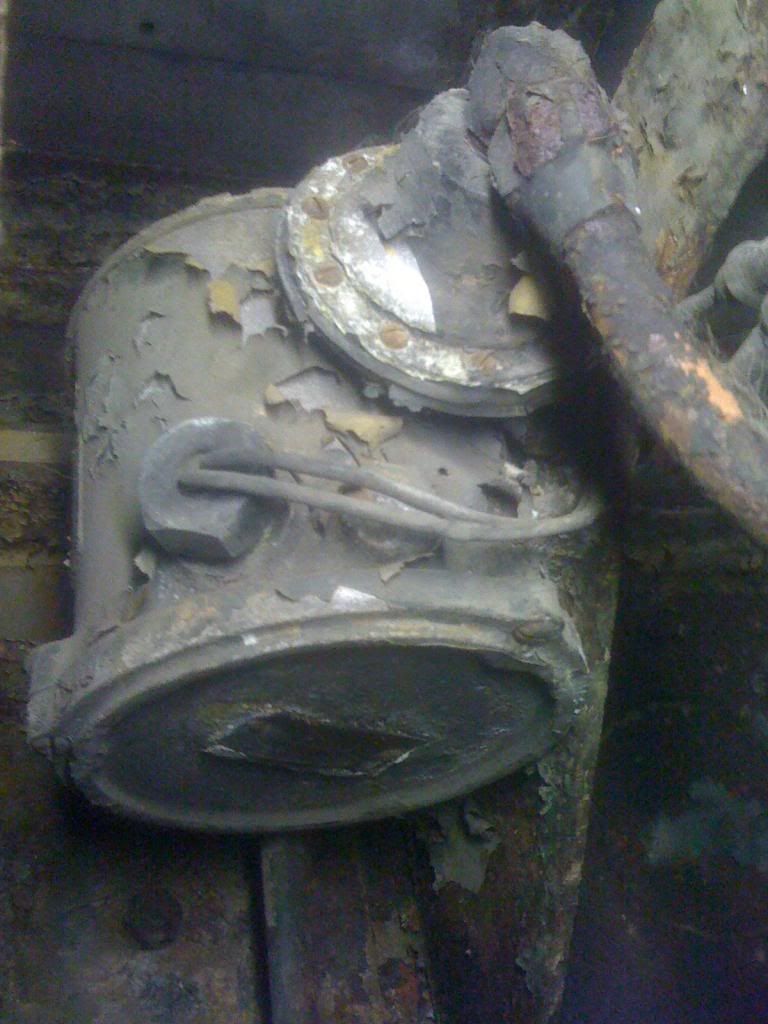
This was the first interesting thing I found, its tee'd into the rear brake line and has a couple of wires coming out. Surely its not just a pressure switch for the brake lights? Any ideas?
Part of the Warner electric brake equipment, works through the trailer brake hand valve below the steering wheel, this bit is the pneumatic controller.
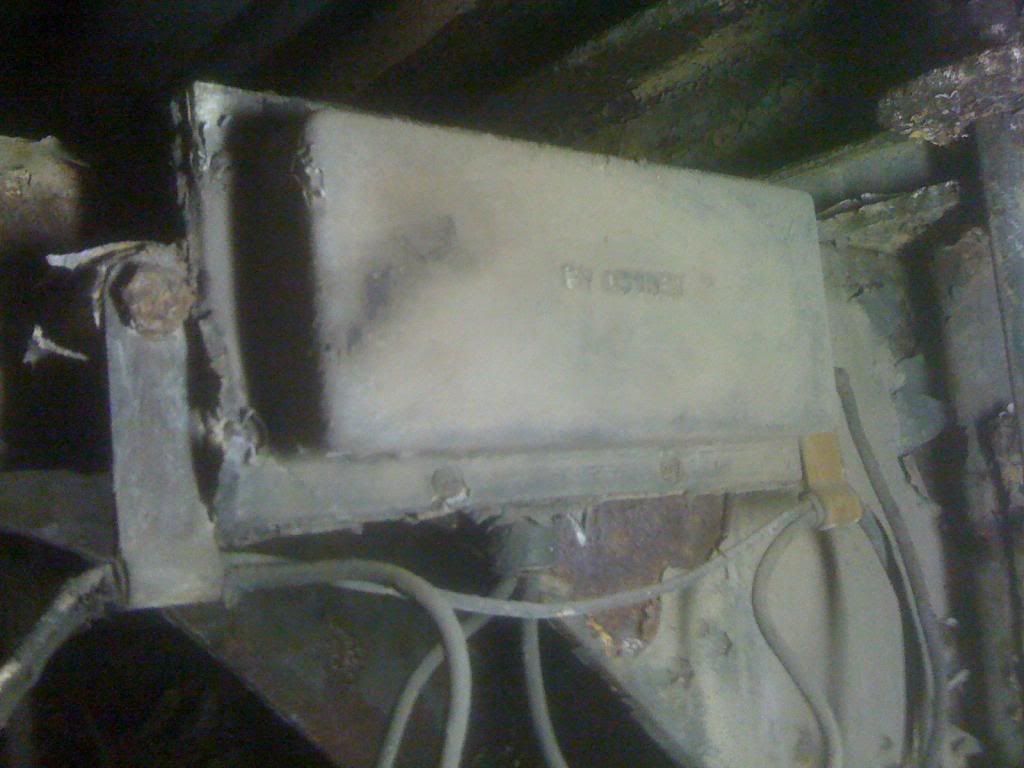
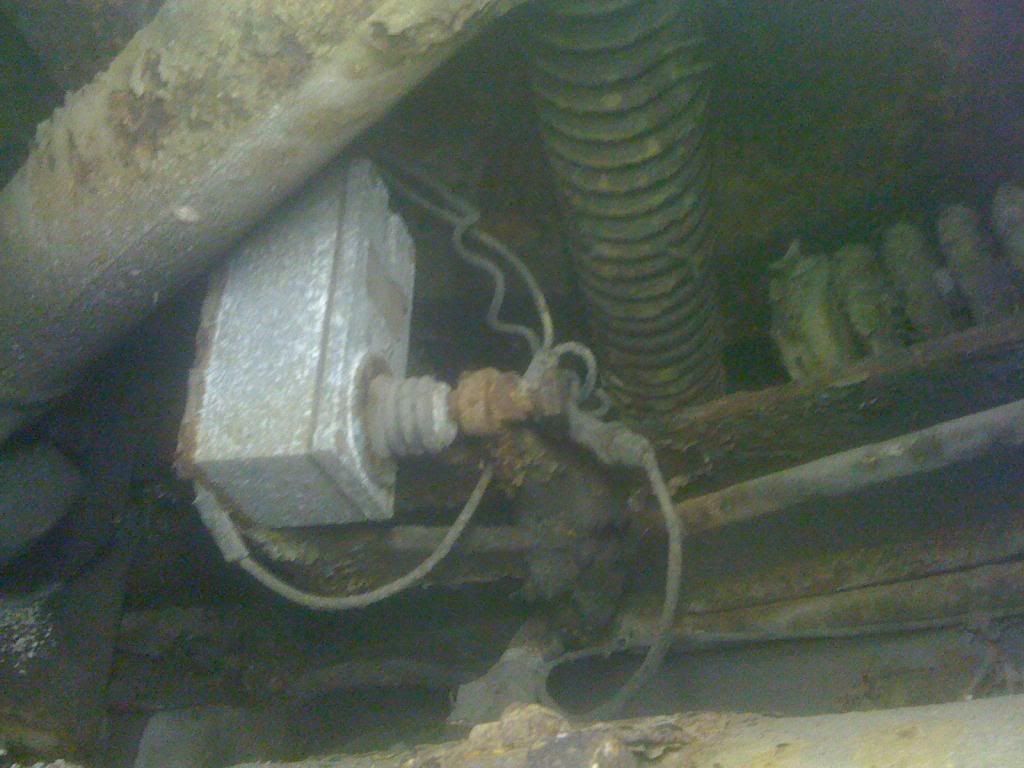
It was connected to this box which must be something to do with it? Electric trailer brakes or something?
Yup, as with above, this is the resistor, fed from the distribution box. This then goes to the pneumatic controller, and from there to the 4pt trailer socket. In between these two units on the crossmember should be the brake light switch, mine is.
Next up was the propshaft, bad news here as there is a bit of play in the UJ's, and probably worse a bit of play in the splined sliding coupling. I do think finding a good prop is going to be needed :-( a bit worried about that...
UJ's should be easy to replace if need be, think same as old leyland coaches, sliding joint loads of grease perhaps? Not sure of any SWB martians to get another from as yet.
I also noticed that some of the rear steel brake pipes are corroding more than I'd like, they are holding air fine but I don't want to take any chances. I reckon its 5/8" pipe, any ideas people?
5/8" correct, or 0.628" as the book says.
Next up was the winch area, I was interested to see this switch, on the Pioneer the overload pulled on a cable connected to the engine stop. I guess time has moved on and now it kills the ignition. Probably a good source of electrical problems this thing....
Part of the winch overload circuit, cuts out around 10 tons, simple make or break switch, plunger maybe seized from lack of use, easy to strip and clean. The circuit includes an engagement switch, Burgess springs to mind,that is actuated by the winch clutch lever, it can just be seen if you look in the well that the 3 levers are sited in, maybe seized up. Also lastly a relay, that is located on the inside of the instrument panel housing, left hand side.
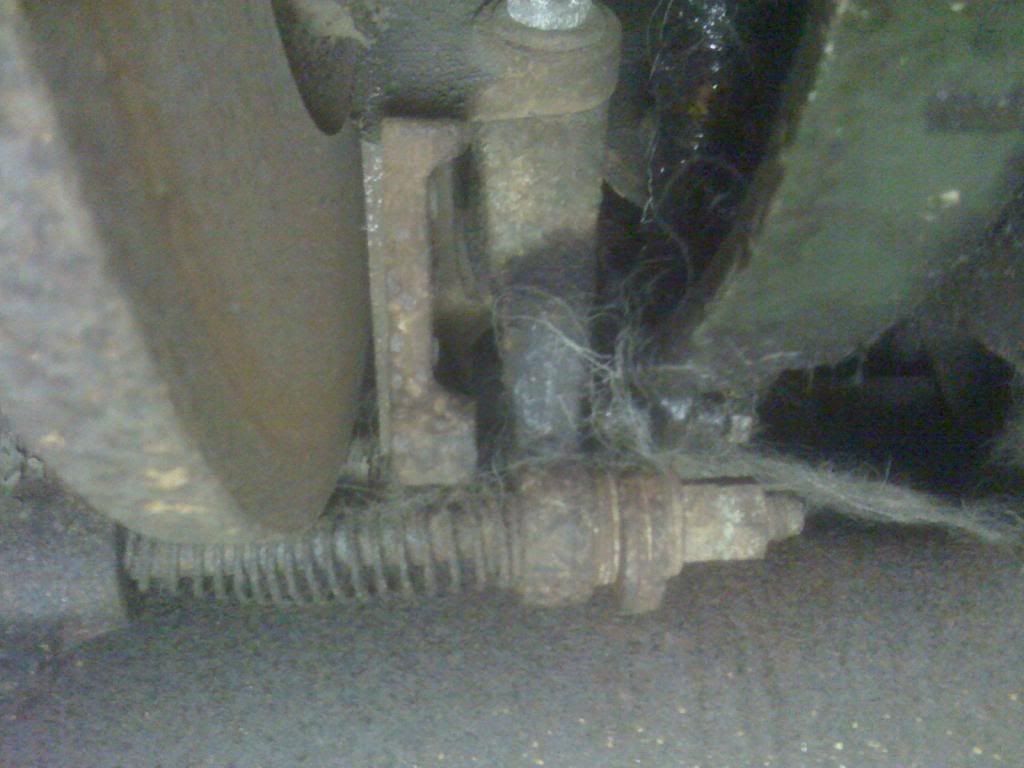
Next up was the handbrake area, the lever operates two "calipers" onto a huge disc brake, its a monster of a thing. Unfortunately the "pads" are well worn and you can see it has had washers added for some extra life. At least this should be relatively easy to get repaired, its just flat pads.
Excessive pad wear caused by seized pivot pins, and there are quite a few! Strip clean and loads of copper grease. I had my disc galvanised as they look terrible rusty! The long 1/2" unf adjusting rods as at bottom of picture, can wear quite a bit where they pass through the link arm, I semi bodged mine by welding up the worn bits, grinding down and rethreading.
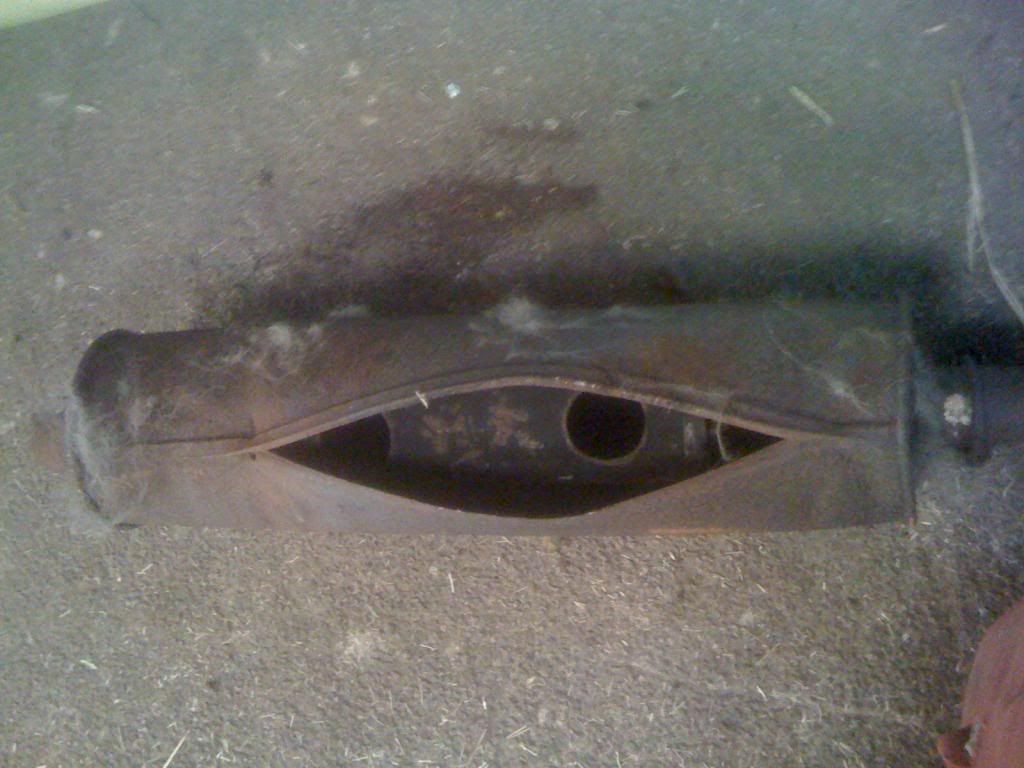
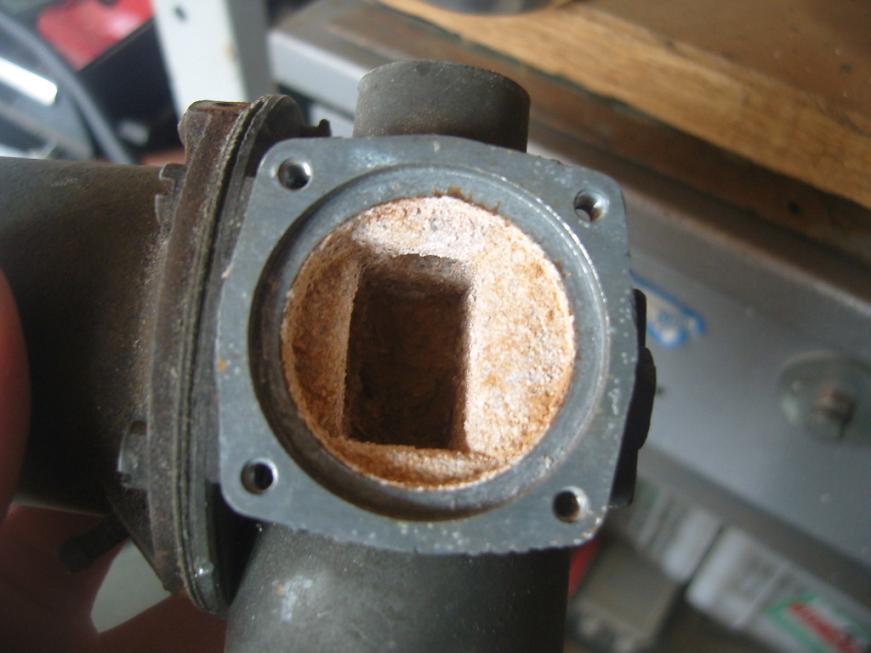
The next thing that caught my eye was the exhaust, some of you might remember an "incident" during the initial purchase that resulted in the exhaust note becoming a bit more fruity
 I think I found the problem! Original exhaust maybe? It is routed right beside the fuel tank that surprised me!
 If you want one, Phil Jackson has one left. I originally thought about getting some made up in stainless, maybe will one day.
Last job of the day was to remove the "bonnet", I've got quite a bit to do under there and the access isn't great, so for the sake of 6 bolts I took it off...
Are your hinges in good nick?

Access is much better now! With the bonnet off you can really appreciate how bonkers the air cleaner assembly is! The oil in it looked excellent, that's good news!
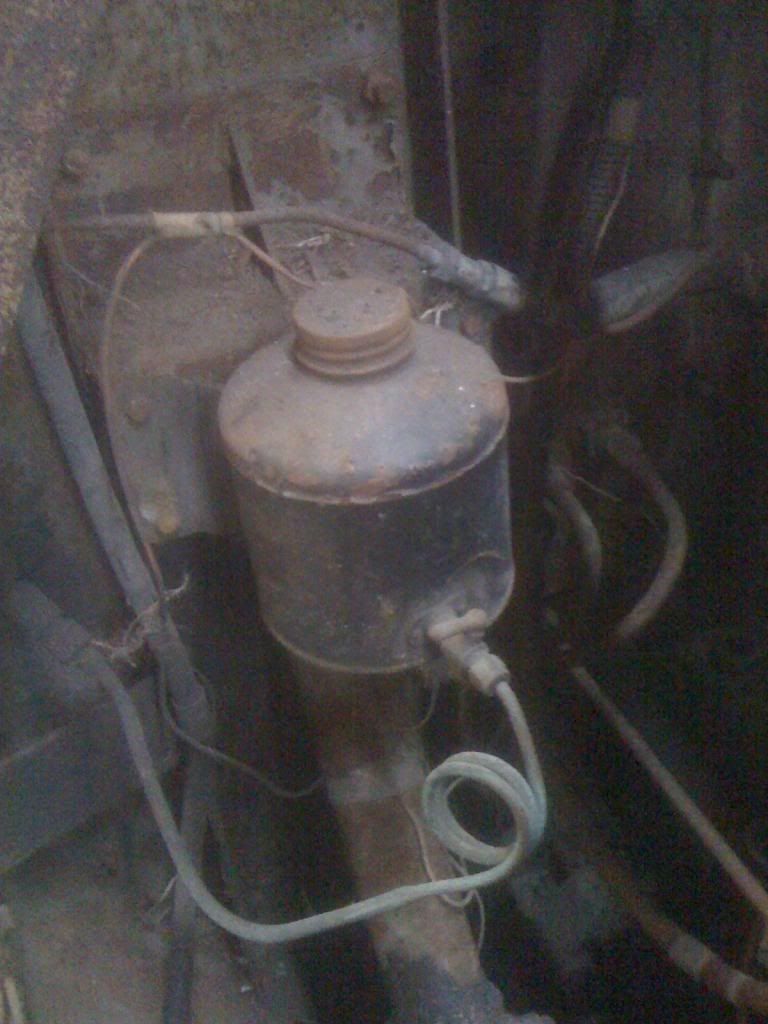
I noticed this odd bottle on the bulkhead, it seems to be connected to a hand pump in the cab. Surely too small for screenwash? I wonder if its for shooting gin into the engine for cold starting?
Kigas cold start system, your tank looks in good nick, similar to some tractors Ferguson TEF.
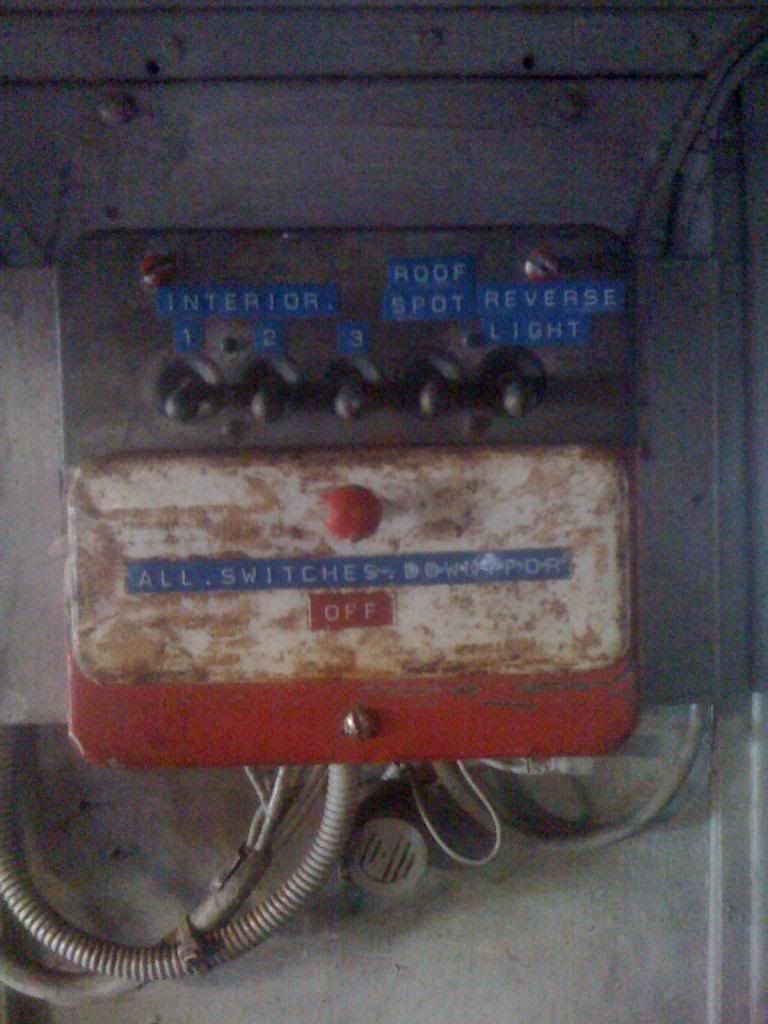
And last thing was to have a look around the cab, this I reckon must be a non-original fuse box thing? I was all ready to rip it out but it does power up some interior lights that look like they could be correct? Any idea's if its original?
Yup, original fitment, CAV 86-26T. Only first three switches used, 1- front cab light, 2- rear cab light, 3- rear body lights, also the fuse for the trafficators and map reading light. Buzzer not original. The fuses are simply fuae wire wrapped around a fuse bridge.
So, quite a productive day, rear propshaft and rigid barke hoses on the wish list now!
Anything else Duncan just ask :-) if you want any wiring diagrams or other exploded views PM your email and I'll get them scanned.
Simon
-
Just reread your post, and when you say "DP" terminates inside, in reality it doesn't as DP is actually OP - oil pressure, and this is probably an ignition wiring diagram whereas the oil pressure wiring wouldn't need to be included.
Simon
-
They are written twice inside because as pointed out it is a junction box. From the switchboard there are four cables that run to a four pin plessey type connector, with the following identifications : oil pressure switch - OP terminal D, starter solenoid - SOL terminal B, the ballast resistor - R terminal A, and lastly ign filter unit through to the coil - BST terminal C.
Simon
-
True! Even saw your clutch Andy.
-
Duncan, check page 7, about half way down, shows my accumulators in bits. I had some new seals made, and I think I should still have some put away somewhere.
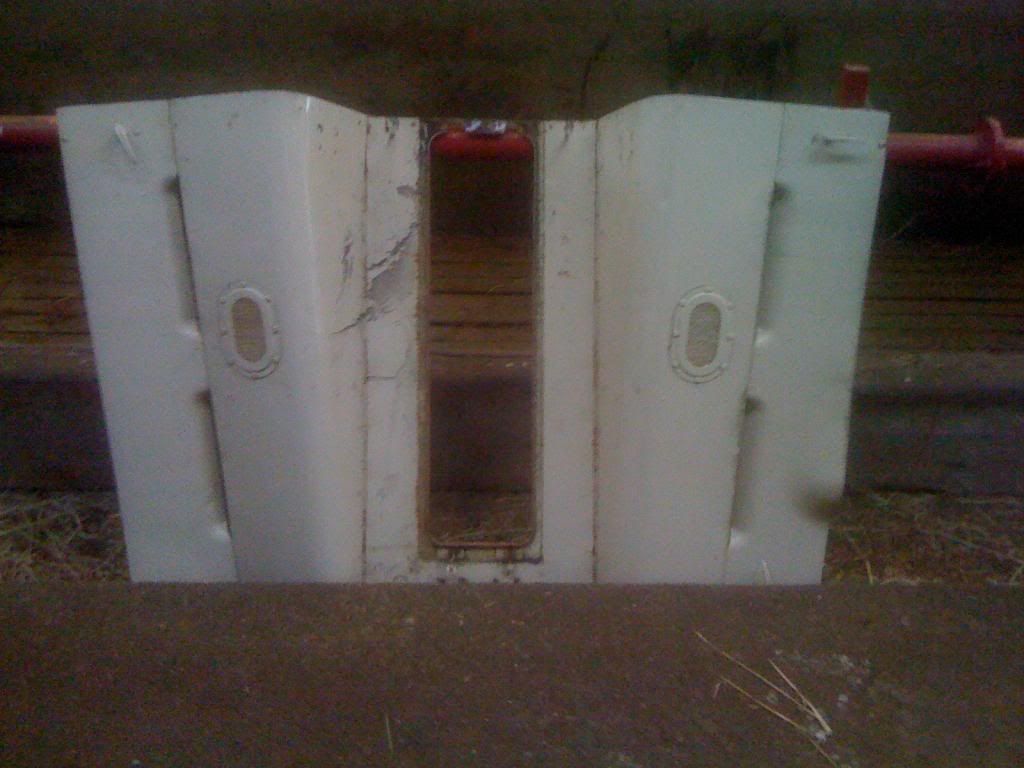
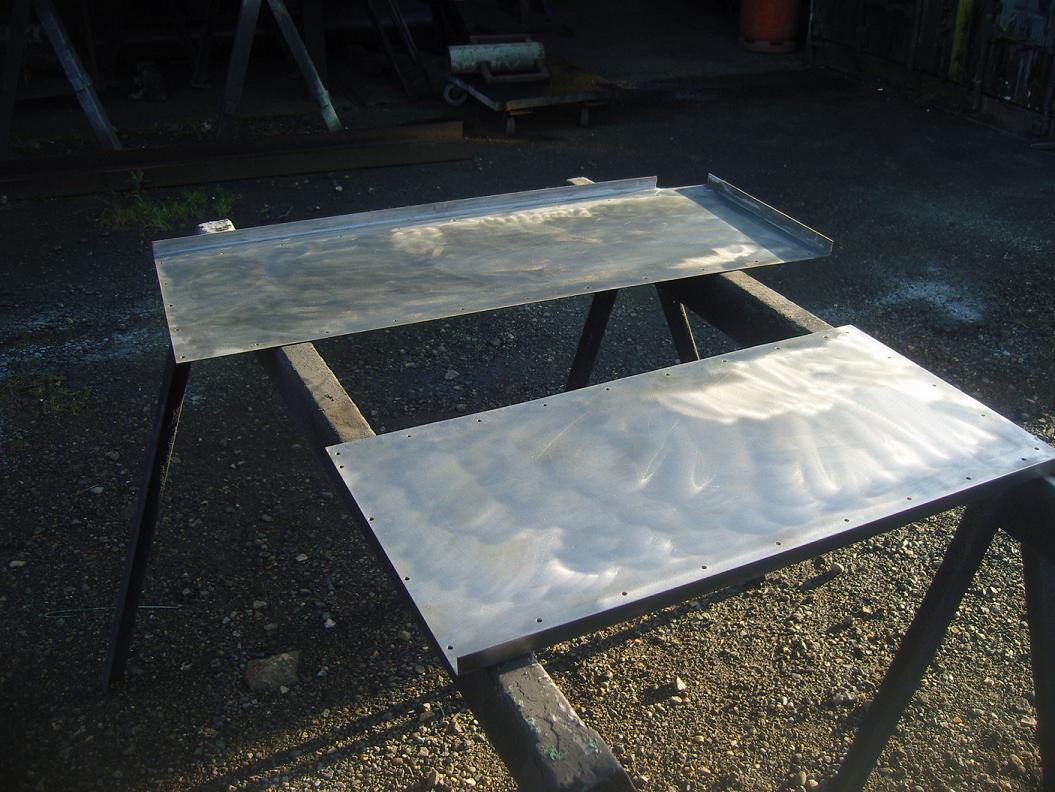
Recent progress has been a bit of painting on the cab panels, in a small window of sunshine, it rained about an hour after I got them painted.

Panels prepped and ready.

And painted, slightly blotchy with the rain, but should rub down ok. Not got all the rivet holes drilled yet on the large panel, they'll be done when I start to refit it to the vehicle.

-
That's the one. He still has a lot of other stuff to clear out. He's hoping to sort out a lot of hydraulic stuff for the next time I go up, the only snag I have is that I am running out of shed space to store it all!
-
If that fuel tank was located up near Newcastle, then it is no longer there, I had a run up to Jacksons to see Phil a couple of weeks ago and came back with a van full of stuff, another in planning for next year.
Simon:D
-
The mechanical fuel pump is still in situ on the engine, though I have a new one to replace it with when it stops working, the electric fuel pump was fitted in the system 'coz squaddies used to flatten the batteries winding them over to draw the fuel up to the engine driven pump, as it's a quite a large distance to travel, and it was an easy fix to overcome the problem. As for nitrogen charging, I have a charging head that I got from a chap in America which they use for pumping up shock absorbers, cost around £150, includes I think 3 feet of high pressure pipe and a no loss valve chuck. This is the one I bought
All I need now is a bottle of Nitrogen.
Also hope your accumulator seals are ok.
-
Happy Christmas to you all, and best wishes for the New Year too.
Simon
-
Good to see you back Duncan, thought you'd disappeared!
Simon
-
What you've done so far looks good, keep it up. And this blog.
Simon
-
As promised earlier, I now have shots of the electric fuel pump rebuild. Although it did work ok, though needing a whack sometimes to get it pumping, I decided to fit a complete overhaul kit aquired from Burlens.

As was.
There was a lot of fine brown/beige sediment in the casing, but as I had a couple of old 12v pumps, I used the best for the rebuild, the only difference between 12 & 24v is the actual solenoid unit.

The parts kit.

New valves fitted, same valve fitted to inlet and outlet, one just turned upside down.

The points being fitted, adjusted later when pump assembled.

The two pump parts before being screwed together.

Job done, just got to test it works now!

-
I will say Martian too. They were used in many different ways.
-
With regards to the floor panels, just been removing the old layers of paint and beginning to sand them down ready for an undercoating.

Ready to strip & clean.

Bit of filler, a good sand & slap some paint on.

This one is not too bad as it's out of sight under the centre seat.

Sanded ready for paint, unfortunately this also killed my belt sander! Santa I need a belt sander :-D.
Lastly for now the metal cowl bits that cover the top of the auxiliary gearbox, I've got them stripped but not painted.

I'm also in the process of rebuilding the electric fuel pump, with a new repair kit, will post at a later date. Also the floor panel locks are in the process of being cleaned by the good old electroloysis method, with mixed results.

-
I have to say I've hardly done a thing on the truck lately, so no panels back on yet, will probably leave that till spring now as days are getting shorter. All I have really done is a bit more parts shopping, and a bit of work on the removable flooring panels. Shopping has entailed laying on the settee and ordering stuff of the internet when I see something that will be useful for the rebuild. So it has been a case of ebay and a new one I've not heard of, makano surplus, whose website is oddly enough http://www.makanosurplus.co.uk , this site is full of bits & bobs for mainly Ferret, Saracen, Saladin and other armoured vehicles of the era, but as with commonality of parts at the time, stuff for softskin vehicles too. Quick service and delivery times too, 5 stars in my book, well pleased with them.

Nos B80/81 plug leads, got a spare set too to put away.

Also got these, good lengths of Unipren 12, hopefully long enough to do for rear lights etc, possibly originally Saracen/Saladin fitment. From ebay, you can find some real bargains/treasures at decent prices, I aquired 6 NOS red charging lamp lenses and 3 No plate/convoy lamp repair kits.


-
Enjoying very much! Just what sized tyres are fitted to 49 BM 10? Like the fact that doors and windscreens have been removed.
-
http://www.urbanghostsmedia.com/2011/12/massive-vehicle-graveyard-haunts-abandoned-british-wartime-air-base/
see second to last photo... i wonder if it could be bought?
It could be bought, it was still there on my last visit in March. though there has been a bit of a cull there recently.
Simon
-
Just heard on the news Clive Dunn has died, aged 92.
-
I can well remember travelling past Gamston several times probably around '93/'94, lots of Stalwarts there too, prices starting at £500 for a good one.
-
Looking good Andy, coming on a treat. Have you had any dizzy moments with all this DBG around you? :nut::nut::nut:
-
Still quite quiet lately, all i've done is aquired a few more bits of Unipren cable 18 and 50 amp, as far as I can tell from LR radio installations, but ideal for odd lengths that I need for Distribution box leads and such like. Decent price too. Also on the electrickery front, I have made up a new junction box to switchboard conduit, which I am quite pleased with, certainly better than the Mk1 I did earlier, which I will most likely redo, when I have more tinned copper sleeving.

18 amp unipren, about 12 ft x 4 lengths.

Nice new 50 amp unipren, not sure how much.

Junction box conduit. Looks half decent.
I think my next job is rewiring another Distribution box. Also really hoping to get some panels rivetted on within the next month, fingers crossed.
-
Some very nice pics on there.
-
This is the only Martian I have seen at a show this year. I believe it is ex Jacksons. Not 100% sure, but I think now owned by Andy Cox.


Leyland Martian - Return of the MadRat
in Blogs of MV restorations
Posted
Hi Duncan, the same lights were used, by simply unbolting the lamp unit and undoing the usual military bullet connectors, and moved to the other mountings. The trailer brake operates through the 4 point socket, the smaller 12 point socket is part of the NATO wiring upgrade, which also included proper indicators and brake lights. Your silencer does look like the original part, being quite long and thin - about 5" diameter, quite small diameter exhaust pipe too, 2 or 2 1/2 ". Between the fuel tank and auxiliary gearbox is the correct place for it, and the tailpipe crosses the vehicle and exits at the back end of the wheel chain cage, should be a clamp bolted to it. The trafficator boxes will most likely be empty, I think there should be an aluminium cover on either side of the cab, just behind the front doors, just screwed on. The original lighting set up was just the headlights, and sidelights (trumpet type) at the front, and at the rear a convoy plate lamp, number plate lamp and two taillights (trumpet type again), fitted into the rear body upright channel, there is a hole in both sides, and the lower portion is slightly bulged out too. The lighting upgrade removed the old trumpet tail lights, replacing them with the usual military lamps and large 4" diameter lenses, and outrigger lamps either side at the rear too. The front lamps were unaffected, apart from the inclusion of Butlers indicators mounted atop the front wings.
12 pt socket on left, with spring loaded lift up flap, 4 pt socket on right, with screw cap, exhaust pipe non standard!
Best pic I could find of the headlamp mounting points and guards.
Tailpipe routing from the silencer.
NS lamp bracket.
OS lamp bracket, and no plate mounting, no plate lamp in centre, also just see the convoy plate, the mounting for that being a bit of angle iron.
The original location of the tail lamps, in the hole at the bottom of the left hand upright, if you can make out the rusty splodge with a couple of holes in it, halfwayish between the two uprights, the out rigger mounting is bolted there.