


RMS
-
Posts
453 -
Joined
-
Last visited
-
Days Won
1
Content Type
Profiles
Forums
Gallery
Blogs
Events
Articles
Store
Downloads
Posts posted by RMS
-
-
4 years? you sure?
-
Nice trailer, shame about the rusty bit on top!
Ok, this is my first time trying to upload pics, so it probably wont work!Anyway, my new project, a 41 Willys MB Slat Grill. Just collected it last week from Belgium
[ATTACH=CONFIG]35733[/ATTACH]
-
Offers over £1,000,000 if anyone fancies it? i would have it but a little short on change this month!
-
Come accross a G8T in Louisiana today, used as advertisement for a hardware store. no engine or trans but the bodywork was in good condition and it has most of the original dashboard still, shame about the rear body though.


-
photo taken in Grand Isle Louisiana yesterday, one of the many belonging to the national gaurd in the area.

-
Thought i would share this snap, this is one of Paulob1 beasties in it element, looks perfect, sounds even better at full throttle.
didn't manage to get a snap when she bogged down though! the winch pulled Guilford 3 feet closer!!!

-
a set of brake shoes soon then? all that sand in the drums:cry:
-
Thanks guys that is exactly what I got off a good friend. But alas that has not done the job :cry: . I drive 1100 yards or so and the coil gets incredibly hot and of course breaksdown. I have also now changed the condenser and checked the points gap and that all seems fine. Any suggestions?
Check the ohms of the coil, it should be about 3 ohms for 12 volt standard coil or about 1.6 ohms for 6 volt standard coil.
-
What a fantastic weekend, great selection of vehicles there as always. should have some snaps taken from the 100ft ladder:nut::nut: (not mine, i only got to 80ft!).
massive thanks to all those that put in the huge effort to make it happen, looking forward to next year already.
-
We are next to the green tent near the green vehicle!
through the vehicle entrance straight on to the end cant miss us, we have some special import beers for you!!!!
-
just got back from the show ground, looking quite busy already, looking forward to sitting down with a beer:cool2:

P.S. the Auverland next to our tent is not mine!! (bleedin embarrassment!)
-
Yes interesting conversion, not that it ever went to Northern Ireland.
i believe Dover was the most exciting thing for this Landy, converted after release by your good self if i'm right?
-
Heres a real cracker, slow, cumbersome, slow, very poor handling, did i mention slow?

-
I Have found the new Fel-Pro USA ones are the best. always run a very very thin smear of sealant (a tip from Tony Sudds) around the outer edges of the gasket top and bottom, and as richard said check the head for warp.
Barry
-
Wow thats a great find, looks very complete with original parts, which is a good start with a GTB as finding the panels is a slow job, i know.
the best thing to do is find out where it is jammed, it takes a few minutes to disconnect the drag link, then you can see if its the steering box jammed or the front hubs, i suspect its the steering box if it has been outside for many years as water will work its way into the column via the centre of the steering wheel, possibly the top bush in the steering column has rusted solid? The steering should be very light on the GTB even when stationary (compared to other trucks of the period) but it needs a lot of turning to go full lock to full lock!
Keep us updated, i am about halfway through my GTB (chassis number 198483) if you come across any drivers seats i need one and a spare wheel mount.
heres mine as i got her home.
good luck
Baz,

-
My Jeep engine has done near on 18,000 miles now (since i rebuilt it) no hardened seats, no lead substitute.......and no problems:D
-
Whip plug no.1 out and turn the engine over until its on the compression stoke for no.1 (stuff a bit of tissue in the plug hole and it will pop out when compression builds) turn the engine until the piston 1 is roughly at the top then check the rotor arm is pointing to no.1 lead on the dissy cap. then check the rest are in the correct firing order (probably 1-3-4-2, clockwise or anticlockwise??).
if its pointing toward no.1 then loosen the dissy and get an amigo to turn in either direction by a few degrees whilst trying to start the engine, should find the correct spot, then timing can be refined with the engine running.
-
when you say you cant get it to work do you mean no spark or cannot get the timing in the right place?
-
Hi there,
Whats the price for jeep trailors please in good condition:-)
Christian
£700 - £1000 seems to be the going rate, depending on how good
-
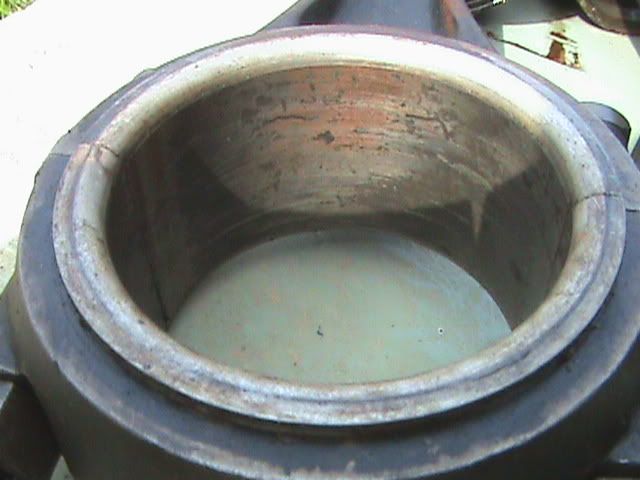
Pistons again..................
Apparently new big end shells aren't available, and the top shells are just going through the tinned surface. The top shell is different from the bottom in as much that the shells are located by a peg in the big end cap. As new shells aren't available; I had thought of drilling a new hole in the top bearing shell and inverting them, as the top shell always wears out first. I know it's a bit of a bodge, but it wont be doing millions of miles and should last ok. I doubt whether I could afford to have the shells reconditioned, so this may be the only option.

Ouch expensive! just had a 1930's four cylinder Auto Union engine big end bearings re-tinned and machined as they were knackered.....£1000!........... + VAT!!!!:nut:
Barry
-
may as well seeing as your there.
-
its the 432 motto "Pack Out!"
-
Very nice Tony, great work.
I think an International will have to go on the wish list!
-
new jeep ones are about £35-£40 depending on whether Willys or Ford. the tube is very short though, some of the old ones i have removed are up to 4-5 feet long.
I fitted a new one in my GTB needed to be a lot longer than how they come so i sent it off to Speedograph richfield and they put a longer tube on for me.
Baz


My new toy, a '41 Willys Slat Grill
in Blogs of MV restorations
Posted
cor that trailer looks even better from that side!