


Hutch3674
-
Posts
55 -
Joined
-
Last visited
Content Type
Profiles
Forums
Gallery
Blogs
Events
Articles
Store
Downloads
Everything posted by Hutch3674
-
I have now managed to make some progress on the Mighty Militant, I have clean the engine and given it a lick of paint which has uplifted its image greatly. I managed to change all the radiator hoses and refitted the original jubilee clips, hopefully I have them well positioned in case I need to change a hose with the radiator on. Two new fan belts to go on (1640 C Series) £14.00 each, the old ones can go on the spare parts locker just in case... The crankcase breather was also removed and given a bath in petrol and though;ly cleaned out awaiting refit. Also a large selection of cab floor and all wheel drive levers have been sandblasted and also awaiting refit on my next trip home. I did observe a small leak from the steering box which pissed me off a bit, after a quick investigation I realised it was leaking from the filler/level plug which was on finger tight. The reason it was weeping from the plug was I had filled it up in the shed at an estimated angle, once it was refitted to the cab it leveled itself off, so happy days. I did find that the easiest of jobs take the longest and never go to plan, joys of motoring I guess. Next mission is the removal of the bumper whilst the radiator is off.


-
Hi Rob, No this EMER came with the truck... .
.thumb.jpg.92075a3ec2fa9cd1354be13b47bed47d.jpg)
-
After several weeks work I managed to complete the Radiator and the steering box, all good to go after the engine is cleaned to a high standard. I found that after removing the radiator to get to the steering box bolts, that I have opened up hundreds of other jobs now. Everything I can see is covered in 50 years worth of oil and dirt, so I will be busy over the next few months. I did manage to get both front windows out to get in amongst the window frames and the surrounding area, With the windows out, I manage to remove both wiper motors for a good cleaning and hopefully rectified the existing airleaks,. followed by a coat of Deep Bronze Green. The last 2 months have taught me a lot, it's advisable to read the EMER before commencing any big jobs, this would have saved me a lot of time, but trial and error. Got there in the end, just got a major cleaning operation on now and if possible the removal of a lot of components to service, clean and a touch of Sky Blue. I have removed the Distribution box and the Generator panel a nice job for inside the kitchen on these cold nights. The internal wiring is in good condition, but the external wiring is in a bad way and has in the past caused trouble for starting. Well a day of rest tomorrow and back at it again next week.
.thumb.jpg.9322bf2ddf318ae1db49c48a6adff7f4.jpg)

.thumb.jpg.7e696f0458ff619dd62d2c40d859f82a.jpg)

.thumb.jpg.73a19faa24ba9455c614f99d2576e999.jpg)

-
Any ideas why there is some holes on one of the blades? I think some sort of balancing / Harmonising .
.thumb.jpg.cc0252acc9012e1e62122240e7a22f95.jpg)
-
After a few week's hard graft trying to remove the steering box, I decided it would be easier for freedom of access to remove the radiator, another long job. The hardest part being the two mounting bolts, but once these were free I was on a roll. The steering box is held in by three bolts and the one on the socket in the picture above is the easiest to access, the other two are around the front and are difficult to get any leverage on them to free them off. Next step to remove the radiator Definitely a mechanical lift due to the weight of the radiator, but I am operating under battlefield conditions and the radiator slid down the ladder at a good controlled speed, it will require a different technique on refitting. With the radiator off, I will have the opportunity to give the front end of the engine a good cleaning and to change all the radiator hoses as a form of preventive maintenance. It was a piece of cake to remove the last two steering box bolts, so it was a good move. The steering box came out through the cab with a few groans from my back, and once out it was down to the shed, followed by a good wash in petrol and the 6 nuts removed on the access panel and I drained off the oil, then it was opened up, to see how I was going to remove the steering worm shaft. I should have read the book (EMER Wheeled Vehicles D 152) first; as it states once the oil is drained " The steering worm shaft can then be unscrewed." This had me thinking could it have been taken out without the removal of the steering box, but it is trial and error, I am also thinking maybe the steering worm shaft would have hit the cab roof before it had cleared the steering column. I must remember to measure the length of the steering worm shaft prior to refitting it to see if the cab roof would allow the removal/clearance.The steering worm shaft was taken to the local engineering firm to get the threads re taped to allow the bearing cage to screw on correctly. I am now cleaning up the steering box and getting it ready to refit after the engine has been cleaned to a high standard along with the radiator. The EMER Wheeled Vehicle book states the steering box takes 2.27 litres of OC 600, never came across this on Tanks or Stalwarts, any one know of the civilian equivalent?


-
Just a quick question? There are 4 of these (Dowel type) pins/studs in the two drive axles brake drums, any idea why they are different from the others? Each brake drum is secured by 3 studs with nuts and washers and one of these dowels per drum. I need to get two made locally to complete the refurbishment of the rear axles/Brake drums.

-
Purchased in County Carlow, I loved the 6 hours drive to Omagh...
-
After another awesome leave period I managed to get some more restoration work done, The rear four wheels were removed along with the brake drums, shot blasted and Bonda Primer added followed by a coat or two of Deep Bronze Green. I also managed to complete a panel on the front of the cab along with the radiator cowling. Several other items were removed for the shot blasters too; the worst being the tailgate which was a three man lift. The brand new headlamp which was in the truck on purchase was finally fitted to replace the badly corroded one on the drivers side, with the remains of this I was able to restore the left hand one and after purchasing a set of headlamp inserts (Shiny bit) I was road worthy again. The indicators & four-ways are now fully operational after the best part of a years labors, so happy about this I made a video of them winking. Along with the tailgate I was able to remove the springs and adjuster brackets, the refitting will be fun at a later stage methinks, as the tailgate was awfully heavy so I refitted the brackets a hole further up the slide to take a bit of weight whilst opening and closing it. A locally manufactured step ladder was also fitted to the tailgate to allow me to remove the tailgate pins when I am older. Jerrycan holder & tool bin also got a clean up and a double coat of DBG. The two brackets in the drivers cab used for the tool boxes, the floor plates, drivers seat mount & floor plates along with the pedals also got a good clean up.


-
Update on the steering problem now that I am safely back at work. OK Gents, after returning back home choosing roads which felicitated a right turn only I managed to get parked up back on the drive safely. I went straight to the User handbook (EMER) and started to look for remedies, also posting my problem on HMVF and by experience I knew if I couldn't get an answer here I was in deep pooh. I took this mad notion that the problem was in the steering box so I went through the various stages of preparation to remove the steering box, I removed the steering wheel and stowed it away on the passenger side of cab. Next step according to the user hand book was remove the brake pipes from the brake pedal (Mind your knuckles) Accelerator pedal and clutch pedal, then on to the cab floor bolts and the trailer brake on the side of the steering column. I also had to remove the seat and frame and the rear floor plate so I could release the front floor plate as they overlap each other. Then on to the ball joint on the drag link, split pin out and that is as far as I got even after a local trucking company gave me a plastic case with various types of ball joint splitters it wasn't for moving anytime fast. Then I received the messages above from HMVF and after reading them several times I returned to the cab when I spotted the bolt and tab washer on the steering column, I removed and unscrewed the cup on the top only to discover a lot of iron fillings on top of several damaged seals. The nut that should have been secured by the grub screw (Alan screw type) had been loosened off or lost its grip on the shaft, which I believe allowed the steering wheel to be screwed down on to the top on the column and stopping when it reached its lowest point. I was now blocking a minor roundabout and it wasn't long before I realized I could apply a right hand lock and loosen the steering a bit and thankfully I was OK to limp home. I tried in vain to reassert the nut but the threads were to far gone it was impossible, so I took it to the local garage equipped with a lathe and he re cut the threads for me, I was hoping that I could now refit the nut, but the shaft wasn't having it either. I was told if it wouldn't take to the shaft then bring the shaft here and they would be able to re cut the threads. I again tried to split the ball joint but to no avail. Completely disappointed after coming to a standstill and my time was running short. I will now have a local mechanic to do the splitting for me in my absence, that should leave me three big bolts to remove on my return home. I hope to then strip the steering box down and remove the shaft for re threading to be completed, then the reassembly after checking everything else in the box.
-
On return from my MOT, I put a full right hand lock on, as I was going to be close to the kerb I tried to put more of a lock on that was possible maybe pushing it beyond its limit. I noticed the steering to be heavier on left hand locks on the journey home. Finally the steering refused to allow a left hand lock to be applied on an exit off a roundabout. I tried a right hand lock which was possible. I did notice after a few struggles that on turning the steering wheel it was actually screwing itself closer to the steering column shaft cover (Like a nut going on to a bolt). Any ideas? I think I may have upset the steering box. What think ye?
-
Convoy / Number plate light.
-

What was this for? Job card? 1959 Army Moke
Hutch3674 replied to 59Prototype's topic in British Vehicles
The last time I saw one of those label holders it was on an MFO box, lol. Not seen one in a Military Vehicle before... -
Great job, my eyes are dim I cannot see lol, I can make some of it out...11/22-1 (24v). Great job Gents Hutch

-
Nice, It hasn't changed much over the years. I downloaded the fitting instructions from that link, it may be helpful. Many thanks, Hutch
-
...
-
Anyone have an idea where I might be able to obtain a 24v Hella Four Way Flasher switch from? Required for an AEC Militant MKI (1966), I am sure these were once fitted in the land rover dashboards in the 80's.

-
I found that even with a brand new dashboard that the yellow labels on each wire the black lettering wore off very quickly if handled to much so I got a small printer (made by Brother Flee bay). Handy tool for all sorts. The indicator switch was I believe the same as the champ. Badly positioned on the Milly if you have long legs lol. I've broken one all ready.
.jpg.e4aa39ff9d9dcd75002884a62ed97f62.jpg)
-
Another 7 wonderful days spent on the Mighty Militant, I managed to remove the two front wheels and the spare, split them down and had the wheels shot blasted, primed with BP and a nice finish of DBG, plus the two brake drums. I would like to have went deeper but time was against me. Removed 50 years worth of paint off the front left hand corner and primed it and covered it in DBG, took a few hours of work stripping paint with an old Black & Decker heat gun. Next time home I would like to get the four rear wheels and drums sorted, and if possible the front bumper off along with the tailgate, hoping I will be able to achieve this in good time I might be able to do another panel or two. Still no ignition, just after I spent 11 months getting the indicators to flash, every day a new noise. I have the lights, cab interior light, horn, I'm thinking now my fault is between the Rubber block/distribution box and the dashboard as the rubber block & wiring behind the seat are in poor condition, I am hoping to by pass the armoured conduit and try this as a process of elimination. I am hopeful I will find my problem and have it rectified, and reward myself with a good 20 mile road run. Hutch


-
I did ask if it would be OK due to the bad weather, and that I would line the worktop with an old towel before applying the shuttering ply. Bit Bl**dy cold in the shed.
-
After an awesome 3 weeks at home I managed to make a start on the restoration of the Mighty Militant, removing 50 years of paint, and re applying some fresh Bonda prime, followed by a coat or two of Deep Bronze Green. I removed both foot steps on the front mudguards and the two light cluster housings, the dashboard and the supporting bracket. The engine cover was also removed, I managed to clean up and treat the immediate area behind the dashboard to save me the trouble of removing it at a later date. After 11 months of playing with the indicators I managed to rectify the problems, one bad earth and a new flasher unit, and a bit of help from HMVF Friends.


-
Awesome Result, Many thanks Troops
-
Hi Troops, after the purchase of my AEC Militant MKI 38EP19, I discovered these back rests in the cargo compartment. I don't believe they belong to my Militant and at a recent vehicle show I asked several owners of various vehicles (Champ, Jeep etc.) if they were familiar with this type of backrest. No one up to now has been able to identify them. Any ideas?
.jpg.f8634feaaeb8a76e96854dc73dd312b1.jpg)
.jpg.65566f55f5e71553ac16897f4c8f3a68.jpg)
.jpg.bcb0260232f794af6b2cf9fa64d624cb.jpg)
.jpg.909ad710bc1775023329b2cfba7f76b4.jpg)
-
Steel wheels, heavy! not that I weighed them but I am told they are 70kgs in weight, I did try to buy a spare one on flee bay, and I was told to sort my own delivery or collect in person, estimated cost was a 3 figured sum from some of the leading delivery firms. I am looking for one or two nearer to home for collection in person.
-
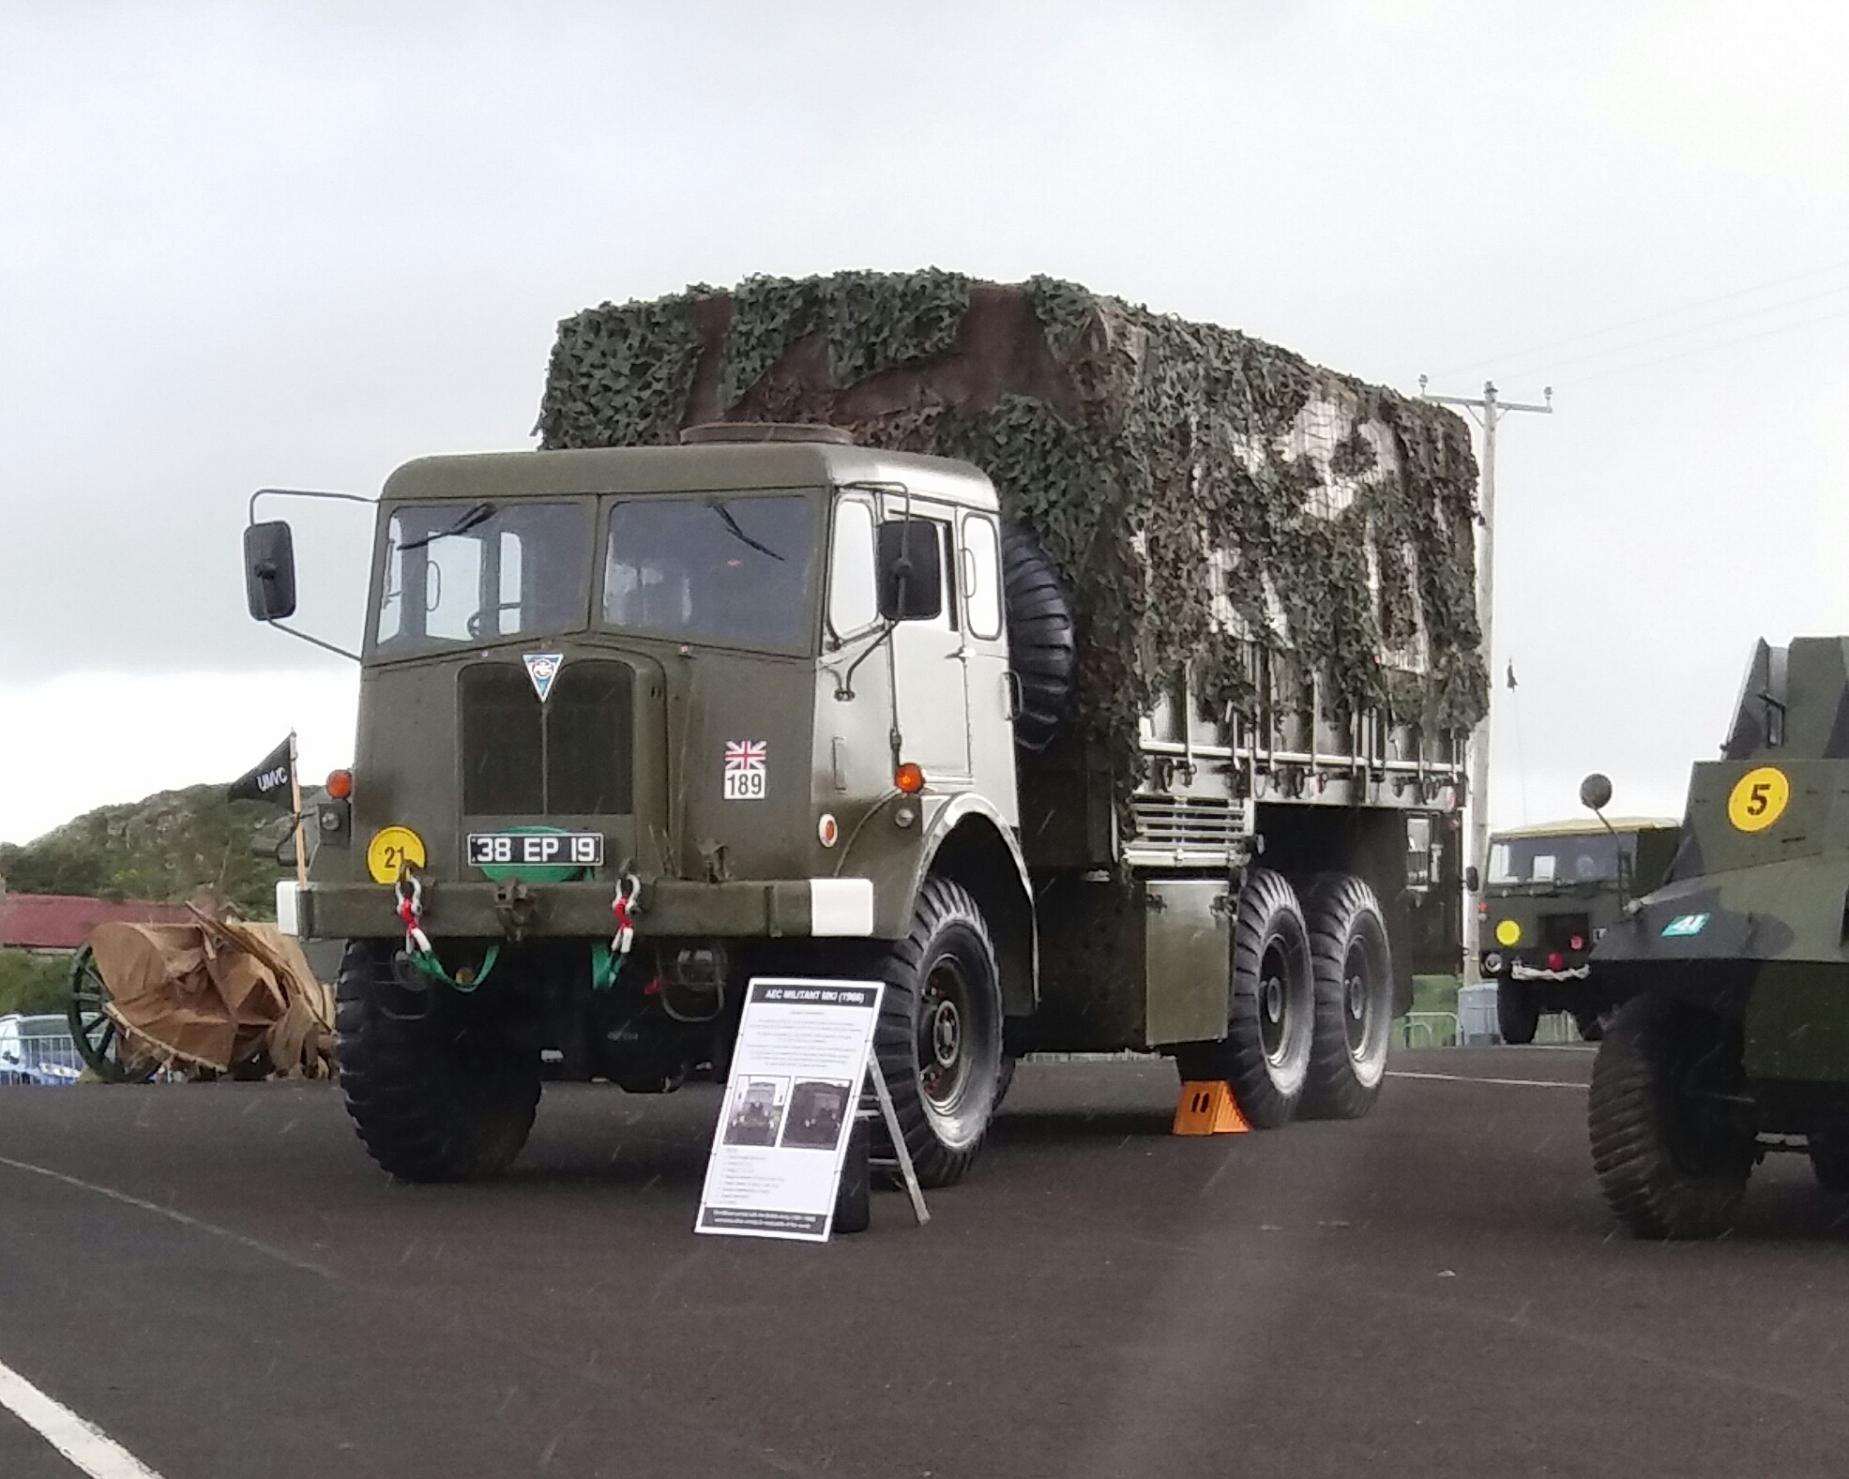
38EP19 Done very well at the Portrush Military vehicle Show, our first show and we managed to secure the "Chairman's Cup" for best vehicle. Happy Days and a great start. Anyone help out with the AEC Militant MKI (1966) wheels below? One wheel has 20 split rim nuts and the other 24 split rim nuts, everything else is fine. Was wondering if the wheels are from a different vehicle or did the Mil change design of the wheels from original spec. The spare wheel also has 20 split rim nuts, which leaves me to think that the 24 split rim nut wheel may have been an original spare wheel. What think ye?


-
Just a quick update and progress report for my last trip home...All 6 recently purchased wheels (HMLC Stalwart) have been stripped down, tyres, inner tubes & rust flaps removed for refitting in the near future. Tyre bashing was fun with limited equipment, I managed to salvage a brand new inner tube Marked 1965 W.D (War Department I think) and the rust flaps also were in great shape. So I hope to have several spares to keep me on the road in the future. The 6 rims are now on Flee bay for a little cashback I hope). Next trip home I am hoping to refurbish wheels and brake drums, after the gardening is done of course (Not).


.jpg.5134afe7a9d49554fc43b6773eb22b29.jpg)


.jpg.d76998a52be2c6bbae1ef2c43d798b2b.jpg)

.jpg.120cd2b35700303441b91a4083d096cd.jpg)

.jpg.5fea8ef1845ee7144a4f7f8b22e8dd1f.jpg)

.jpg.475939d104fe30fd59c8f57519f12aad.jpg)

.jpg.1a14aec4d7ddbf0c5f983f298ac24544.jpg)


.jpg.e4aa39ff9d9dcd75002884a62ed97f62.jpg)


.jpg.f8634feaaeb8a76e96854dc73dd312b1.jpg)
.jpg.65566f55f5e71553ac16897f4c8f3a68.jpg)
.jpg.bcb0260232f794af6b2cf9fa64d624cb.jpg)
.jpg.909ad710bc1775023329b2cfba7f76b4.jpg)


.jpg.5134afe7a9d49554fc43b6773eb22b29.jpg)