


greyhound32122
-
Posts
180 -
Joined
-
Last visited
Content Type
Profiles
Forums
Gallery
Blogs
Events
Articles
Store
Downloads
Posts posted by greyhound32122
-
-
good day radiomike7 I would like to uprate the c6 nfl in my diamond t 980 if possible. I didn't know compression ratio is different thought it was just fit supercharger and alter fueling. Any advice or info would be greatly appreciated. Regards sam
-
looking for a Rolls Royce C6 super charger as fitted to Scammell constructors etc must be complete with inlet manifold and drive gears
cash waiting and happy to travel for right one
call/text 07533067157 any time
many thanks Sam

-
lots more progress on 1531 i have pretty much all the air lines fitted to the truck know part from the winch clutch and trailer hand valve lines. as the truck is generally up together. know i have made a start on the winch which luckily is not seized apart from the 2 control levers but a bit of heat and they are starting to move. the 400 odd feet of winch cable is not to bad but i will be putting a whole new cable on as it is not something i like to assume is going to be ok when winching hard.
aiming to turn the winch around in about 2 - 3 weeks then my sights are set on sorting out the Rolls Royce C6 engine so starting to get into the interesting bits know.
regards sam


-
 3
3
-
-
making a lot of progress on 1531 know, all the wheels are built up and fitted, the range box is finished bar fitting the new top cover. the hand brake mechanism is mostly in i just need to get the shoes/pads lined and fitted. almost at the stage of choosing to start either the winch or the engine.
hopefully tomorrow will be another good day so should have another up date coming shortly.
regards sam


-
5
-
-
a lot has happened since my last post the range box is know back together and installed into the truck, both air tanks are fitted and have got the rear wheels fitted so 1531 is know much easier to move about know. also farmed a lot of the painting out as it was easier to get all the small fiddly parts sprayed than waste a lot of short day light hours painting with a brush.
the header tank has come back from being repaired as it has been frosted in it's past life and had a 5 -6" long crack that has know been welded up and just needs a few little jobs doing to it then it can be painted as well. there is a load of small parts that i can get on and fit then ounce i have tidied up the parts i have painted i can move onto the engine and winch.
at the point were every part that goes on makes a big difference to the look of the truck know which is such a great feeling, also today marks exactly 1 year since i started taking her apart.
regards sam


-
6
-
-
thank you doug it is great to have a decent amount of time off to be able to get loads done to the truck.
succeeded in getting the range box in bits today, one selector shaft was seized and every thing on the out put shaft was rusted up from the flange nut right down to the bearing. generally very good condition all the gears and bearings appear to be very good so it should just be a clean/paint reassemble exercise.
tomorrow will check what is good or bad and start cleaning & painting.


-
1
-
-
Christmas holidays have started so have 2 weeks to spend on the Diamond and not wasting any time getting stuck into the long list of jobs.
started with refurbishing all the different air valves and switches for the brake system which only needed cleaning as all were internally very good with no perished diaphragms or bad springs. also stripped the radiator as i am making one good rad out of two as i wanted the header tank with the "DT" emblem but that rad had a bad bottom tank so a lot of work but worth it. lastly i started on the range box this evening which had water in it which is no surprise at all with these and the gear set is very good being the upgraded helical set which was fitted to most Rolls Royce powered Diamonds during the upgrade process in the 50's - 60's. hopefully it will be just a simple strip down, clean, paint and re build.
that is 2 days down 12 more to go can't wait to get back into the shed.


-
to answer doug's question we use a steel plate equal in thickness to the original tank in this case 2.5mm and i make it big enough so that all the weld is on good thick base metal (tank). in this case a 2" x 2" patch which i curve so it matches the radius of the air tank and helps retain strength. then i just do a single run all the way around with a stick welder at around 35 - 40 amps which gives good penetration with out under cutting.
in the UK it is very common on older vehicles to see patched air tanks or brazed copper air lines etc. i know were BlueBelle is coming from but from working experiences with steam boilers which i have hydraulic tested old riveted boilers to 300 psi which have a working pressure of 200 psi in steam. these boilers have known thin spots like 2 mm thick or less and a hydraulic test does not make the boiler fail and that is fact they always fail when hot and when they do fail they just drip and hiss.
either way i know the air tanks on the Diamond T are sound and i know to keep an eye and a ear on them as with any old vehicle. i have seen air tanks on another diamond t with braze repairs and never give a problem. of course a repair is only as good as the person who does it. besides a modern air tank is only 1.5 mm thick when new and the tanks on the diamond t are 2.5 mm thick and run at a lower pressure than modern trucks so i can't for see any issues.
-
1
-
-
the air system is 110 psi and is perfectly safe and if you go worst case scenario you would just hear air leaking out.
the air system on a truck does not have to be in test, the air tanks on a truck are not pressure tested they either hold air or they do not.
i build steam engine boilers for a living and i have seen boilers hydraulic tested to 300 psi or more and even when they are down to 2mm of thickness and they don't leak or fail. worse they do is start to drip or hiss and not much more.
trust me if i thought they were no good i would have scrapped them but having had a boiler inspector thickness test, put a camera inside and pressure testing them to 150 psi on air they are sound part from one spot were it had managed to make a hole which the inspector said to patch it as it is a very common practice.
thank you for raising the questions though as it is nice to see someone taking an interest in these things.
regards sam
-
1
-
-
not a lot of bolting parts to the truck at the moment as at the stage of just cleaning and painting various parts ready to be fitted, have sent the wheel rims off to be blasted and painted. last few days have been spent repairing the air tanks as there were some pin holes and small area's of pitting which i have built back up with weld.
this after noon i also got very lucky and a very nice gentleman, Graham Upchurch actually photographed 1531 at the 1991 Knowl Hill steam rally and boy doesn't she look so much better back then.


-
1
-
-
hi Doug
yes it is kind of funny that john keeley used it for moving engines about and i will do the same ounce it is finished, got plenty of engines in the yard to shift.
regards sam goddard
-
cheers John can't wait to get her rolling again.
lots more work done on 1531, rear axle hubs have been swapped around so the wheel studs are on the right side and very surprised at how clean the brake drums and shoes are in side as they have been sat in the box for over 70 years and never turned a single rev. started on the winch rope tensioner mechanism as it is completely seized up so will need a lot of work to get it back to a usable standard.
finished the weekend off by getting the last rear axle in to 1531's chassis and really looking forward to breaking the 8 rusty rear wheels down for blasting & painting.


-
1
-
-
thank you very much Pete i am not a fan of electric technology bad enough the diamond has lights etc to wire in!
got the first rear axle in today which is not as simple to fit as you would think specially when doing it single handed but got there in the end just need to top the oil level up and paint the hubs/break drums. the rest of the axle/diff i will leave as it is as it would be criminal to paint over all that original 1945 olive drab paint which has survived for so long so it will be painted with a oil/paraffin mix.
the second axle needs reconfiguration as it is turned 180 degrees to the first axle so the left hub moves to the right and vice versa so i got to swap the hubs rounds so the right & left hand wheel studs are the right way round. also the drive flange needs removing and the bearing dust cap fitting then it is just the simple task of following the same process as the first axle.
plan to have 1531 rolling on all 10 wheels by new year so should manage that goal.
regards sam


-
1
-
-
couple of late evening's after work has got the wire rope roller under neath the ballast box made and fitted, with thanks to Jason Jeffries for lending me his to copy as 1531's original wasn't good enough to get measurements from. today me & Dan Jones got the first NOS rear axle out of the box and got some clean oil in side it and know terns over very nicely by hand. so getting a bit closer to rolling on all 10 wheels again, have also made the decision to only paint the hubs/drums as the original 1944 olive drab paint is to good to paint over and i think it is always nice to keep good original paint were possible, but am open to peoples opinions on painting the axles.
know the forum is back up and running i will keep the updates coming on 1531's progress.
regards sam


-
1
-
-
thats it got my 969a back after looking for it for about 9 years its ok but looking for a exhaust manifold petrol rxc still fitted in truck any one know where i can find a manifold
evening Andy
David Wildenberg was trying to get some from the states and i know he got a can in the last month with a load of DT parts in it so he may have one.
regards sam
-
thank you for the positive comments every one, yes Mark the chassis is welded some by me and some during it's service life, i have welded two small sections into the top of the chassis rail's just under the ballast box as they had rotted right through plus building up other corroded area's. Also the British army cut a piece out of the rear cross member and welded a thicker piece in then welded webs in the back to make it stronger for towing the 50 ton Dyson trailers as post war the T's were grossing 90+ tons when they were only ever design'd for 60 ton during the war.
i have been told stories by T drivers from the 50 - 60's that rear cross members were ripped clean out of the chassis but i think this was more to do with the cross members being bolted back in after modification instead of being riveted.
regards sam
-
thank you cosrec can't wait to drive it down the road.
-
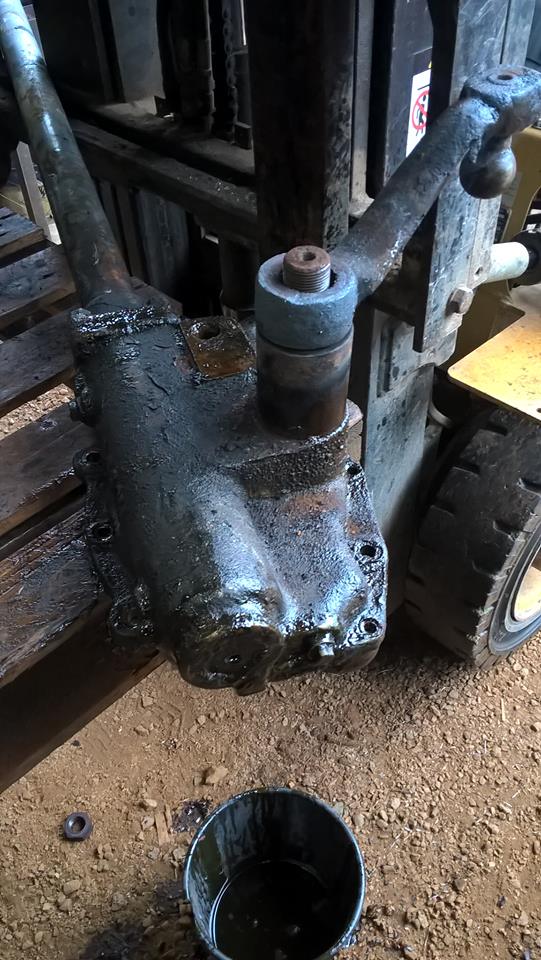
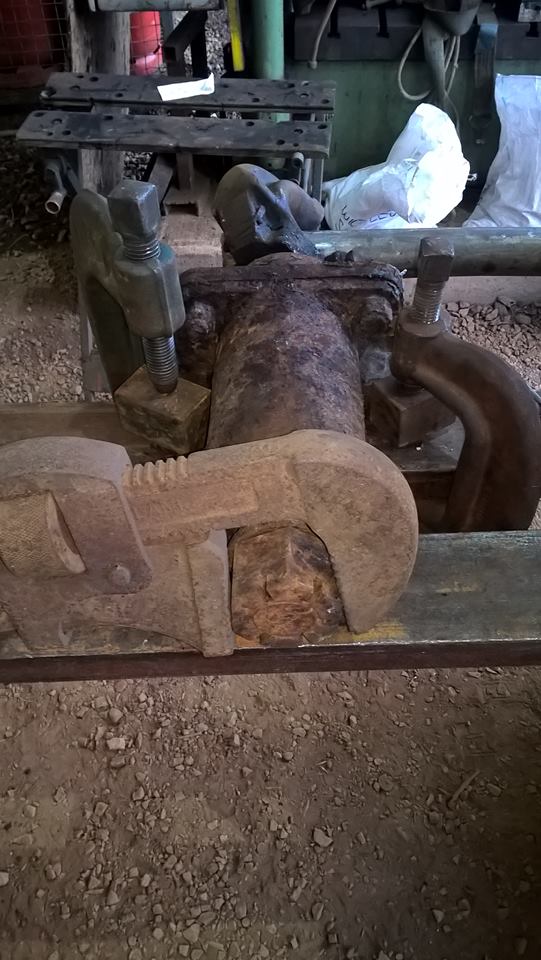
front axle break valve/pipe work cleaned & serviced the valve was in exceptional condition internally considering it looked rough as hell on the out side.


-
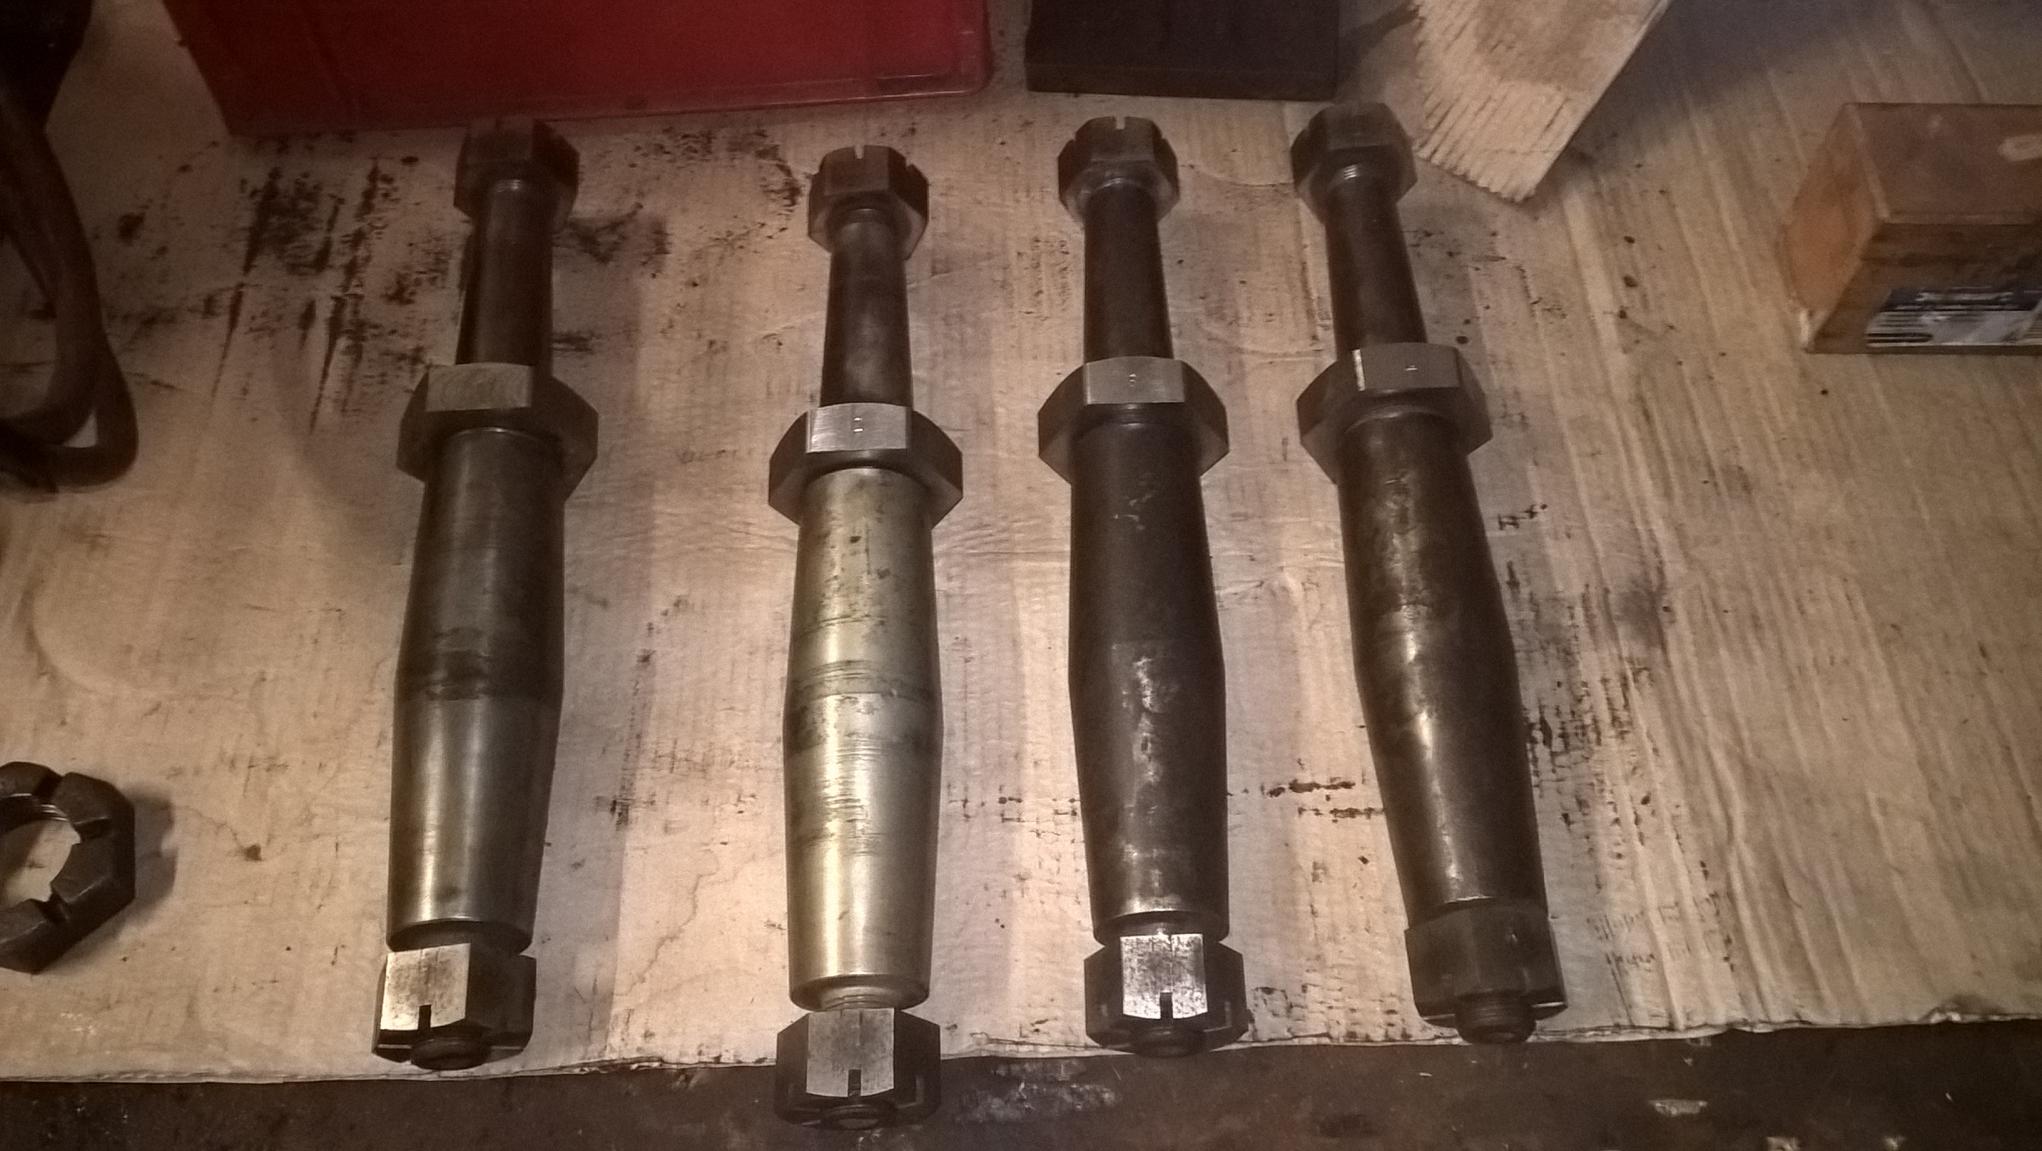
Dam good day, torque rod pins & rods fitted, steering box stripped & blasted ready for paint tomorrow and 2 brand new 1200,20's turned up as well happy days

😊


-
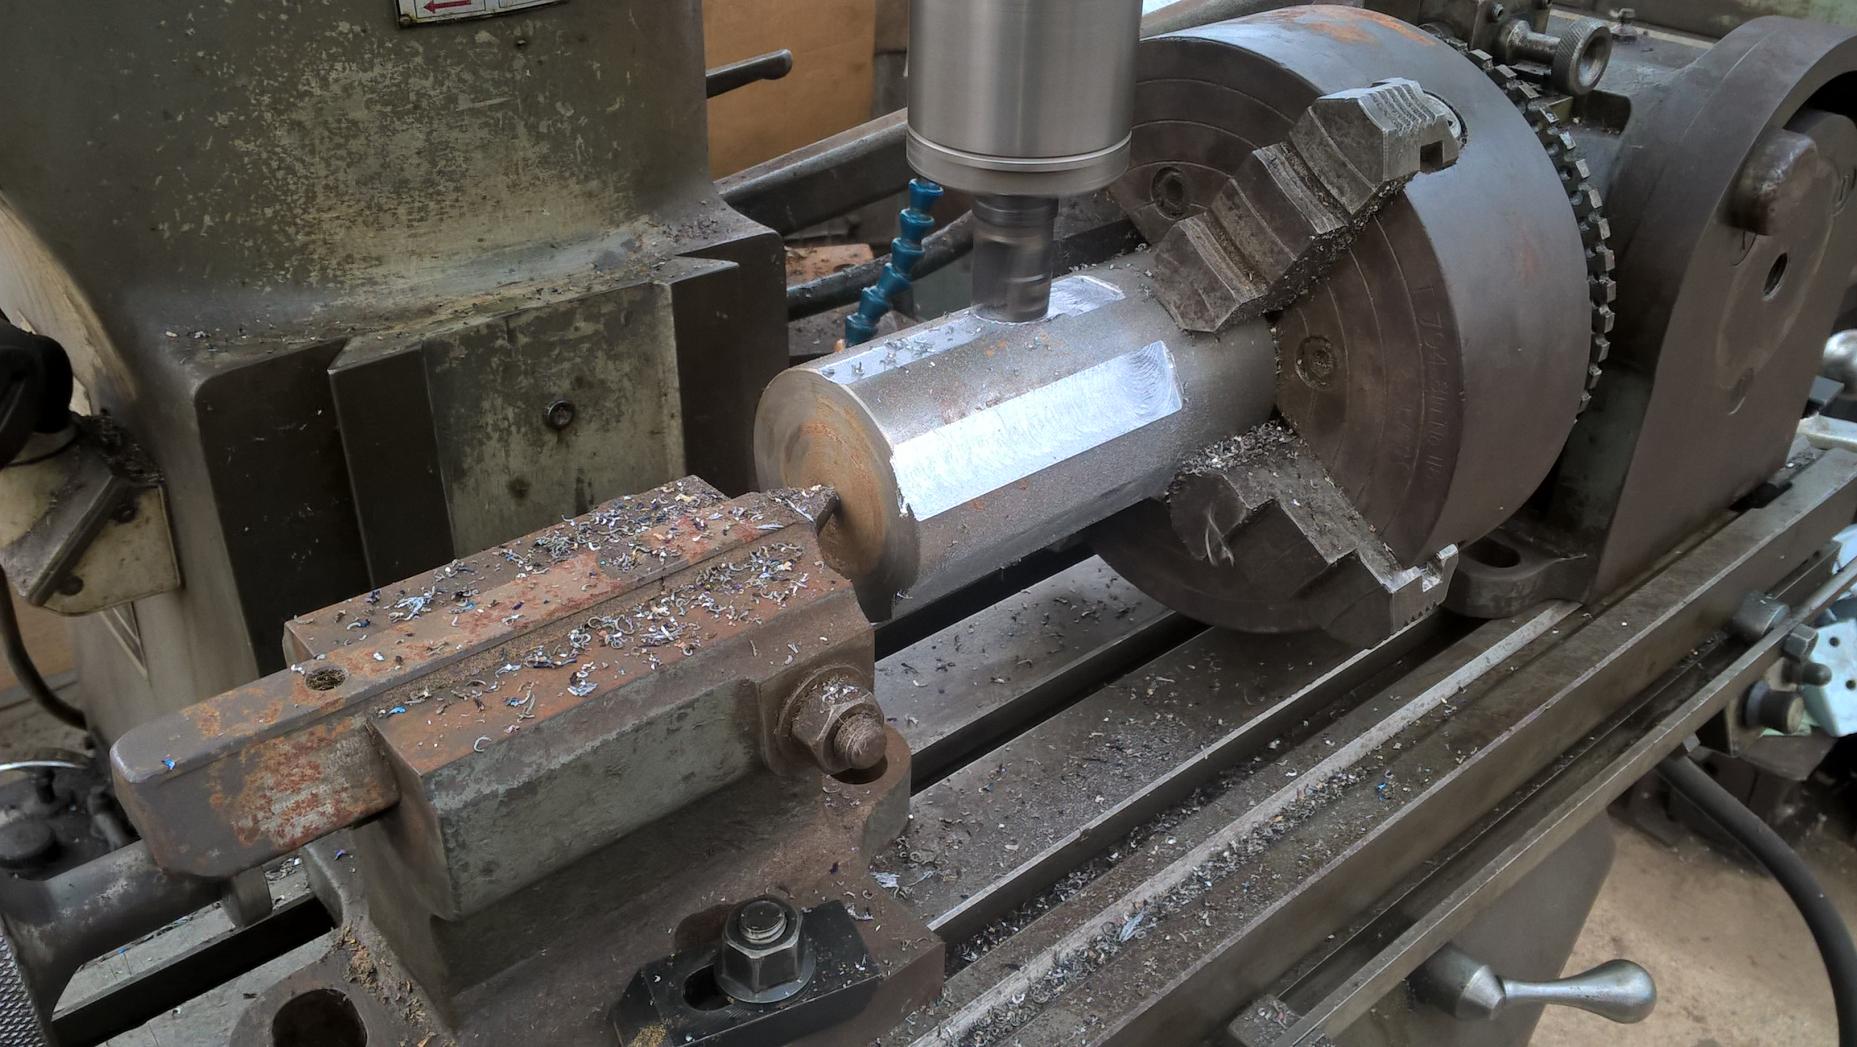
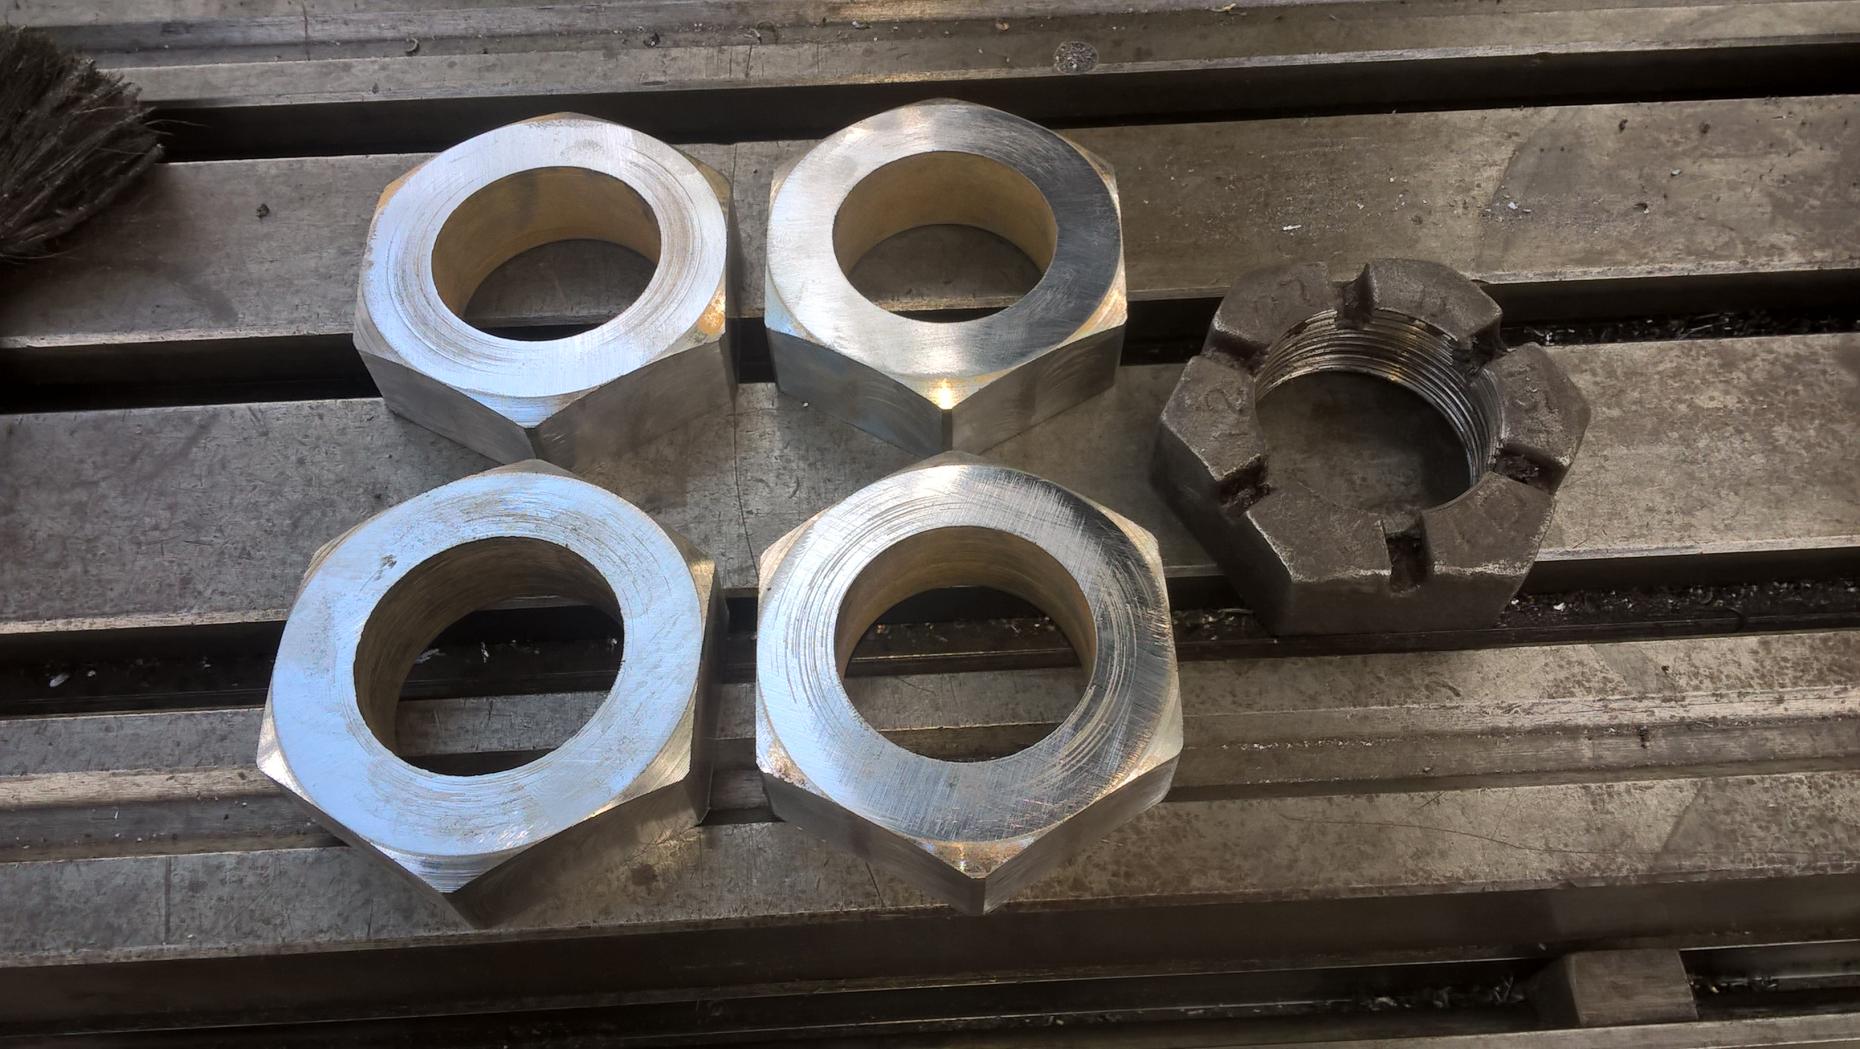
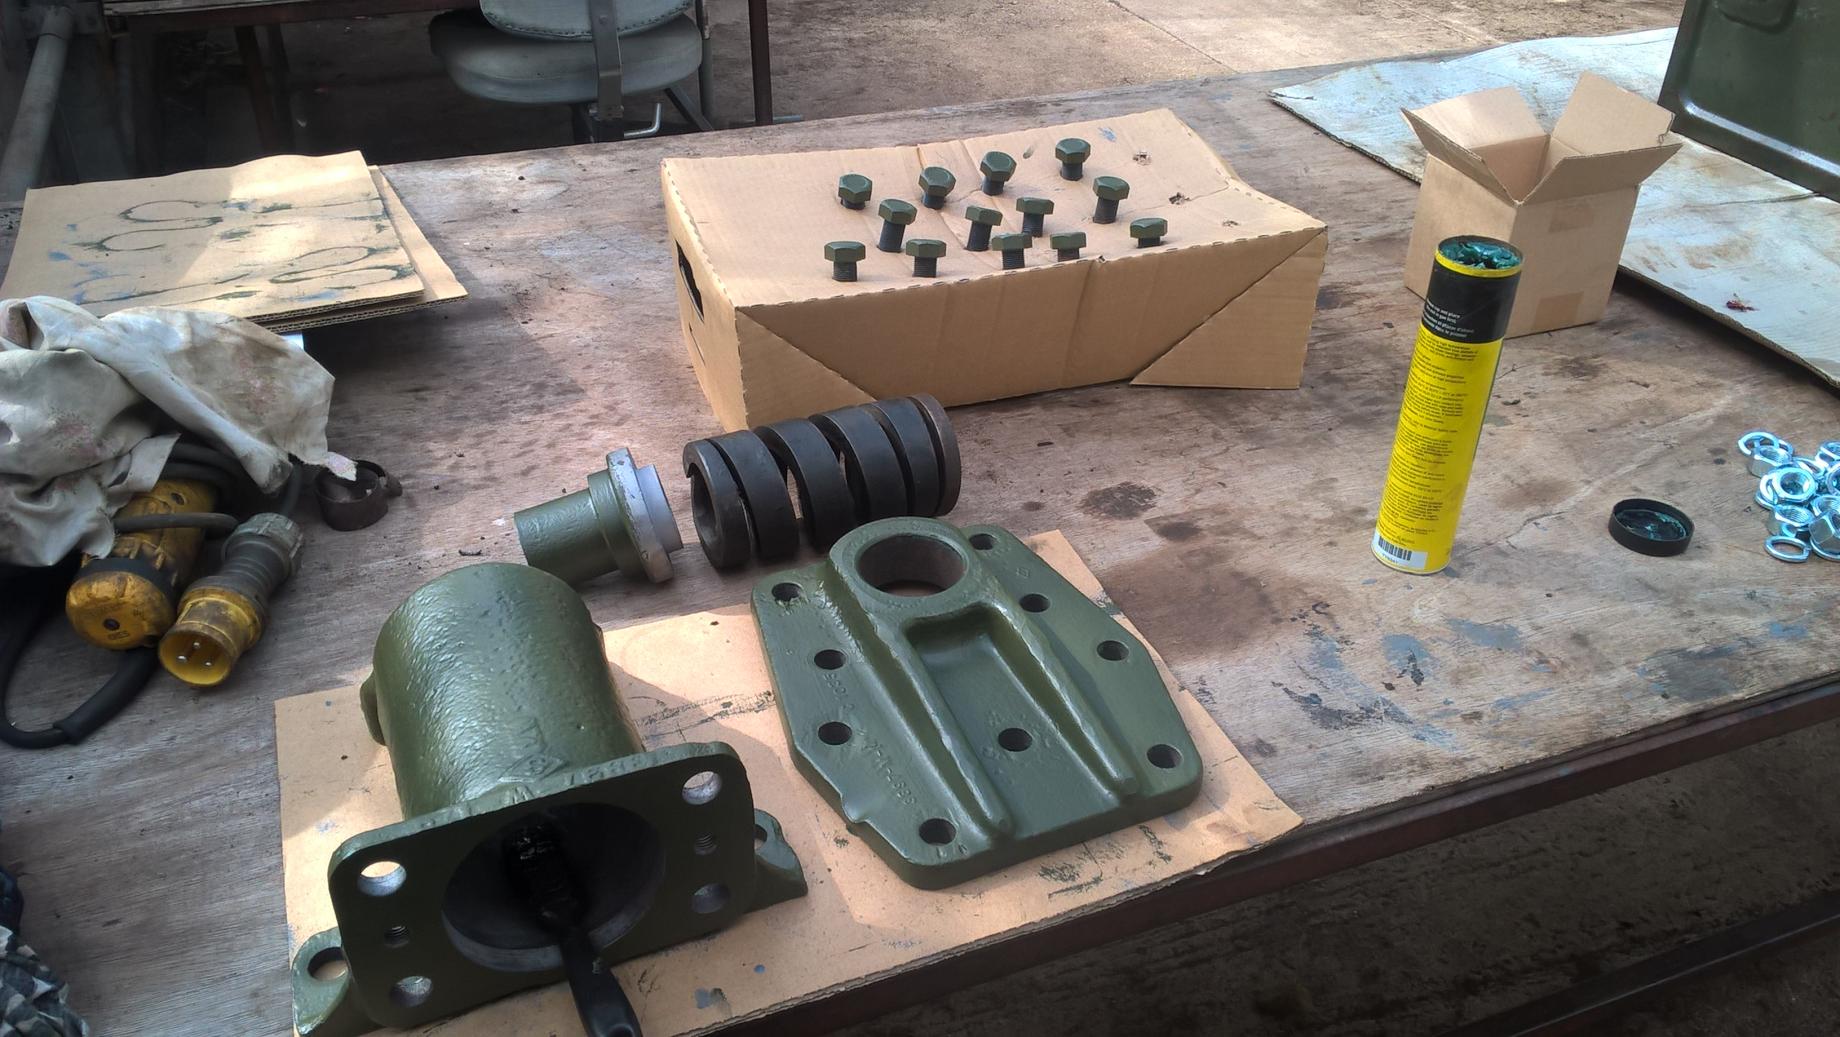
large torque rod pin nuts finished just got to clean the split inserts up and the pins can be installed. rear pintle hook spring case has been stripped painted and re fitted. thank you to Andy Blackford for screw cutting the nuts, and showing me how easy it is to do.
large torque rod pin nuts being made from scratch, threads are screw cut as they are an unusual thread for the dia.
rear pintle hook spring case being reassembled and fitted back to the chassis.


-
well being young and single helps John
 cerney next year you can drive 1531 and let me know what you think.
 -
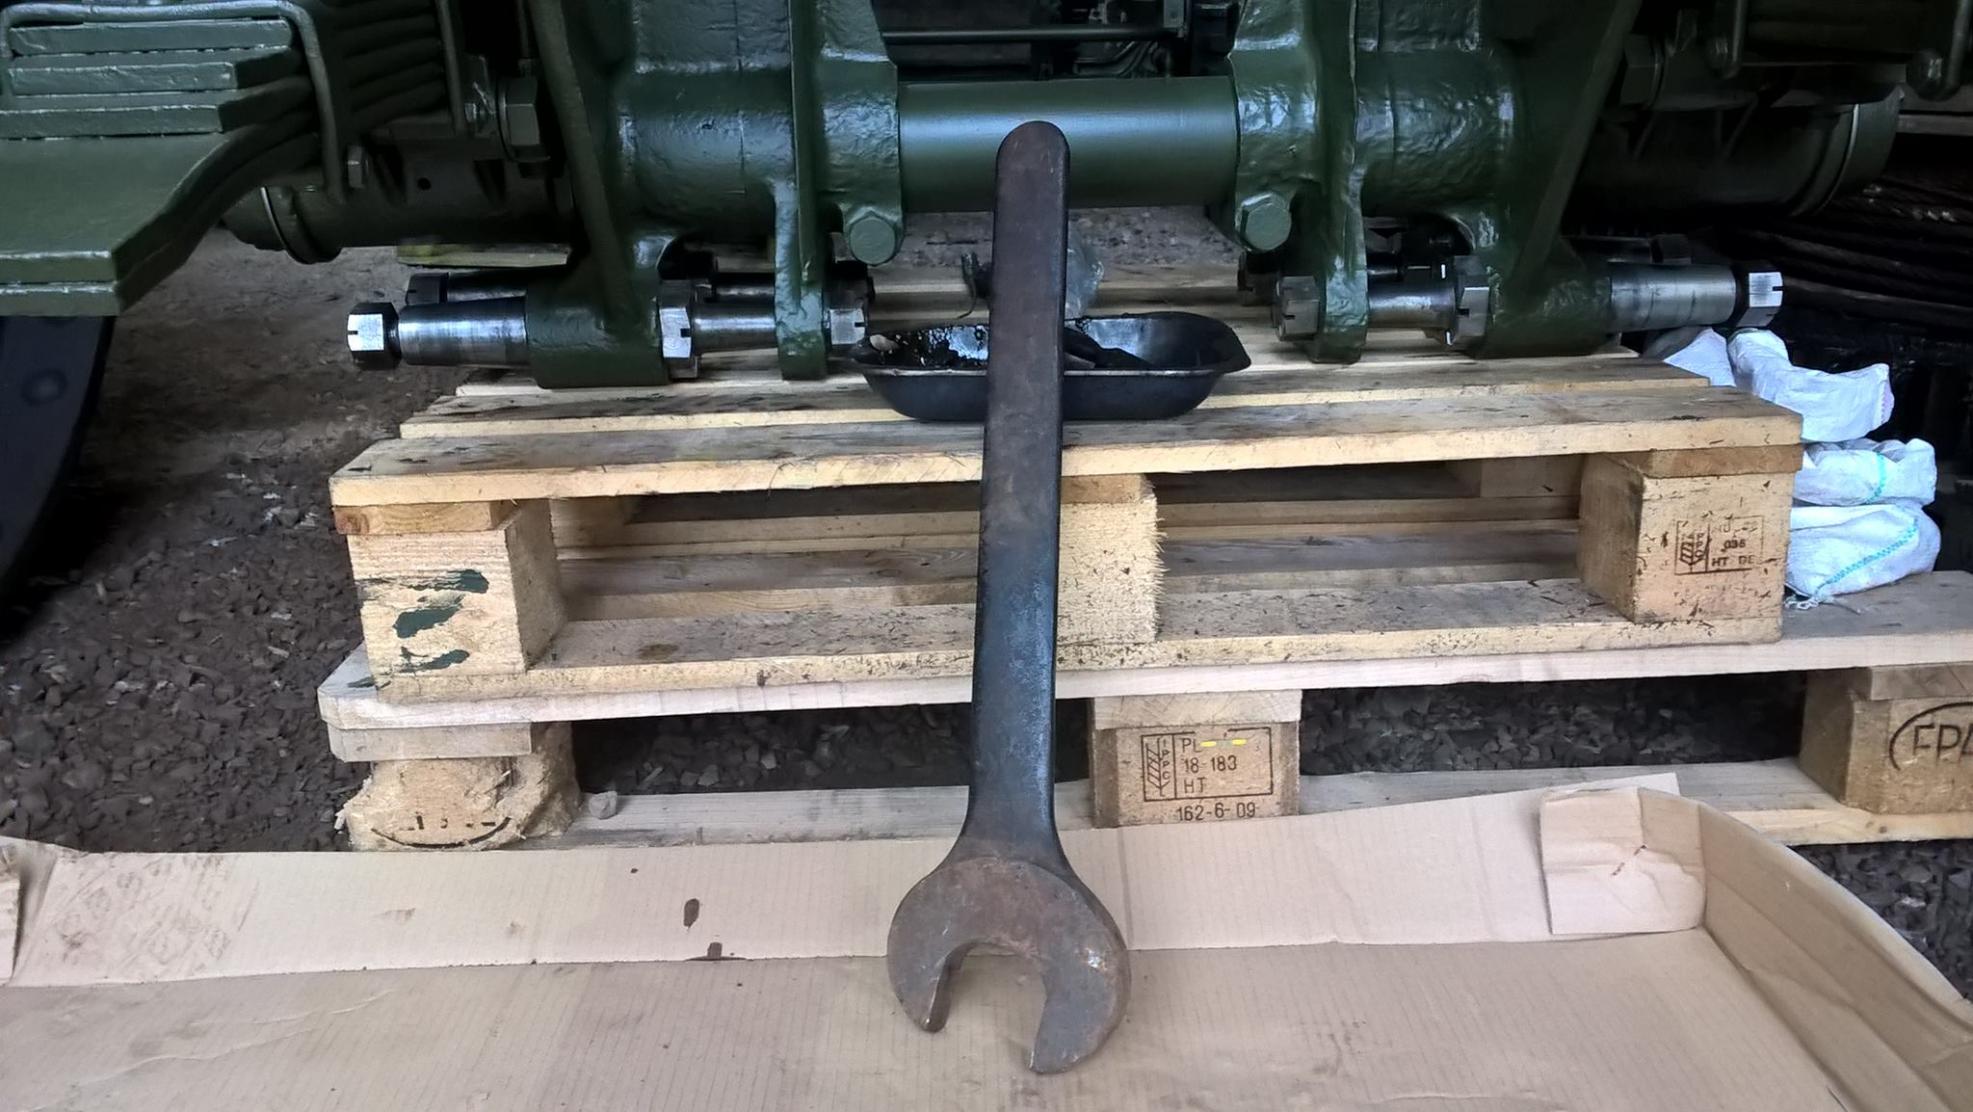
thank you draganm yes i am making my own castle nuts the originals were so heavily corroded you would never undo them.
also making any of the special nuts and bolts as you can't buy them of the shelf and trying to find NOS parts is very unlikely, my thinking being a man or women made it in the first place so no reason i can't.
regards sam
-
lots of progress on 1531 the rear winch fare leads are in, a couple of small parts have been cleaned, painted & fitted and in the process of sorting the rear pintle hook out. next couple of jobs include painting the steering box and getting the NOS rear axles out of their crates and fitted to the truck.
new torque rod nuts
front axle air fittings cleaned & fitted
replacement lower torque rods
some of the various parts being blasted and painted
winch fare leads being assembled
rear pintle hook being disassembled
more pictures to follow
regards sam


-
just finding the vehicle itself is a fantastic find.
know i know nothing about HT's so what is the difference between international, autocar, white & diamond t??
regards sam


Wanted: Rolls Royce super charger
in HMVF Classifieds
Posted
quite a lot of differences but is there any reason you couldn't put the super charger straight on to a NFL and adjust the fuel to suit? the gear boxes will be fine as the Wynn's diamond t's ran 220 cummins with no issues and some 980's have rolls royce eagles fitted with no issues and i no of a 320 cummins big cam driving original transmissions with no issues. week link is the single plate clutch i think.
if you don't think it is wise to fit a super charger to a nfl then i will leave it as is, just assumed they were the same engine just with the charger fitted/removed.