


minn200
-
Posts
421 -
Joined
-
Last visited
Content Type
Profiles
Forums
Gallery
Blogs
Events
Articles
Store
Downloads
Posts posted by minn200
-
-
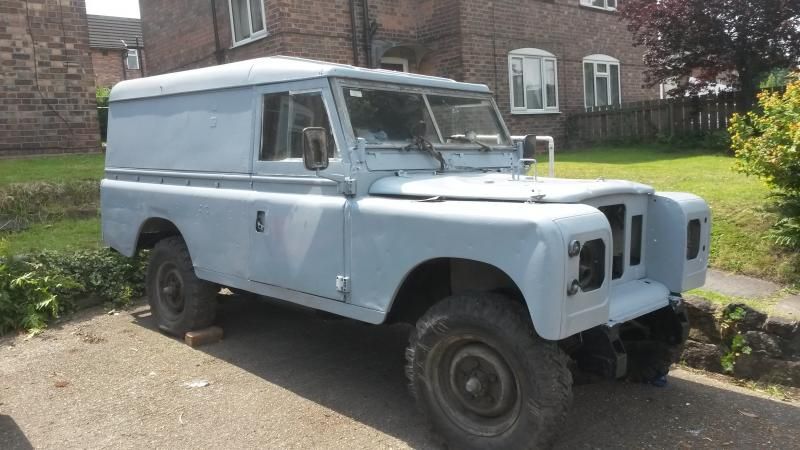
More Green
Main
Posted by min200 Thu, July 10, 2014 12:08:41
I started the day having to look at the electrics of this bloody thing...
Seeing as the low beam lights had decided they were not going to work anymore it took priority because I use it daily as my hack for work. After a bit of trying to get my ape like hands in small places it turns out it needs a new relay so that will have to be sorted at the weekend.
Still onto the Landy because lets face it you don't want to be reading about a motorbike do you...
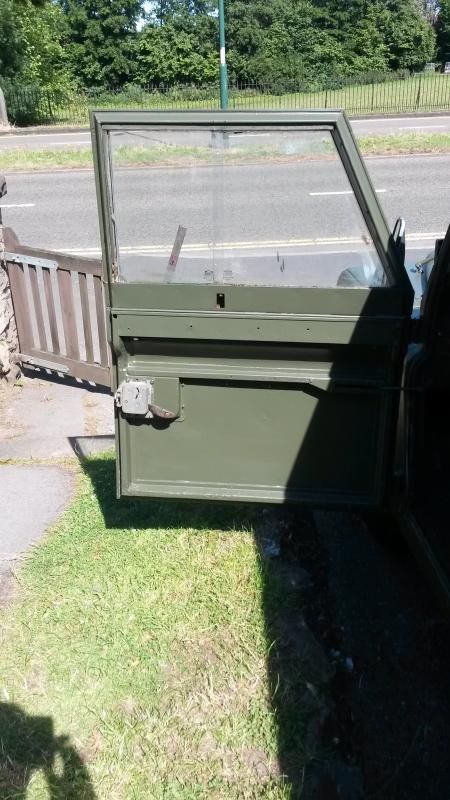
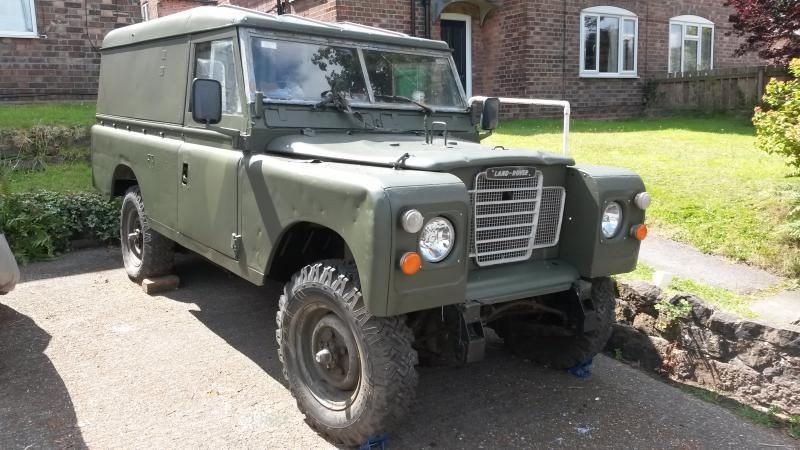
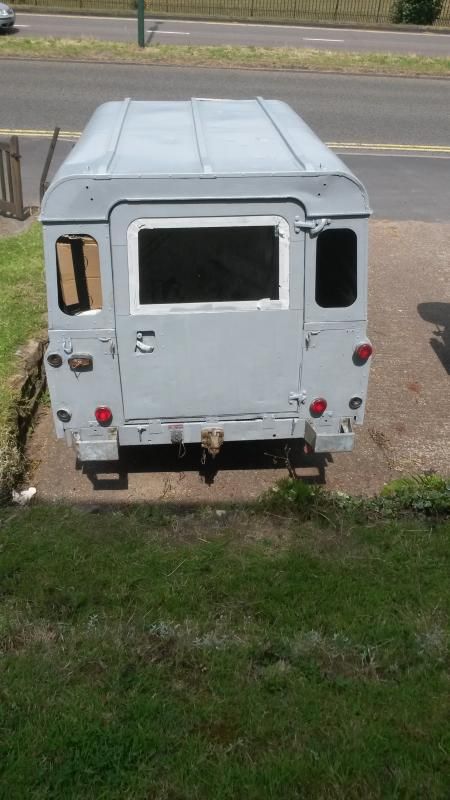
Today was another painting day!! Yay me!! More green paint to scrape off of my arms because I tend to get more on me than on the surface I am supposed to! The lucky areas today were the inside of the doors and in all fairness they needed it because they looked like this..
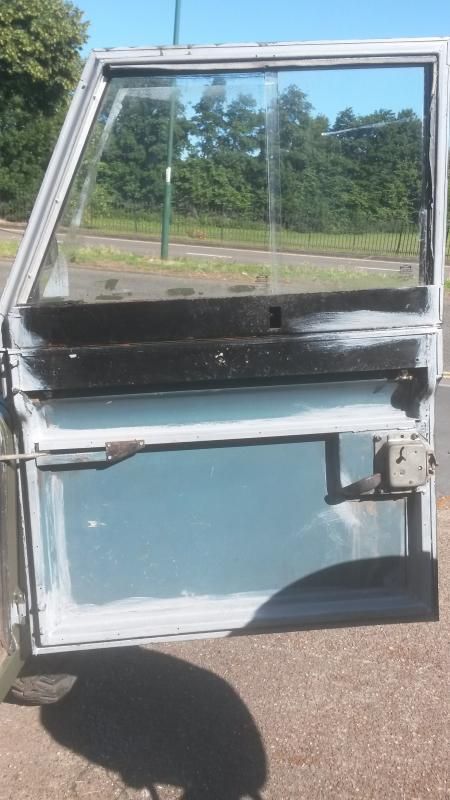

With the sun facing the right way and a good breeze it didn't take to long to put a couple of coats on both the doors and my arms.
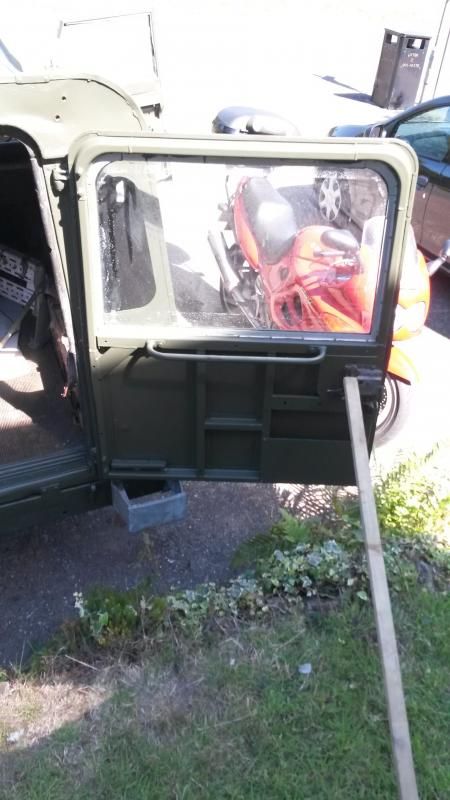
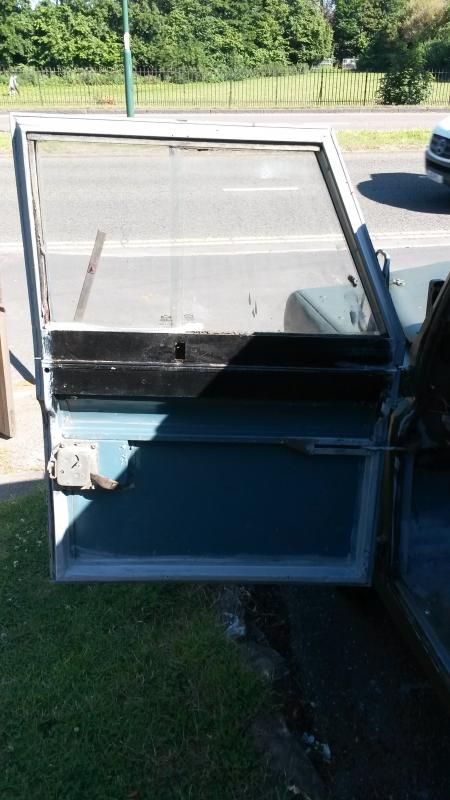
Whilst I was throwing the paint about I thought I may as well give the inside that's not still covered in half stuck on and rotting sound proofing a couple of coats...
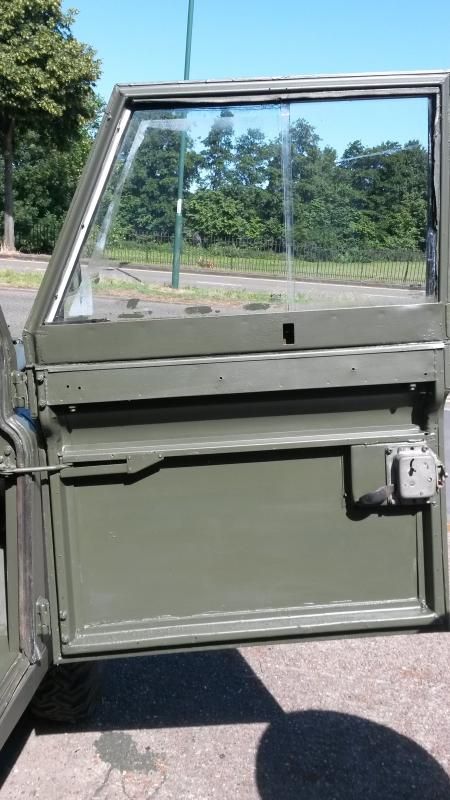
It does tidy it all up though! Trying to save some money I have started to soak the one rear window rubber that's covered in paint in a bucket of soapy water for a couple of days...
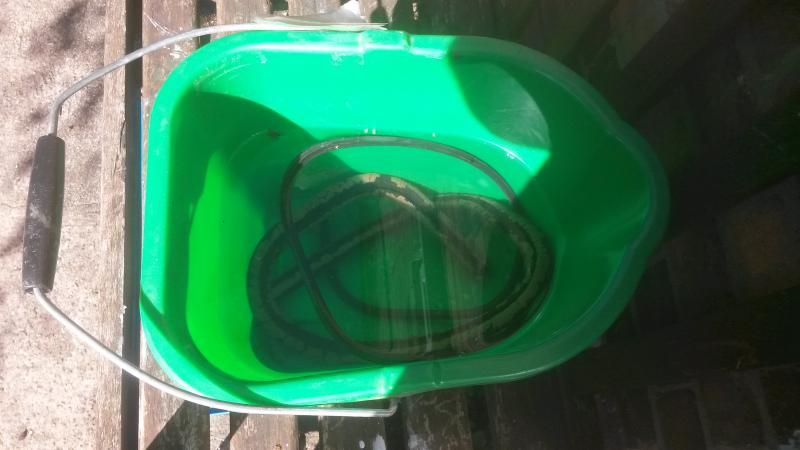
This is an old trick I picked up years ago it lifts the paint away from the rubber making it easy to remove and should save me a tenner or so because I should only need to buy one now.
The problem with this fitting in the rebuild before going to work is my shed is taking a hit and is a right bloody mess...
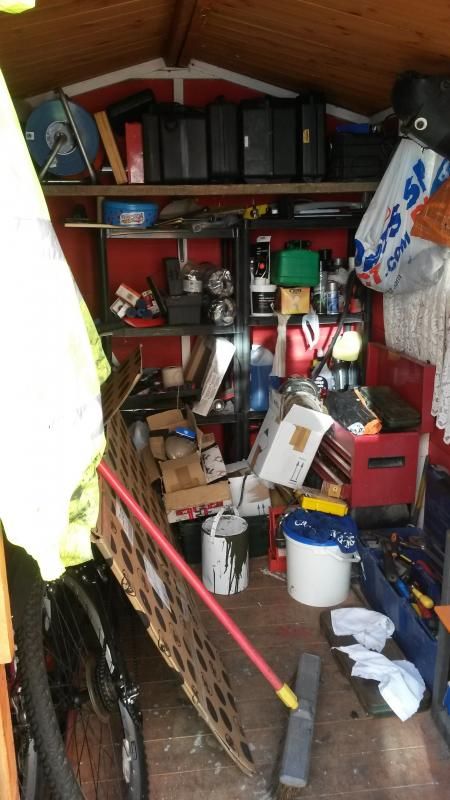
Well that's my excuse for being a lazy arsed git who doesn't want to tidy it up anyway.
-
Your steering drag link and track rod look a bit of a strange shape, a bit bent! looks like someone has lifted up the front with a forklift and bent them
Couldn't agree more and its on my "to do" list which is indeed a long list. Once the painting has been finished inside I will be onto the mechanical rebuild...
-
Pottering
Main
Posted by min200 Wed, July 09, 2014 12:23:32
You have got to love this dry weather! It's given me time to just potter with the landy and it's amazing how much you can get done when you are not trying to get anything in particular sorted out!
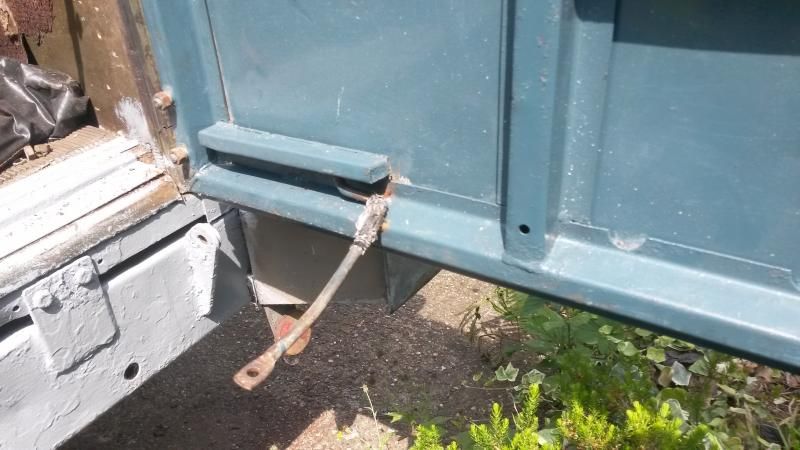
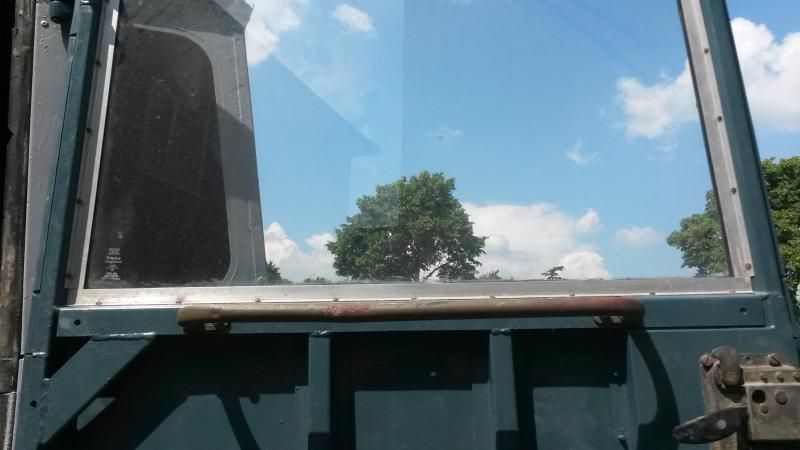
The drivers door needed the restraining bar refitting...
But it needed new holes drilling before I could fit the end cap on.
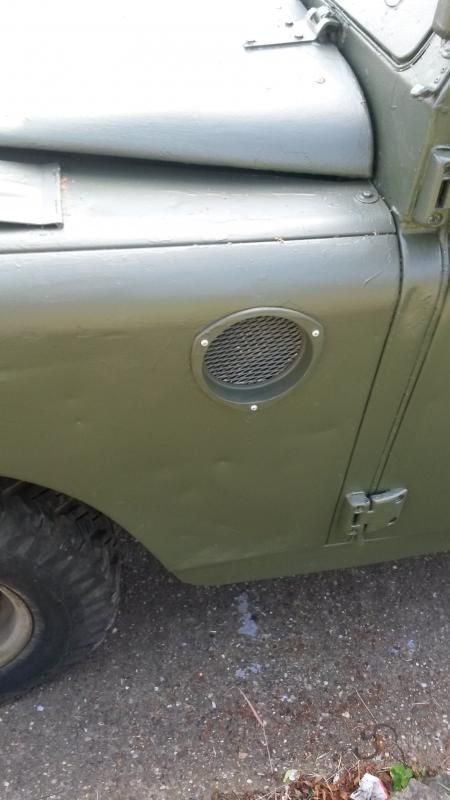
Then I refitted the air intake mesh. I am wondering whether or not to paint the screws green or just leave them silver...
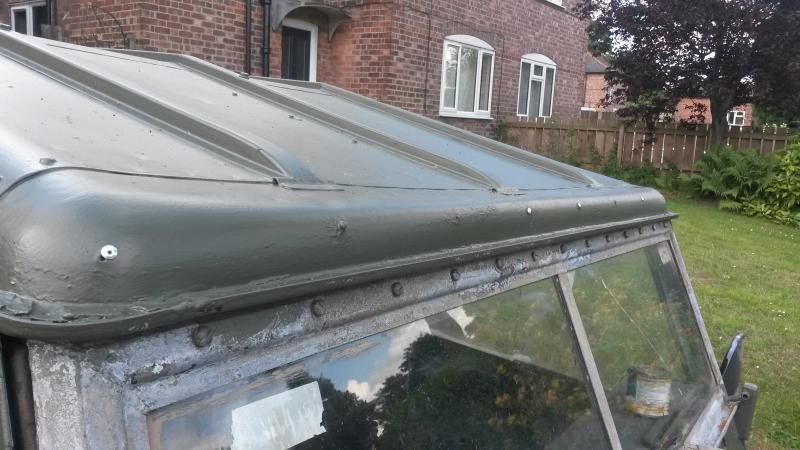
Then onto the front of the roof. When I was painting it I realised that there were a few holes there where rivets had been before so the easiest way forward was to replace the missing rivets.
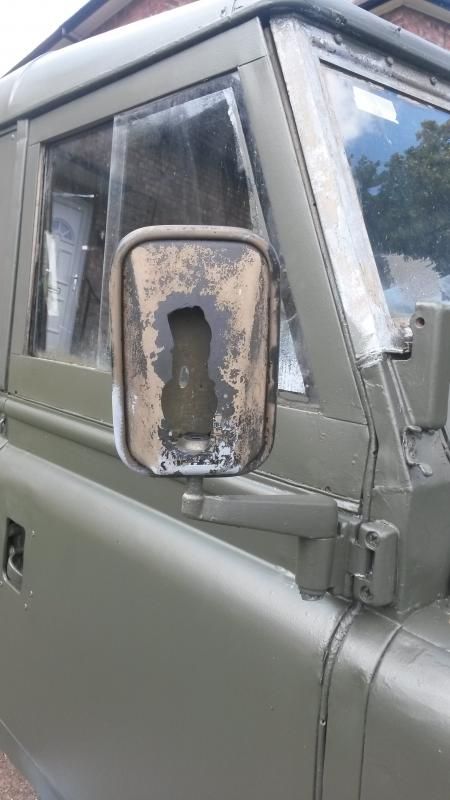
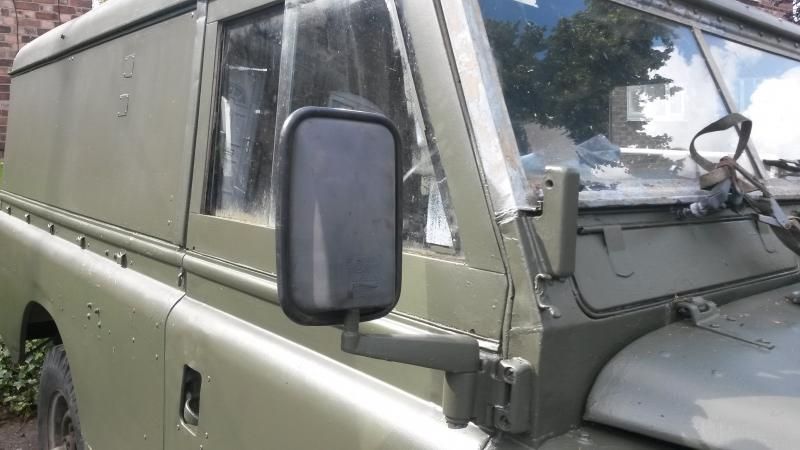
I took a look at my watch and time was heavily still on my side so I decided it was time to sort out the drivers side wing mirror.
Surprising what effect these little changes have on the whole motor!
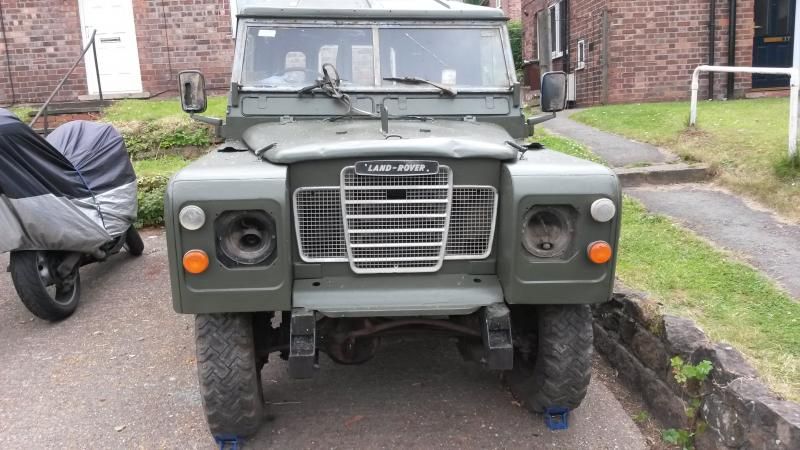
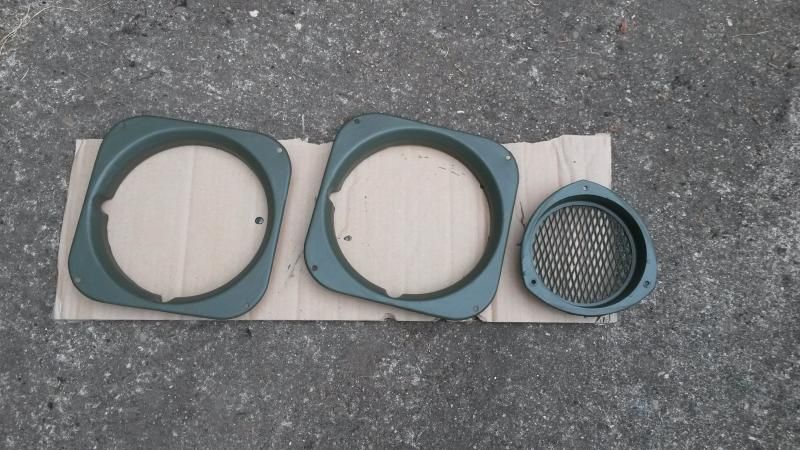
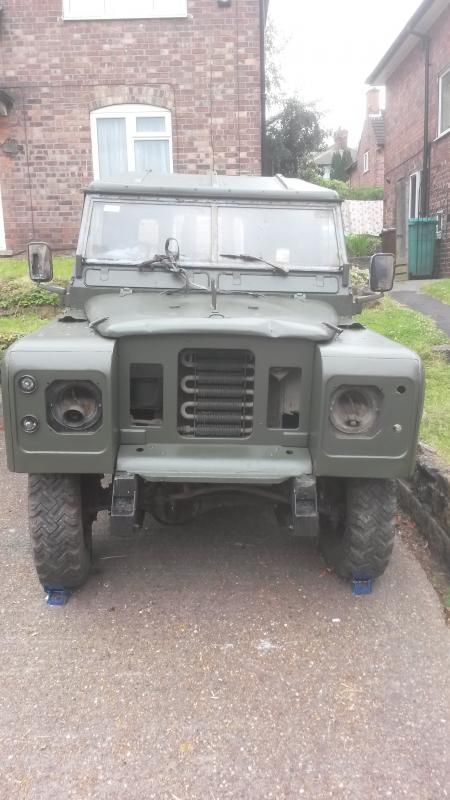
Now it was onto the headlights which as it turns out are the standard military issue ones that differ from the civvy ones in just about every way! Luckily I had already bought the replacement headlamp frames and they were still attached to sealed units and headlight cones. I stripped out the military ones
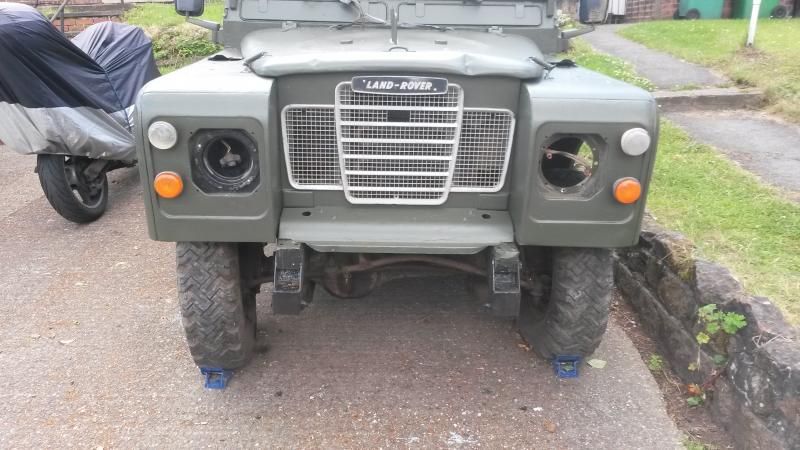
And set to fitting the civvy standards remembering to use the correct fittings and wiring. I also took the opportunity to fit the halogen conversion lamps that have been in the shed for a couple of months and the headlamp surrounds.
It's only starting to look like a proper Land Rover again! Still so much to do but I love the way its starting to look complete again!
-
Thanks folks you are indeed a mine of information

-
That's great thanks!
-
IM pretty sure they only had two screws in the outer rings but I will check and let you know. Makes no odds anyway as the inner rings around the lights were rusted to hell and I have bought some replacement civvy ones for it. The halogen conversion has already been done by someone in the past as well.
I will be putting up a picture about the light switch soon as its the military one with about eight different settings...non of which I have a clue with and the only setting I will need is the "normal" driving conditions one!
-
I have no idea what any of that means lol
-
The originals did with this motor as it came without any! I have to order the plastic gromit things to screw into to hold them into place though.
-
Lighting
Main
Posted by min200 Fri, July 04, 2014 12:36:24
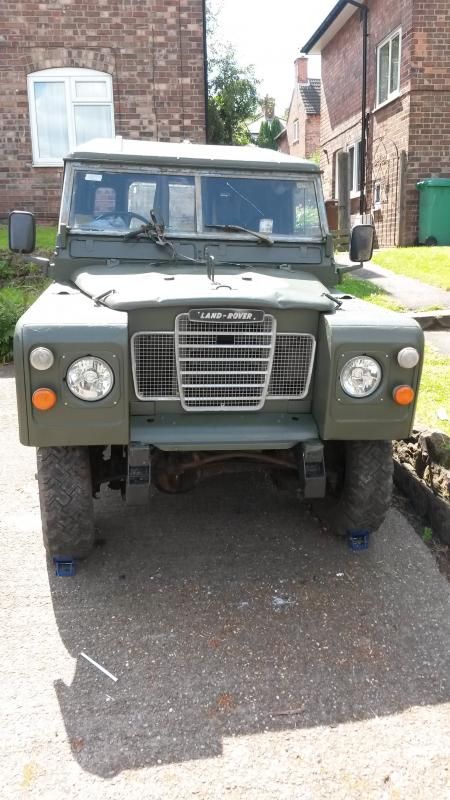
Steady morning just putting the lights back on.
And then I painted up the headlight surrounds and air intake vent cover.
The chores of family life then called upon me to collect the middle daughter from uni and now its time for work so best be back off to the grind I don't want to do eh!
-
Yeo im quite pleased!
-
Started Painting
Main
Posted by min200 Thu, July 03, 2014 13:31:22
It's starting to look like a Land Rover again!
I had an early finish at work last night so I got up early to collect some new rollers and git stuck in painting. With the strong breeze and sunshine I managed to get two coats on before wrapping it up for work.
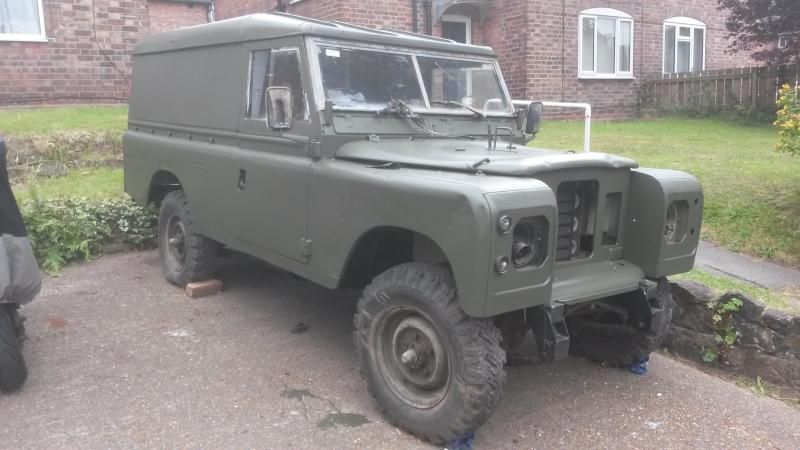
I feel like im getting somewhere now
-
New Doors!
Main
Posted by min200 Wed, July 02, 2014 13:20:22
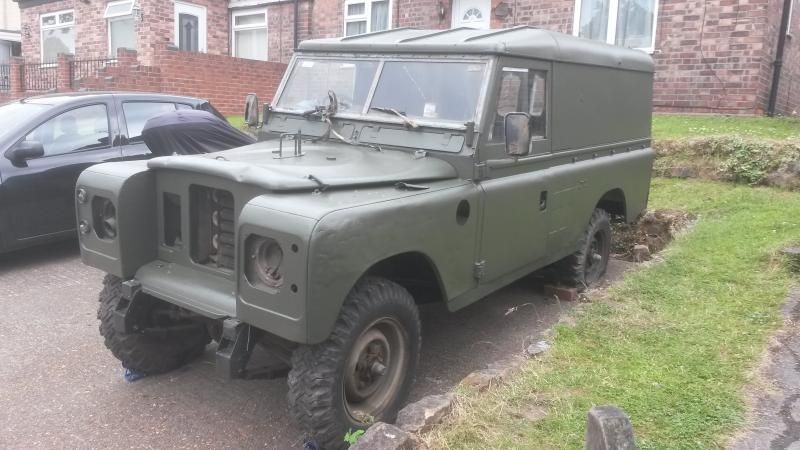
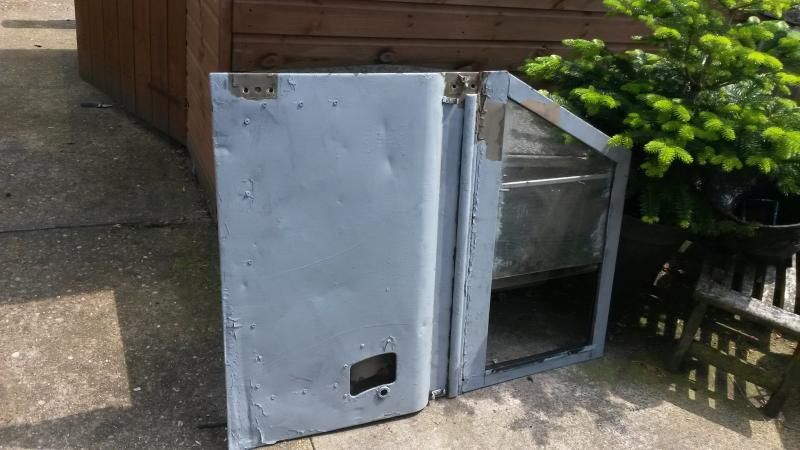
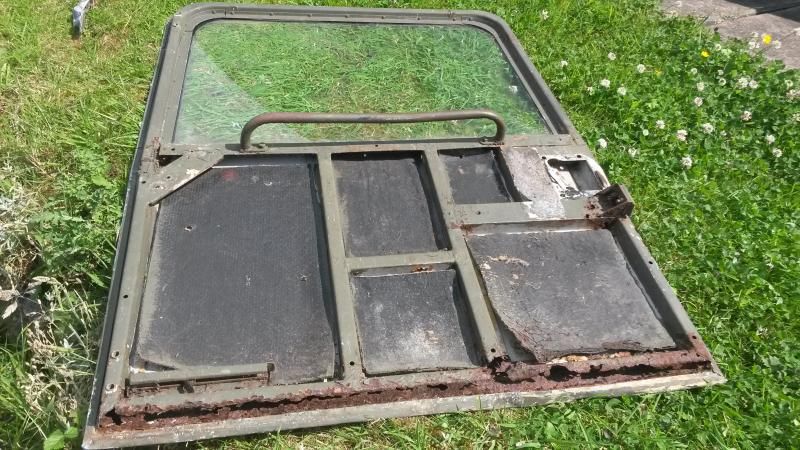
The weather has been with me this last few days and I have been geeky excited because I managed to buy a pair of half decent front doors at the weekend so onto the Landy they must go!
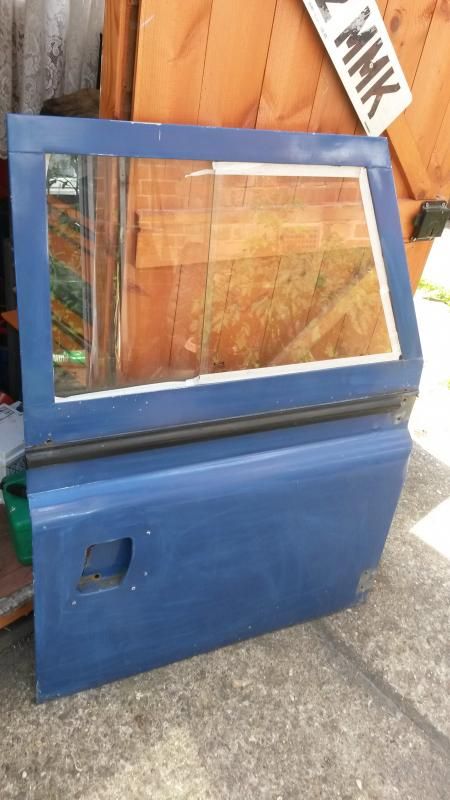
I was happy to find that the door hinges and bolts hadn't rusted away into scrap and they came off quite easily!
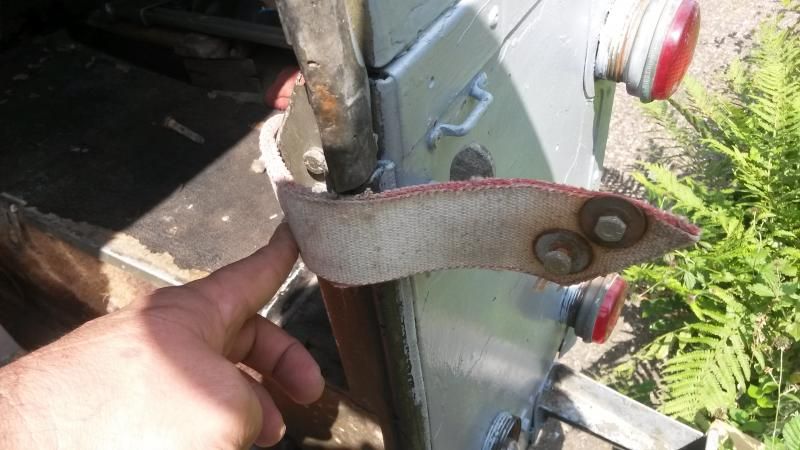
****At this point I must point out to anyone who hasn't removed doors before like me that it is far easier if you remove the door stay BEFORE removing the hinges. This will save you standing there like a pillock with a rusty door hanging in your hands whilst still attached to the motor wondering what the hell you are going to do now! Personally I stood the door back in its frame and popped a couple of bolts back through the hinges but this was after I stood like a prat with the neighbours and passers by looking at me with looks of barely held in laughter on their faces!***
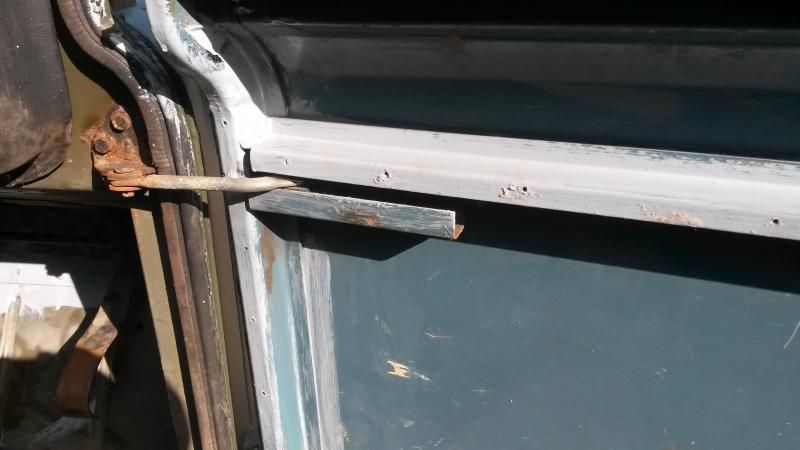
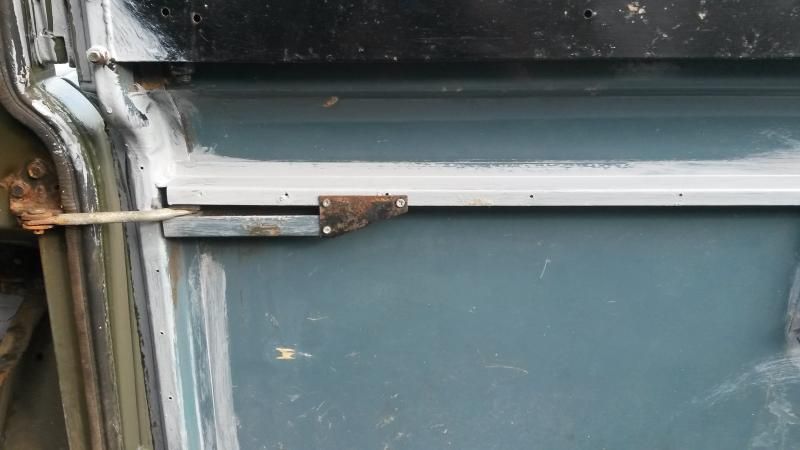
So before taking the hinges off remove this cover...
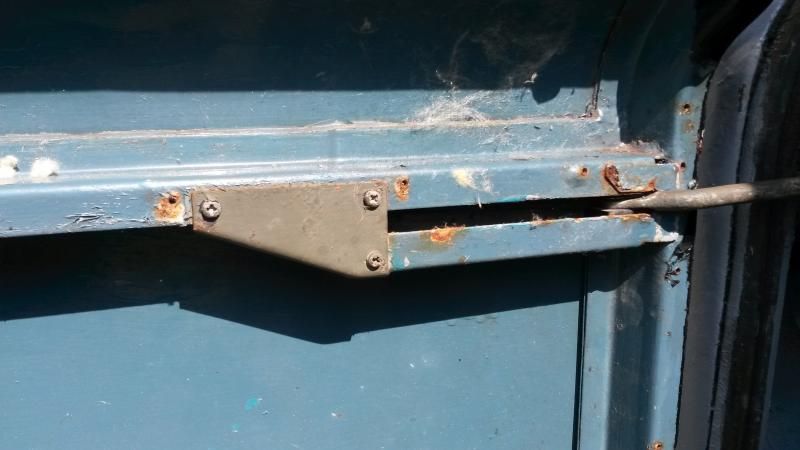
and remove the door stay but take the split pin out of here...
and remove the bolt. Then the door will come off freely and unhindered saving any red faced embarrassment and looking around to see if anyone is watching you.
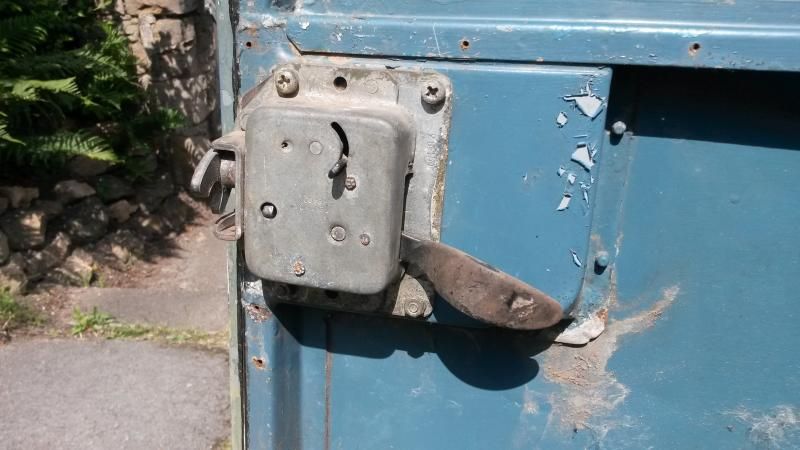
I then removed and refitted the door latches to the replacement doors.
So I did this for both doors and fitted the replacement ones. Then I rubbed them back a bit ready for priming and masked up the windows.

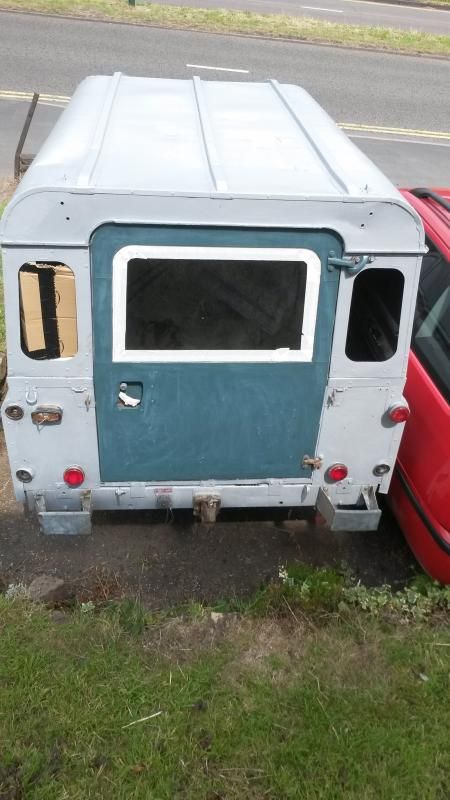
Time for another couple of coats of primer and the top coat paint was delivered whilst I was out painting so guess what tomorrows jobs going to be?

So a mornings work to make it look the same as it did before I started but at least the doors work and are rust free now!
There are some parts on the old doors and the old wing that I have kicking around including the window runners that I will need to put in these replacement doors. So a happy hour stripping bits off of junk to then stick on Ebay to raise some much needed funds for the project.
All in all not a bad days work but I am now happily sitting on the top of the hill and with each new task the Landy will start to look like a motor again from here on in!
Landy Project Costs
Land Rover £375
Sanding Discs £11.70
Ignition Barrel £20
Heritage letter £21.75
2x Batteries and rear 1/4 light £35
Pair Battery Terminal Clamps £3.99
Floor pan nuts & bolts £6.50
Grinding disc £2.25
Under Seal £8.99
Complete set of lights £85
5 Litres Primer £24.99
4 Discovery Wheels £10.20
Rear Door £21.00
Front Door £20.00
Handbrake spring £1.50
2 Discovery wheels
Two seatbelts
Wing Mirror
2 Headlight surrounds
2 headlight frames £60
2 Front Doors £60
Nato Green Paint £36
TOTAL £803.87
-
Thanks Trevor that may well be the case but its always good to have a couple of back ups seeing as I want to be doing off roading in the old girl!
Im clumsy at the best of times so breaking bits is a dead cert!
-
Blimey Mike that wing looks in better nick than he one I have just primed up on mine! :cool2:
Love the rust though I have plenty of that to share about as well

-
I will probably end up crying over how much is spent in the end! BUT I really do want to know and the aim is to do it with as much bargain hunting as possible!
-
[h=2]Spending more![/h]MainPosted by min200 Mon, June 23, 2014 21:41:41
Just a quick update more to keep tabs on money spent than anything else.
There's a chap called Gary over in Derbyshire that breaks and also rebuilds Landys and seems to have an endless supply of parts! Visiting this bloke can make a serious dent in your wallet!
So this evening I have bought and collected two more Discovery steel wheels, a replacement wing mirror, two headlamp surrounds, two headlamp frames and a pair of discovery seatbelts as the ones in my Landy are beyond repair.
All this for the sum of £60 so I cant complain! Hopefully he will have two new front doors at the weekend as well.
Landy Project Costs
Land Rover £375
Sanding Discs £11.70
Ignition Barrel £20
Heritage letter £21.75
2x Batteries and rear 1/4 light £35
Pair Battery Terminal Clamps £3.99
Floor pan nuts & bolts £6.50
Grinding disc £2.25
Under Seal £8.99
Complete set of lights £85
5 Litres Primer £24.99
4 Discovery Wheels £10.20
Rear Door £21.00
Front Door £20.00
Handbrake spring £1.50
2 Discovery wheels
Two seatbelts
Wing Mirror
2 Headlight surrounds
2 headlight frames £60
TOTAL £707.87
-
Spending Money.
Main
Posted by min200 Mon, June 23, 2014 17:27:22
I seem to have had my fair share of luck on ebay in the last week or so. I usually miss out on any real bargains but it seems it must have been my turn lately
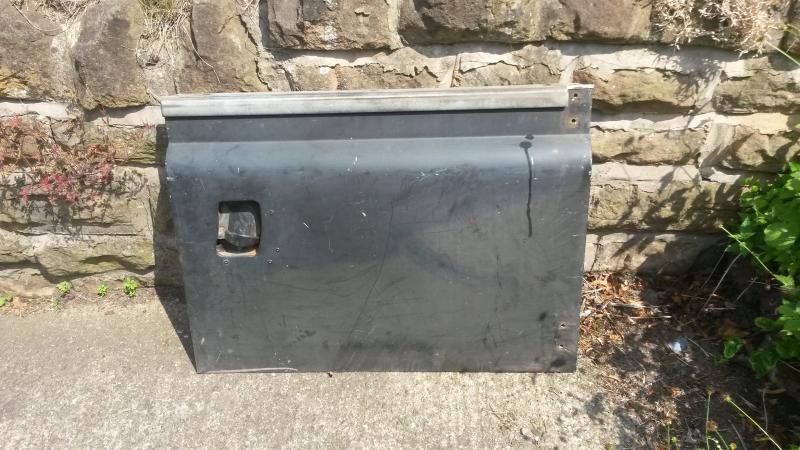
I have picked up a rear door in excellent condition with lock and key for the princely sum of £21.

When I got there to collect it I was asked if I wanted a drivers side door bottom in nearly new condition with a bit f surface rust on for £20...yes please!
Then I had to go out and collect a set of discovery steel wheels I won for £10.20
The tyres on three are shot but one of them is more than good enough for a spare. Upon closer inspection one of the rims has a lot of weights on so I wont bother with that one as I know somewhere I should be able to pick up a couple more wheels later today.
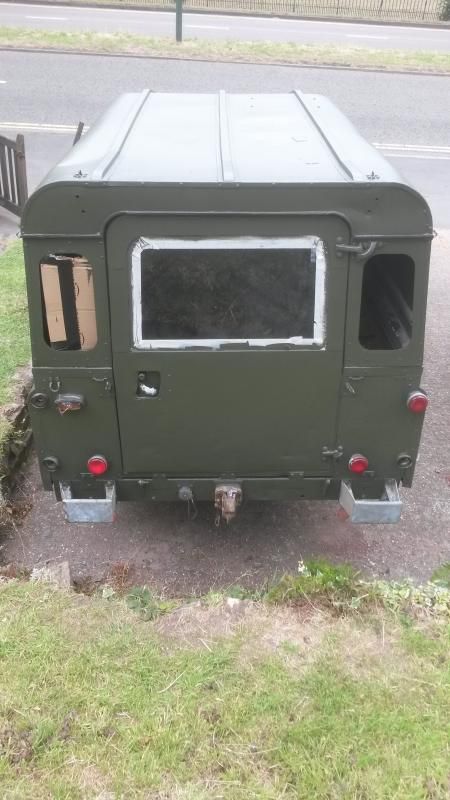
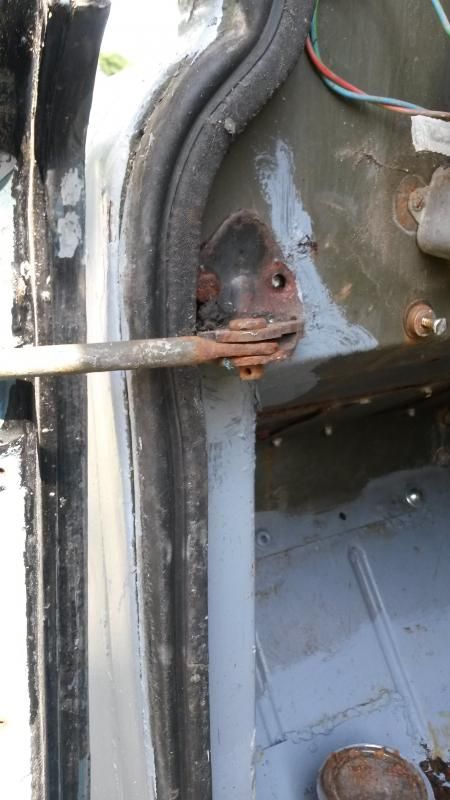
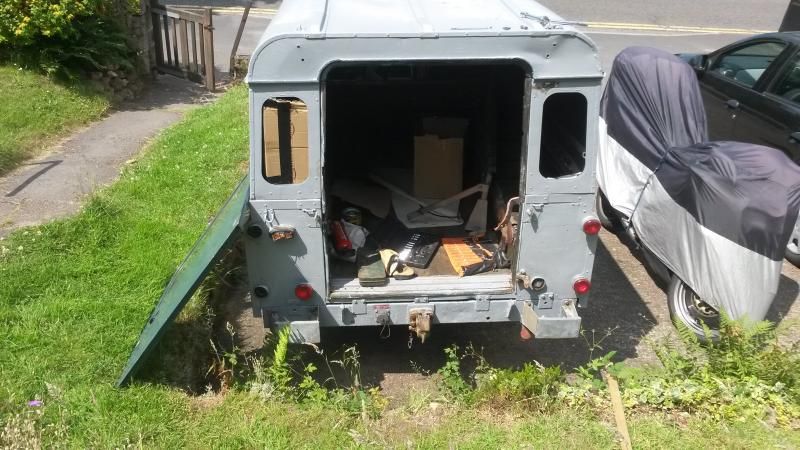
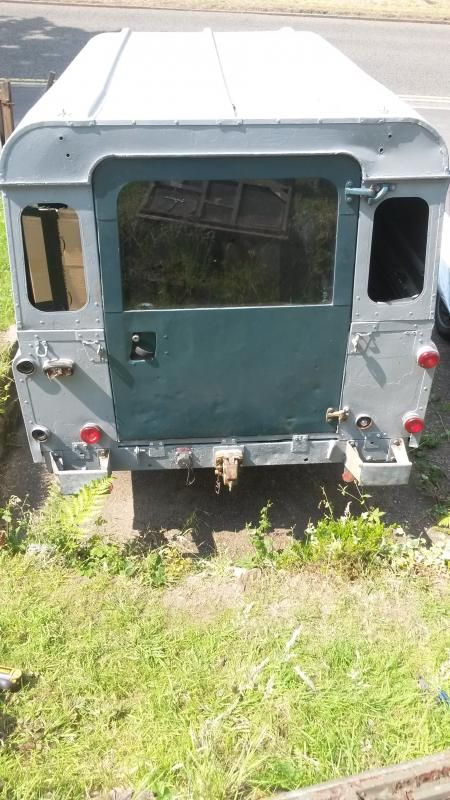
So after unloading the car I set to removing the old back door from the Landy you can easily see why it needs replacing...
But I had to have the inner door handle off of it to put on the new door. I can report I actually managed to get something right by noticing the door retaining strap before I had taken all of the hinge bolts out and would have to had the door hanging off trying whilst trying to reach the right sized spanners!
So I soon had the old rotten door off and gone...
And the new door was fitted. There was a different retaining arm on this door but seeing as I had so carefully noticed the canvas one I removed the metal one.
It wasn't as easy as I would have liked I had to bend up the flap at the end of the run and remove the rubber stopper

It soon popped out and I just folded the end flap back down again.
The interior handle was then fitted to the new door
And ta da I now have a door that locks and closes on the Landy! It's the only door that locks and closes on the Landy but hey its one more than I had this morning!
Im off to haggle on a few bits later so will update in due course...at this rate it will look like a Land Rover again soon!
Landy Project Costs
Land Rover £375
Sanding Discs £11.70
Ignition Barrel £20
Heritage letter £21.75
2x Batteries and rear 1/4 light £35
Pair Battery Terminal Clamps £3.99
Floor pan nuts & bolts £6.50
Grinding disc £2.25
Under Seal £8.99
Complete set of lights £85
5 Litres Primer £24.99
4 Discovery Wheels £10.20
Rear Door £21.00
Front Door £20.00
Handbrake spring £1.50
TOTAL £647.87
-
All looking good so far keep up the good work!
-
Fuel System Part 2
Main
Posted by min200 Wed, June 18, 2014 11:48:31
After some feedback from readers of my blog I have been informed of a few things and put them into place.
The reason my engine is running its nuts off is this...
This is a hand throttle and is fitted in FFR Land Rovers and when this is pushed over to the fully on position the engine does indeed gat a bit lively!
So after putting this in the off position the engine started lovely and ticked over nicely. I let it run a while and then once the coolant had warmed up a bit I tried the artic heater and hey presto lots of lovely hot air blowing in from all directions. So this little bit of kit can stay in the rebuild
There isn't a needle in the carb on the landy and this was a presumption on my part after working with classic mini's for years! So with that in mind and the obvious oversight on the hand throttle I have come to the conclusion....

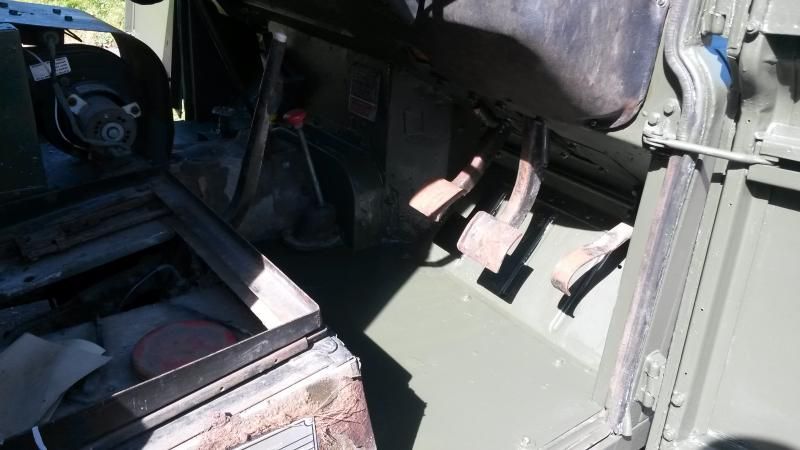
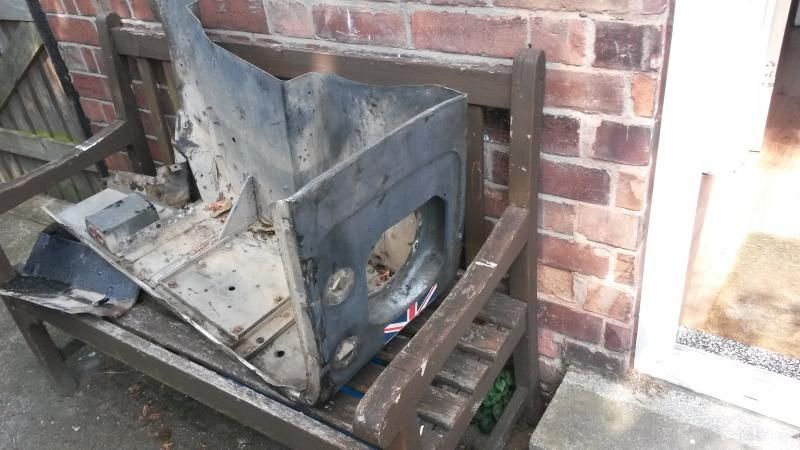
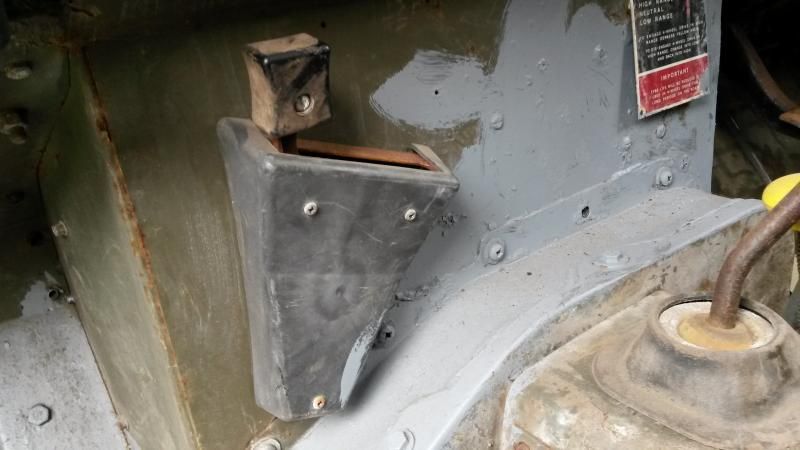
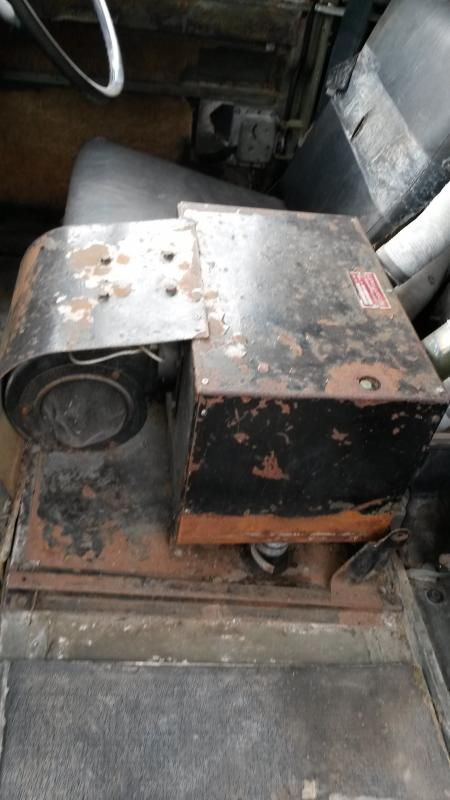
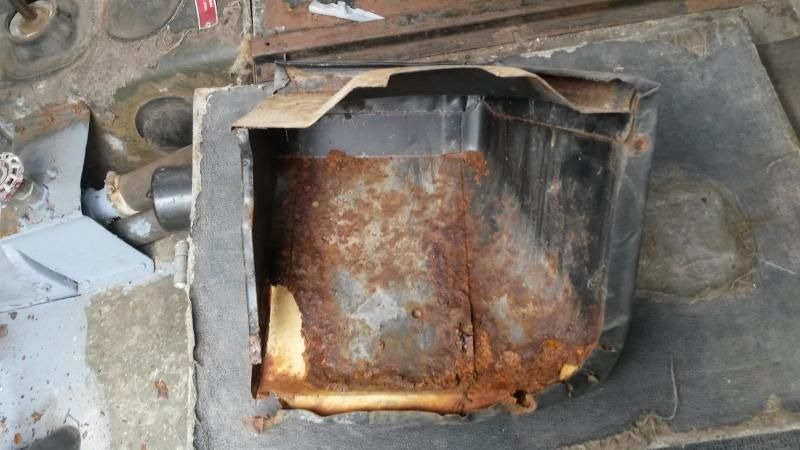
I took off the end dash panel to check the wiper motor over and was greeted with a lovely shower of rust so another part to be replaced has been added to my list.
But still cant complain as so far I am still on the right side cost wise on this rebuild
-
This rebuild is getting expensive
-
Oh well that's ok I have plenty of kids.......LOL
-
Thanks folk I learn something new here every day! I didn't even realise it had a hand throttle and I was just working on the presumption that the carb would have a needle....I have only ever rebuilt mini's before can you tell:D:D:D. BUT I would just like to point out I am not going to be sacrificing a body part everytime I need inspiration on a problem fix
-
Had a spare hour this morning so I thought I would follow the fuel system through and see if it was a simple fix like a split pipe or seal gone somewhere I had suspected the primer pump was knackered but it all looked ok.
This proved fruitless after climbing under in and around the Landy. When I dropped the seat base trapping my finger between it and the seat frame I had had enough. When I saw the blood I just laughed to ,myself thinking that this was the icing on the cake!
So I took a few minutes out sticking a plaster on my finger wondering what the hell could be the problem with this twin tank system. That's when I decided it may be better to have fuel in both tanks even though there is a tank switch as it is literally the only thing I hadn't done.
A quick trip to the petrol station later I put the fuel into the empty side tank and tried to prime the pump....the fuel pulled through no problem at all! At this point I started to get my hopes up and pulled the choke out gripped the key and gave it a turn....
It fired straight up and revved its nuts off so I pushed the choke in and it still revved its nuts off so off it was turned again! Talk about happy though the fuel system works!
After a bit more looking around the carb I am pretty sure the needle is stuck but if a carb rebuild is all I need to do I am very pleased! Im still looking for the ever elusive body parts but it will probably be new doors the way I am going.
The next thing to buy after the doors will be a clutch cylinder to see if that can be freed up or whether it will need replacing.
Not a bad morning at all
-
No nothing scrapped BUT the radio try took some abuse getting out so I doubt anyone would want it now...


Land Rover Series 3 Restoration
in Blogs of MV restorations
Posted
Water Tight...Well sort of.
Main
Posted by min200 Sat, July 12, 2014 19:52:29
Today I have had the pleasure of working an early shift in the office which gives me the pleasurable opportunity to greet all of the night shift drivers returning back to base. These guys are a special breed of folk that work the night shift because inflicting them on the general public during the day would be considered a cruel and criminal act to anyone they encountered in fact if I called these guys the most miserable bastards on the planet it really would be an insult to the most miserable bastards on the planet.
They are singularly the most ignorant and unpleasant folk I have ever met and quite frankly they are a waste of air but I just smile and be jolly in their company because this really seems to piss them off.
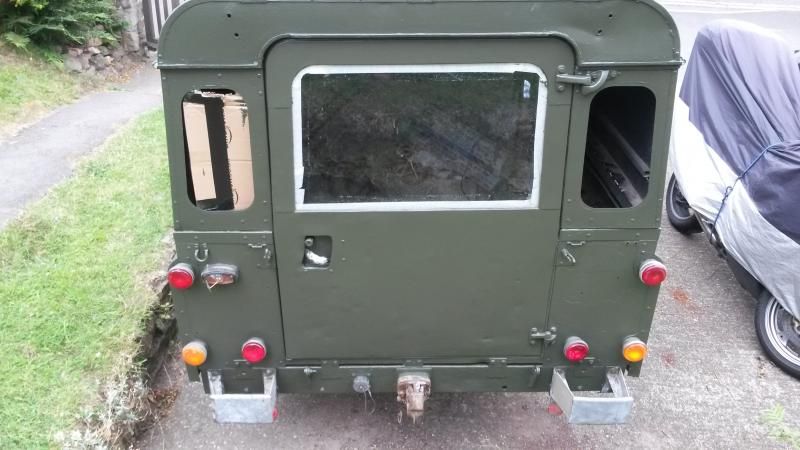
two o'clock soon came around and an eight hour day is a really short one in my world so I arrived home happy in spite of the nose to tail traffic on the ring road. Wifey was in and doing chores so I sat down to open the post that turned up at the same time I did. In amongst all of the flyers for pizzas and mobile phone contract offers was the new window seal for the back quarter I had ordered and seeing as I had cleaned up the other one I had soaking yesterday I set about fitting the rear windows to the Landy.
Thankfully I still had the window seal insert tool from my rebuilding mini days which made the task nice and straight forward along with the hot day that kept the rubber nice and pliable. I remember trying to put the seal insert in on a really cold day once, I soon gave up on that idea and waited for the days to warm!
So with those windows fitted it should make my Landy water tight again...well as watertight as any Land Rover gets...ummm ok then it will stop any puddles coming back where the windows were not fitted before.
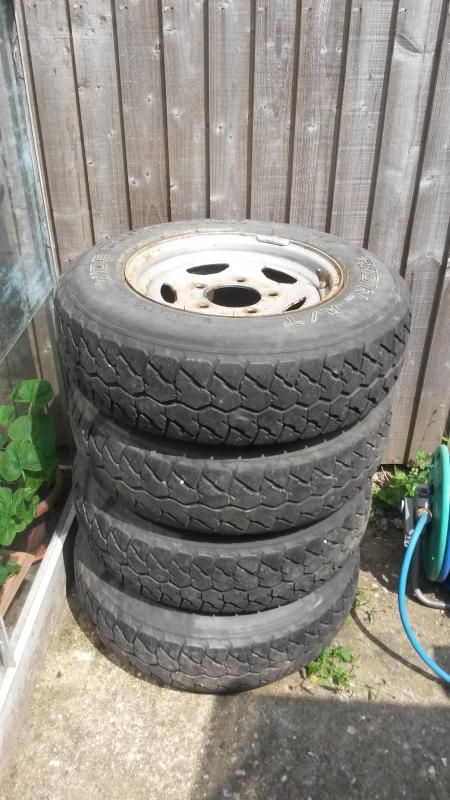
Wifey and the girls were sat n the back garden by the time this was done so I sat with them cleaning up the old Discovery wheels I had bought getting them ready for some anti rust painting.
There were six wheels like the one in the picture but even I am not dull enough to take pictures of them all!
Right I'm off to a party So depending on the hangover status I may or may not get anything done tomorrow!
Landy Project Costs
Land Rover £375
Sanding Discs £11.70
Ignition Barrel £20
Heritage letter £21.75
2x Batteries and rear 1/4 light £35
Pair Battery Terminal Clamps £3.99
Floor pan nuts & bolts £6.50
Grinding disc £2.25
Under Seal £8.99
Complete set of lights £85
5 Litres Primer £24.99
4 Discovery Wheels £10.20
Rear Door £21.00
Front Door £20.00
Handbrake spring £1.50
2 Discovery wheels
Two seatbelts
Wing Mirror
2 Headlight surrounds
2 headlight frames £60
2 Front Doors £60
Nato Green Paint £36
Rear Window Seal and insert £9.99
TOTAL £812.86