


gritineye
-
Posts
3,387 -
Joined
-
Last visited
Content Type
Profiles
Forums
Gallery
Blogs
Events
Articles
Store
Downloads
Posts posted by gritineye
-
-
I was thinking 'what desperate/diabolical bodges did members use to get their broken down pride and joy home?' I can well would imagine some of the stuff done at sea!
-
Special award,more like a knight hood,did a similer thing with range rover panhard bush in france the new polybush didnt like the leak from p/steering box and decided to come out on a winding lane by the side of the riverThe wheel wobble caused a few anxious moments and to my amazement i found i could now speak french.The tempory repair was made by me cutting up the leather belt from my trousers.it lasted several wks.This problem arrose again this wk with a forum members car.(no names) it happens with oe but takes longer.Having given up the big trucks a long time ago for boats i am finding this thread very interesting.THANKS
We need more real life drama here, Catweazle, can't you feel a new thread coming on?
-
Andy
If you bar the winch drum round you will find a large hole which is used to drop a hoist chain or cable from a beam or overhead gantry. Box can then be removed from below. Book time to remove a gearbox is 4 man hours, but we managed it in less never having done one before and despite both of us being sparkies!
Mike
Hi Mike, I had a feeling you might have spotted this tread, your input is always welcome.
It took me around 4 hrs to do it my way, I didn't know about the hole in the drum, I've now spotted a 2" ish hole in the winch just above the rear output flange, if a rope could be passed through this the job would have been easier. my way was a bit dodgy not having a proper hoist or a nearby tree in the field!
The Explorer book says to pass lifting tackle between the cab and body and warns that the gearbox assembly will be unbalanced as it will be supported forward of the point of balance, I found doing it a bit scary as I value my fingers/limbs etc. hence my rather over the top 'self and hasty' warning, I hope no one thought I was belittling their abilities by this.

-
As one worryer? to another, the Explorer pt.no. is 28/263, my memory of Layrub couplings is that they looked like second the one shown, (I had one on my Sunbeam S7) I assume that the 30 ton would have had this sort as apart from anything else it is more 'fail safe'.
There is a pic of my Explore in 'Tugs of War' up on a trailer, this was because the couplings broke up the first time I took him to W&P, and I needed room to work! I managed to cut a new rubber bits out of an old army boot heels and wire them in place to get home!
The one shown on my Explorer was "re-manufactured" by me about 11 yrs ago, and has held up well, apart from the alloy bits corroding away as can be seen, this is why we worry, once bitten twice shy, that's a lot of metal to get home!!
-
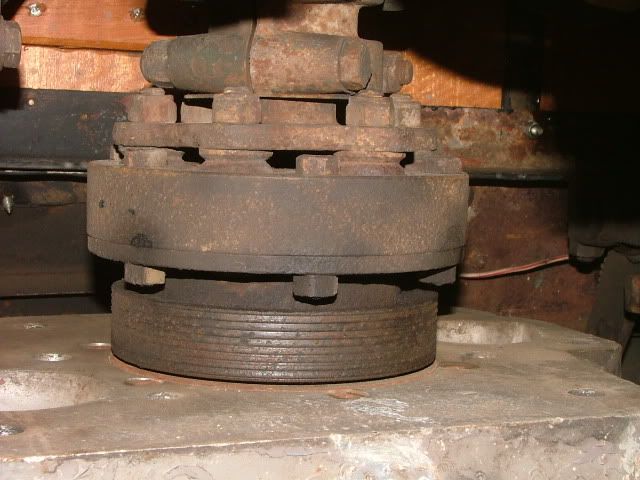
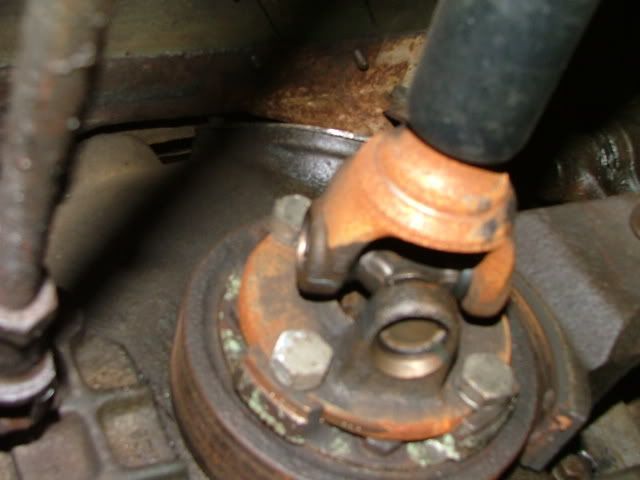
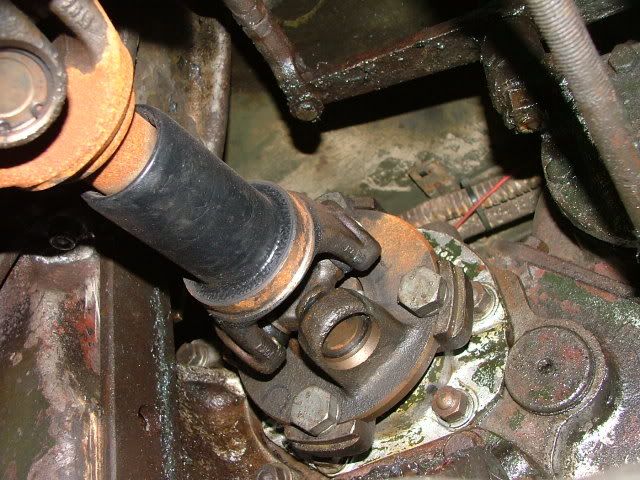
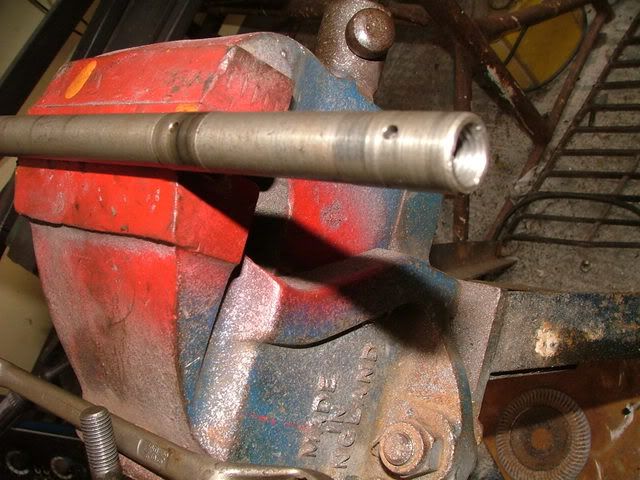
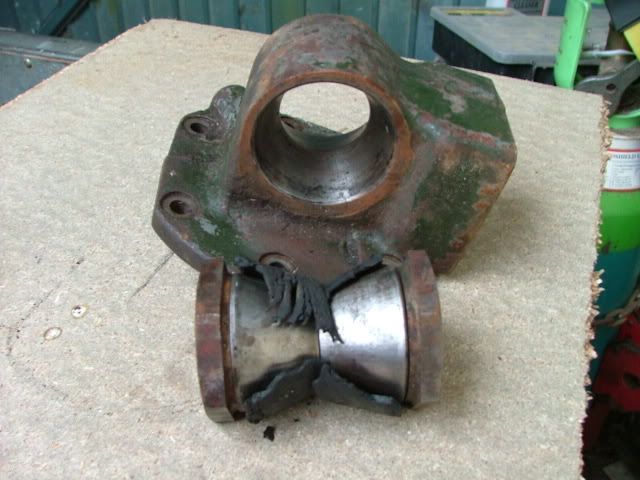
The clutch is connected to the gearbox by a shaft on a lot Scammell vehicles, this is fitted with composite alloy/rubber couplings to absorb engine vibrations and to allow the engine to move around relative to the gearbox.

Here are the ones on my Explorer, getting a bit old now!
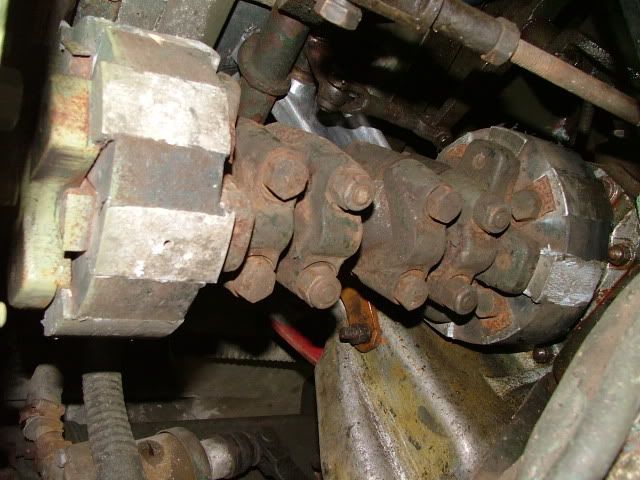
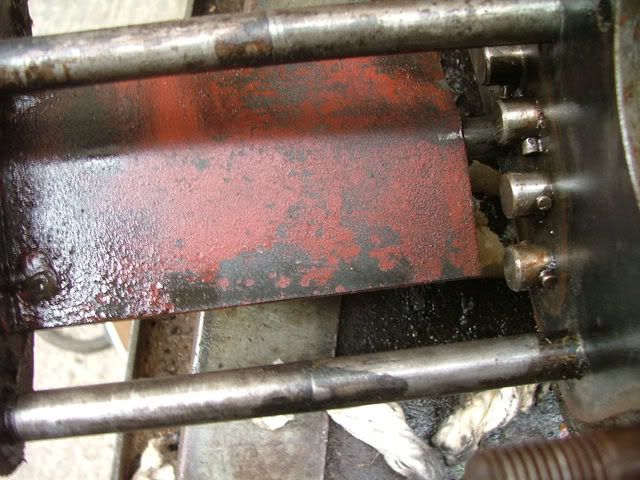
Other types, here is a Layrub type, I think these were used more in Constructors and different type of flange is needed.
This one is fitted to an Explorer with a Cummins engine and a Eaton/Fuller bell housing modified to take a Scammell (Constructor?) clutch shaft.
Some Engine transplants use only one coupling, but ideally, to allow for engine movement (the gearbox movement should be almost zero) two should be used.
As the correct very rare explorer rubber couplings are now fetching £217.50 on ebay without any guarantee that the rubber has not already degraded, an alternative solution is needed, Here is one pioneered (I know, wrong thread) by Graham Germany and which has been copied by other Explorer owners to good effect. Graham does a high mileage towing in his Explorer so it has had a good test. He uses slightly modified Explorer flanges, the cost is very reasonable.
However, I was always told that a propshaft with universal joints should never be fitted directly to an engine without a vibration damper between, as the torque peaks generated could create spikes many times the rated torque for the propshaft, and also the vibrations would damage the needle rollers and sliding splines. Most vibration dampers are rubber/steel composite.
I don't know weather the springs in the center of a clutch plate act as a damper (they help with a smooth take up though), but the rubber couplings do the job and it can only be assumed that is why they were fitted.
If you have the original Meadows petrol lump still fitted with the original solid center clutch plate, you should think about this before changing to this modification.
I have been told I worry too much, any one have any thoughts on this? I'd love an informed answer to this one please!
-
First pic shows the gate - apart from being able to skip 2nd and 5th you have to go up and down the box in sequence. Sounds tedious, but it is a lovely box to use, and it ensures you are always in the right gear or not far away! For me the best part of Scammelling is changing gear :banana:
Second pic shows the gearchange mounted onto gearbox. This view is of a Constructor - I think I'm right in saying the Explorer unit does not stick out anywhere near as much as this (?), so vibration effect would be less than on a Constructor. Even so a lot of weight hanging out there!
Tony
I went for a quite a long drive yesterday and enjoyed every gearchange, beautiful ! :-D:-D Parked up and spotted a pool of oil under the transposing box :eek: the rear t/box cover drain plug had gone awol, but the oil in the main part of the t/box was still over half full so no damage done, phew! (Rear wheel drive does not go through the transposing box)
Yes the Explorer gate lacks 4" spacer
As the rubber couplings for the engine to gearbox shaft are now selling for £217.50 on ebay today I will post a different solution to this common Scammell problem.
-
I convert all mine into .AVI & have found that produces the best results...
Thanks, I'll try than on the next one
-
I have recently put two videos on HMVFTV and the first one plays a lot worse than it does on Y**t**be.
To get vids to play well on Y**t**be I converted the original mpeg2 to mpeg4 / '480 X 360' / frame rate '24', this works pretty well, it does not on HMVFTV.
I have put other vids on HMVFTV as mpeg2 and they don't play all that well either, and take ages to upload.
Can we possibly have a definitive 'best format' for HMVFTV set out in lay mans terms, in the help section of the site? I think a lot of members would welcome this, I know I would :help:
I know this would be difficult to do because of all the variations that exist but just knowing a starting point make things easier,
-
Militant MK 1 6 X 6 Gun Tractor with some sort of Scammell.
Must have broken down for the Scammell to be pushing it :cool2:
-
Welcome younggun, an increase in Scammell men is a good thing, if any members of your family need persuading this is the place to send them!
-
And you have to look in every corner they get every where!
There was a robin or two that nested in my Explorer and once there were four nests, one in each of the rear chassis ends. No eggs so I raked them out and went to a show for the weekend, when I returned one bird was waiting by the farm gate and followed me until I parked up, then got straight on with a re-build!
Black birds love it on top of the starter motor which is easy to stop but one poor robin decided to hide a nest in a corner inside the radiator cowl and suffered the consequences when the fan started to turn and the nest was sucked out! :-(
A friend had the top hose off his Explorer and a wren went in through the hole and nested in the coffee pot, He also had a blackbird on the starter, this meant a quiet few weeks at home for him and his Scammell! :-( :cry:
-
no more info available Andy
-
I think I posted that before the crash, maybe you got it then, that was the first time I got him running.
I got the box out underneath, put a trolley jack under the transfer box, took out the bolts and spacers that hold the rear mountings to the chassis, then shoved a couple of spades or similar into the gap to act as guides. Then loosened the bolt that goes through the front mounting and lowered the back end first till it's near the ground. Then lowered the front end using a puller winch / snatch block hung on the lamp bracket at the rear of the cab (I have the canvas tilt hoop bolted to this so it's strengthened) then dragged it out sideways with my Landrover winch. Reverse this to put it back. A couple of other bits have to be taken off to make room, exhaust and brake rods I think.
Not quite as easy to do in practice, took all morning by myself as it was too dangerous to have any one else under there, although someone should be watching for safety reasons. It went back in about the same time. Not much effort just to be careful and just took my time. I was never under when jacking or winching and did a lot of thinking!
As a former contractors plant fitter I have the experience to do this, I would never suggest any one else tries this dangerous task, just saying what I did.
-
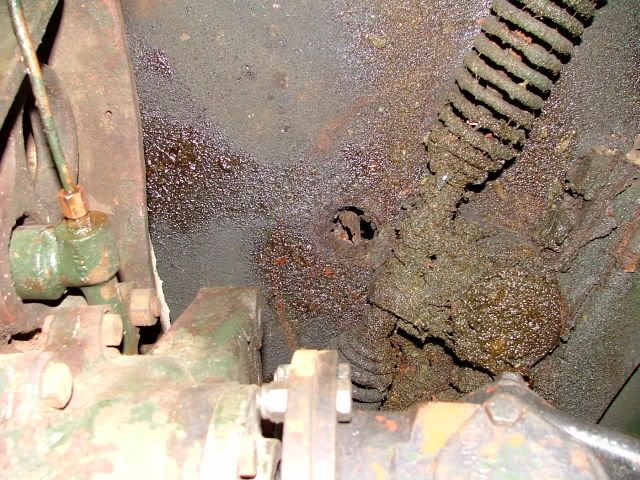
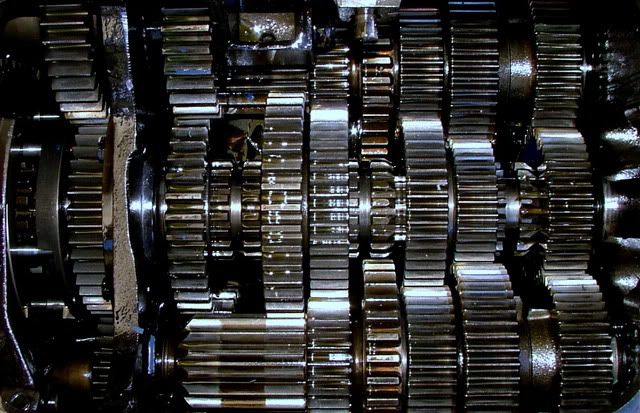
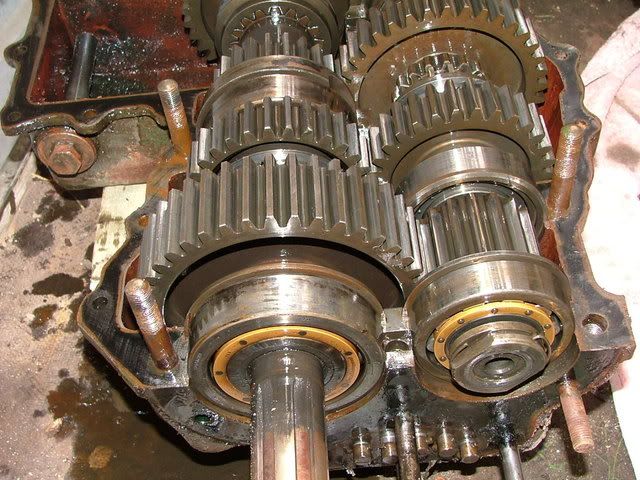
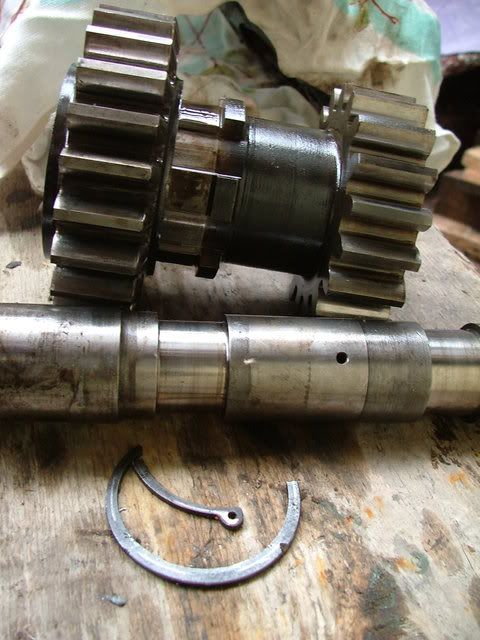
The gearbox has an oil pump. This is the bottom counter shaft oil baffle, which is a close fit inside the hollow shaft, it's job is to direct oil to the roller bearings within the gears and shafts through holes drilled in the wall of the tube to coincide with holes in the shaft under each set of needle rollers. The end has a plug fitted.
This is the one from the top counter shaft, PLUG MISSING, therefore no pressure maintained within the shaft and no oil forced into the needle rollers, note the heat mark around the hole!
This plate is to retain the selector rod in place, it was loose and a shiney mark can be seen where one shaft had been rubbung, the others could pass by without touching it!
This shows marking where the bearing outer races had been moving.
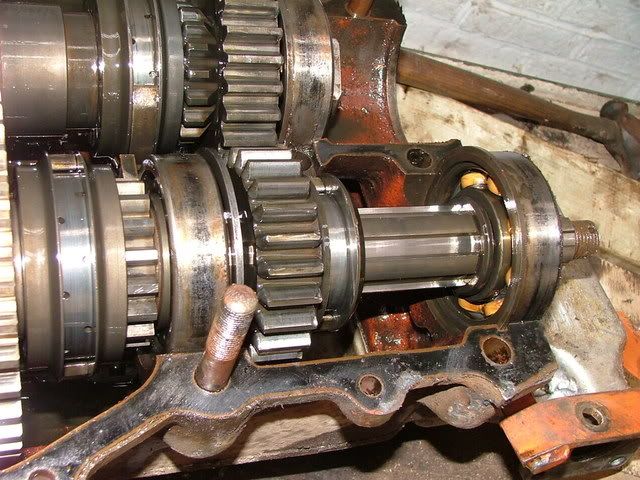
Only a couple of small chips on the dog clutches, made to take years of abuse.

This is the output shaft with a bit of wear on the splines.
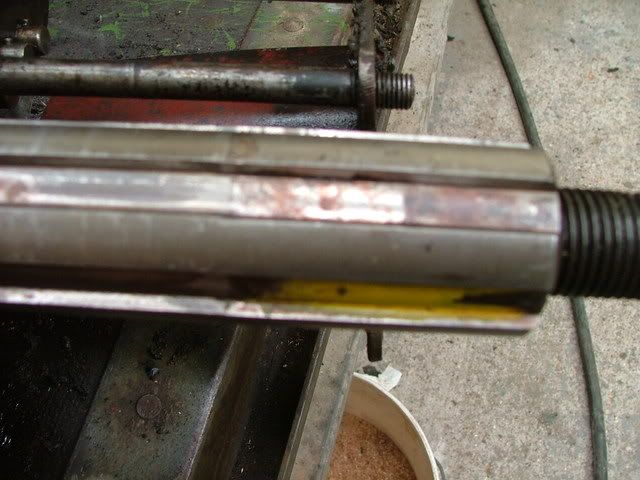
Despite all this the gearbox still worked OK it was just very noisy!
Luckily, a couple of yrs ago I had bought the complete brand new internals from a Constructor box that had laid under a bench for around 12 yrs
only the output shaft, the front bearing and a few of the needle bearings were missing. (450 of them in all) so I re-used the old output shaft as it was worn to match the flange and miced up all the old needle rollers to get some to make up the difference, there was a surprising variation even among the new ones although they were all still mat and unworn. The selectors I didn't touch as they still worked OK after I did a field repair when the bush came loose and jammed the rod at W&P a few yrs ago.
All done ready to put the top on!
Bits left over to re-build another box with.
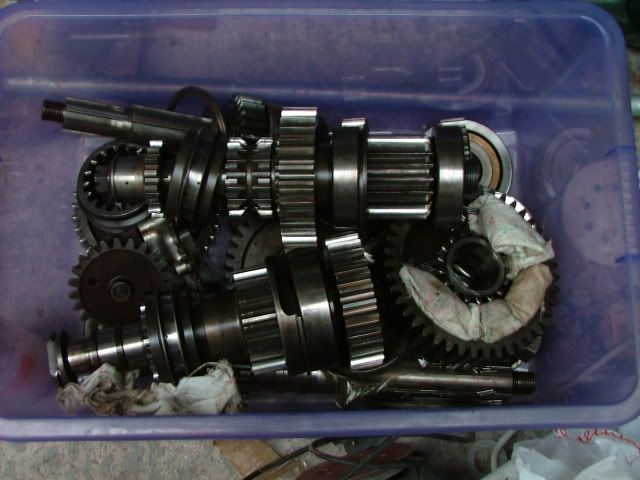
This is just pure gearbox porn! inside the box that came with the Cummins
-
Seems to me the end roller bearings look like they have too much clearance with the outer bearing race. Whats the parts availability like beyond the Bearings ? as in shafts and gears and housings????
New parts are hard to find, owners tend to hang on to any good boxes!
Ah well, I did not know how long since the box was last split. Reason for asking was that using silicone in situations like this, it often has too much applied, pinches up "tight", but then the two halves fret and bolts come loose. There was a batch of Ferrets released, that had been in Cyprus, I have come across several of them with severe leaks form the transfer box. This is where silicone was used (not the offical recomendation) to seal the casings, and after a time it is working out, as too much was used and bolts are loose and unable to keep oil in it.The bolts where proud a fair bit and I reckon they were bottomed out in the blind tappings on stuff in the hole as I got a lot out.
You got me worried there Richard as I used silicone and I have just had a look at the box and it's leaking a bit of oil now, no enough to drip just a covering.
 Will check the bolts etc when it stops raining!
 -
Hi 6X6, Before I saw the larger Constructor pic you posted I thought your avatar pic was of a chap in the back looking through a big pair of binoculars, which goes with what you say at the bottom, the I hope this was intentional as it's great!
-
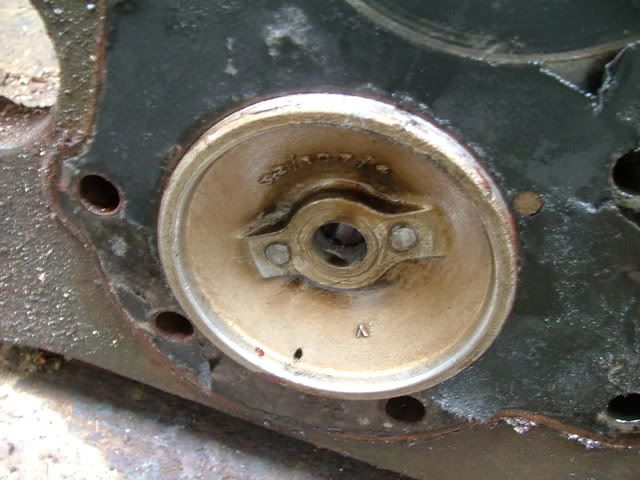
As a matter of interest, had the two halves of the box been sealed using silicone sealant?
Mating flanges look too clean for Hylomar, Wellseal or Red Hermetite!
No red, no blue but some sort of thin black stuff, maybe sabotage, but then silly cone wasn't about back then
-
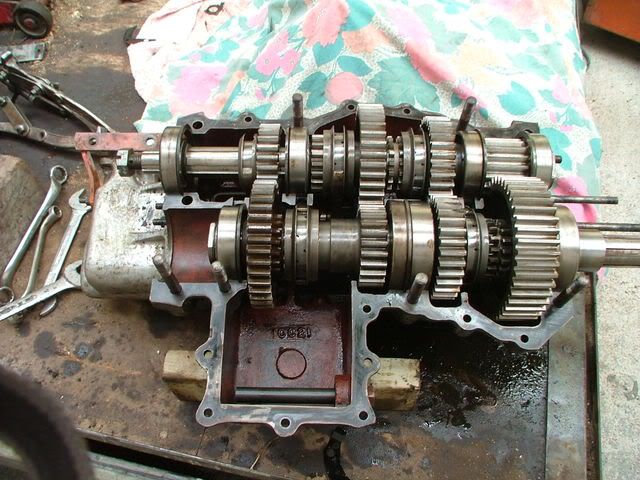
Here we go with Gearbox rebuild photos then,
My Explorer had a vibration problem right from the day I first drove it, other owners said "Oh they're all like that mate, it's the prop-shaft!" It was a bit slack so in went a new prop, (both flanges were straight) still the same. After a bit someone suggested it might be the front mounting rubbers, although they looked OK a slight bit of lift was there
This was because some pratt had not tightened the two nuts enough allowing metal to metal contact, so I got hold of some good s/h ones and fitted them.
Guess what, the vibration was now unbearable so a look inside the gearbox was called for.
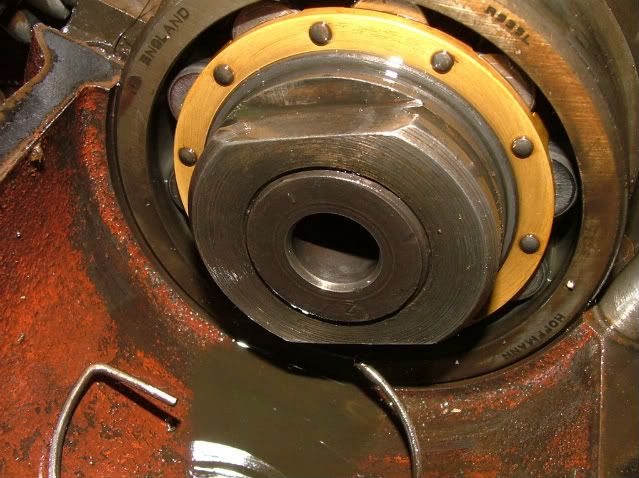
First clue was that the center row of bolts holding the two halves of the box together were not pulled tight down, although they were wired! Second was the nut was undone on the top counter shaft, although strangely the keep-ring was still in place.
Third clue was the front layshaft keep-ring lying in the front of the casing.
As the rear keep-ring had been cut off to save the trouble of drilling more than a tad into the shaft, the fitter must have had a grudge against some one or some organization, or poor defenseless vehicle (how low can you get!) or was just lazy, or was only issued with a hand drill!
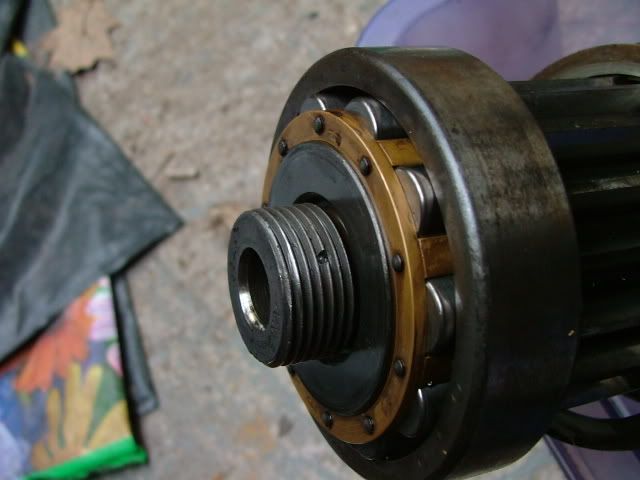
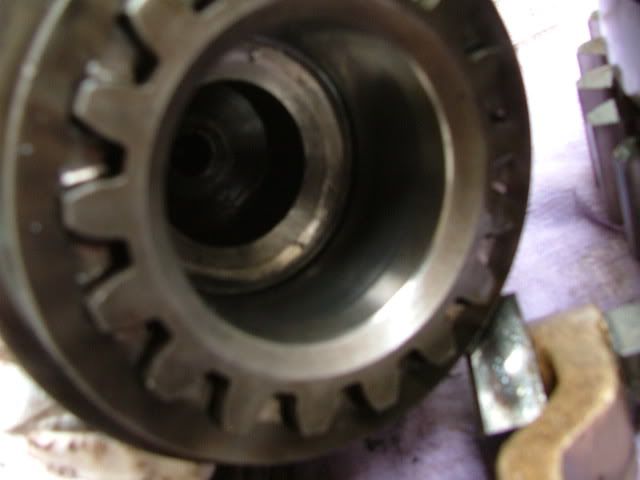
Spot the difference.
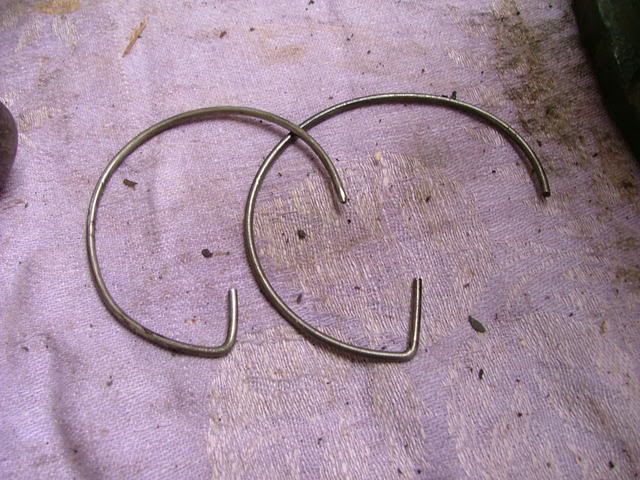
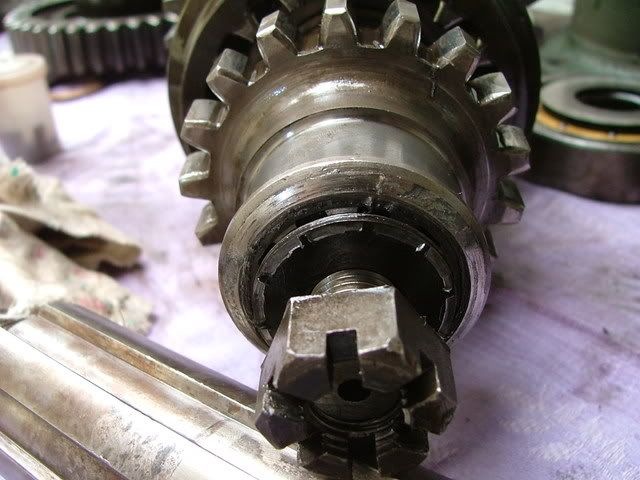
Then I found a broken circlip in the sump, turned out to be from the first reverse cluster, which was floating about.
The consequence of all this was that the top counter shaft was able to oscillate back and forth (blimey this is MV porn) and so giving both ends a good bashing, the rear bearing retaining cap has two studs projecting through and these had dug corresponding holes in the nut, presumably by the nut repeatedly coming to the end of it's thread, a good source if vibration if ever I saw one. Just like a hammer drill !

The inside of the primary shaft got a battering as well.
Well, lucky old me, it couldn't get worse could it?
-
This is one of Georges family Matts, the happy chappy in front was a german prisoner of war and reputed to be the best electrician around, probably just changed the generator on the ground beside him.
-
Any one interested in seeing some pics of a gearbox rebuild?
-
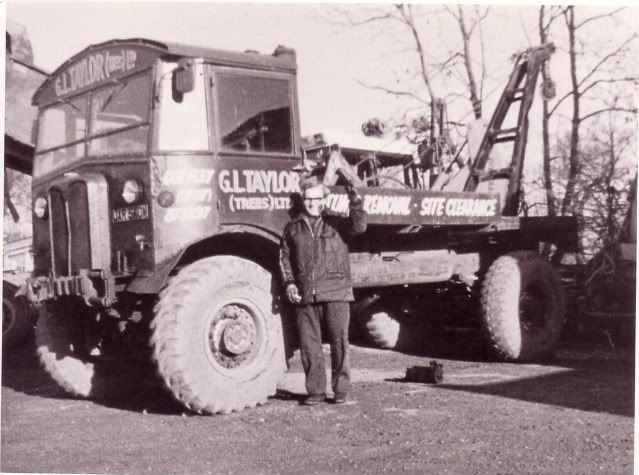
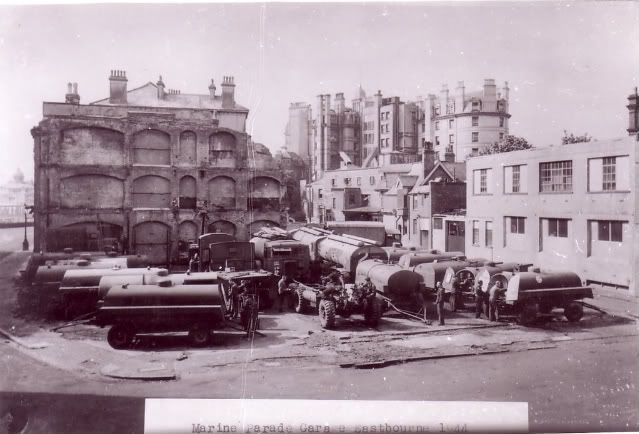
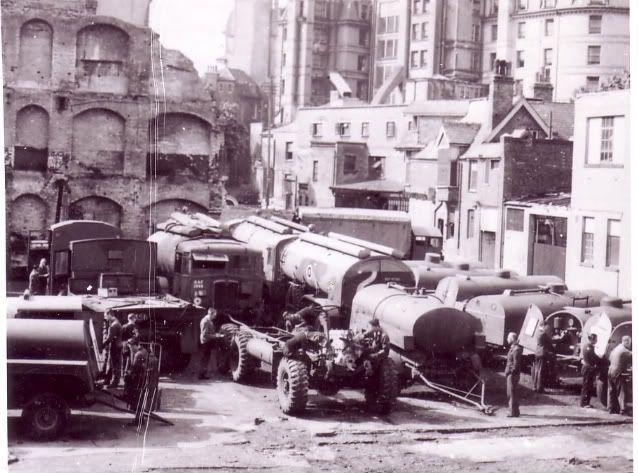
A couple more from George Taylor, Caffyns again, this time on a bomb site on Marine Parade, Eastbourne, The pier is just visible on the extreme left.
-
I think it's the controls to Sweeny Todd's barber chair, he's left his shaving brush, razor and flannel on the floor! You cant see front of the seat as it's tipped over backwards.
-
QUOTE=Is this not Nothe fort ?
at one time it was offered for free to anyone who was willing to restore it.
yes Ashley, thats how I got the photo, I was offered it but I couldn't manage 2 Explorers!!
-
Well they're possibly not the Egyptian variant as the front winch fairlead is on the wrong side meaning they are RH drive. I also notice that the one I have posed as Australian may be New Zealand as it has a number starting with NZ on the door! :red:
I'll look into that a bit further.
Yup should have been New Zealand, in 1956, the Egyptian ones were in 1959
time spent in research is seldom wasted either!!
Scammell Explorer fixes and workarounds
in Transporters & Wreckers (All Nations)
Posted
And by the box full after Aston Down, funny how the security vanished after the last lot was sold!
Thread being started now