


Freeland
-
Posts
54 -
Joined
-
Last visited
Content Type
Profiles
Forums
Gallery
Blogs
Events
Articles
Store
Downloads
Everything posted by Freeland
-
question Water hose clamps for Diamond T
Freeland replied to Freeland's topic in Transporters & Wreckers (All Nations)
Hi Jeff, I understand you would be looking for the DT head gaskets(?). Since I am located in The Netherlands, you might want to check with member "diamond-t-steve" here on the forum. He may know of some contacts in the US who can deliver these. Kr Marco -
question Water hose clamps for Diamond T
Freeland replied to Freeland's topic in Transporters & Wreckers (All Nations)
Thanks Jeff. I found out that any of the clamps of the above pic would go. Also Wittek's "Noc-Out" type clamps would do -
:blush: A little embarrassing that I did not post in this thread for almost a year so about time I give a little update on the project! As said in my last post, we had been engaged with multiple vehicles in a variety of events during 2014. 10 days in Normandy (where, as I recall, we ran into "diamond-t-steve" and his DT, just outside Arromanches) and multiple weekends around Market Garden and the liberation of the Southern part of The Netherlands. We got occupied with the necessary (and often unforeseen) time maintaining, rigging-to-specs and troubleshooting the different vehicles involved. Some had not run for a couple of years... Besides these events, the museum and its collection also required to be running and maintained. But in the background we kept being busy gathering bits and pieces for the restoration projects (Diamond and Dingo) so I knew it was just a matter of time before I could present some real updates here. Below some pictures to give you an idea where we are at. You may notice there is some bending and fitting to do to the bonnet. Once completely fitted and running, the entire Dt will get a second and final, professional spray paint job eliminating any colour differences. Right now we have sorted out the exhaust system and the complete set has been sent off to be replicated to original specs. Also, the window pane has been blasted, glass panels will be fitted soon once we have been able to weld the missing push handle (anyone that has the right dimensions for this part?). The upholstery has also been taken care of by an external party. And once the Dingo has left the spray booth, we can get busy with the ballast box. We aim to restore the vehicle as close to the original specs as possible. Since we now got our hands on all correct UNF-/UNC-sized nuts and bolts (put in a huge spreadsheet taken from the SNL:sweat:) we now can get busy refitting smaller parts. Still, we are quite a way from completing the truck, esp. since we have a long list of hard-to-get (if not impossible to come by) parts for the DT.
.jpg.a1333b8b690b6fe64d7e841e4ff12443.jpg)
.jpg.9ebd61707f99c995cdc33054649cf256.jpg)
.jpg.7818075c9bf247d7403e17d2a4c74011.jpg)
.jpg.31b40b6d34729476065a8a15980f04fa.jpg)
.jpg.d4327a35c27f7f749ab2532db7d08cae.jpg)
-
question Water hose clamps for Diamond T
Freeland posted a topic in Transporters & Wreckers (All Nations)
For our restoration of a Diamond T I am looking to swap the post-war 1950's water hose clamps for the proper wartime types. Going through the spare materials in the workshop, I came across these: I am pretty sure the left (open) and middle (closed) clamps are wartime types for Jeep, Dodge etc. (?). The one on the right is the proper size for the Diamond water hoses, not sure if it is the correct type though. Can anyone tell me what clamps to look for? Would it be the first two types but then in a larger diameter? Many thanks for your input!.jpg.b0b8da3dc151a4f59f37eff8f9e7b3e7.jpg)
-
Isn't this done by BAIV (http://www.baiv.nl/)? They do a lot of repro-work for HT's.
-
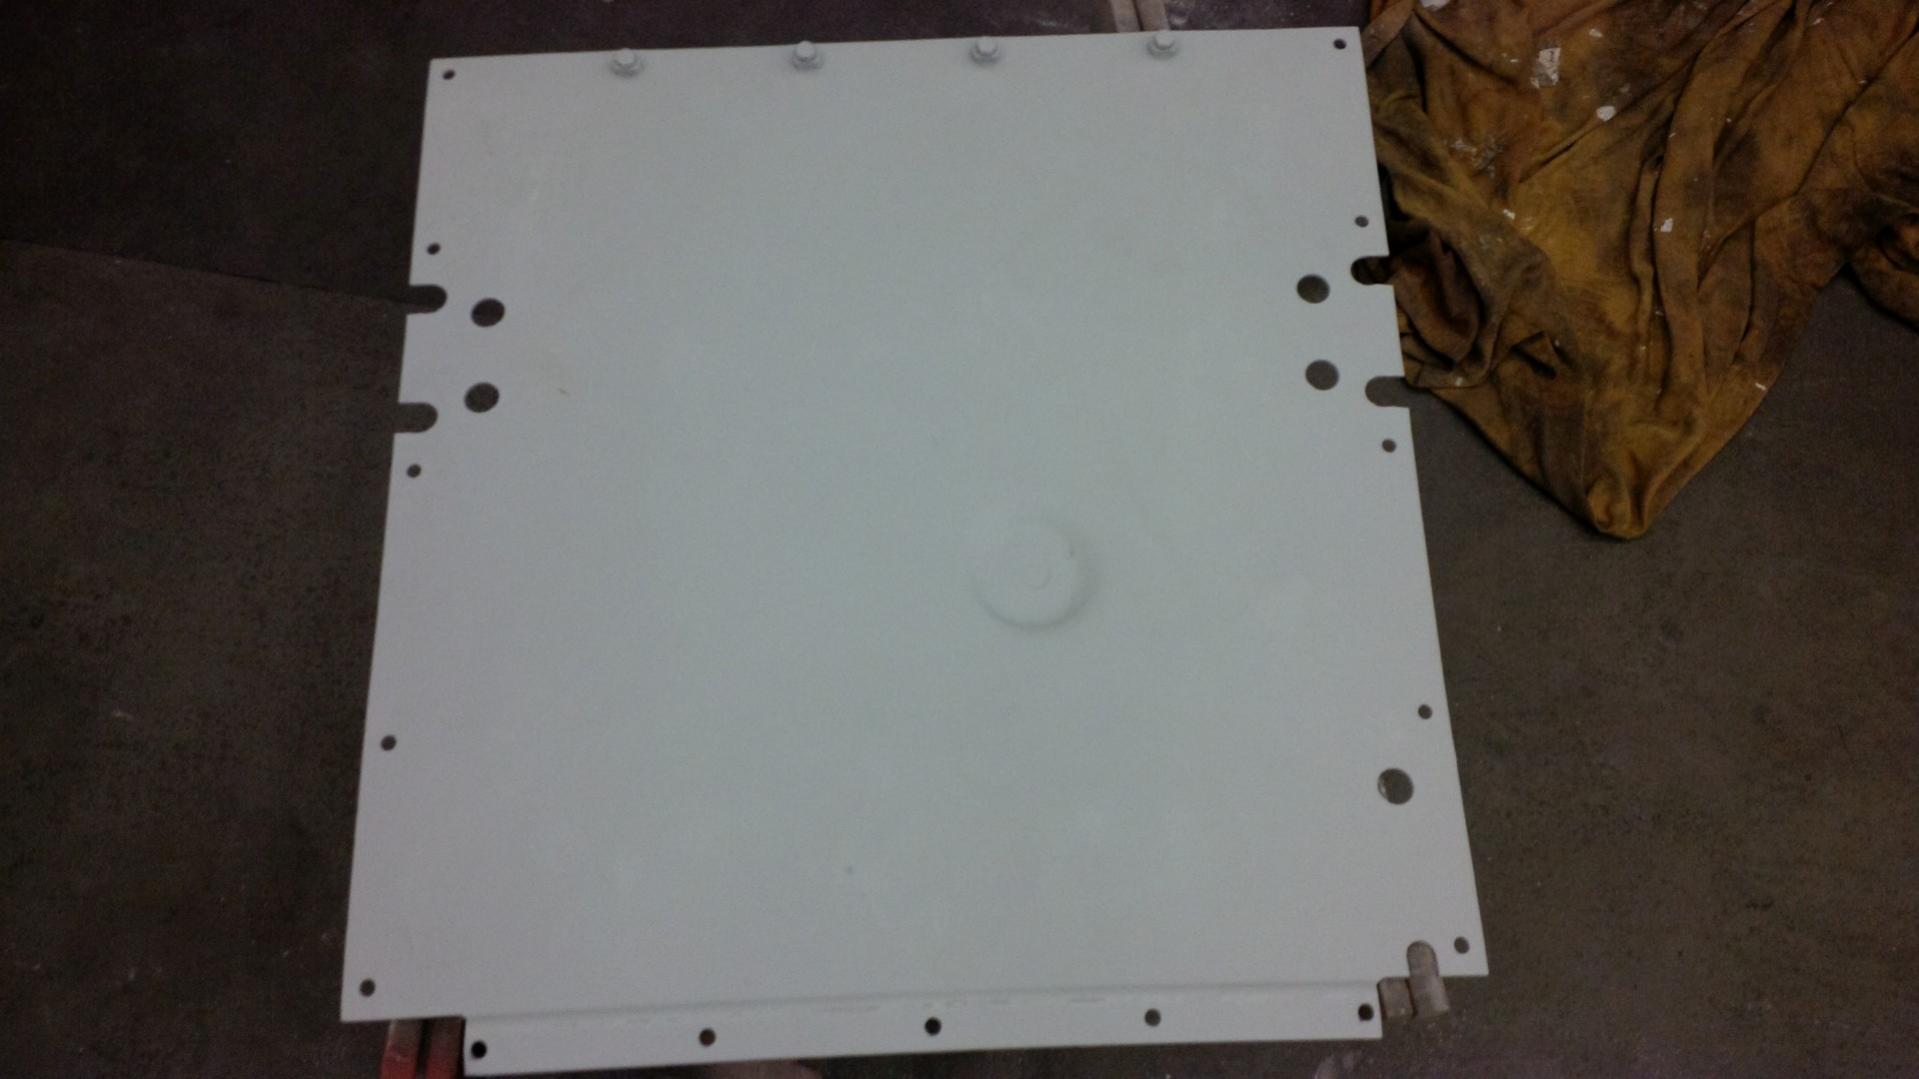
Well, I finally found out these do not belong to the Diamond T at all...but to the Daimler Dingo that is simultaneously being restored :red: :blush:! Prob. the result of having more people dis and re-assemble parts of the DT over 20 yrs time On close inspection some of the plates were stamped with the several digit combinations, year and a broad mark...Also, the whole structure of the material did not check out from what I had handled so far with the DT. The plates belong to the Dingo's underside: But besides this smal distraction, the cab parts have now been assembled as well as the front fenders: Meanwhile, we also have to split valuable time overhauling the Ford M20 and Scout Car M3A1 for the upcoming D-Day festivities...I will make sure no more parts get mixed up :-D
.jpg.5f80385d60163e6e5f71f47da118a760.jpg)
.jpg.ca6a23fbc43bef8d03663484d5c10b0d.jpg)
.jpg.f7058480b6270bba2dbaa13f1347b25f.jpg)
-
Hi John, thanks for you swift feedback. Actually I was thinking along those lines, although none of the original documentations we have (manuals, SNL parts) makes note of any of these six plates. Four of them are heavyweights and rather look like reinforcements/armoured plates to me. So having them placed underneath the vehicle would make sense...As long as these are not post-WW2/"after-market" additions I am fine with it Tomorrow I have planned a full day at the workshop so I will check this rightaway.
-
Winch installed and cab complete: If only we would know what these plates are for (we have 6 in total)......: Anybody has a clue?? Many thnx!
.jpg.d4b16e1142722e1bf5f100c164d526d5.jpg)
.jpg.d79be59edb77e8041e75537f1ebd7086.jpg)
.jpg.abf95f4d77f32bc380dadeefb5c3978d.jpg)

-
Just a brief visual update: The winch has now been fully overhauled and is ready to be reinstalled: Still missing some parts like the rod connecting the front cab to the radiator (will be reproduced from scratch) and one of the battery retainers. Still, getting there slowly but surely! Our goal is to have this machine on the road by September this year (70th anniversary of Operation Market Garden): Once all "hard" components are in place, the whole structure will receive a final spray paint job before installing the air lines, electronics and canvas.
.jpg.425ea265a5b9aac62e80aca866d16762.jpg)
.jpg.22550ed7f04bc912990ecc0b877dc10f.jpg)
.jpg.8b9305105280f62375f893810143e8cc.jpg)
-
Quite some work has been done since my last post so time for an update! The panel work came back from the blasters but needed some spot-welding and touching up. Esp. on the cabin parts which consumed quite a lot of time since those parts had to be primed and sanded again afterwards. Finally, we got the right color after many attempts by the regular supplier and we were able to make good mileage on the spray painting. Finished installing the steering gear, radiator, transmission and drive shafts + all related "attachments". The fuel pump showed oil leakage which had to be sorted so it had to come off for a weekend's overhaul. The pump was refitted with the proper timing. Btw, this is one of the few ëngine" parts we did not respray since we want to keep the original patina. Furthermore the front cabin part has been reseated (we are still looking for the proper front support, any hints?) and the winch has been fully disassembled, awaiting its paint job. We also put back the front bumper, although we still have to order the proper nuts and bolts for it. As with many of the connecting materials on this truck, the formats of nuts and bolts are a mixture of metric, UNC and UNF. Our goal is to make the DT as original as possible. The result so far (I will try to get some detailed pics later):


-
Moving forward with our complete Diamond T restauration see http://hmvf.co.uk/forumvb/showthread.php?38214-Diamond-T-981-ground-up-restoration-the-right-colors-for-a-wartime-Hercules-DXFE/page3 we have decided we would like to have the complete cable loom rebuild to original specs, using original, NOS or replica materials. I contacted Vintage Wiring from Maine but it appears they do not have anything on the 980/981 series cable looms (only on the 968 series). So I was wondering if there are other reliable vintage cable loom builders that we can contact. A firm situated in Europe would be preferred btw. Many thanks! Marco
-
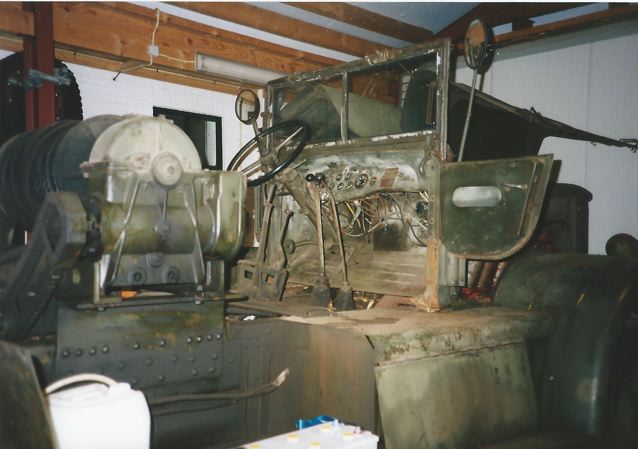
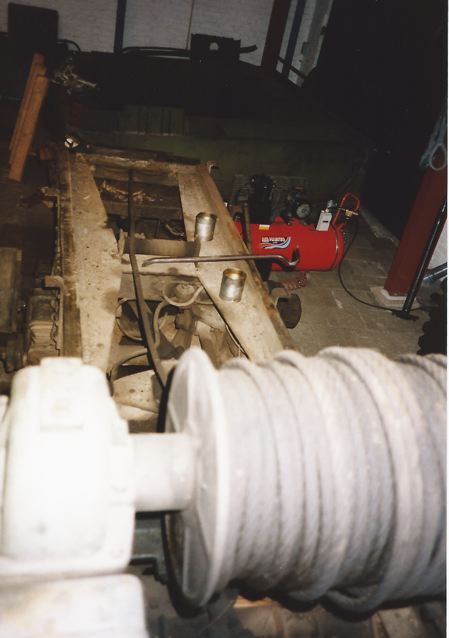
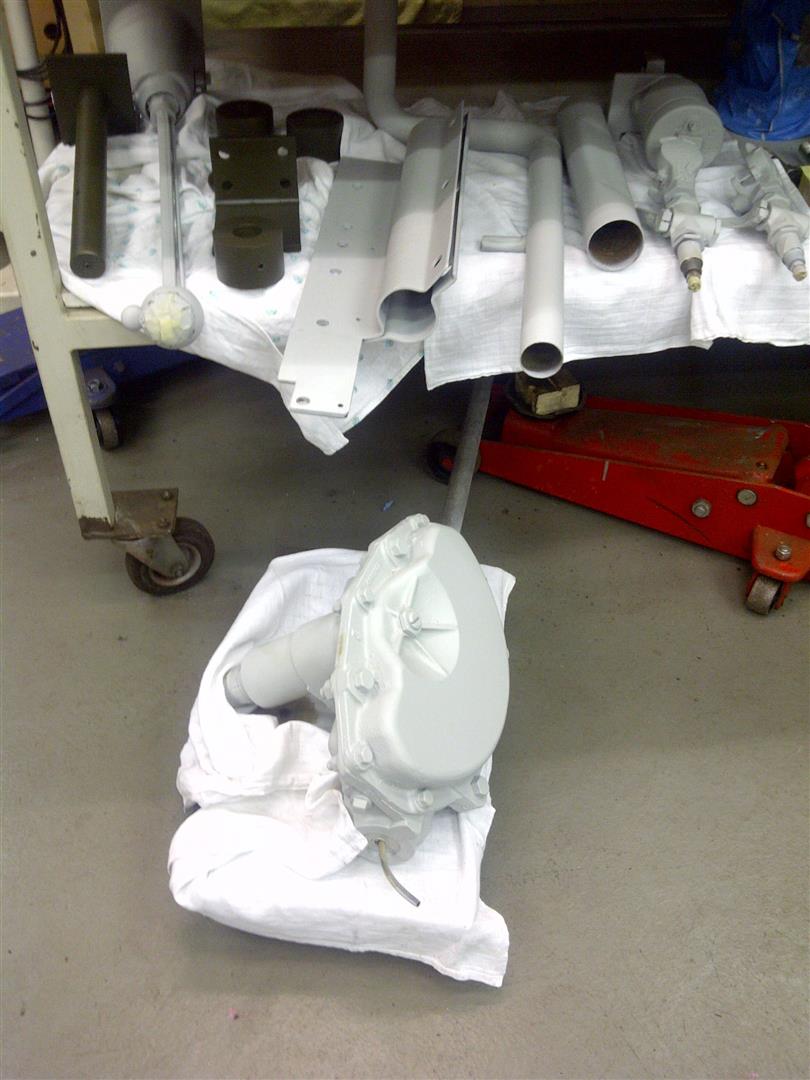
It has already been two weeks since I came back from my holiday so I am working on the "T" again. The transfer case has now been bolted into place but I am looking for the proper color of the shafts that connect on both ends. Should both be grey, green or different colors for each shaft? Tony, as for your last question: no, the heads have not been removed during this overhaul. That was already done by the late "house-mechanic". He also took on the complete fuel system a couple of years ago and forewarned us the balancing of a 980/981 fuel system can be real tricky. You may notice from the pictures that this section we did not spray paint. We never took that sub-system apart during this resto since it was already finetuned and it is still in a vacuum state. Earlier, one of you asked for some pictures of the state this Diamond was in when purchased. I managed to find some pictures of the vehicle dating back to 1995-1996: .


-
prices of deac weapons at war and p show !
Freeland replied to griff66's topic in Weapons/Accessories
Recently, I received from a licensed importer an overview of prices incl for some of the guns mentioned here (fully working specimens, not tampered with). I must say I am really amazed at the market prices of the deacts mentioned here (and found "out there" in general). I guess it is also due to the popularity of reenacting these prices have gone up in a short period of time? -
Thank you all for your supportive input on this project! I will do some proper replying when I am back from my holidays (typing long texts via my phone is taking too much time). Will be enjoying a 2 months "in between jobs" so maximum time to work on this project (besides the Dingo that is simultanously being restored).
-
After having received the wrong color for four (1) times in a row over the past 1.5 month, we finally had the opportunity last weekend to spray paint the inner part of both frame beams for the second time. The engine could now be reinstalled which we did last night... :laugh: (again not the best quality pics but I only had my phone at hand) The ever-reliable Ward LaFrance to the rescue! A tight fit! Just one inch away from adding some extra ventilation holes in the roof... Lowering by mm's...Notice the generator is not installed yet, that is a different story... Installed... ...or is it? When outlining the engine with the front adapters we had not noticed the front support coming loose by half an inch! Appearantly it had been poorly tightened from the start since we never touched it. So the whole engine block sat too far backwards to tighten the rear adapters. Not wanting to raise the engine block again (damaging the frame, waking neighbours with the Ward alarm clock etc.) we had to do a lot of prying, pulling and heaving before the heart of the "T" was finally in place. It was about 1 in the morning so no time to tidy up for any press pictures. Which I did the next morning Cleaned and ready to install the auxiliary transmission (after our holidays that is :-D) And still the mounting was not done. I noticed the TM stated that, from the rear two engine supports, the front bolt in the right hand support should be fitted in from the underside upwards. Probably for easy access since the cabin rests on top? Luckily, by means of a good garage jack and a plastic hammer this proved an easy exercise:
.jpg.53d313668e952e3fef1560dde76dd3c4.jpg)
.jpg.ff3d8165e93596c1c052f0f706def2b5.jpg)
.jpg.1a08d58fc38fec1b17b13e5ebbe167dd.jpg)
.jpg.8b8daadb136fad5d7ad34c174907edab.jpg)
.jpg.62b6dcaa7b749f736dbeb3d2ce7cdb6b.jpg)
.jpg.a5b8b5411bf7b761e25d3b7cf221faca.jpg)
.jpg.3d3415e9a7d9e2d43f14856c7790c623.jpg)
.jpg.793b280e5ba9108b5ac052ea1a5214e5.jpg)
-
Guys, many thanks for reacting to my question and for coming up with answers and suggestions(I somehow was not subscribed to it so was not aware of any replies)! In the meantime we already discussed what we could do and have decided that pushing the T over it's (mechanical) boundaries is not the way to go. Instead, the 981 will be kept 100% original Cheers again, Marco
-
While still in the midst of the restoration of a 981 (DXFE engine) we are now seeking a way to increase this transporter's top speed. Reason for this is that we plan to drive the "T" from Holland to Normandy in June 2014 for the D-day commemorations. However, with other vehicles in the same convoy and the T's max. speed of only 35mph, it is going to be an extra long haul. We do not want to make any irreversible changes to this 100% original vehicle, therefore does anyone know of a more sophisticated trick in the book? I am then thinking along the lines of making changes to the final drive for instance. Esp. since we will not be pulling out any stranded Shermans nor do we plan to take it offroad at any time. Maybe by adjusting pignon and/or crown wheel? Or swapping any of these out with a specimen from a different truck like GMC, Mack etc.? Or perhaps there are other ways to just add a few extra miles per hour? Any help or hint is greatly appreciated! Thanks, Marco
-
Thank you Steve! It is a fun project to work on, although we also suffer from the inevitable setbacks. For the second time now we received the wrong color green from our supplier so my spray painting job is on hold. Meanwhile, we installed the steering gear but discovered it only had about 4 bearings left. @John: I already saw your post on g503 regarding the decals. Since there are more vehicles with Hercules engines in this collection, I want to check what is needed. I will pm you when I have the complete inventory, ok?
-
Just a small grapihical update on our w.i.p. Engine after steam cleaning Primed and spray painted! Meanwhile, the frame has been been spraypainted for the first time. Major parts will be refitted in the coming weeks Data plate Engine dated 17 Jan. 1944
.jpg.736249852b8ae6cbba9734a9c94fc70f.jpg)
.jpg.672d8eb814e563eaf1896432318d033f.jpg)
.jpg.49cef5b65e40dc0c914dceafc7a33845.jpg)
.jpg.c350ca5a124d37ce3edadb3a30961bb3.jpg)
.jpg.3e451956a53c4aa1b7c3e1611a53eb7e.jpg)
.jpg.c7a3a7757b8b357cf11f79d8f0d5d2cc.jpg)
.jpg.2931f165724db1078fbff6ec0a72a135.jpg)
.jpg.e23f8b4d12cad140983b15643cd298b1.jpg)
-
And that is only half of it....Photographing, documenting and labeling is the way to go. I am very happy with the workshop since virtually all necessary tools imaginable are available. Let us say it helps when someone has been in the tool shop equipment business Yes, those are spray fume extractors and a effective system indeed. When engaged I have to open the larger outside garage door to avoid any vacuum..
-
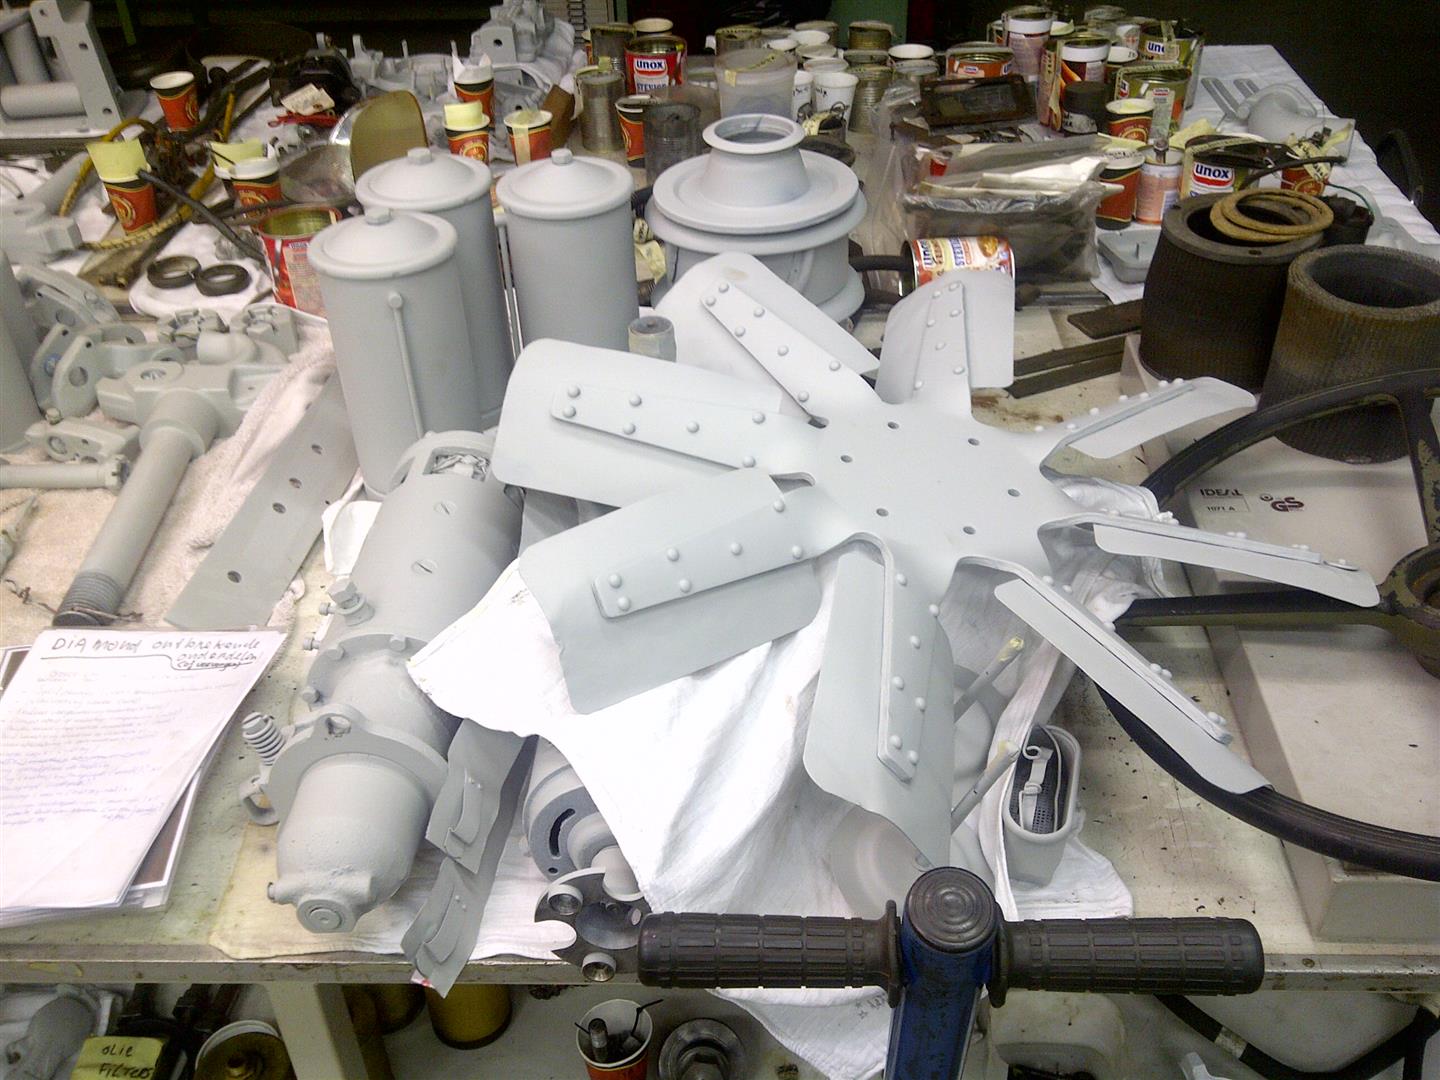
The engine currently sits outside awaiting final degreasing/cleaning before we move on to the priming stage. It has already been steam cleaned a few days ago and as some parts are now bare metal, it is fully wrapped up. Now we only need a few days of good weather. Made some snapshots with my phone yesterday to give you a further impression: Transfer case Every tiny bit has come off. The semi-gloss black corner (minus the steering wheel ). The latter will be soaked in brake fluid for a while to remove all that green (French) paint Laundry line And more. Hopefully that snow camo will be replaced with the proper green by the end of this weekend Some parts ready to be fitted Bonnet, wheels (tires to be replaced) and cabin. The cabin is in good condition (hard) and the only thing that needs replacement is the firewall. Unfortunately the bonnet revealed no numbers or markings underneath the layers of paint Old but hard steel ready to be taken to the shotblasters. The winch is in good order, just needs disassembly, thorough cleaning and a new paint job More for the shotblaster


-
That one was taken at the 2nd Red Ball Express (2012) weekend ("Twente Achterhoekweekend"). An excellent weekend with over 350 WW2 vehicles, from parabike to M10. http://www.twente-achterhoekweekend.nl/EN/ If you happen to be in The Netherlands at that time it is sure worthwhile visiting
-
Hi John, thank you for replying to my questions. As for the filter on the compressor; I am led to believe this should be semi-gloss black since the inners of the filter "case" are exact this color. Unless of course this was a post-war French/Italian paint job. Thanks Richard. The engine's paint was heavily chipped, repainted by hand(!) so this needs new priming and spraying. But technically it is ok; it simply ran when brought in! So, we decided to leave the fuel section alone since the late fulltime mechanic (passed away a year ago, aged 88) already did this part. He explained finetuning the fuel system is a different sport so.... This 981 has been here since '95 and there are a lot of analogue pictures at hand. But I will look up the digital ones to post here later on....I took a few today, will post tomorrow
-
This HUP, rescued some 12 yrs ago from French reserve depots, bears it's original paint and markings although the WD number marking is post-war. This is here where my question marks came up and I decided to find out more. I posted the same question on the Maple Leaf forum a year ago but never got an answer. Also, the RCA museum in Canada was not able to come up with anything. I am pretty well known with the German and US military markings from the '44-'45 ETO but my knowledge is a bit lacking when it comes to British and Canadian forces. The following signs and markings are found on the vehicle (sorry for the dark pictures, I only had my phone at hand): Formation Sign 4th Armoured Division This Unit Sign would place this vehicle in the 15th Field Regiment RCA (towed) Unknown sign to me Tactical sign, HQ squadron? I got as far as being it a HUP from the 15th Field Reg. (towed) RCA, regimental HQ (?) which was attached to the Canadian 4th Armoured Div. (Gold leaf on green) . I suspect it being a battery HQ vehicle considering the black diamond tac sign, although I do not know what the "blue part" in the diamond means. Also, the beaver sign is unknown to me. Is this a common Canadian Forces logo? Lastly, I was wondering if there is anything to say about the vehicle's WD number (CZxxxx) origins and moreove where the HUP fits in the order of battle for that era. A lot of thanks! Marco


-
Yes, I will get to that later for sure to spice up this thread (too little time unfortunately to start a full-blown blog)
.jpg.a1333b8b690b6fe64d7e841e4ff12443.jpg)
.jpg.9ebd61707f99c995cdc33054649cf256.jpg)
.jpg.7818075c9bf247d7403e17d2a4c74011.jpg)
.jpg.31b40b6d34729476065a8a15980f04fa.jpg)
.jpg.d4327a35c27f7f749ab2532db7d08cae.jpg)
.jpg.b0b8da3dc151a4f59f37eff8f9e7b3e7.jpg)
.jpg.5f80385d60163e6e5f71f47da118a760.jpg)
.jpg.ca6a23fbc43bef8d03663484d5c10b0d.jpg)
.jpg.f7058480b6270bba2dbaa13f1347b25f.jpg)
.jpg.d4b16e1142722e1bf5f100c164d526d5.jpg)
.jpg.d79be59edb77e8041e75537f1ebd7086.jpg)
.jpg.abf95f4d77f32bc380dadeefb5c3978d.jpg)


.jpg.425ea265a5b9aac62e80aca866d16762.jpg)
.jpg.22550ed7f04bc912990ecc0b877dc10f.jpg)
.jpg.8b9305105280f62375f893810143e8cc.jpg)


.jpg.53d313668e952e3fef1560dde76dd3c4.jpg)
.jpg.ff3d8165e93596c1c052f0f706def2b5.jpg)
.jpg.1a08d58fc38fec1b17b13e5ebbe167dd.jpg)
.jpg.8b8daadb136fad5d7ad34c174907edab.jpg)
.jpg.62b6dcaa7b749f736dbeb3d2ce7cdb6b.jpg)
.jpg.a5b8b5411bf7b761e25d3b7cf221faca.jpg)
.jpg.3d3415e9a7d9e2d43f14856c7790c623.jpg)
.jpg.793b280e5ba9108b5ac052ea1a5214e5.jpg)
.jpg.736249852b8ae6cbba9734a9c94fc70f.jpg)
.jpg.672d8eb814e563eaf1896432318d033f.jpg)
.jpg.49cef5b65e40dc0c914dceafc7a33845.jpg)
.jpg.c350ca5a124d37ce3edadb3a30961bb3.jpg)
.jpg.3e451956a53c4aa1b7c3e1611a53eb7e.jpg)
.jpg.c7a3a7757b8b357cf11f79d8f0d5d2cc.jpg)
.jpg.2931f165724db1078fbff6ec0a72a135.jpg)
.jpg.e23f8b4d12cad140983b15643cd298b1.jpg)


