


Simon Daymond
-
Posts
571 -
Joined
-
Last visited
Content Type
Profiles
Forums
Gallery
Blogs
Events
Articles
Store
Downloads
Posts posted by Simon Daymond
-
-
Hi Daz, welcome to the forums. (thanks for the advice Catweazle) ^^
-
Hi Mike, welcome to the forums. Do Fisher Price do angle grinders for kids?
-
Hi Steve, welcome to the forums.
-
Hi Rob, welcome to the forums.
Explorer beating you into the ground? - wait till you've had a few more years, you'll be subterraneous
-
Hi John welcome to the forums, sounds like you are a mine of info!
We like pictures on here, so if you can oblige, in between mince pies of course.
-
nice ferret, welcome to the forums, (sorry if it's a little late) might see you at some shows with the militant, seeing as you're local like
-
just to bump this, does anyone know of any storage in the Yorks area? I need a militant size parking space. Timbo, did you have any luck?
-
Had a quick read through of some of the literature on the links, listing the building wouldn't automatically mean it was saved, however it would seem that by listing it, at any further planning applications, the building's importance etc would be noted, even if no-one was present to make the case for it, i.e. if the chap wanting to bulldoze it had a planning meeting whilst we were all up to our chins in W&P mud etc.
I'd make the application, but don't know enough about it to do proper justice, and making half a job would probably do more harm than good. Surely a collaboration could be submitted?
-
they're like buses, wait years for some, than a shed load comes along at once (mind this was the first time I actually asked, they weren't really the most pressing of problems prior)
-
looks like a nice bit of kit. Whilst on the subject 6x6, do you, or any other members, have any ground anchors, as pictured?
-
doesn't it state at the bottom of the decision, that applications can be made to English Heritage to have pillboxes classed as 'listed'? Wouldn't that be a better longer term solution? Clearly the individual seeking demolition is just going to keep going at this.
-
regards unhelpful comments;
if I want to get any work done on the militant, I have to take it in the garage and bolt the bloody doors, if I don't I attract an audience, who all remind me of that Harry Enfield character.. 'you don't want to do it like that..' etc etc
So I must decline your kind offer of moral support, sorry. I've become quite adept at giving onlookers the message ' look I'm giving up my spare time to get something done, will you please bugger off' It seems to work very well, and saves a fortune in Christmas cards.
-
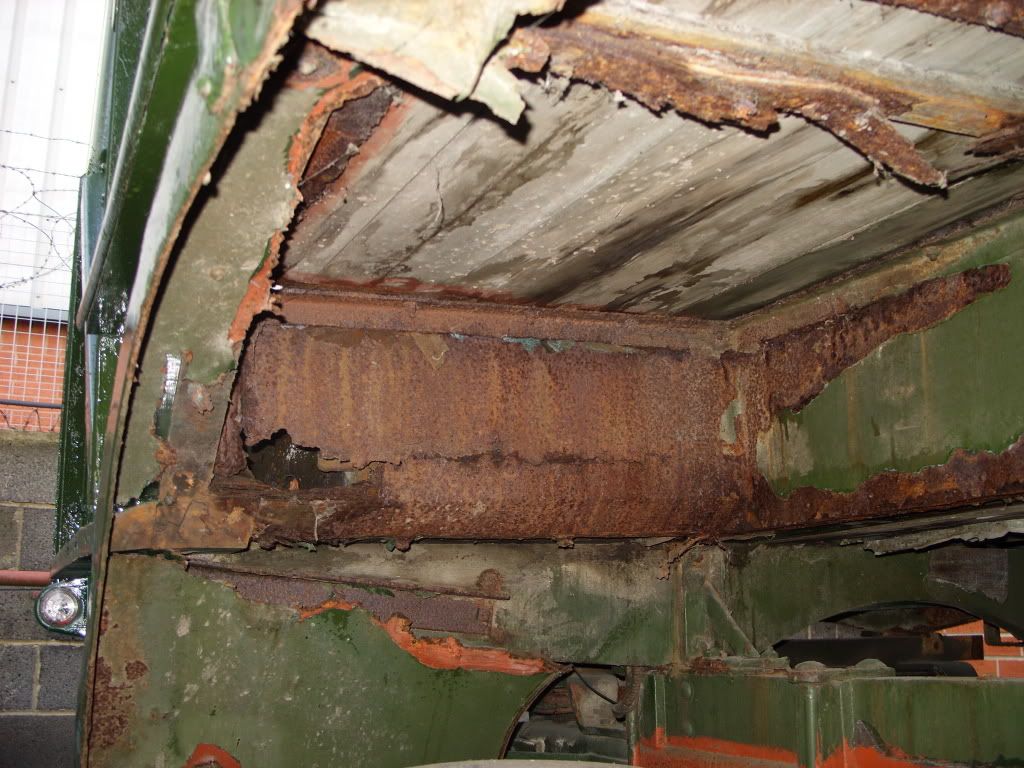
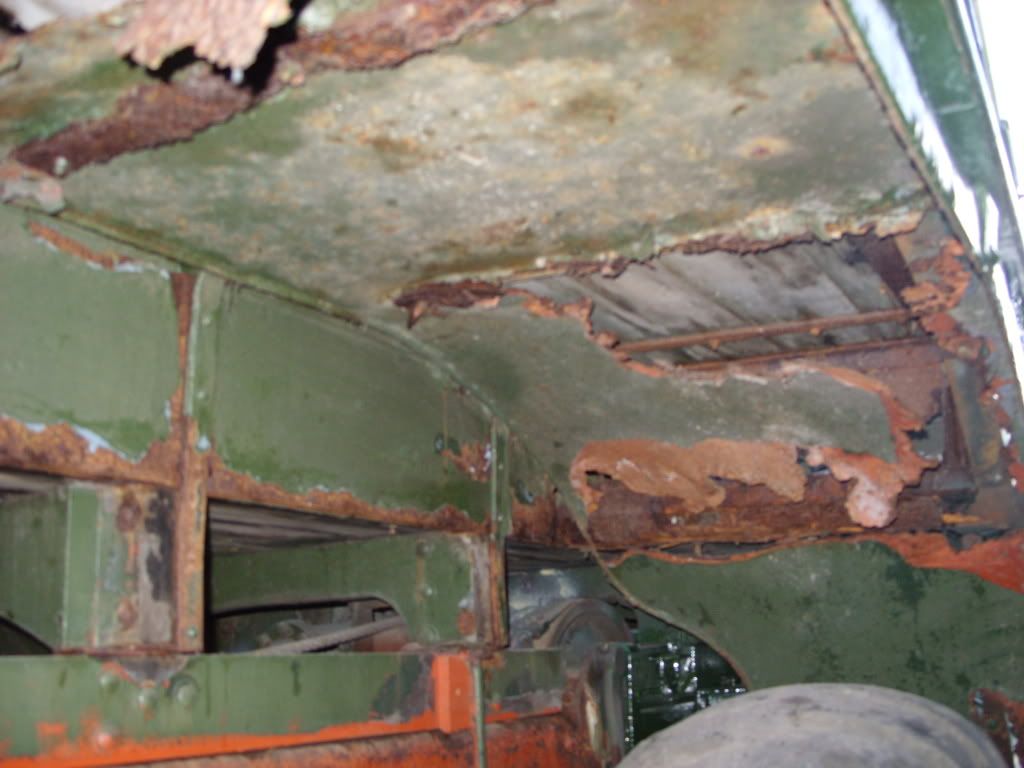
The wheelarches were always suspect, but have been helped along, by pokers at work, who seem to think they are doing me a big favour by poking a hole in what was left, whilst pointing it out to me.
I'm hoping that I can get a good enough pattern from what remains. The pictures show the off-side wheel arch, which is terrible, although the nearside, isn't much better. What I intended to do, was to make a paper template from the goodish N/S wheelarch (the flat bit not the outer edge) then use it to cut 8 flat pieces, then I was going to tack four of the pieces internally, one per wheelarch section, then remove the worst of the original metal, then tack the other four externally, ending up with a sandwich with the original wheel arch in the middle, but only the outer edge visible. The outer edge on the wheel arches is intact on all sections and I think I can get the metal to weld to it. Does that make any sense? Basically I'm going to attempt a repair in situ, welding where it will, using the orignal arches to get the shape, and benefitting from the fact that they are still fastened to the body.
Failing that, apart from starting completely from scratch, I don't see what else to do. The wheelarches are far too fragile to stand being removed, let alone being worked on in the garage, I think the best option is to get the wheels off, remove the large flaky bits, clean an edge to weld to, and get cracking.
I've looked at the wheelarches, and think that once the arches have some good metal internally, I should be able to release them from the body, and slide the outer skin into place, then jack the wing back up into place, wedging the metal and forming a curve, then I'll blat it with the welder! Anything that either blows through, or looks to messy can always be tidied up.
That's the plan, if it works I'll show you the pictures, if it doesn't no-one will get to see it!
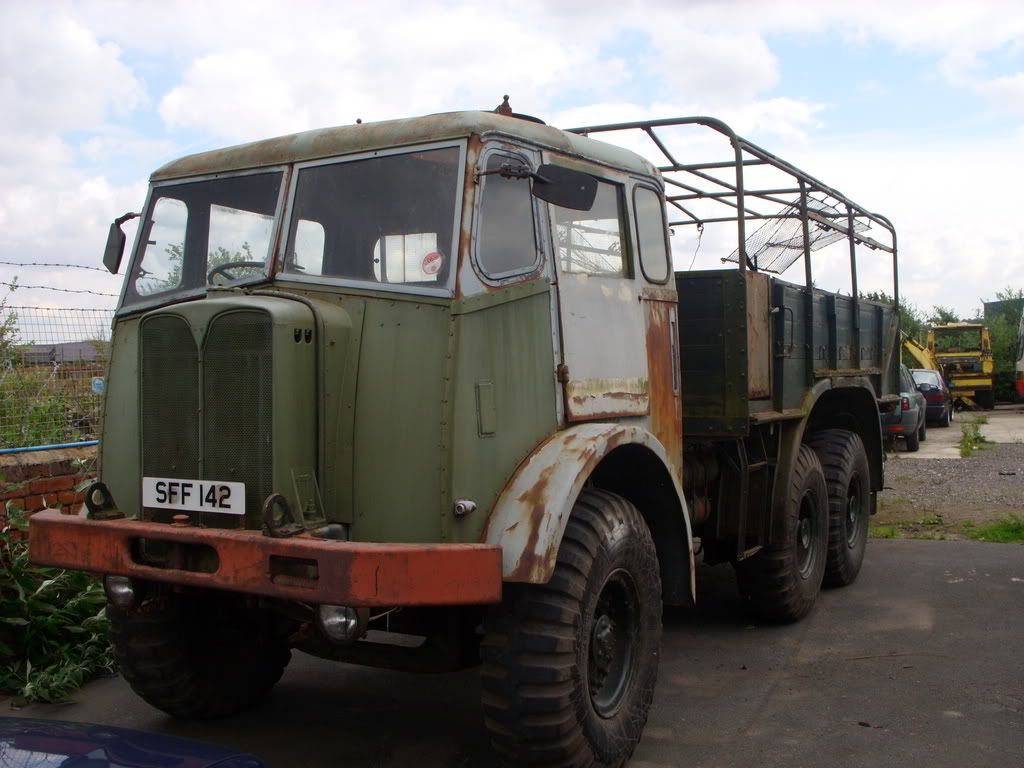
This is the nearside wheelarch, the gaping hole was where the centre part went, but this was a flat sheet of steel with a rolled egde, which is still present. I can either make a complete new one, or simply weld some flat steel sheet to the original edge.
-
That seems it, thanks Richard, I seem to recall that it had both on the back, would there be one either side of the tailboard? i.e yellow and blue diagonal square on the left, red and blue on the right? The one you show looks vaguely familiar, however, the one I recall had only a very crude stencilled crown etc.
The yellow and blue were so poor they were literally smears of colour, I wouldn't have known what shape or size they should have been.
Any ideas what the insignia on the radiator could have been? It was a dark blue triangle, same shape as an AEC triangle badge, with a white patten on it, it's visible in one of the earlier militant pictures I posted.

-
well I called into workk today, after Xmas shopping with Tina, to take some of the interior body pics of the Militant. However, when I dropped the tailgate I remebered that I had dumped a load of junk in the back, and seeing that I was in my finery, and with the boss watching, relaised that I couldn't shift it to take some better pictures, so these will have to do for now.

someone, tried to use these steps, despite being told not to, and pulled the bolts through the floor, more bleedin' work!
In primer back in July, it's still wet in this picture
taken today, still plenty to do , but getting there, next job finish the headlights.

-
Hi, welcome to the forums, be brave and just get on with it
-
Fantastic NOS, thanks for that I thought that strip was going to elude me, also the pyramid tread strip, something I was told was discontinued years ago, I'd better get an order in before I spend all my pennies on Christmas.
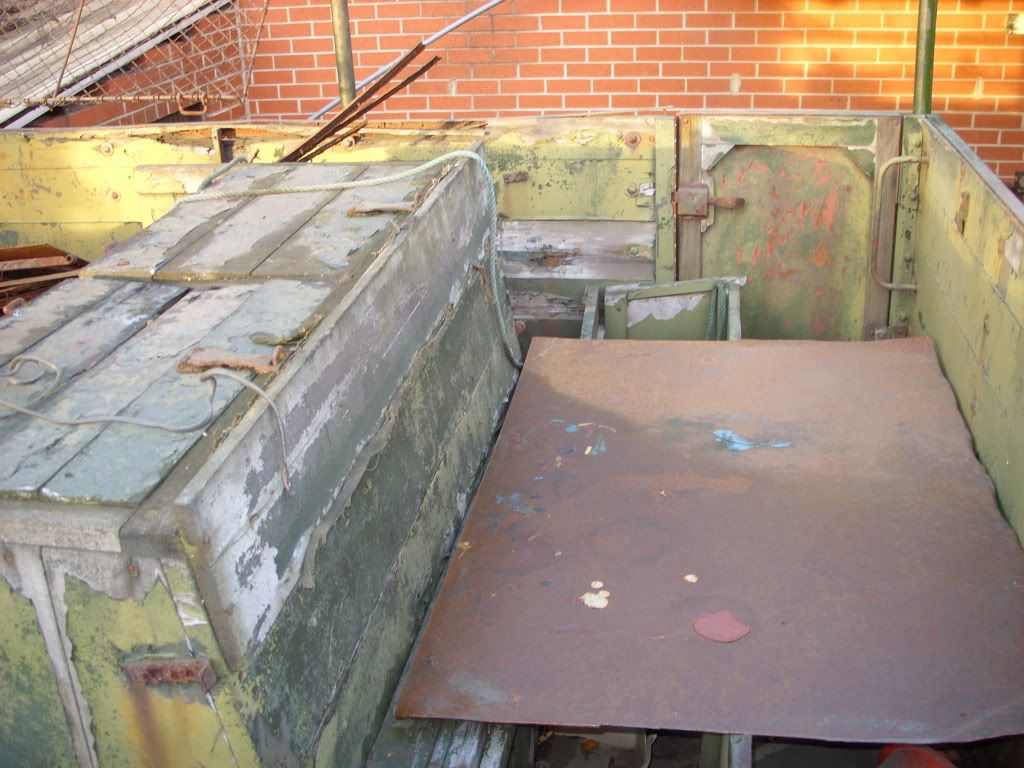
Tom, the back body, although a bit sorry, seems complete. There are the seven crew seats and lockers at the front, which comprises a 5 seat row at the front, then two single seats behind ( one nearside, one offside), access to these seats is gained by tilting the seat back forward, of the seat in front. Also, there are two single seats, which hang off the rear body sides.
The back body could be better, but at least it's all there to copy etc. I'll post some pictures this weeked. If anyone wants any more detailed ones or measurements etc, just ask.
Unlike some militants, this one wasn't stored too much and got around, but I can't accurately recall the history, I was told it over the phone by Wally Dugan, ex-military museum, Beverley, and I didn't have a pen! So I'll have to get writng off for it.
From what I recall, the militant ended up in the driving school, sorry don't know the Army term for driving school. Would anyone know the insignia? I recall a blue and red square with a crown on the tailboard, but it was barely visible, and has long gone. Also there was a blue triangle painted on the radiator, with a white pattern on it, but again it was so bad you couldn't make out what it was, or at least I couldn't at the time, sadly this was all before digital cameras, and I didn't take anywhere near enough pictures.
From the driving school, it was sold at auction in 1982 I believe.
-
here's the plan, I was going to cut some flat steel for the wheel arches, then offer it up, with the wheel arches still attached, and tack weld it in place (the arches are that bad they would lose all shape if they were removed, but the outer rolled edge is fairly good)
I had hoped that someone had some wheelarches which would have saved me a lot of time, but nevermind, I love burning holes in myself with weld spatter!
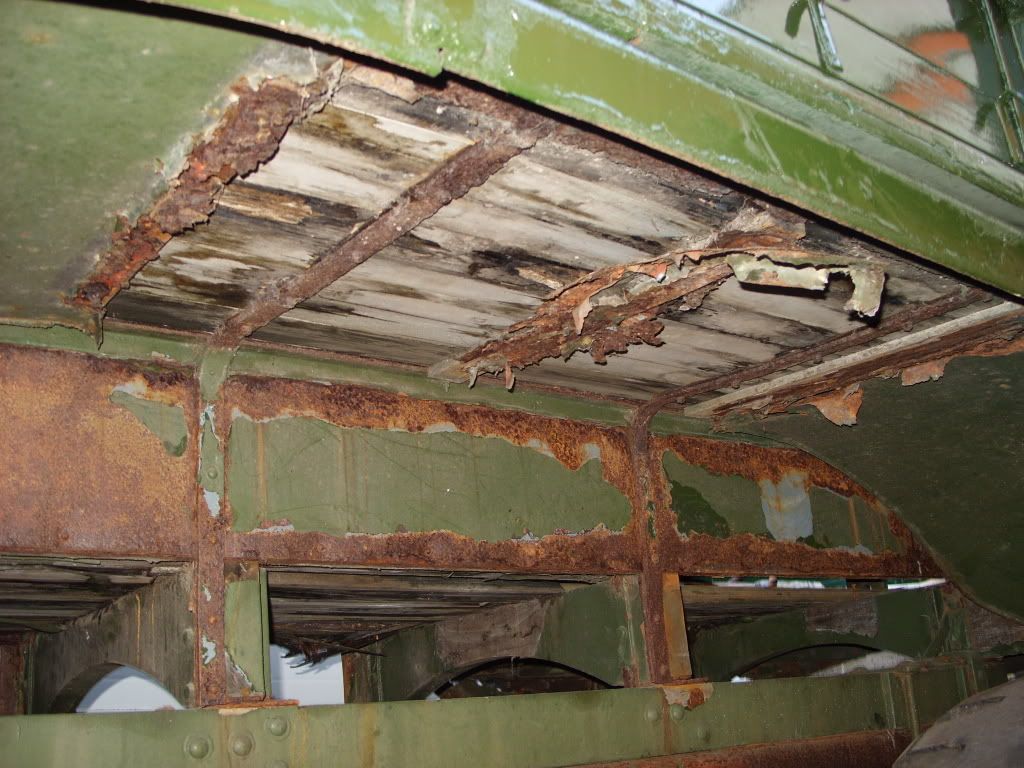
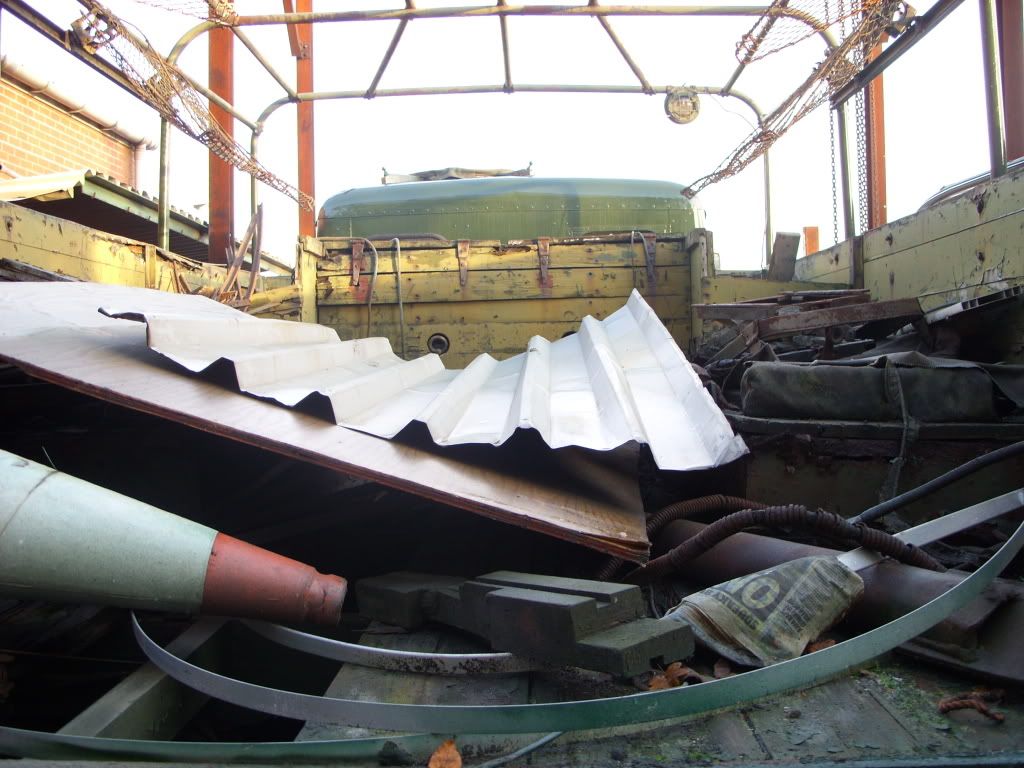
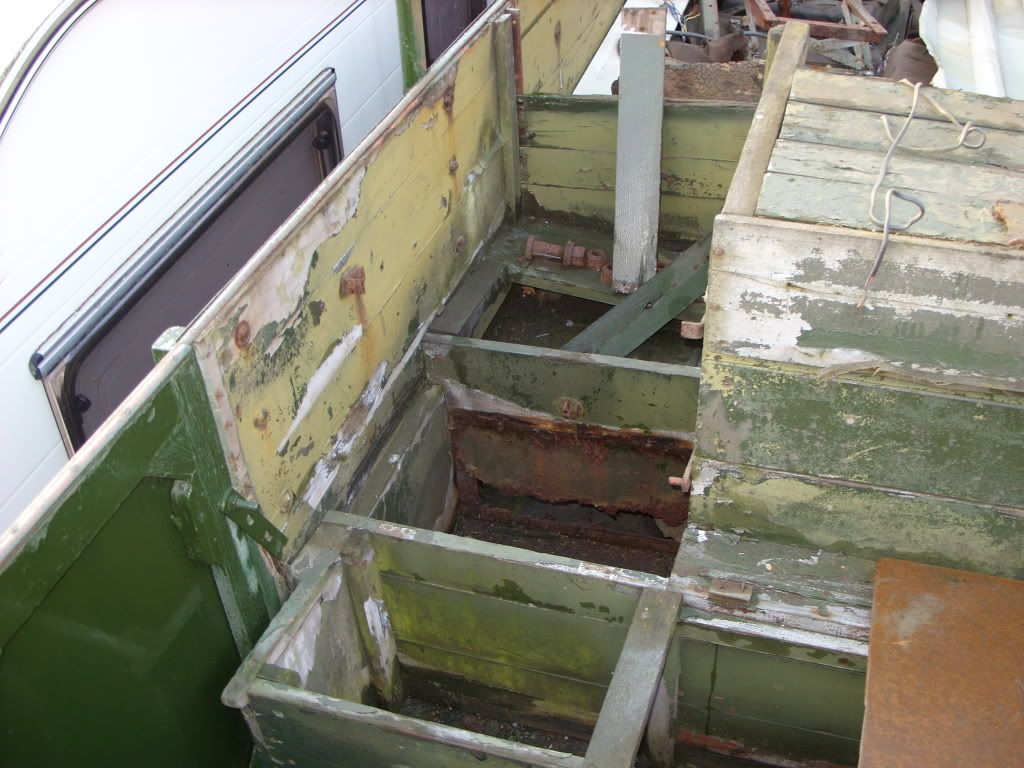
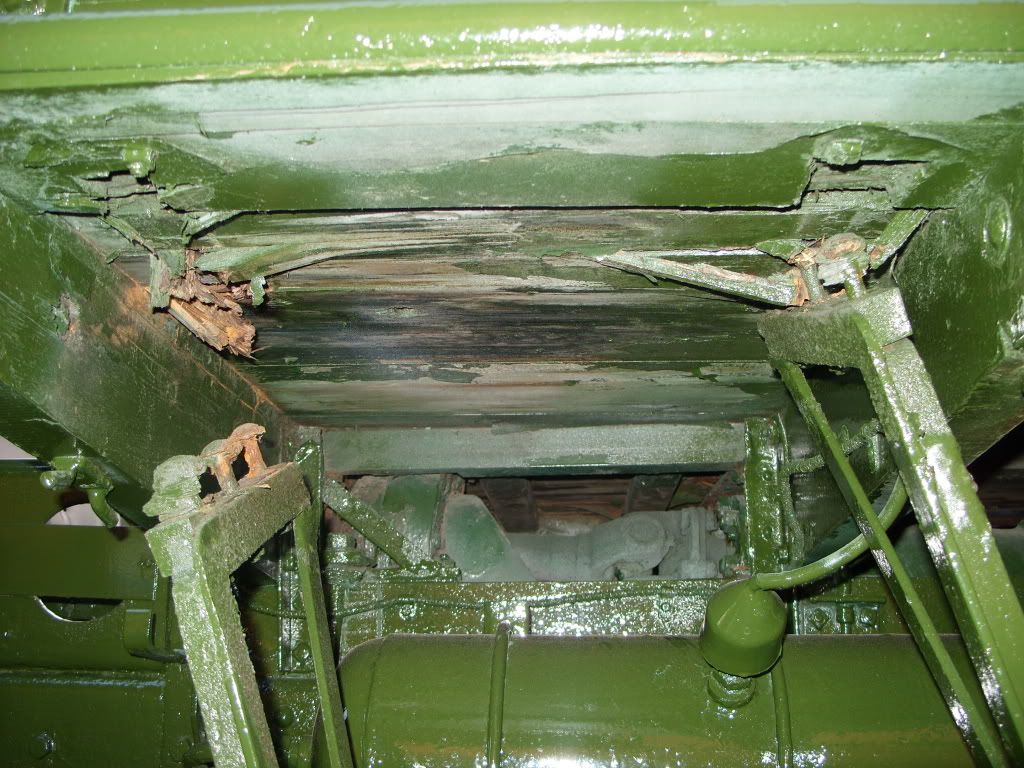
The pictures below were taken last summer before I started this recent bout of work. The rear body is ok but has a few rotten planks, in the sides, tailboard and floor. I hope to remove the remaining floor and use the planks to repair the tail gate as it seems the same thickness. The floor wil be replaced by ply, not original I know, but a damn sight cheaper and won't be seen once painted.
The back body is a project in itself, but from a distance looks ok for now. The main aim with the militant, since last summer was to get it put back together, then back into a roadworthy condition, then hit the road! I can't commit to a nut and bolt restoration job, it'll have to be a work in progress from now on. I tried the former method originally, which resulted in bits everywhere, garages, sheds, cupboards etc, and a vehicle that looked a state.
I'll take some better pictures soon, and intend to post a few before and afters for comparison.
the above was taken last year, the missing plank was there until I put my foot through it
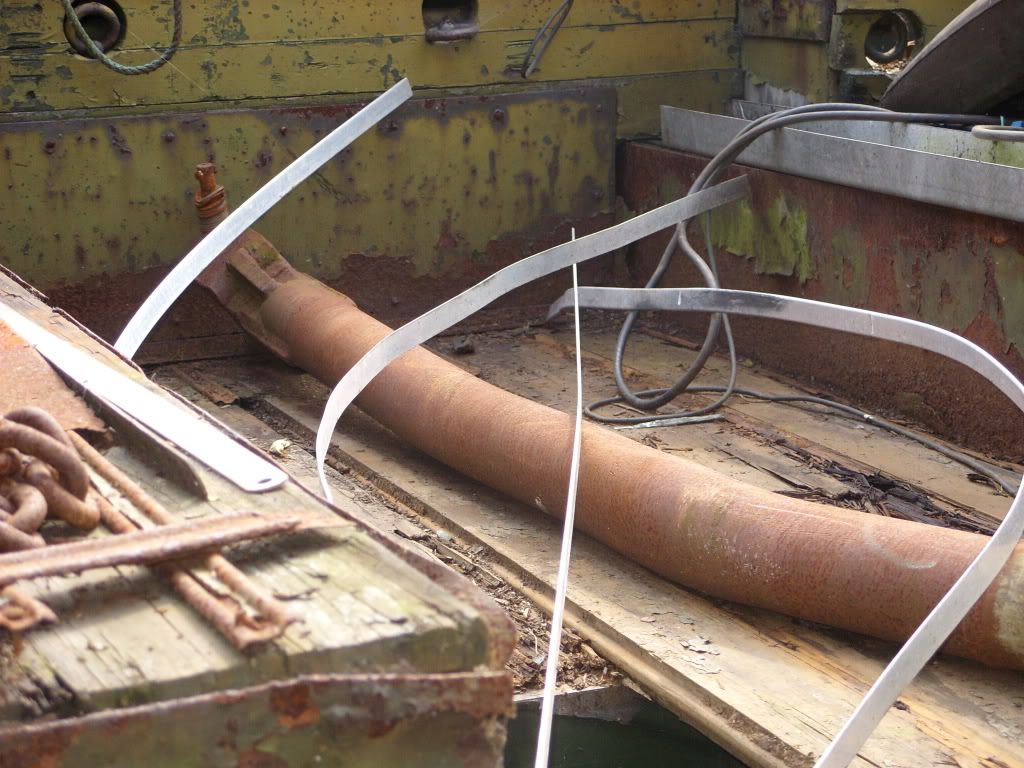
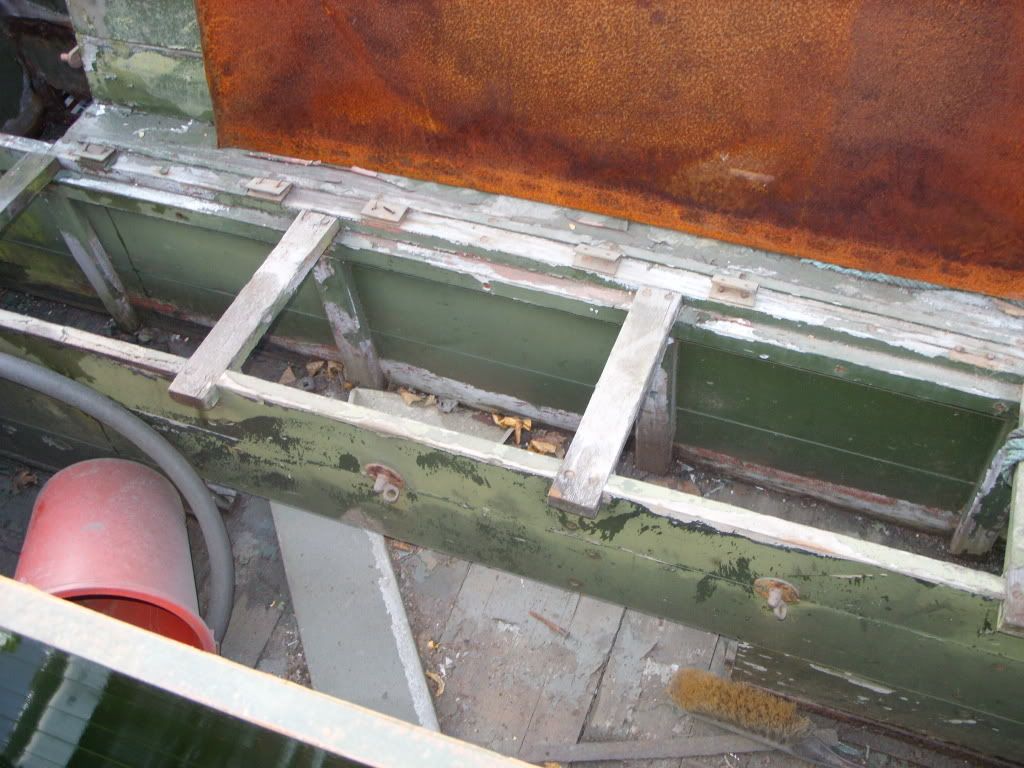
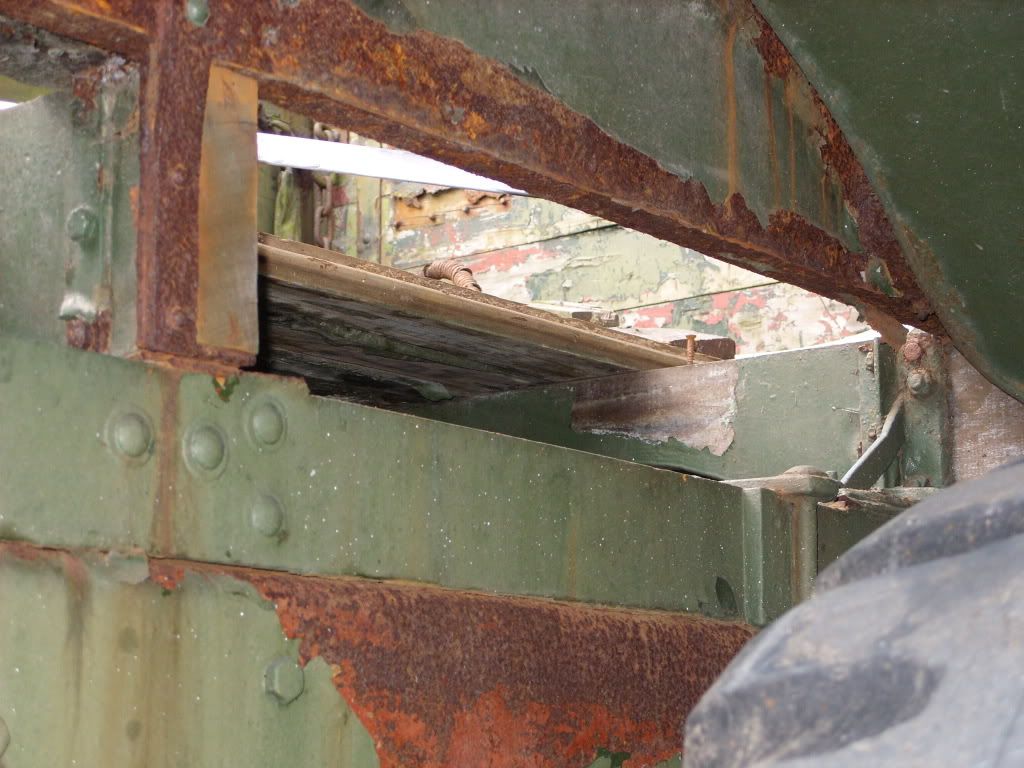
this is a limited view inside the back body, note the missing plank, and the other behind the tow bar, yep I put my foot through there as well! Does anyone know where I can source the steel strip that fastens to the floor, you can see it in the left of the picture. BTW, thanks to Andy for putting me onto the militant that was on ebay many months ago, see earlier in this thread, I bought the unloader valve from it, now the air problem is well and truely sorted.
-
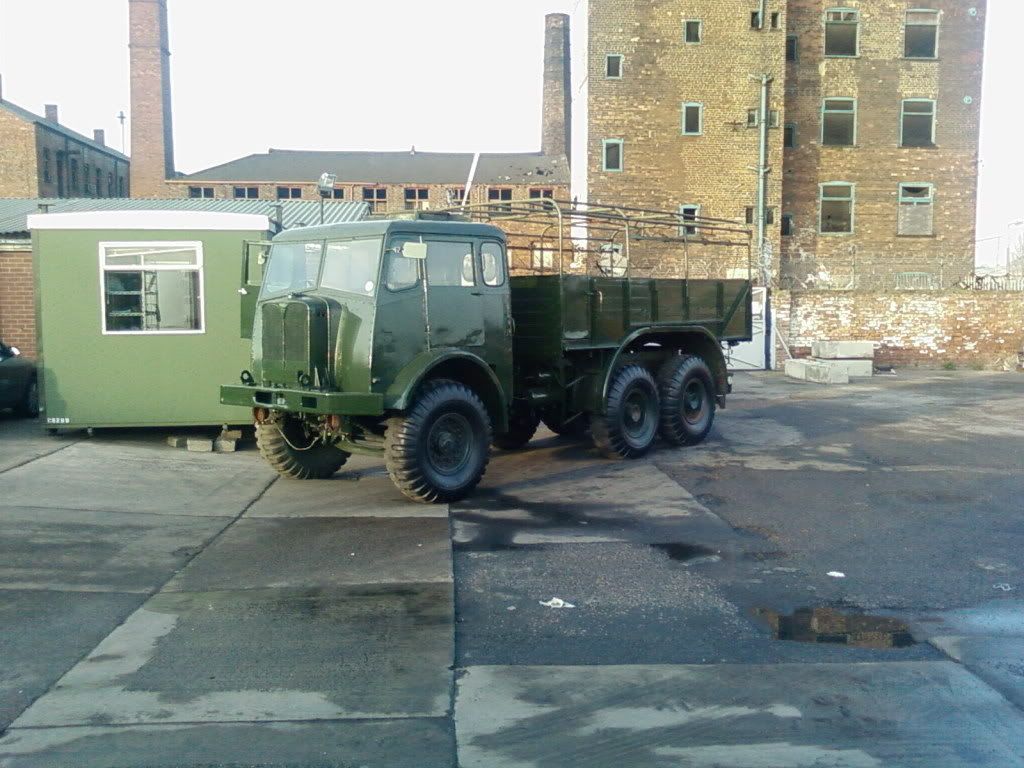
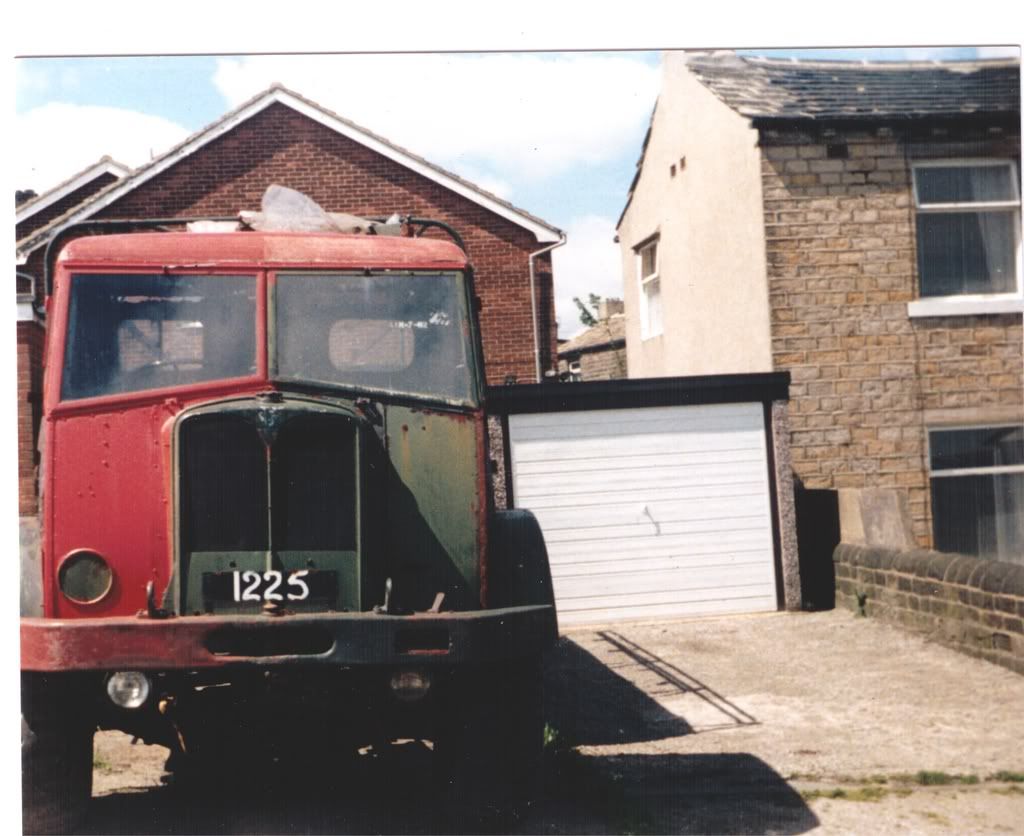
bit of an update since I last posted, a bit of paint has gone on. Still too much to do to mention, but at least she looks better, if only from this distance! Took this picture, with my phone, at the weekend after moving her around the yard after putting two new batteries on. More to follow later but a quick contrast above, in 2008, to the one below, summer of 2007. BTW, does anyone know of anyone with any rear wings? These are absolutely shot to hell
I'll update more later, it's a job for those cold nights.
-
seems like an awful lot of work for little over £3000, looks nice though but not for me.
-
Hi, there, hope you like the site?
-
my question answered, thanks chaps.
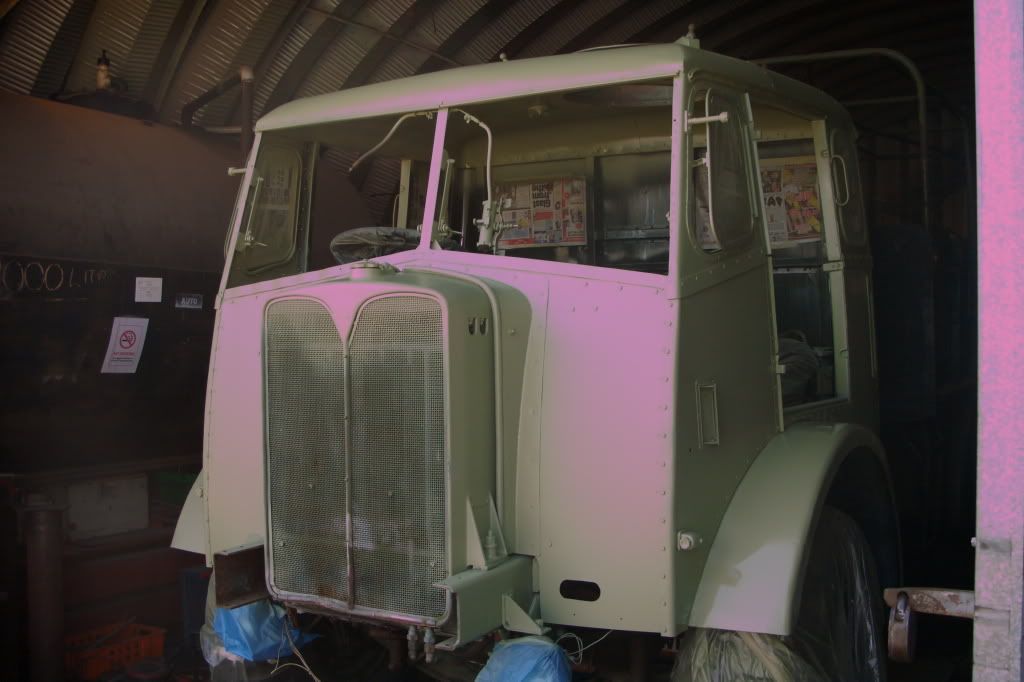
(BTW, my militant went green last weekend, well the cab at least, pictures to follow shortly)
-
What does/did, lock and load stand for?
-
I've never used a torque wrench, just feel, start in the middle and keep working out, it was how I was taught by an 'old boy' an hasn't let me down thus far. I always make sure to clean the head bolts in the bench mounted wire wheel, and use plenty of engine oil when located them.
New here!
in Introductions & Welcomes
Posted
Hi Boely, welcome to the forums, plenty of interseting stuff ( & people) on here.