


mkVsten
-
Posts
59 -
Joined
-
Last visited
Content Type
Profiles
Forums
Gallery
Blogs
Events
Articles
Store
Downloads
Everything posted by mkVsten
-
Just a quick note bout the two batteries you recently purchased. I figured with my Ferret I would invest in two really good batteries, so I bought two Optima's (sealed spiral cell battery) and guess what, two weeks after installing, turns out I had a bad battery. A bit of a disappointment, but no problems in the last year with the replacements.
-
restoration 54-82540 Ferret Scout Car Restoration 35 BA 95
mkVsten replied to mkVsten's topic in Blogs of MV restorations
Here you go Robin, I little video from yesterday of the engine starting for the first time. After cleaning the carb and replacing the spark plugs, it flashed right up with a few turns of the starter. I didn't even touch the distributor ! http://www.youtube.com/watch?v=QdHxalVOCLs -
restoration 54-82540 Ferret Scout Car Restoration 35 BA 95
mkVsten replied to mkVsten's topic in Blogs of MV restorations
Success! After cleaning the carburator, replacing the diaphrams, installing 6 new spark plugs and priming the fuel pump The engine sparked to life instantly. I was amazed it started so quick. I didn't even touch the distributor. Keep in mind, the last time the engine ran was at least 5 or 6 years ago.:shocked: Now that I know I have a good engine, I have to get the brakes working. Once that is done, I will take her for a drive to make sure the gearbox is working correctly, then I can pull the power pack. I made a video of the start up. Will download it shortly. Yippie!!! -
restoration 54-82540 Ferret Scout Car Restoration 35 BA 95
mkVsten replied to mkVsten's topic in Blogs of MV restorations
That is quite ironic. I do have the fuel tank, the previous owner removed it for cleaning. It would be quite a job to fabricate a proper fuel tank for a Ferret, its a work of art in its self. Not saying it can't be done, but it would have to be by the right guy and I would think it would be an expensive task. You can see the top of the tank in the photo below, behind the side bin. Happy to dig it out and take some good photos of it if you need them for reference.
-
restoration 54-82540 Ferret Scout Car Restoration 35 BA 95
mkVsten replied to mkVsten's topic in Blogs of MV restorations
Andy, Thanks for the photo. Interesting idea to extend it that far. As mentioned its cool to see how things evolve and change during production. -
restoration 54-82540 Ferret Scout Car Restoration 35 BA 95
mkVsten replied to mkVsten's topic in Blogs of MV restorations
Does any one know what the two round welded bosses are for above the rear windows? My later mk 2 Ferret does not have these..jpg.d1a53aec7cfc41c43e91b301beeeb9f0.jpg)
-
restoration 54-82540 Ferret Scout Car Restoration 35 BA 95
mkVsten replied to mkVsten's topic in Blogs of MV restorations
Carb isn't finished soaking yet, so I quickly mounted the rear fuel can rack that was mounted on this Ferret to have a look and see how bad its twisted. I think it was used as a backstop at somepoint. Its badly bent up and twisted but great for a pattern. Took a few snaps. Very crudly made, so easy to fabricate a perfect copy with my welding skills :-) I read somewhere this was added to the Ferrets Canada sent to Egypt/Sinai Penisula in 1956 and used in Germany as well.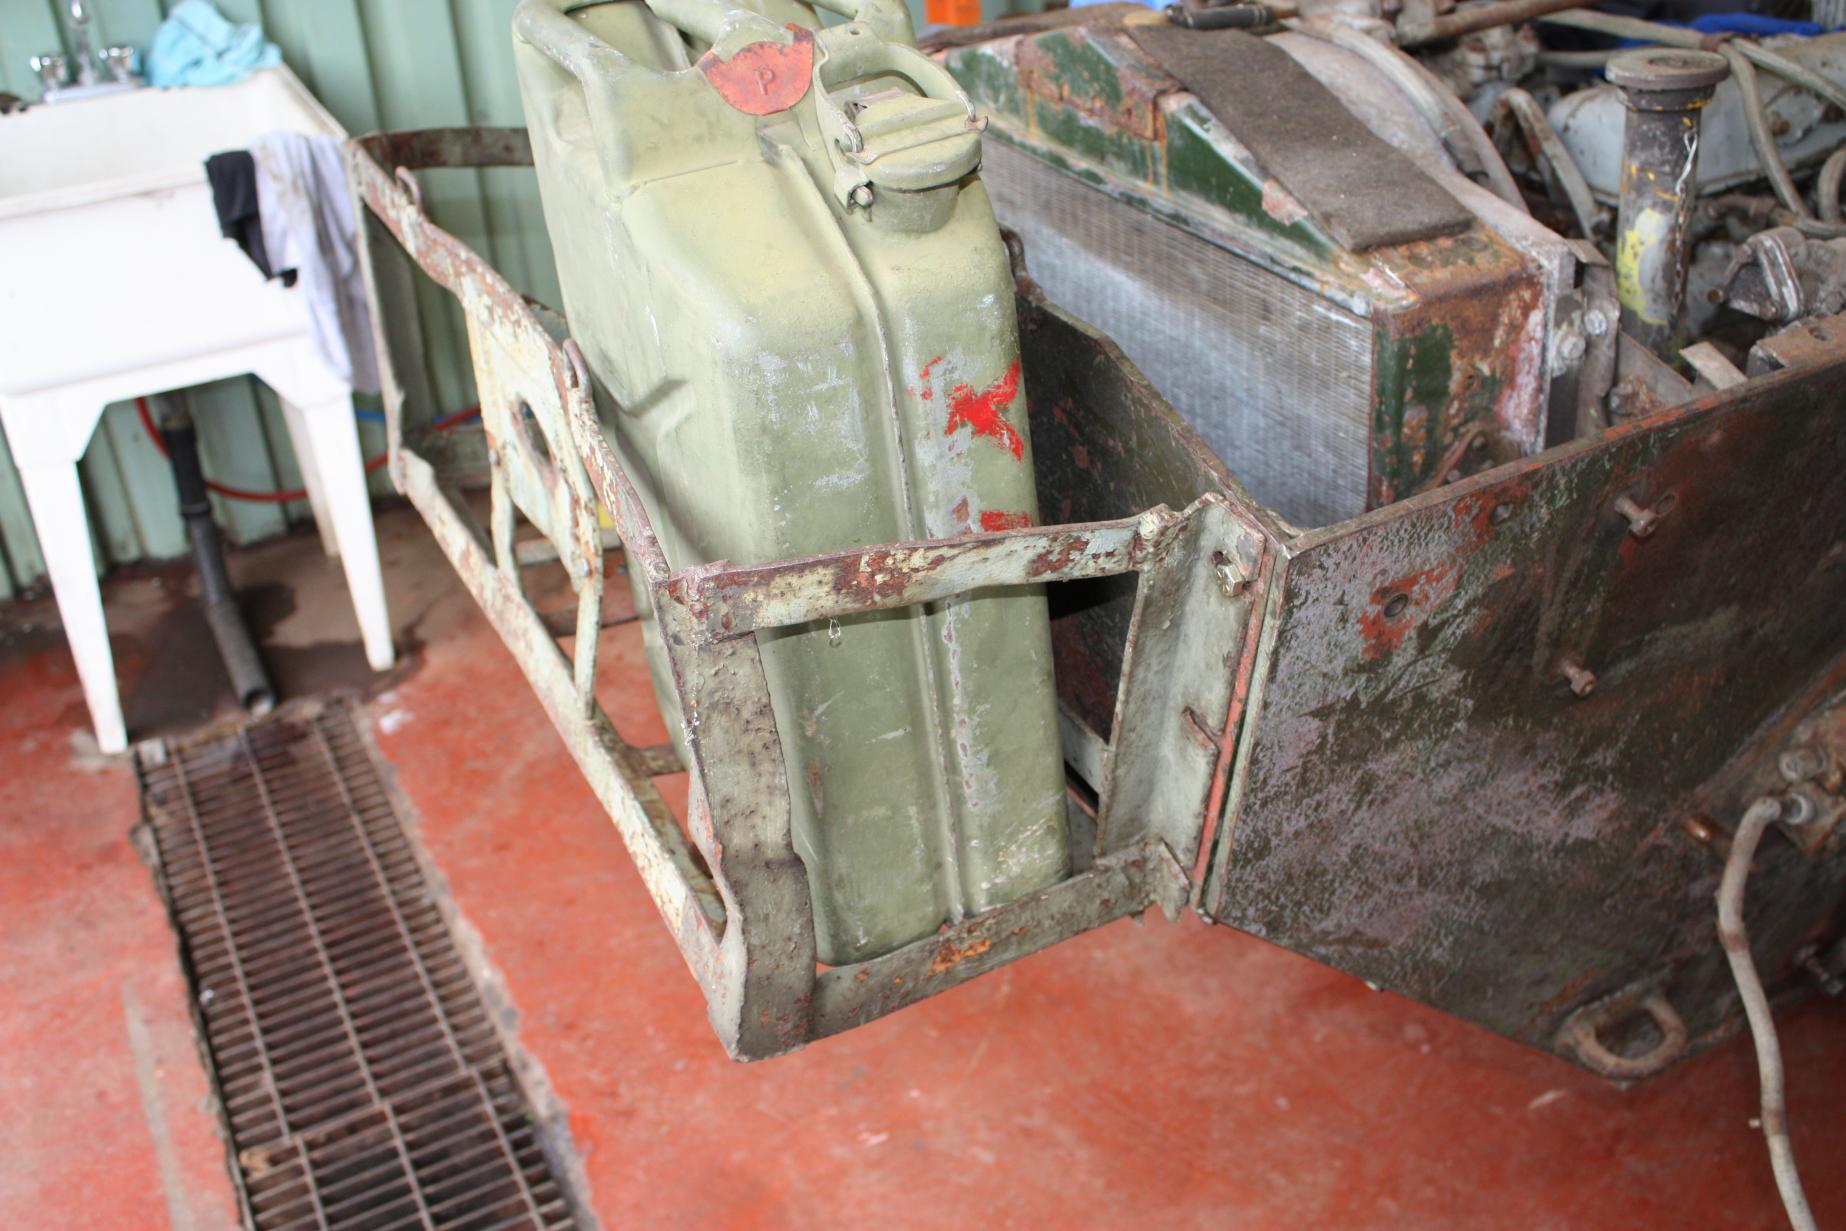


-
restoration 54-82540 Ferret Scout Car Restoration 35 BA 95
mkVsten replied to mkVsten's topic in Blogs of MV restorations
Here is the next job. Once I rebuild the carb and install, we may see her spark to life once again.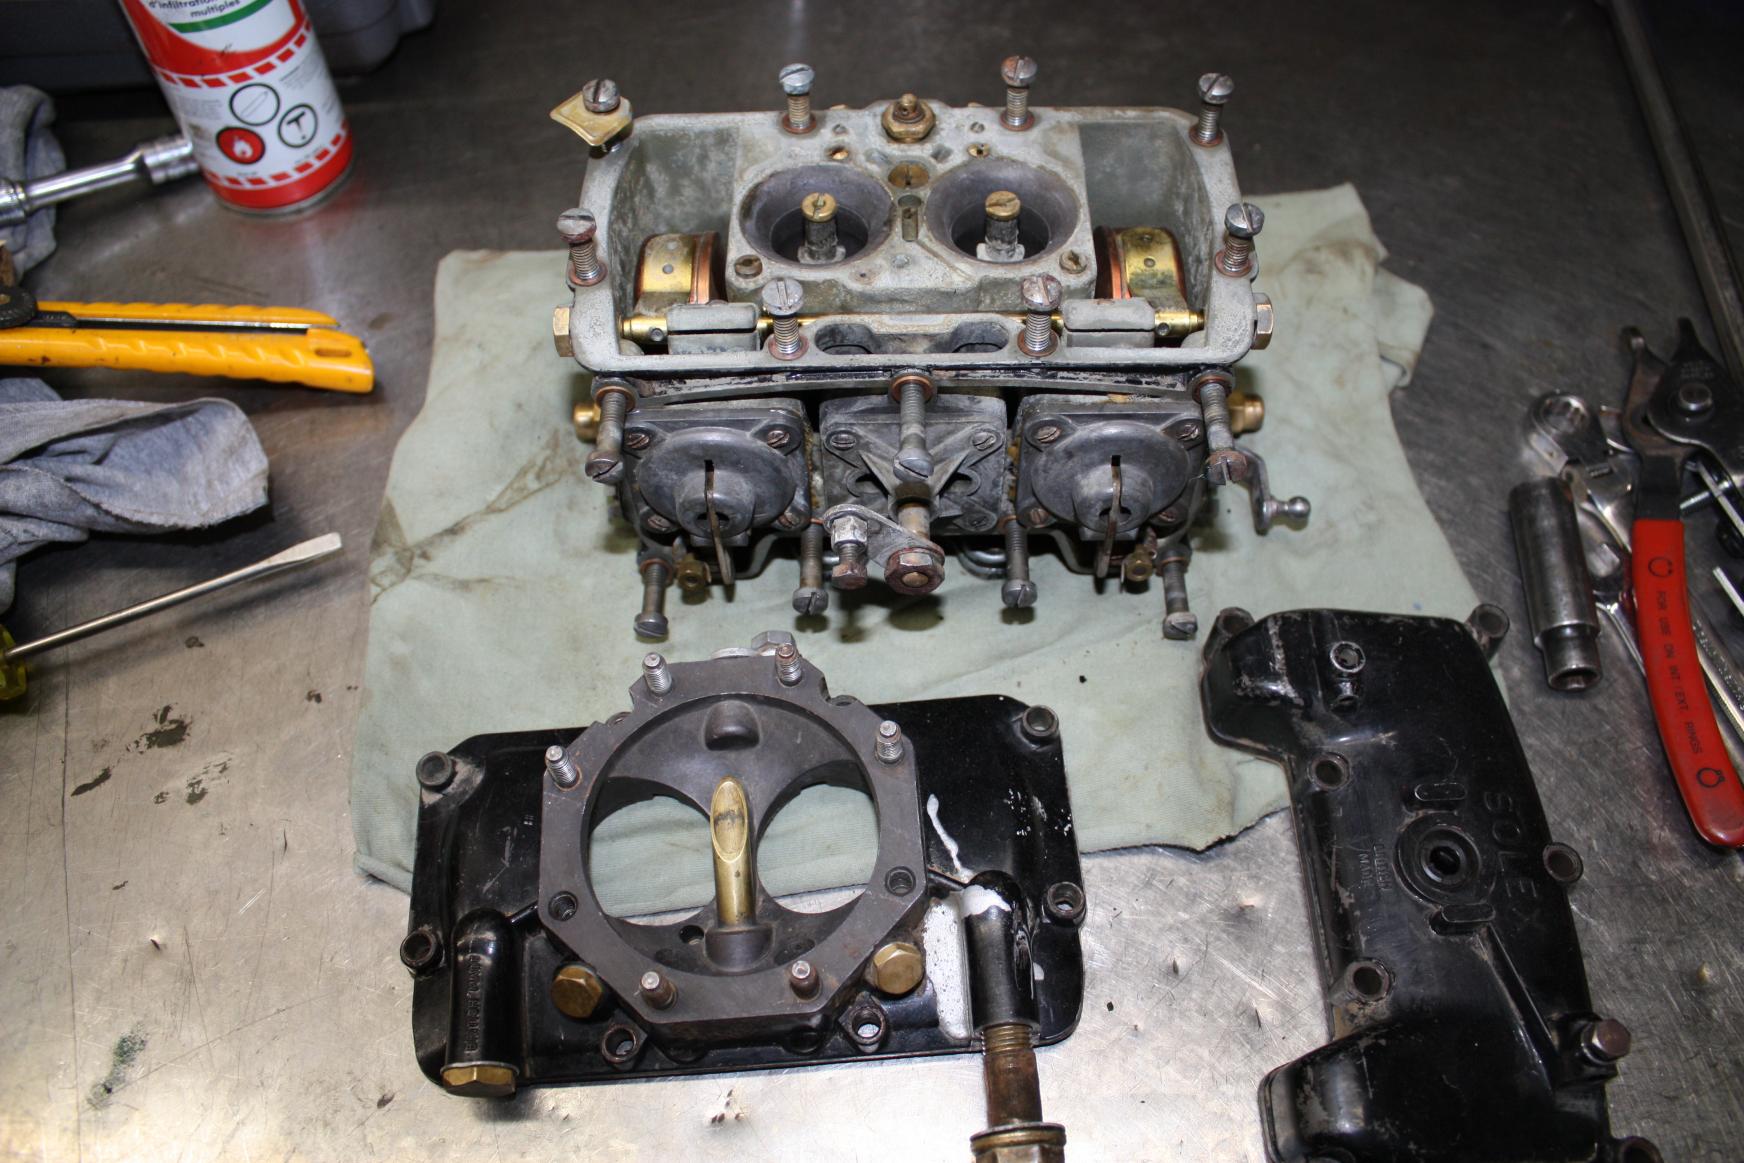
-
restoration 54-82540 Ferret Scout Car Restoration 35 BA 95
mkVsten replied to mkVsten's topic in Blogs of MV restorations
Removed the left side fenders and bins... When I removed the LR bin, hiding in a mound of twigs was another spent case dated 1973 and what I would like to think is a juice can tab. I know it wouldn't be a beer can tab...Can't be.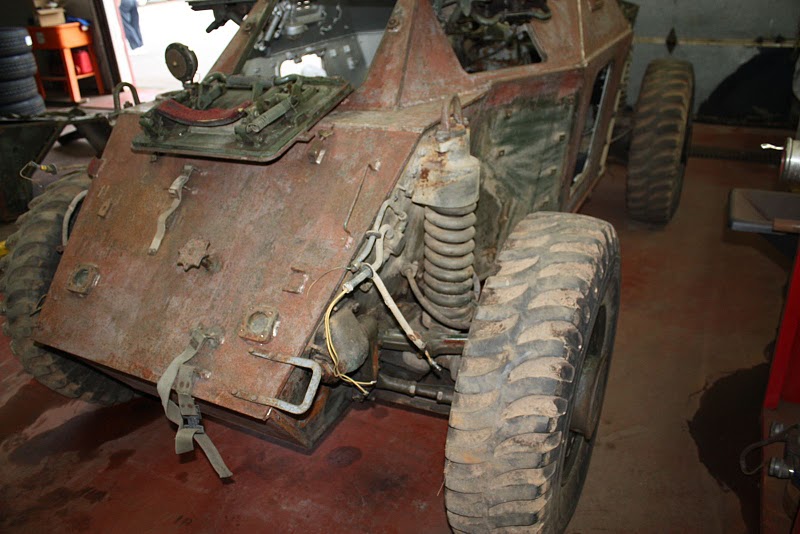


-
restoration 54-82540 Ferret Scout Car Restoration 35 BA 95
mkVsten replied to mkVsten's topic in Blogs of MV restorations
Bins and fenders removed on right side...


-
restoration 54-82540 Ferret Scout Car Restoration 35 BA 95
mkVsten replied to mkVsten's topic in Blogs of MV restorations
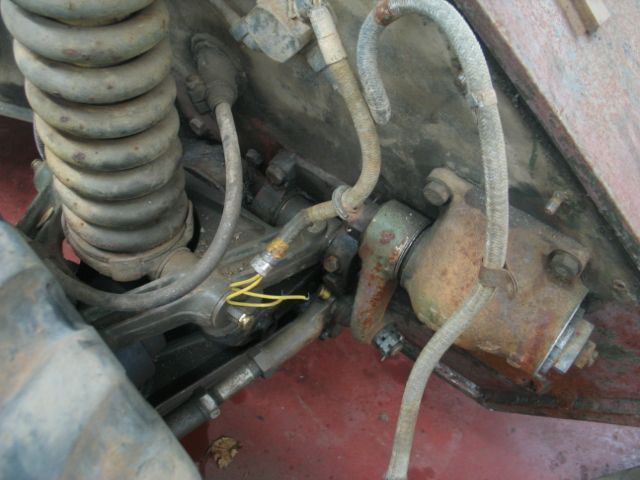
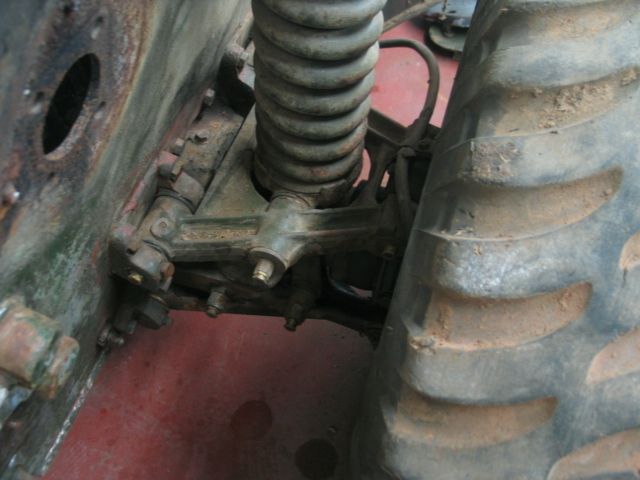
A few things have to be done to the Ferret before attempting to start the engine. Keeping in mind the engine has not run for about 5 or 6 years. Replace all the fluids and check flywheel fluid. The Carb needs to be rebuilt as well as the diaphrams are really bad. Hook up a temp fuel tank. I want to prove the operation of the running gear before the powerpack is removed. First order of business is to remove the outer bins and fenders. When the RR side bin was removed, these were wedged between the bin and the hull.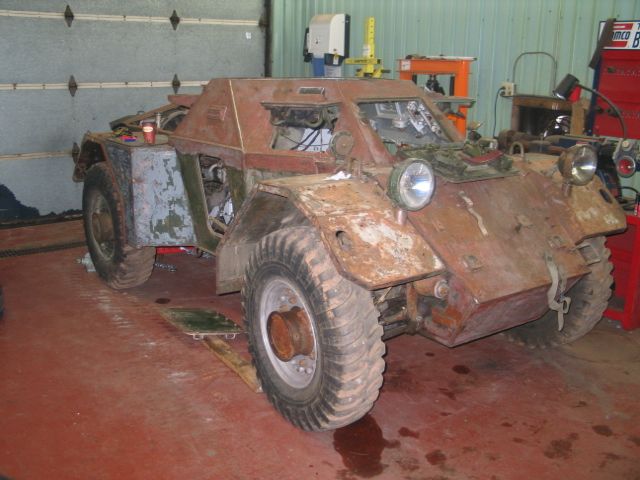


-
restoration 54-82540 Ferret Scout Car Restoration 35 BA 95
mkVsten replied to mkVsten's topic in Blogs of MV restorations
Parked in the shop, this is where its going to be for a while until she is mobile.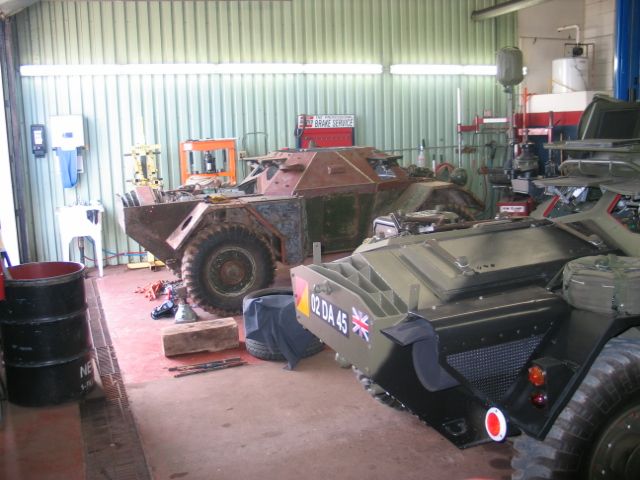

-
restoration 54-82540 Ferret Scout Car Restoration 35 BA 95
mkVsten replied to mkVsten's topic in Blogs of MV restorations
Will list all the CDN mods with photos I can see on this ferret in another reply but here is an example, the two welded studs on the RF armour for a spot lamp bracket to be installed.
-
restoration 54-82540 Ferret Scout Car Restoration 35 BA 95
mkVsten replied to mkVsten's topic in Blogs of MV restorations
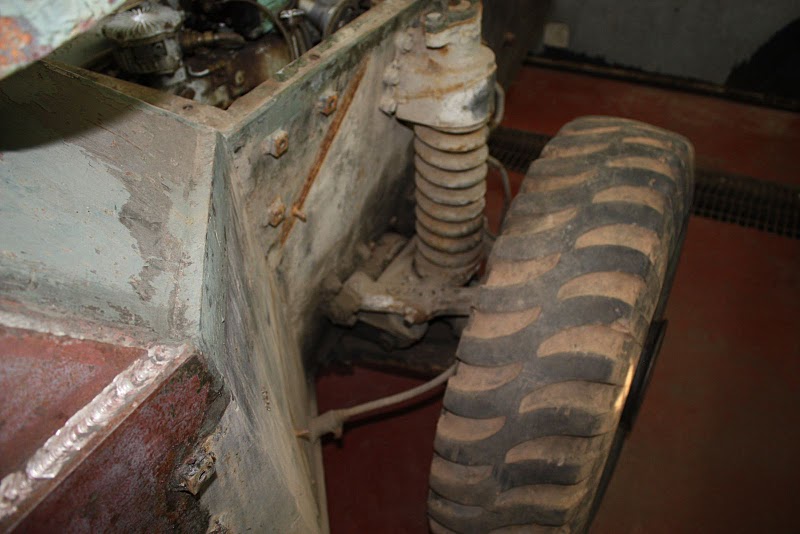
I have seen several different variations of lamps on CDN Ferrets. The original early style, the Brit tower lamps and later the M-Series lamps. Seems there was no standard here for the lamps, just a matter of putting on what worked when required. The majority when released had been fitted with the M-Series lamps in various ways. This ferret has all the CDN mods except for the DR-8 wire reel mount on the Left side. I want to keep the vehicle as original as possible as it was used by the CDN Forces. The signal lamps/brake lamps are a real mess. Not sure what to do there. The conversion using the Brit towers are hideous, but it is what it is. I will either leave them as they were or make up the small brackets as was done on some of the other CDN Ferrets such as seen in the photos below of 54-82593 (Gate Guard at 1 NSH(N) Armories) The lamp bracket above is much cleaner looking. Strange how they remounted the rear lamps, moving the Brit towers inwards on the fenders. I can only assume to prevent the lamps from being smashed about. Kinda makes the fuel can rack useless unless you mount the can on its edge. You can see where the large holes cut in the fenders for the original tower lamp wires were crudly covered up. This is the same on the front and rear fenders.


-
restoration 54-82540 Ferret Scout Car Restoration 35 BA 95
mkVsten replied to mkVsten's topic in Blogs of MV restorations
RCEME rebuild tag on top of gearbox. Workshop 202 is located in Longue Pointe (Montreal). Click on the link Workshop 202 for a bit of interesting history.
-
restoration 54-82540 Ferret Scout Car Restoration 35 BA 95
mkVsten replied to mkVsten's topic in Blogs of MV restorations
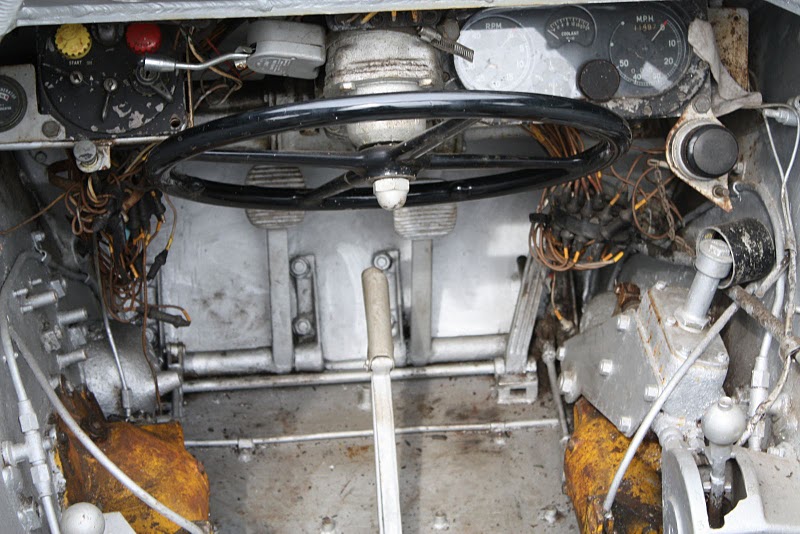
Some interior/detail photos photos: Creative way to convert the Brit lamps to the M-Series lamps Typical grey color engines that are in all CDN vehicles, I assume the orginal was repainted at some point.


-
restoration 54-82540 Ferret Scout Car Restoration 35 BA 95
mkVsten replied to mkVsten's topic in Blogs of MV restorations
At my Shop


-
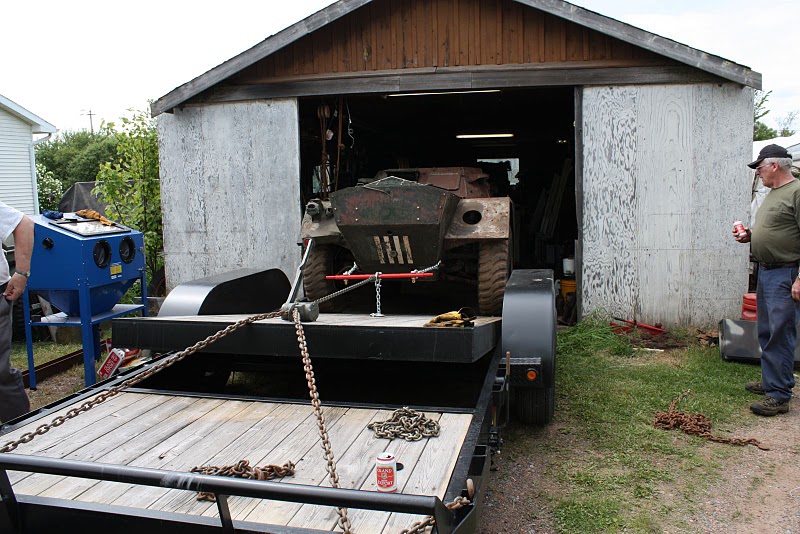
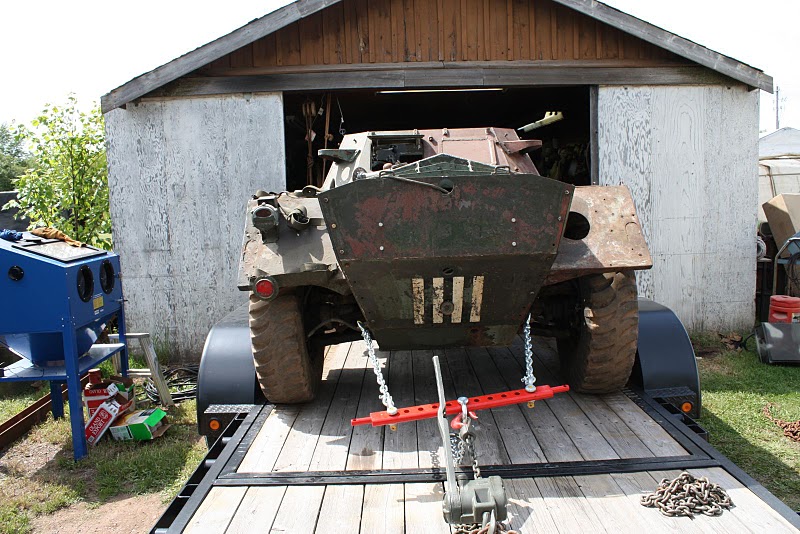
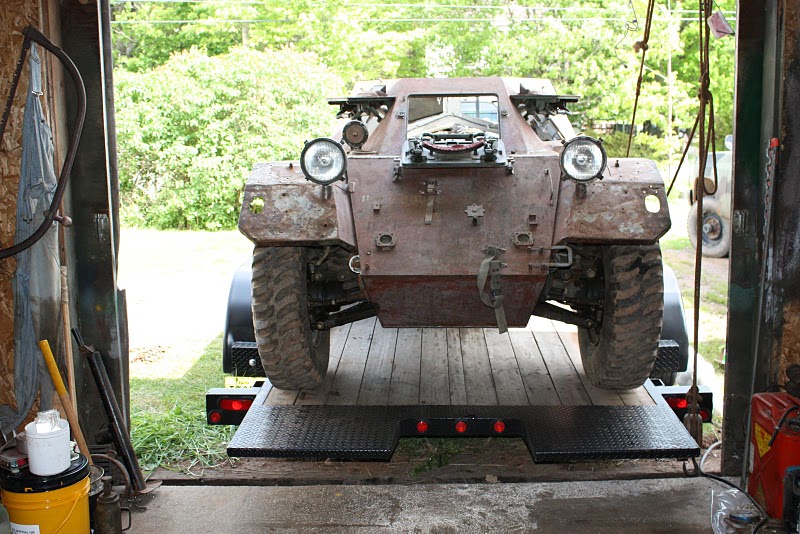
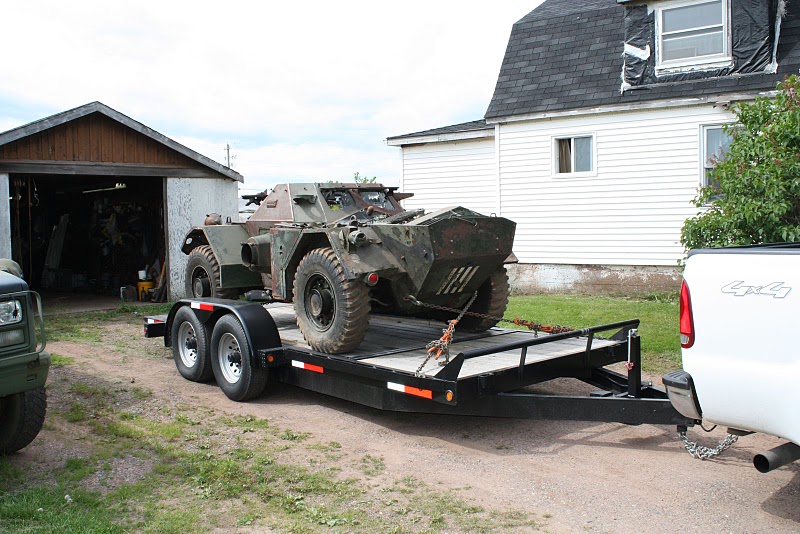
Figured I would start a thread of the restoration of 54-82540. Its one of the original 124 Ferret Scout cars Canada purchased in 1953. This one was released from Canadian service in 1983. First the recovery photos. Tucked away in this garage for the past 8 or 9 years. A very slow way to load a trailer on a hot day... Loaded and ready to roll


-
The Ferret will be a very rewarding project. With only a very few ex-Canadian Ferrets in private hands here in Canada, its makes the job that much more rewarding. The trailer I have has done alot of hauling the last 4 years. Its rated for 14,000 lbs so has handled any challange I have thrown at it. I will say that a tip deck has its good points and its bad points. I don't think I would purchase that style trailer again for what I use it for anyhow. Trailer deck is just a bit too narrow for my liking, I have about an inch to spare on either side when loading my Bren gun carrier. Can be a bit of a pain.

-
Got things sorted out, so I went and recovered the Ferret yesterday. Now the fun starts...


-
Battery Box lids just look a bit larger then my later manufactured Ferret. A bit more substance to them. More photos to come...
-
Ha Ha, Monday night may be a bit optimistic, I have to go to Halifax Monday so thats gonna set me back a day! CFR Number is stamped on the right front of the hull in front of the antenna mounting boss near the edge where the armor slopes. Yes, have spoken to Colin about it, he has supplied me the WD number for her, but I have it at work. Will post it up soon. If I recall is something like 35 BA 60. Good to know about the battery box lids. First time I have seen the early ones. Once I have it pulled out, will take photos of all the CND mods made to her, there are quite a few. Save me one of those screen stowage boxes! Cheers
-
Just a few more


-
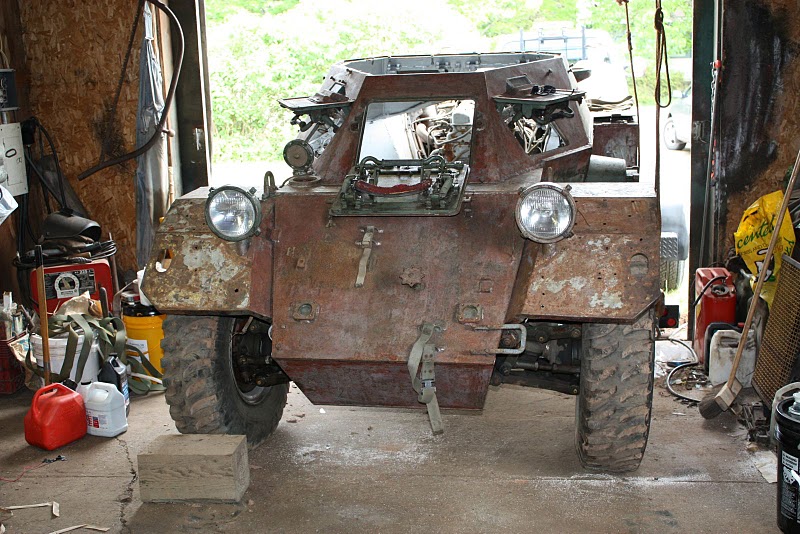
Just thought it proper to post up some photos of a Canadian Ferret I purchased. Have picked up most of the loose bits and will be collecting the hull tomorrow now that I have storage space for it. The engine runs, believe it or not. Will not play too much with it until I change the fluids and check the gearbox. Its been sitting for a long time. Disposed of by the CDN forces back in 1983. CFR # 54-82540 (CFR = Canadian Forces Registration) Hull # 321.B.3.4 WD # 35 BA 95 I assume the battery box lids are correct? They must be the correct early style as my later Ferret lids are completely different. Should be a fun project and a fairly rare piece of Canadian Military History in civi hands over here! Will post up some more of the loading/recovery tomorrow


-
Robin, I know the feeling oh too well. Been there, done that, but would and will do it again. Photos from November 11th tell the tale, it rained the day before the parade during the drive to the event, it was still raining when I stowed my "soaked" Universal carrier at the local Armories for the night and as the last photo from the drivers position will show, it rained/snowed during the parade. It rained so hard, I though about how nice it would have been to have a bilge pump as there was a good 1 inch of water rolling around on the floor...no kidding! Did I mention the temp was hovering around 1-2 degrees celsius? :-) Cheers

.jpg.685d81ce223e49438ec61f293ee8f6da.jpg)
.jpg.d5a3309a554be9d9ee05290b90007980.jpg)

.jpg.d1a53aec7cfc41c43e91b301beeeb9f0.jpg)


.jpg.685d81ce223e49438ec61f293ee8f6da.jpg)
.jpg.d5a3309a554be9d9ee05290b90007980.jpg)