


Great War truck
-
Posts
4,972 -
Joined
-
Last visited
-
Days Won
28
Content Type
Profiles
Forums
Gallery
Blogs
Events
Articles
Store
Downloads
Posts posted by Great War truck
-
-
He has a Peugeot too!
-
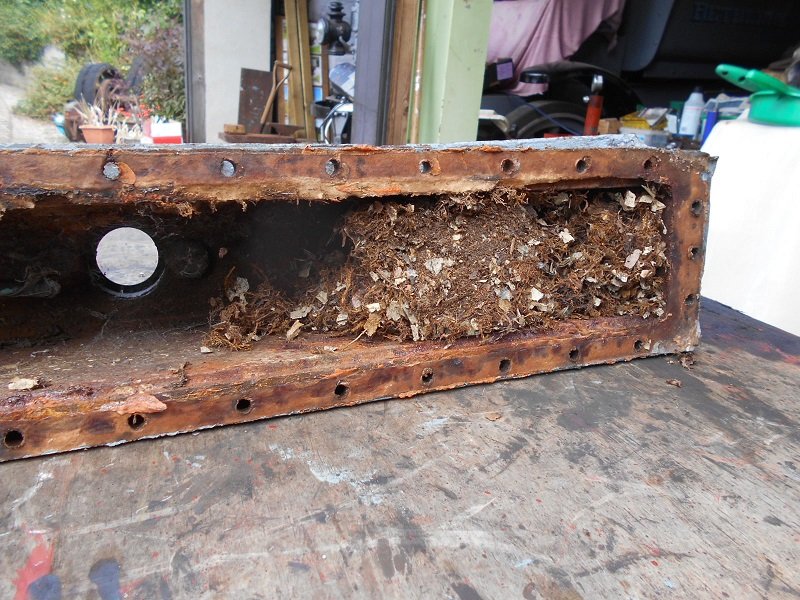
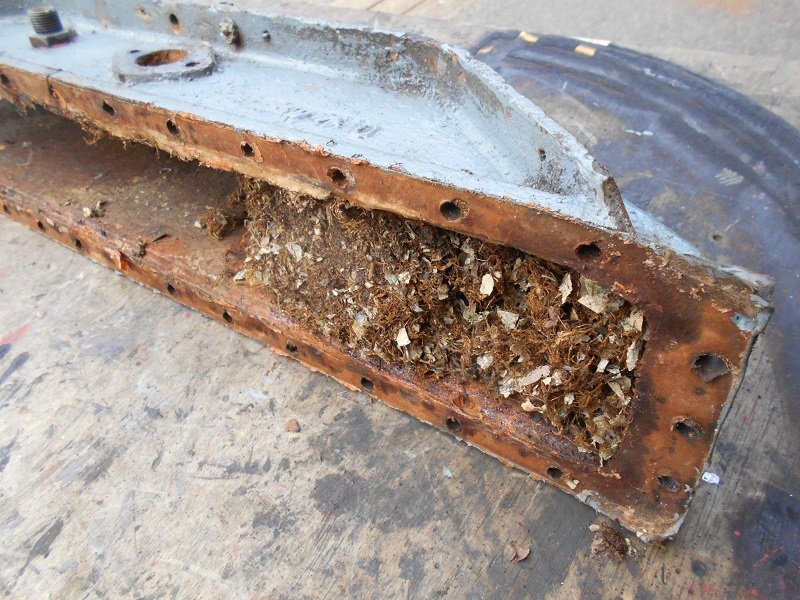
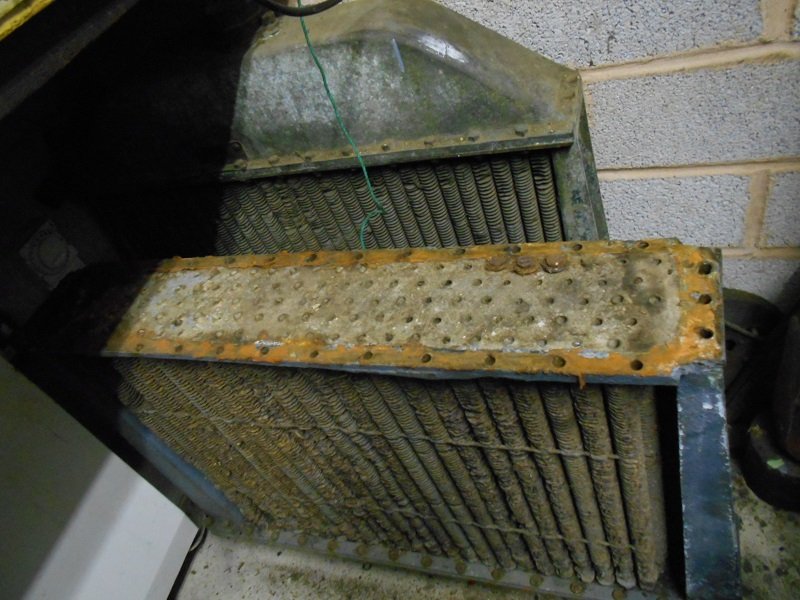
Top Tank of the Iron Radiator now removed - after the usual fight with rusty nuts and bolts. Looks as if a mouse has had a nest inside it at some time. The fittings removed from it and put to one side. It was painted over at some time without any cleaning or de-rusting done so it looks very sad. If the core of the Californian Radiator is sound, we shall probably use that one - decision on that when that one is stripped.


-
 5
5
-
-
Some painting done today of some of the previously primed bits so that they are now in undercoat, but as a diversion, we started to look at the Radiator which is in very poor condition. We do in fact have two - we found a second one in California when we there on holiday a few years ago. That one has Aluminium, tanks and side supports whilst the one that came with the lorry has iron top and bottom tanks, one iron side support and one alumnium.
The Firm of W.J.Barkus made spares for Peerless and other Makes after the war when the lorries were being used by civilian companies and the back of the iron top tank has "W D Peerless" cast into it and it seems very possible that during its civilian life, original aluminium parts were replaced with Barkus parts. We shall probably never know for sure.
The core on the one that came with lorry is absolutely finished and we will have to make a new core but we wait now with baited breath to see the inside condition of the tanks on both radiators. We are hoping that the iron one will be fairly sound inside but if the aluminium one is anything like the one on the Dennis, then that will have had it too. We have started to strip the iron one down but that is not going to give in without a fight! We think that we have now found out what the correct Radiator Cap should look like and that will be something else to make up.


-
When we took over this lorry with its quantity of spares, there was one set of Transmission Brake Drums in the selection of spares that came with the lorry. Each Brake Drum comes in two halves and they have to be bolted together when they are fitted to the Jack shaft. They were partially dismantled when we obtained them but had since rusted together again. Todays task was to get them apart, clean up the bolting faces so that they could be bolted together for sand blasting and almost certainly then for skimmimg.


-
3
-
-
Nothing very exciting but cleaning and priming continue. With the Radius Rod, we have 4 complete sections of the rear part of it and three of the front part which incorporates the revolving sleeve. After some effort the sleeve part was freed up on two of them where they were all rusted solidly together - the third one has so far refused to "give in". As we only need two, the third stuck one has been returned to the Spares Department to keep for another day! We soldier on - it will be great when the gang can reconvene and start puting some of these bits together!


-
3
-
 1
1
-
-
Pile of stuff back from Sand Blasting - not a bad job but still some work to be done on them to tidy them up, The Transmission Brake Drums are a little concerning as they are deeply scoured and pitted and will want skimming at the very least - although we have a good Spares Department, I am not sure if we do have any more of these. You will notice in the pictures that some parts have been doubled up as it was not easy to identify the best ones until they were cleaned so any duplicates will go back into "Spares"


-
1
-
-
Thanks for explaining that Alan. It looks like it has the donors name silver thimble on a plate on the side.
-
Thanks Richard.
That makes sense.
Tim
-
Sorry Richard. What is Silver Thimble? Manufacturer or donor or something else?
-
Love that padlock.
-
1
-
-
Today's photographs - of stuff brought down from the Caravan. We were hoping to locate some sound brake and clutch linkage bits - all of these bits were recovered from yet another chassis located some years ago - but all are heavily rusted and the linkage rods are tubes which have become very thin. Some of the clevis' may be fit to be used again but many new ones will have to be made. The rods are notionally 9/16" and 5/8" in diameter. The larger ones are threaded standard 5/8" UNC but the 9/16" ones 9/16" by 18 TPI - UNS again.


-
4
-
-
DSCN0252.JPG (4.5 MB)DSCN0253.JPG (4.4 MB)DSCN0254.JPG (4.4 MB)DSCN0255.JPG (4.5 MB)Not done much today but went looking for more Foot Brake Parts. Dug out the only two "drums" that we have loose - called "Service Brake Drum" in the Parts Book . I don't think that there are any more of these.These really are heavily corroded - I have taken them over for blasting but I think that they will want skimming. I didn't measure them but I think that they will just go in the gap on the Student. They attach to the Jack Shaft.


-
1
-
-
The main objective today was to clean up the brakes, just to make them a little cleaner to handle. The Brake Shoe liners complete with the linings still attached were removed from the Brake Shoes and then the first lining was removed from the steel liner. At this stage it was possible to see how the lining was attached to the steel liner - eleven copper rivets on each. The steel liners are fit to be used again after the old worn linings are removed from them - the copper rivets to be drilled and knocked out. The 5/16" nutted csk screws holding the liners and linings to the shoes will have to be replaced.


-
1
-
-
Which rally were you planning to go to in France?
-
Progress slow today - the second assembly did not want to come apart and it was a real fight when compared with the last one. The brakes still to do and they are filthy - started to clean them today so that I could get at them. Through the gunge, it rather looks as if the original (asbestos?) lining was riveted with small - perhaps just 1/8" rivets to the the 3/32" thick steel "Brake Shoe Liner" and that in turn with the lining as one complete item was secured to the shoe with 5/16 counter sunk screws through the lot, nutted on the inside with slot nuts.


-
Started on the second Radius Rod today - more of the same as the first one with a lot of grease and dirt to contend with. Hope to finish that tomorrow. And also the brakes from that wheel to dismantle.
The mystery of the Brake Linings has been solved - we think! A look in the Parts Book - reveals Part No 2105 which is described as a "Brake Shoe Liner" and that 4 per vehicle are required. No more information than that but we assume now that this item is fitted between the brake lining and the brake shoe. The linings taken off suggested that the probably asbestos lining was bonded to that steel part but probably the pressure on it when in use has given that impression. We will try to separate one tomorrow to see!


-
2
-
-
Still mainly working outside at the moment and as it was a nasty wet morning, we got off to a slow start. Brightened up after lunch so now with the first Radius Rod and Brake assembly stripped down and having taken that one as far as we can go for the moment, it was appropriate to get the second one out from "Stores" to start all over again. As previously, it is again very dirty and tomorrow's job will be to start stripping it down so that we can progress that as far as the first one.
The brake linings now being revealed are so different from the ones on the previous lorries that we have worked on in that the linings are bonded to steel backs whereas the previous ones were just ordinary linings which were copper riveted straight on to the shoe - the Peerless ones are bolted to the shoe. Is this a common arrangement or is this something peculiar to Peerless?


-
1
-
-
Some great images there. I do like the Peerless with an improvised windscreen.
-
Finished dismantling that first set of brakes today and took the linings off the shoes. Linings not riveted to the shoes but 5/16" x 7/8" csk steel screws used and nutted on the inside with slot nuts - so every one was split pinned as well. I think that this the first set that we have taken to bits where we have found that the original linings have been bonded to steel as well - this was 3/32" thick. In the past with the other lorries, the lining material has been riveted directly to the shoe with copper rivets.
So tomorrow, we start on the other side.


-
3
-
-
A little time spent today on scraping the grease and muck off the first set of Brakes - just a little nicer to handle now. Tomorrow, the linings come off as they need to be replaced. It appears that they were as much as 1/2" thick originally and are held to the shoes by 1/4" steel c/sk screws, nutted on the inside with a pinned slot nut. A bit of a surprise as we have been used to seeing linings held on the shoes with copper rivets.


-
1
-
-
Should the engine number correspond with the chassis number?
-
Finished stripping down the first Radius Rod from the 2nd set but not the brakes - they will follow tomorrow. Everything very filthy but pleasingly, the whole thing came apart more easily when compared with the last one. All the big parts put to one side for the moment and will be sand blasted when the second one from the second set is ready to go as well. Two castings arrived from the Foundry today via a Carrier for the two replacement pistons - the originals were broken (not by us!) - Steve will machine them when we can join up again.


-
4
-
-
Finished tidying up the bits from the first Radius Rod and then extracted the first of the second pair from the Stores Department. This one still has the Brake assembly with it - which is good news. Separated that from the Radius Rod and as the whole thing is so filthy, spent some time cleaning that up to make it just a bit nicer to handle. All these bits will go for sand blasting later. Interested to see that the part number was prefixed with "TC3" when we think of our lorry as a "TC4"


-
2
-
-
More time spent today on taking bits to pieces for assessment. This time - the "Radius Rods" which connect Jack Shaft to the Back Axle. We have 3 pairs and started with one pair that had already been taken off a lorry. The usual fight to get things apart and one of them had been dealt with previously by an over energetic disassembler who took a Hacksaw to it. A shame because that one looked to be in good condition. The remaining two pairs still have the brakes attached to them and will need more work. They are very dirty and very heavy and I look forward to that job!


WW1 Peerless lorry restoration
in Pre WW2 vehicles
Posted
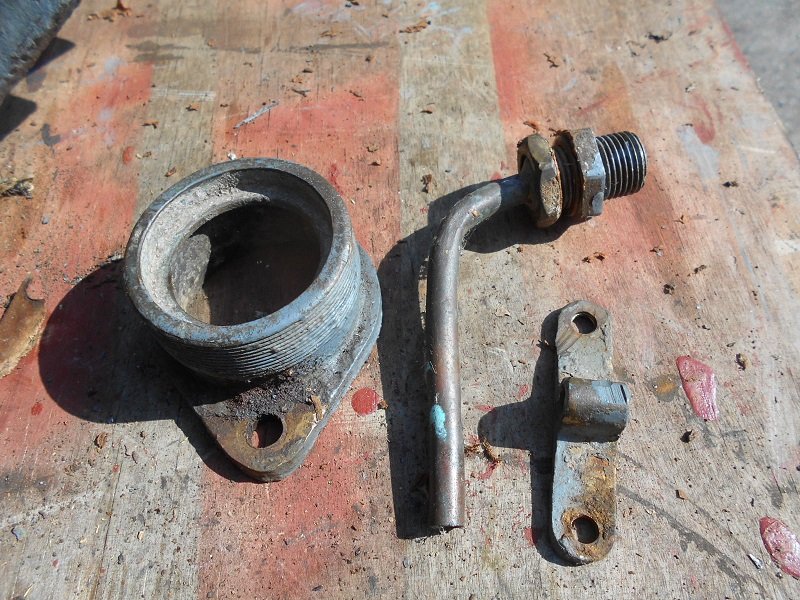
Cleaned up the Radiator Filler Neck with a wire brush and then Kettle de-scaler - which worked very well. Took the pads off two of the Brake shoes - the easy ones - where the others are very mangled and will call for more work. The thread on the csk screws holding the pads on are 5/16 x 20 another unexpected thread and some replacement csk screws will have to be made as I do not think that they are a commercial item.