


philm1
-
Posts
195 -
Joined
-
Last visited
Content Type
Profiles
Forums
Gallery
Blogs
Events
Articles
Store
Downloads
Posts posted by philm1
-
-
I can sence competition, are you going head to head with the Tank factory for finish? High class work.
Thanks. The Tank Factory is a class above us but we still hope to do a quality job within our abilities and budget.
-
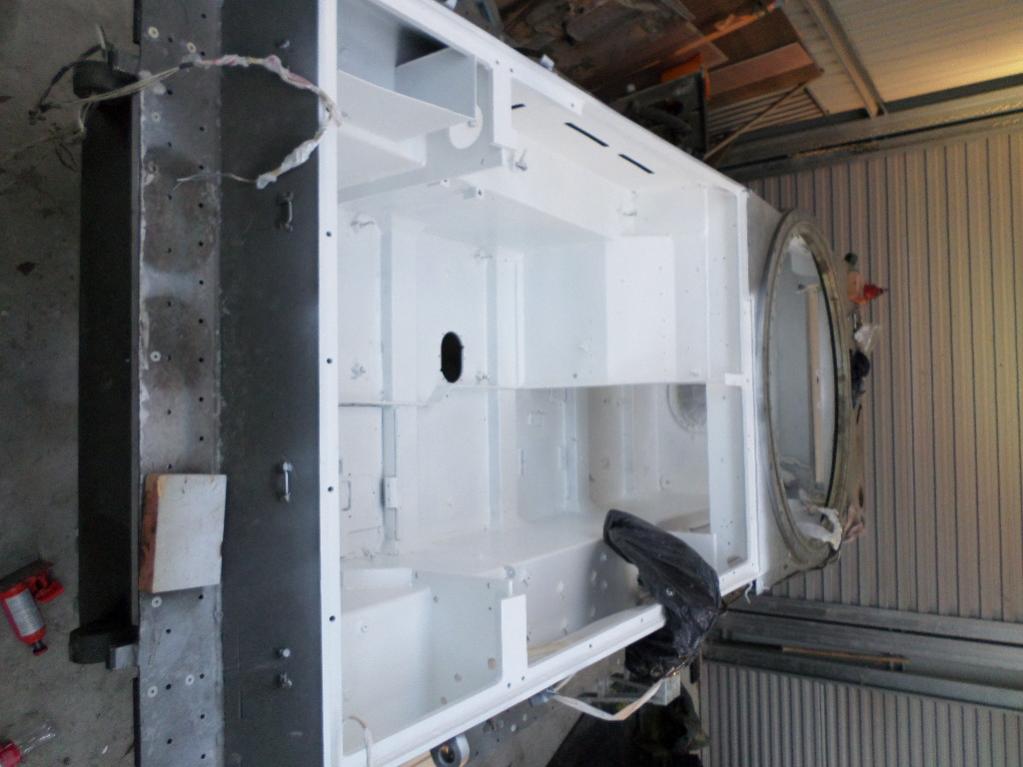
First of 2 top coats in. Again 2 pack paint (white). Starting to look real nice and soon be ready to start putting components back in. Thanks to Brett's dad for helping us with the painting.


-
I'm very interested in knowing what alloy you used for your sponson patch. Mine was patched with an incompatible alloy (6061 I suspect) at some point and rotted away quite badly. I'm also curious to know if you chose to follow the Repaircraft instructions and MIG your repairs or if you went with TIG? Did you use AL 5556 or some other filler?
Caught up with the engineer today to find out what was used and how repairs done. Tig weld, 5056 grade alloy and 5356 filler rods from what he remembers. We put some alloy flat right around the bottom of the sponson to give a bit more bulk and support.
-
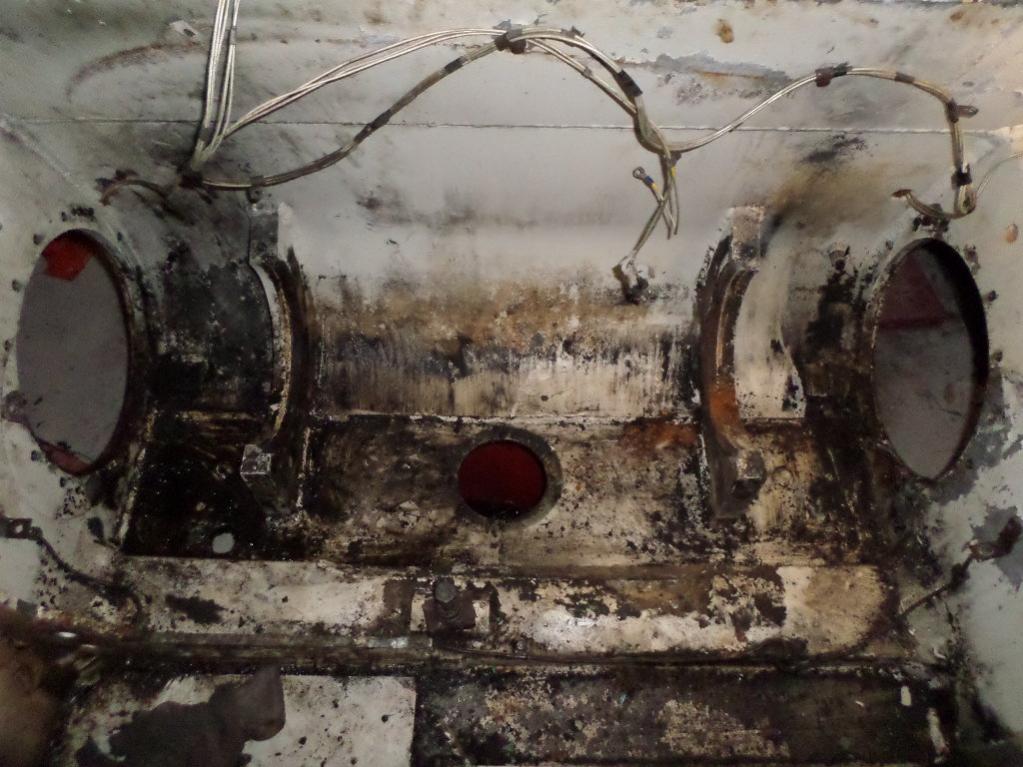
Hull interior undercoated in 2 pack automotive white which also acts as an etch primer.

-
Jealous, what a workshop.
Not ours unfortunately. Just visting for the aluminium repairs then back home again.
-
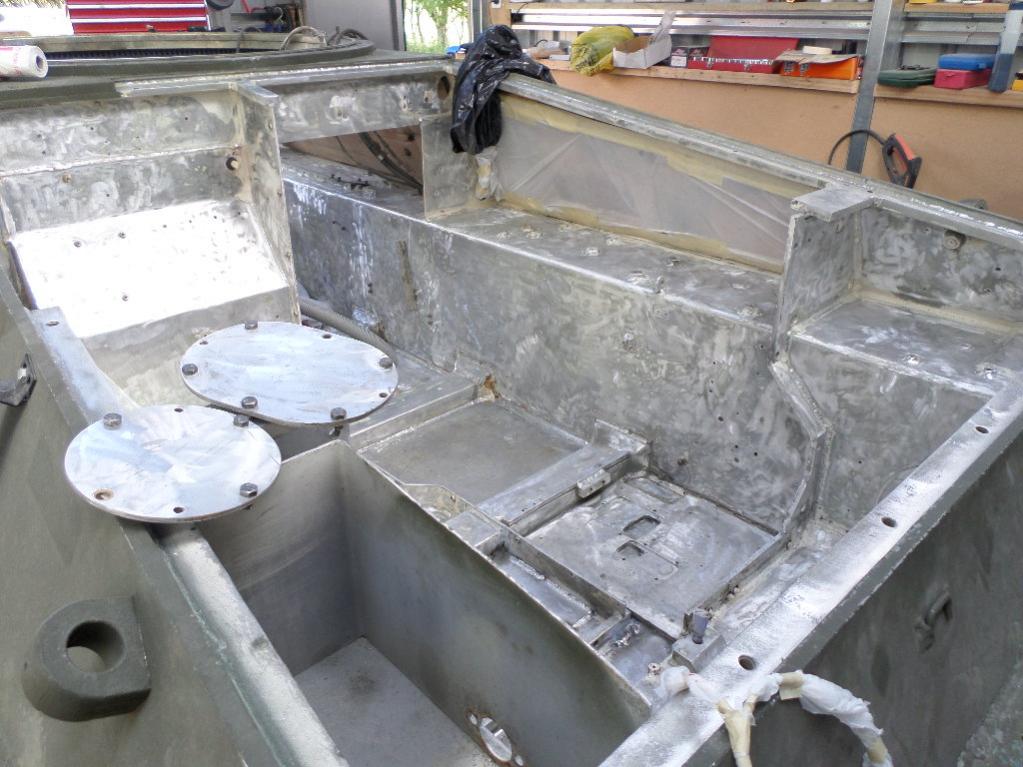
The front torsion bar channel required repairs as well as the flotation screen skirt which had probably been damaged after being lifted and moved by forklifts or the like. These repairs we had an engineer undertake.


-
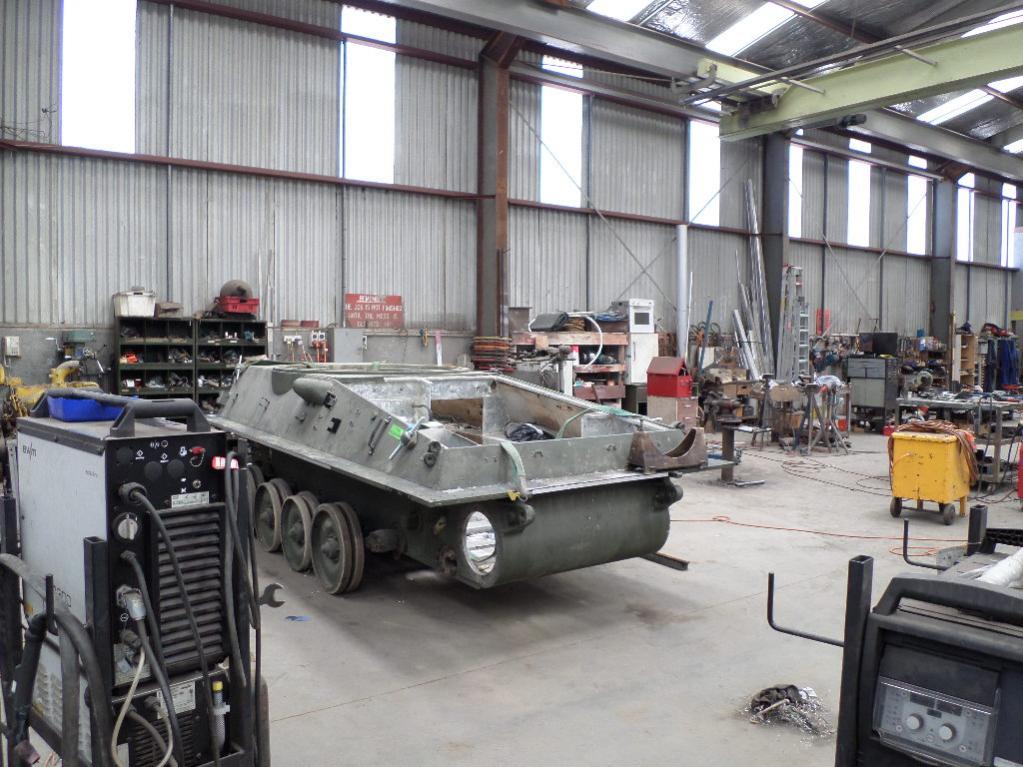
We started to clean up the Hull interior and ended up taking it back to bare aluminium for a full repaint.


-
You going to be doing a raid on The Tank Factory!, I will make sure the sentries are posted.:-)
An easy way around the sentries is fresh donuts and the Tank Factory doors open.
Picked up some bins today which we didn't have room for on our last vist. Luckily I was in the area with work. Nice ex NZ army in Merdec cammo scheme.
Also got to to view the Valentine that is in the Factory being restored currently. See -
http://hmvf.co.uk/forumvb/showthread.php?50645-restoration-of-a-valentine-MK5-tank-started


-
excellent blog .
brings back fond memories ,I've restored an ex Belgian scimitar (as a sabre as that's the turret it came with)
you seem to be having all the same problems but its worth it in the end ,mines great fun to drive now although I still have some finishing off to do .
best wishes
justin
Thanks Justin. They are certainly nice to drive (in my brief experience) and we are looking forward to bringing it back to life.
-
I like your Carbon footprint! You might have to buy some "Carbon Credits " to offset your emissions in clean/green NZ,Cheers:-)
Do you have any "Carbon Credits" in stock? If so, add them to the list for Friday.
-
Just a word of warning, if there is any rust pitting on the torsion bars (and they do look rusty) then it might be wise to replace as the pitting is likely to produce a fracture in use. This is why torsion bars have a coating or wrapping on them.
regards, Richard
The wrapping was mainly in place and most of the gunk was a mixture of oil and dirt. The end exposed appears okay but we will check them all as they are removed.

-
Removal of the fuel tank is a similar story to other forums. The fuel cap ws completely seized and had to be forcibly removed. Several litres of fuel/water were removed (about 250 litres). The access plate was removed and the rest of the foul smelling liquid cleaned out. Seems to have crystalized. At this stage we have decided against removing the bladder as we are not sure that we will use this tank or install a separate smaller one considering most running will shorter and it will be easier to keep fresh fuel. The old fuel did still burn - not explosive like but it did make an impressive sight.


-
Spoke to spike last night they removed the engine because the scorpion was being placed as a gate guardian it is still there at the D and M school Bovington . You can see it from the Tank museum car park.
Al
Would be nice to see photo of Scorpion mentioned above. I wonder if the engine was any good when Spike removed it?
-
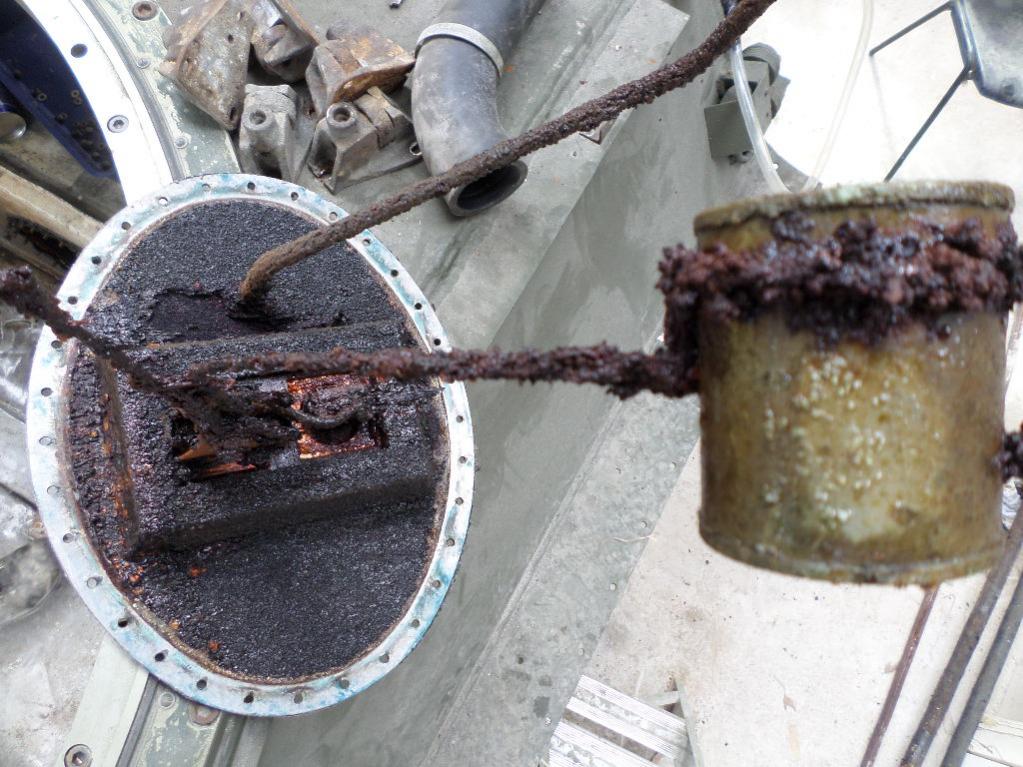
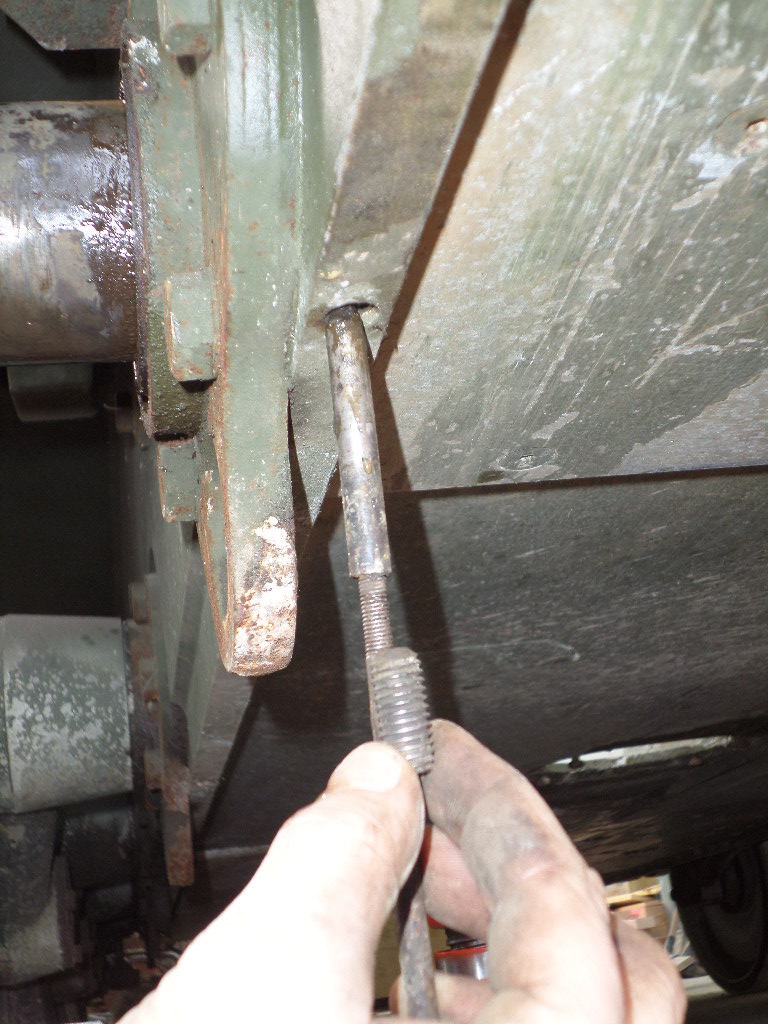
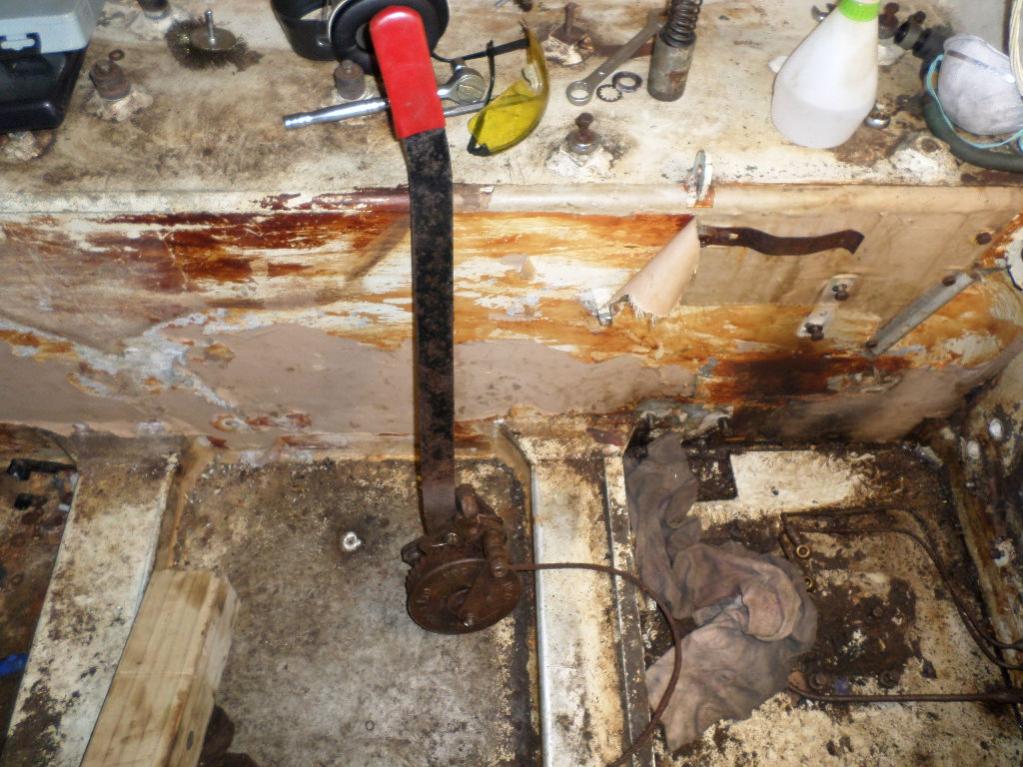
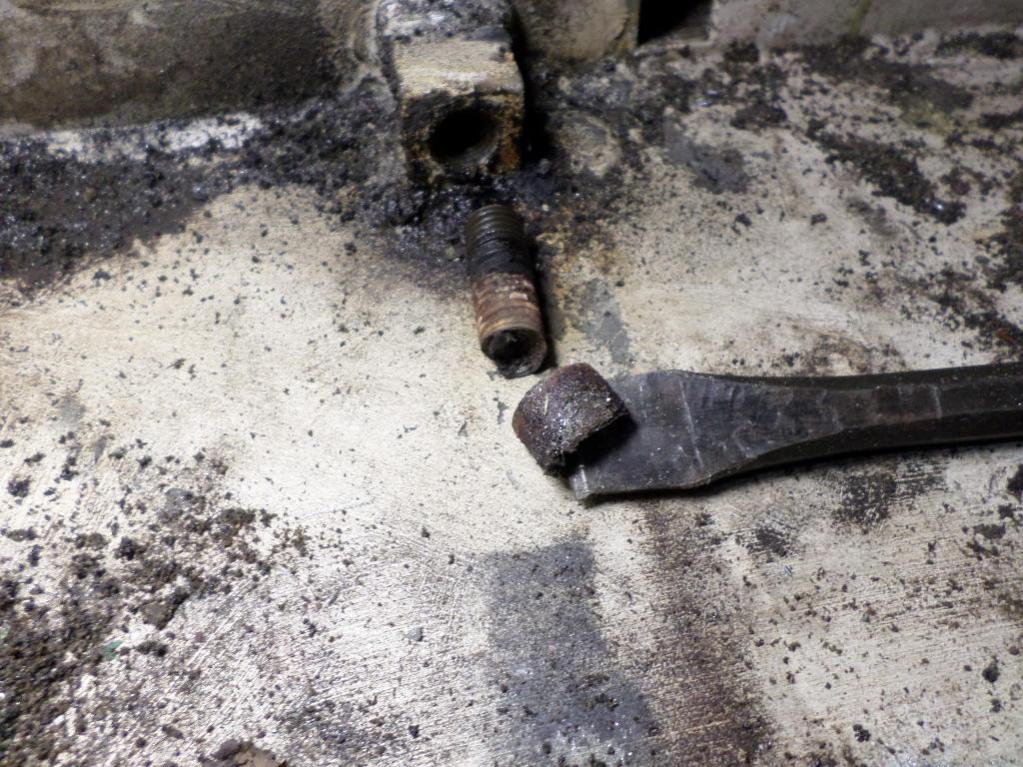
With the front torsion bar channel cover split and full of gunge it was decided to pull the torsion bars to clean and repair. Our understanding was to use a track pin under the hull edge and wind the thread into the tosion bar retaining pin and withdraw. Didn't work as hole is too small. using a 7/32 Allen key a grub screw came out which we thought was the retaining pin (nope). We then found a bit of accelerator linkage threaded rod about 1/4" which wound into the retaing pin and pulled it out. Job done and torsion bars removed and carefully marked 'left' and 'right' then we have a better than 50% chance of putting them back the correct side.


-
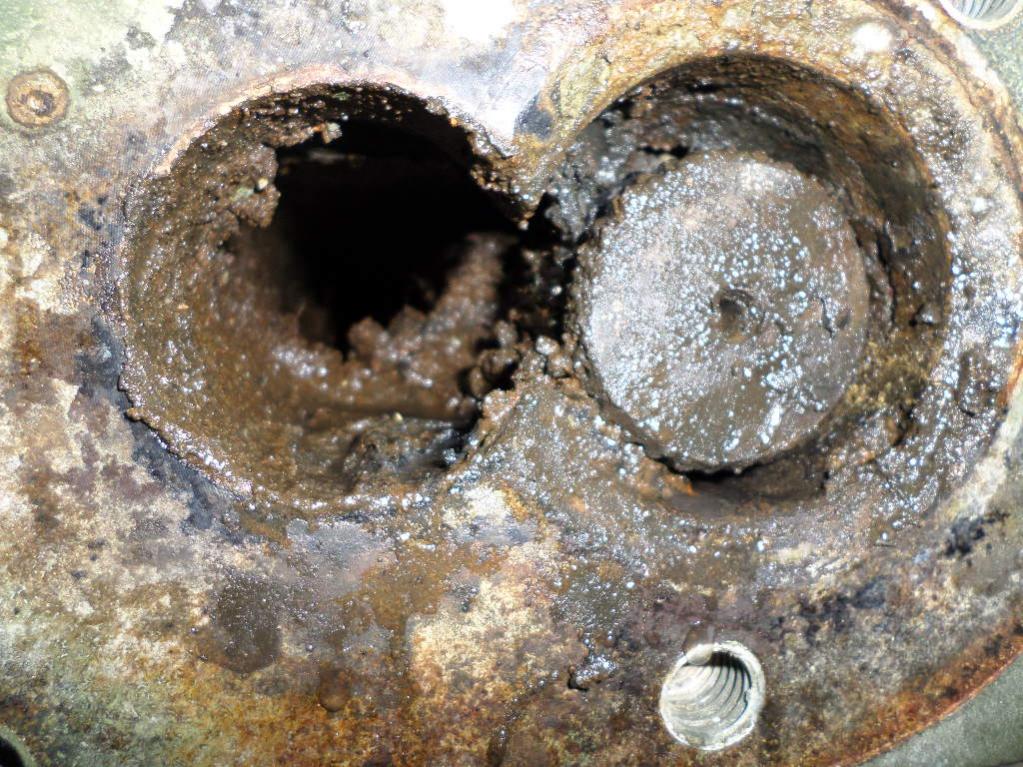
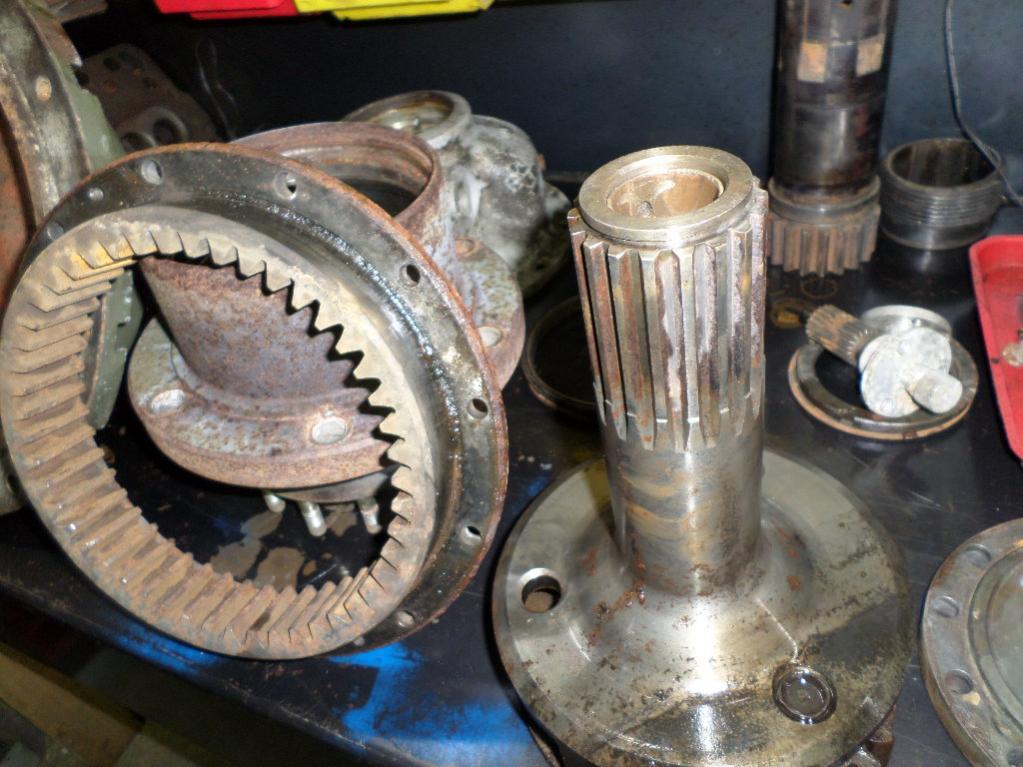
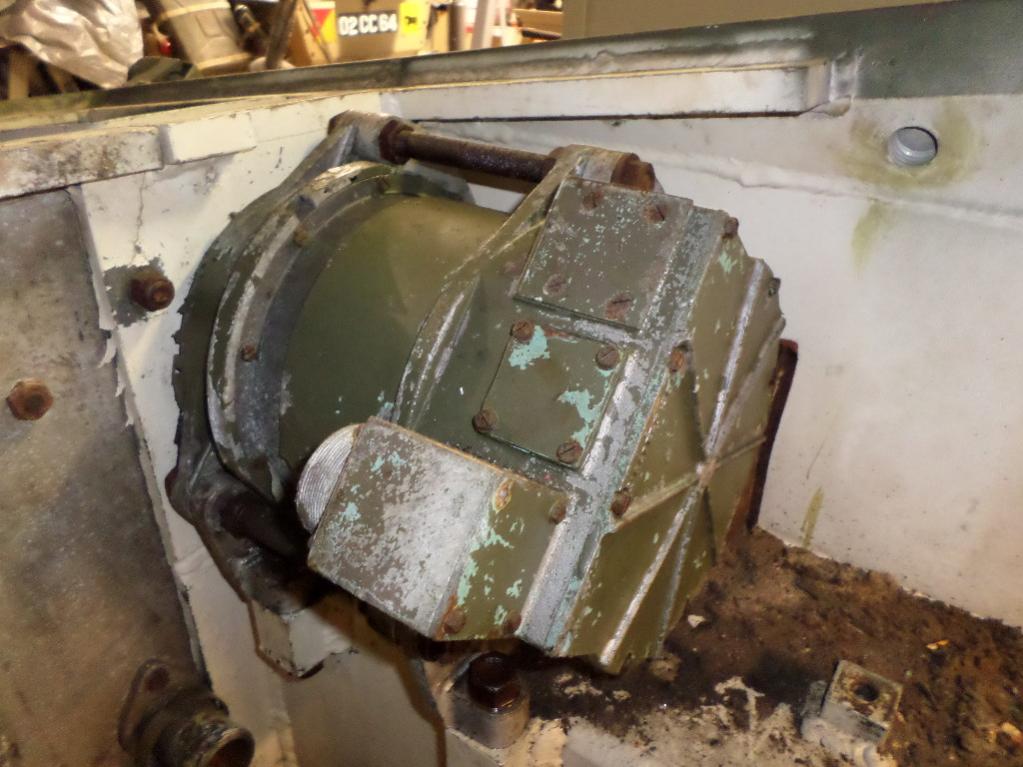
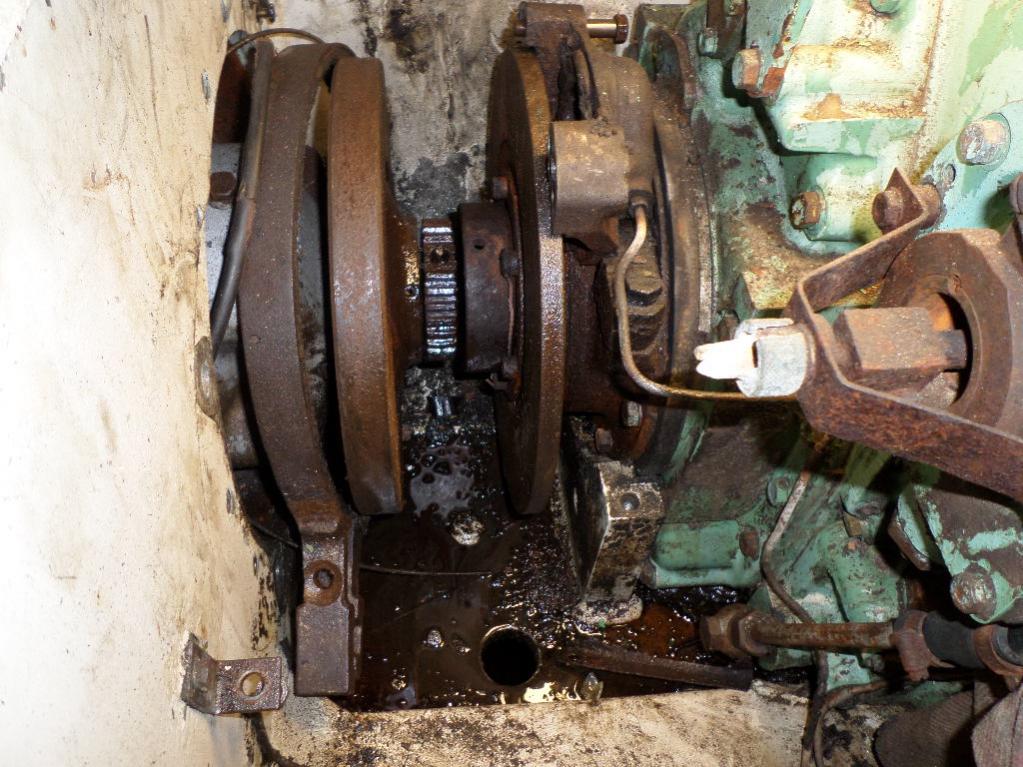
Final drives wouldn't budge even with jacking from underneath and dare I suggest an agricultural (only in NZ) method of hooking the ute onto them to try and pull off (didn't work so don't try that at home). Andrew Rowe of the tank factory assisted again with suggestion of a bottle jack inverted under the hull skirt and push downwards which worked a treat. Final drives were seized and full of water. On dismantling and inspection several bearings were beyond use. We priced up replacement bearings but a visit to the tank factory yeilded some suitable replacement complete hubs which have been checked and are good to go.


-
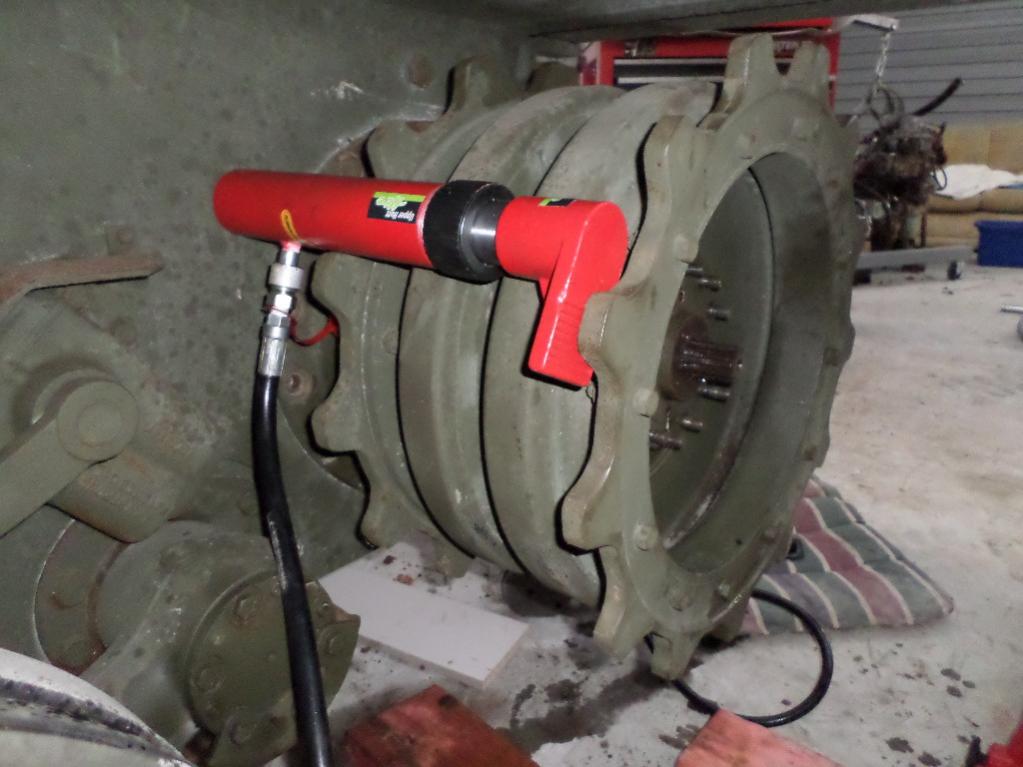
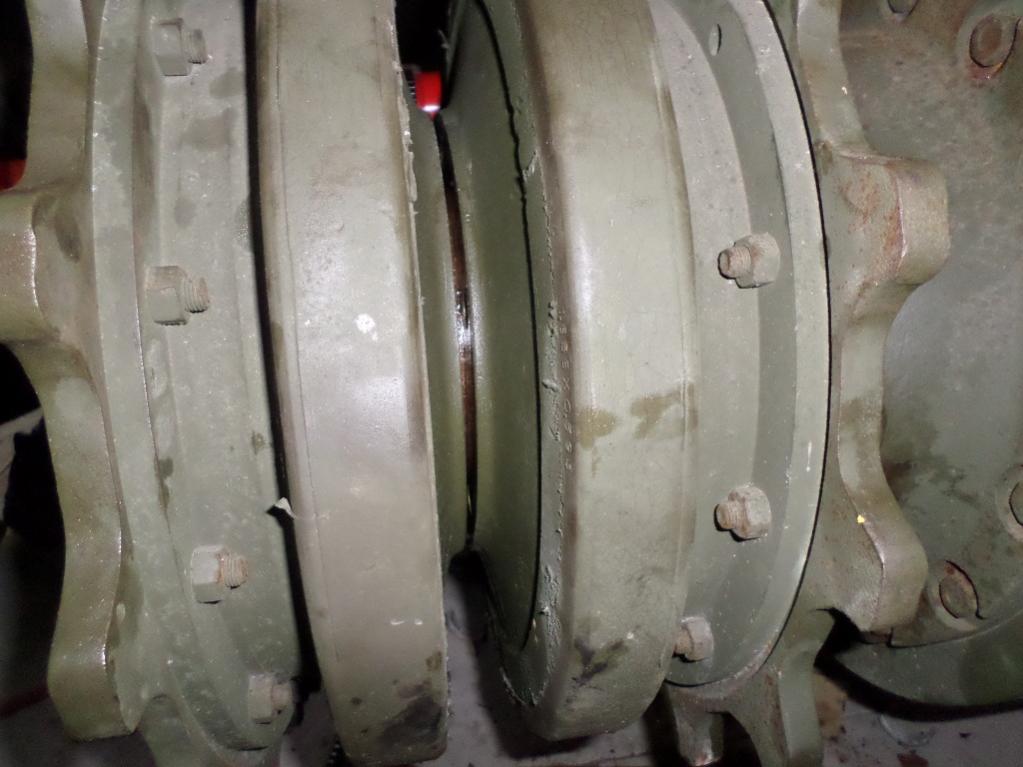
Front Sprockets and final drives - yes another challange. We knew that the sprockets would need a good hit with a sledge hammer or levering with a bar. We ended up needing a porta power which we hired brand new and broke (blew a hose under pressure). Again with time, patience and effort the sprockets and drive wheels came off.

-
3rd engine is a crated reconditioned one which hopefully will bolt straight in and run well. Any suggestions on pre installation checks to make sure things are all good - timing, adjustments or the like?


-
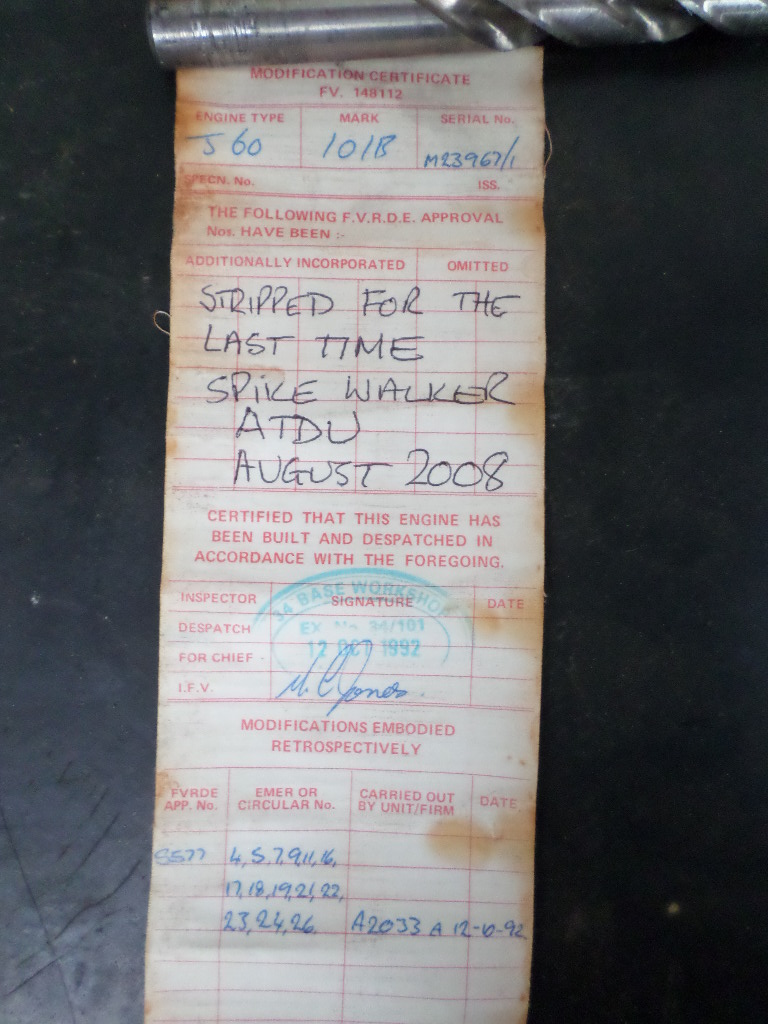
2nd engine is a take out. Why, where, when? I wonder whether the name 'Spike Walker' means anything to anyone? The engine notes for this one say "Stripped for the last time Spike Walker ATDU August 2008". I guess that means the engine was stripped for the last time and not Spike Walker :nut:. Not knowing much about history of this engine I think this is best kept as a spare.

-
We have 3 engines to choose from when things start to go back together all with their tubes with service history notes attached. The first is the engine that was removed which I think will be better as an anchor once stripped of any usable spares.


-
Removal of alternators is easy if you know how! I've taken out loads. The trick is to get a track pin, cut off the threaded potion and slightly round off the edges. You can then insert it into the cap screws, tap it in with a hammer or mallet and turn it with a spanner. I got the process down to 10mins with this method, even with the engine in place. Yes the brackets are fitted to the alternator before it goes in.
A huge learning curve for us but we and others will now know and easier process thanks.
-
Other internals came out relatively easliy with the odd bolt snapped that will need to be drilled. The generator was another hurdle as one of the cap screws (yes had to be one underneath) had its head already stripped so that and being seized we had to use an air tool to grind the head off. A hard to reach area and cold on your hand with the air tool working. It appears that the generator has the mounts fitted to it then the whole unit fitted to the hull. A couple of nights work and a good hit with a cold chisel and success.


-
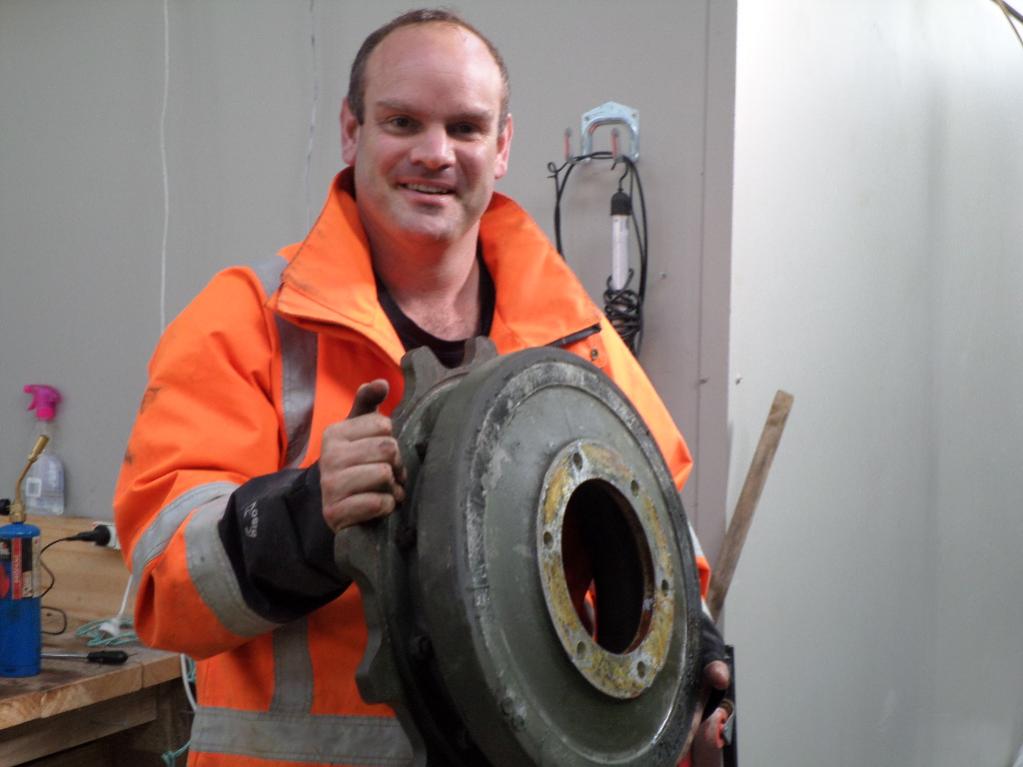
I have been working on the commanders periscope that we got from Andrew Rowe's tank factory. AV.NO.71 MK.1.
It is an ex NZ Army one but has suffered a bit of wear and tear.
The periscope glass was broken
a bit missing from the aluminium hood that frames the glass
the dial unit was seized (a mixture of rust, broken glass and other debris)
the eye pieces lens have had big dirty fingers damage the coating.
The plan was to take it apart as little as possible to get things moving again and make it look pretty externally. This done and mirrors and all lens carefully cleaned.
Using a product called Permatex steel weld I repaired the damaged aluminium hood
A new glass was cut by the local glass shop which I fitted.
the dial unit was successfully un seized over a period of gently oily and trying to rotate
the eye piece lens have been taken to a local expert to see if they can be polished. IF ANY ONE HAS REPLACEMENTS sitting on the shelf somewhere it would be even better.
I do have a question on the operation of the dial unit. Should the numbered dial rotate at the same time as the outer dial? If so I need to have another look at it. If not what does the inner numbered dial actually do as it just seems to turn some gear spurs but not adjust anything. Was seized before so possibly I have not put back together properly.


-
If you can't get the shafts out or the plungers won't move you can always remove the final drives first.
That was another option put forward and removing the final drives was another battle on its own which I will detail soon.
-
The next plan of attack was removal of the gearbox. I have seen on other forums mention made on how quick time wise these things can be removed. Well we were at the other end of the scale.
Vince (aka Grasshopper) and Pavl (aka Teletech) were great helps with detailing the process which is quite simple in theory
- remove the hub end cap
- locate the sprung detent on the gearbox side
- depress detent whilst someone pulls the quill shaft out
Now imagine that the hubs wouldn't rotate, steering and foot brakes all seized and no signs of the sprung detents. Oil and heat were applied to the shaft end where it met the gearbox over several days and at the same time we worked on effectively braking away the seized brake pads. Finally we were able to rotate the shafts just enough to get to the detents and remove the gearbox. This was a big day for us as we were nearly beaten and thought of the gas cutter as a final resort.


Scorpion/Scimitar Restoration in New Zealand
in Blogs of MV restorations
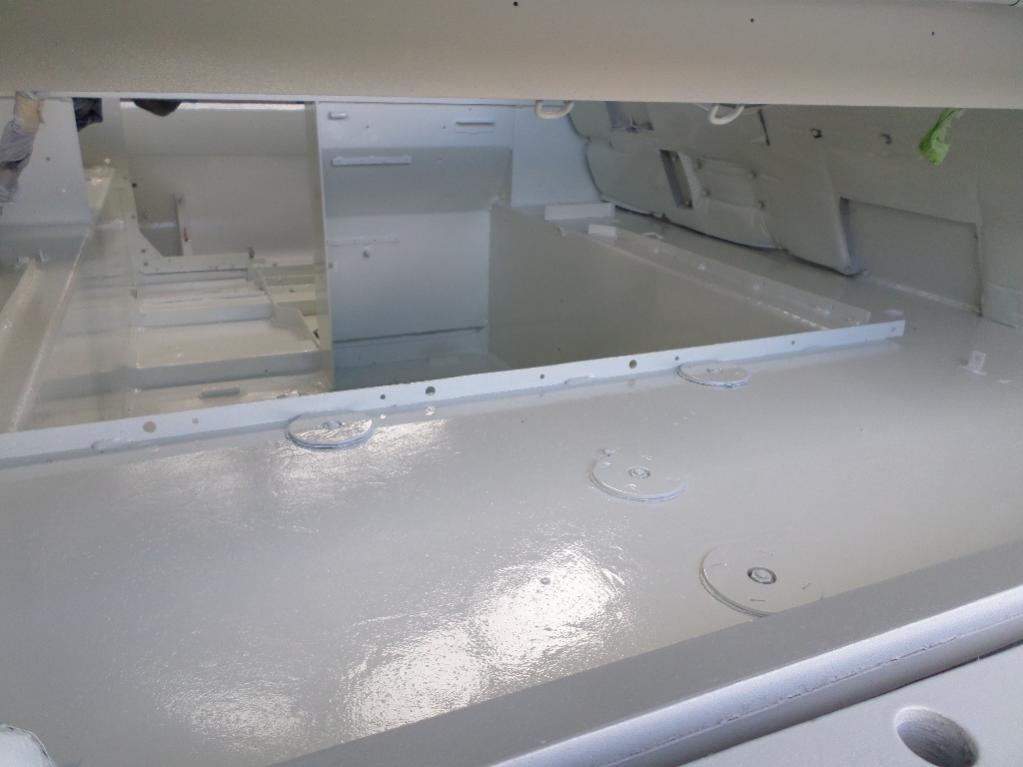
Posted
2nd top coat to Hull interior completed so we can now start to think of where to begin on the puzzle of putting everything back together after a clean, refurbish, replace as the case maybe. I'm looking foward to bolting the horn back in 1st as it has been sitting patiently now for awhile.