


philm1
-
Posts
195 -
Joined
-
Last visited
Content Type
Profiles
Forums
Gallery
Blogs
Events
Articles
Store
Downloads
Posts posted by philm1
-
-
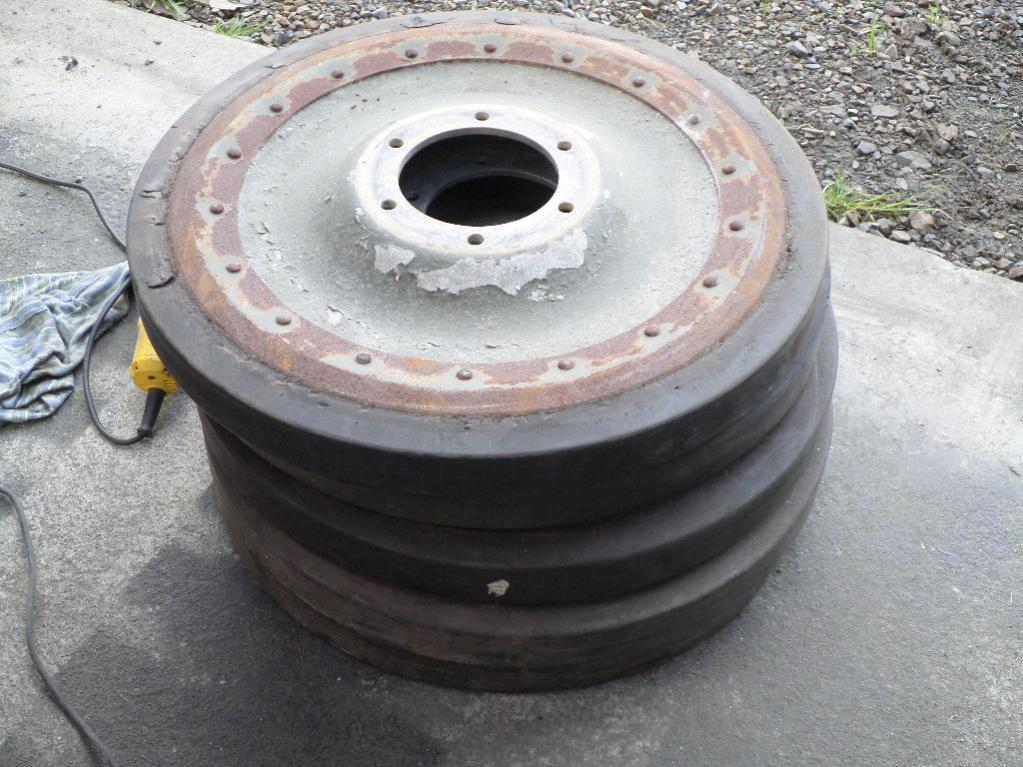
Another session cleaning up the road wheels ready for painting. Not being too precious but thought it best to clean any rust off the inner side steel bands then a coat of anti rust. Bit of fun for a Sunday morning and thanfully the stack got smaller.


-
Thanks for the update Phil, I was getting withdrawal symptoms from not hearing. Once again doing an amazing job.
David
Can't be having that. Perhaps a trip down under is on the cards??
-
I have also put the commanders periscope back together following repairs and the replacement lens Nigel Moss kindly sent to us. Even managed to see through it and target the neighbours house. This unit will go aside pending fitting in the turret down the track.

-
Starting to get cold here as winter sets in. Still aiming to paint lower hull so road wheels and tracks can go back on. This in mind we hired a LPG gas blower heater and set that going for a couple of hours to warm the shed up. Then managed to get a coat of undercoat on. My first time at spray painting but didn't do too bad. Brett, the more experienced painter was layed up on the couch with the flu.


-
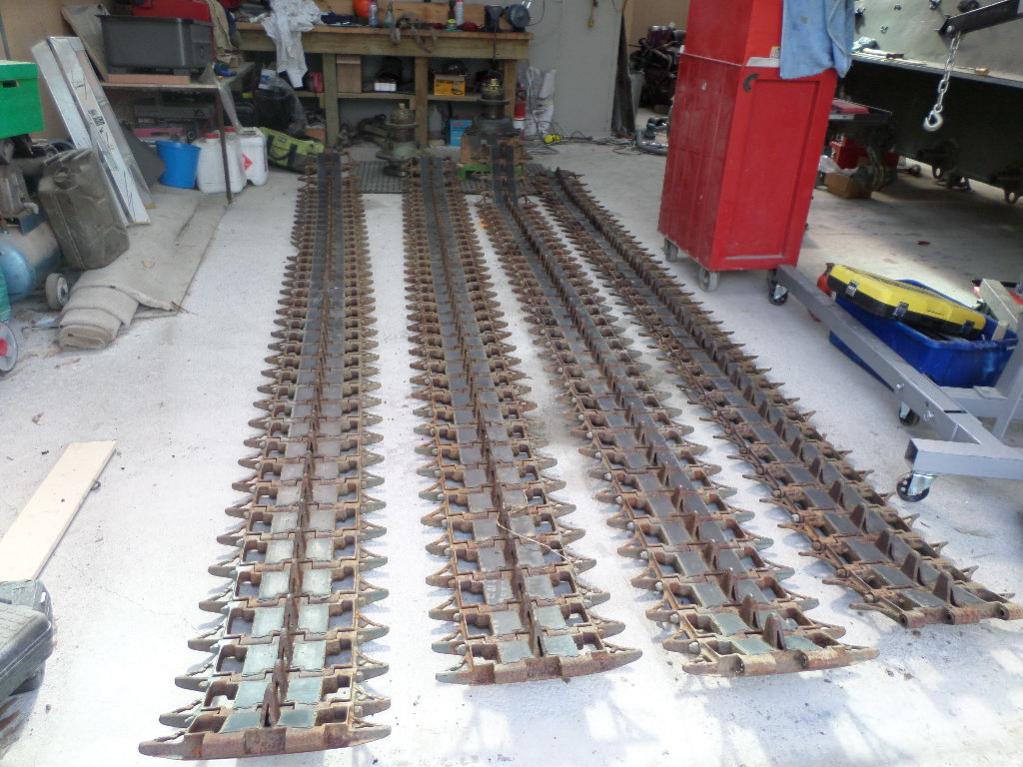
A bit slow on it lately as winter approaches. Did finish giving the tracks a quick paint of chassis black so at least they will look good for the first photo before we go off into the mud. Amazingly easy to roll up but not so easy to move around when lying flat. These now back in the corner of the shed awaiting to be fitted.


-
Back from 10 days in sunny Australia on the Sunshine Coast north of Brisbane. Attended the Marrochydore Anzac Day parade which was hosting the 50th anniversay of Vietnam verterans of 86th Transport Platoon.


-
Phil
I would say Robin was curious due to his knowledge of older vehicles with torsion bars such as the Saracen and Saladin, IIRC
Stolly also.
On them, the height and weight distribution of the vehicle could be adjusted by way of the torsion bar settings.
I read up on the procedure a very long time ago, but if memory serves correct, on those vehicles it could be done
without having to remove anything such as suspension arms etc. Just how enjoyable a job it is I do not know.
The Ferret has a set of massive coils, which aren't any fun to install or remove either, even less so on the Aussie versions
due to the hull strengthening fillet.
Regards
Doug
Thanks Doug. Hopefully we get them all installed again okay. Learning all the time on this project and appreicate the feedback from others. Hopefully we don't do a coil on Brett's Ferret as that doesn't sound like too much fun.
-
What effect will the hull being less than full weight have when setting the torsion bar angle / dimensions?
We are setting them based on the manual 'Electrical and Mechanical Engineering Regulations - Chapter 6 - Suspension & Tracks'. When fitting them there is no downwards weight as obviously they are hanging freely. There is no mention of setting them at different angles depending on the full weight or otherwise of the vehicle. I can't imagine in the field you would want to be adjusting them depending on weights. All a learning curve for us but appreiciate any feedback before we refit the remaing ones.

-
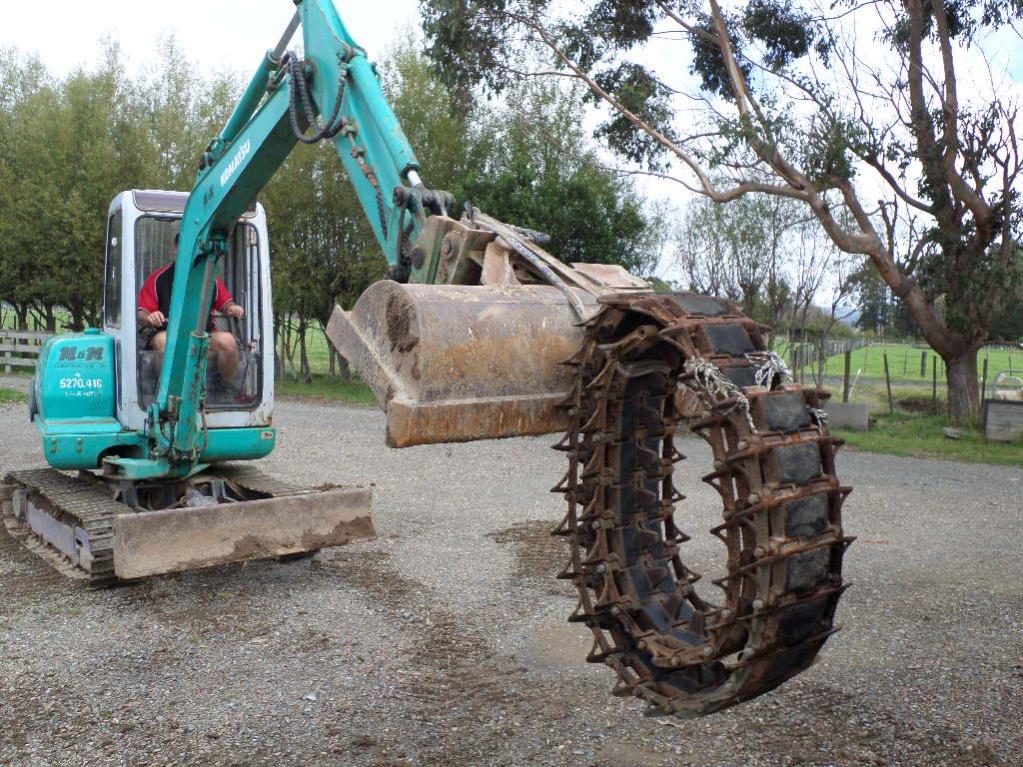
Whilst we were making good progress we also took advantage of the digger that is on site to move around some of the heavier items into the workshop - final drives and track. Hopefully we will get the final drives in place in the next day or 2. The tracks we have laid out to give a quick tidy up ready to go on.


-
Current emphasis is to get the Hull sitting back on tracks. All the tosion bars have been cleaned and are ready to go back in with new bearings in the wheel hubs. Pity we forgot some of the axle end brackets (for other side of Hull) which are sitting in another workshop now shut up for the Easter break. We did manage to get one set of torsion bars back in trying to get the measurements as close as possible for the torsion bar alignment.

-
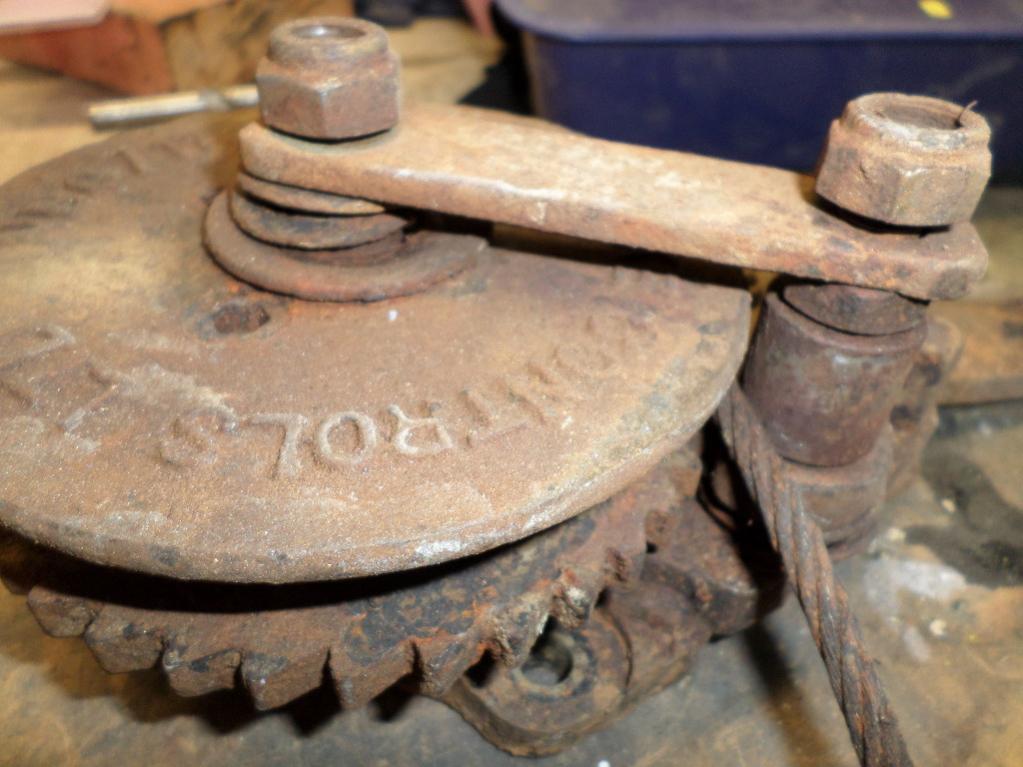
Handbrake also recently completely stripped down, painted and rebuilt. Now re installed.


-
Radiator Fan was seized which was expected so completely dismantled, sand blasted, powder coated, new bearings and reassembled. Now on the shelf patiently awaiting installation.


-
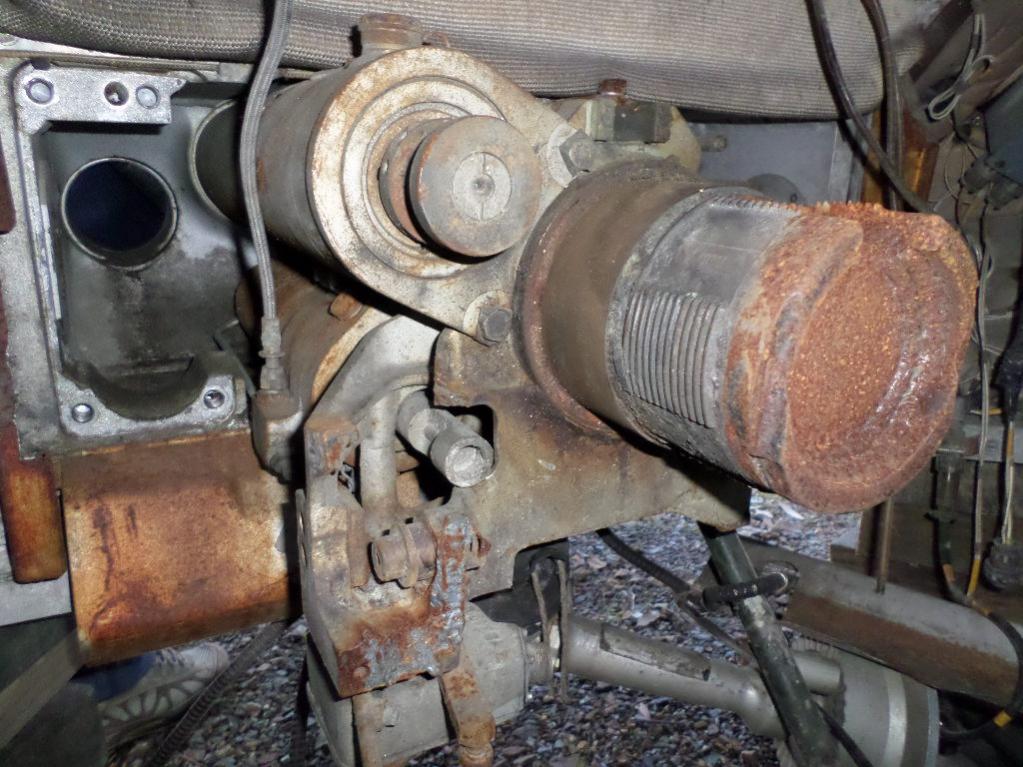
Somewhat ahead ofourselves but looking at the turret I wonder what is actually holding the gun barrel in place?
Would I be correct in thinking that a twist and a pull and itshould come out?


-
Things have been a bit slow as late as both Brett and I have been flat out with our day jobs.
When it came to remove the far side torsion bars we found we were short about 3 inches as the wall was in the way. What to do - Option 1. try and move the hull across but it's sitting on axle stands. Option 2. remove the wall.
We went for option 2 which actually worked out quite well as as it's an internal with steel sheeting. By removing the bottom bolts holding the sheets on we were able to get just enough flex in the sheets to get the torsion bars out.
I have now cleaned out all the channels by using de greaser and pushing several old rags through with a pole. Similar I guess to cleaning a large barrel.
-
Does the horn actually work? Many of that type I've encountered have been somewhat mute!
Andy
Hi Andy. It didn't work initially so I pulled it all apart remembering where everything went (until it came time to put it back together Ummmmmm). The Ferret one is the same so I has a looksy inside that one. Once all back together and after a little bit of fiddling it does actually work (LOUD).
-
A start to putting some bits back on.
Brett first off the mark with the rear idler wheel axles and hydraulic rams.
I just had to get the horn bolted back in.


-
In the last picture, to what vehicle does that tire belong to please?
Hi Robin. Tyre belongs to Brett's MK1 Ferret.

-
Having pulled the front torsion bars and repaired the chanel we decided to carry on and remove the rest. At least we know then that all the torsion bars are serviceable. The channels are full of lovely gunk so we will steam clean those before reassembly.


-
Phil,
If the CVRT turret rings are similar to most other vehicles, eg. Matilda, Staghound, Grant/Lee etc, they are very
straight forward. They disassemble into 2 main sections and with a thin keeper ring that serves to lock the balls in. There is no continuous cage as such that you would know from a regular ball bearing. There are usually bronze spacer plates that serve 6 or 8 balls - effectively the cage but not continuous.
I would expect that the grease may have dried out. If this is the case, pull it apart,
BUT look for any shims, if you find them number them and make sure to match their location with corresponding numbers on the race. You should then just need to clean everything, re-lube and put it all together again. Do your homework on lubes as I would be worried in your climate that a dry lube would not be sufficient protection from moisture. Perhaps Morey's Big Red (I may not have that name spot on) could be worth investigating. It is a chassis lube and intended to act as a dust and water barrier.
Have a look here on my website for a section drawing of a turret ring:
http://www.members.iinet.net.au/~dgrev/dhmg/stagints.html
Worst case scenario is that the turret has been left off at some time. If this is the case, rain will have got in and wrecked the balls. If so, you would be in need of over 100 1 1/8th or 1 1/4 steel balls. Not cheap! Hopefully not what has happened.
Being such a light vehicle there is the possibility that the ring is alloy not steel. This being the case, don't be surprised if you find ceramic balls. If so, you need to do your homework about correct lubricant. The T50 turret on the M113s had ceramic balls and they had issues. I think they were later superceded with Acetal (an engineering plastic) balls which have good load bearing properties. This may be what Secondshooter is referring to and the use of dry lubricants.
Regards
Doug
Broken Hill
Australia
Thanks Doug. We'll start looking at the turret ring soon. Working on getting it back on its tracks is short term goal.
-
From what I remember they come apart fairly easily but it was a long time ago ! you just undo the allen head bolts and it separates , I think there were several pieces to each ring so if the don't have pin punch marks or numbers stamped on them do it yourself as they like going back the same way. we used dry lube on the ball bearings as the Waiouru dust would quickly clog up grease.
Thanks for the info. Did you work on Scorpions here in NZ? If so where do you live now as most welcome to come see the project if nearby Upper Hutt at any stage.
-
Would appreciate feedback on removing and refurbishing the turret ring. Currently stiff to turn probably as a result of sitting for so long. Are there any must do's and especially dont's??

-
Stonking work Phil. That is going to be running before I come out to see you.
David
We are looking forward to seeing you. In what year though so we can worth to that time line??
-
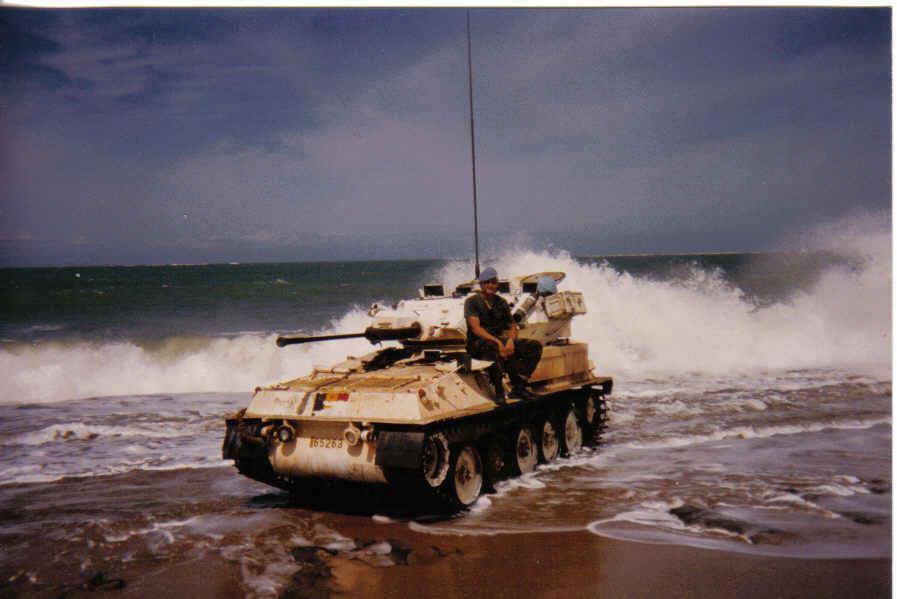
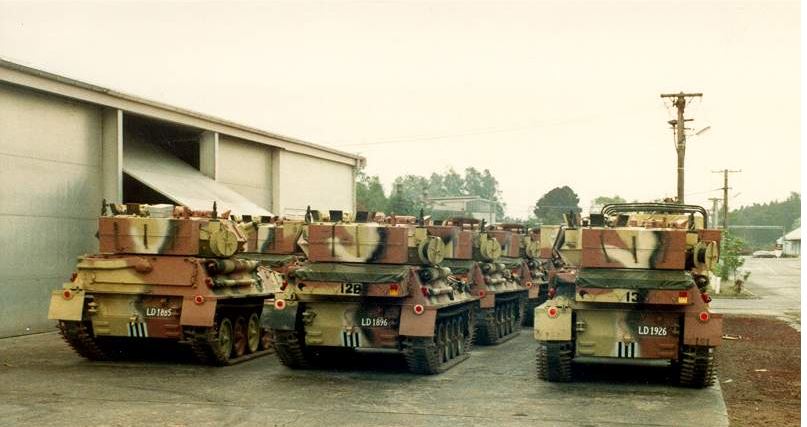
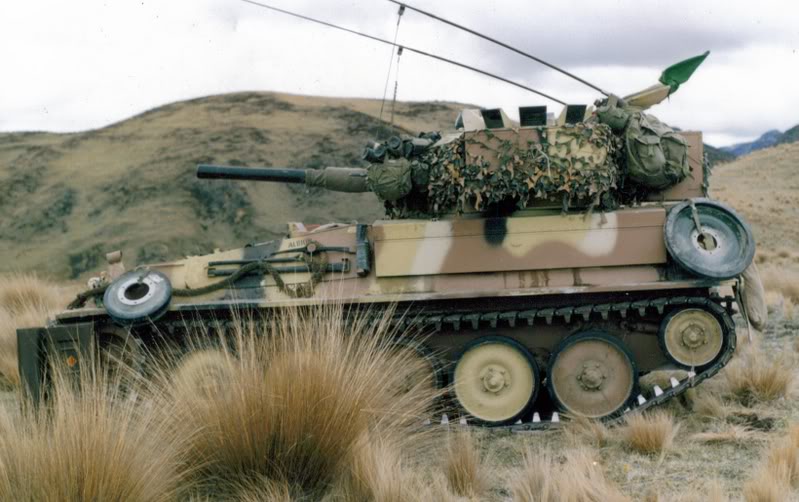
We also like the plain white colour that ours was painted when in Belgium service. Possibly ours was deployed to Operation Restore Hope Somalia?
.jpg.9bfba7547b126d1111edfb828e8dd247.jpg)
(002).jpg.97bbb4b10c5b1471eb40a35a4fd38893.jpg)
-
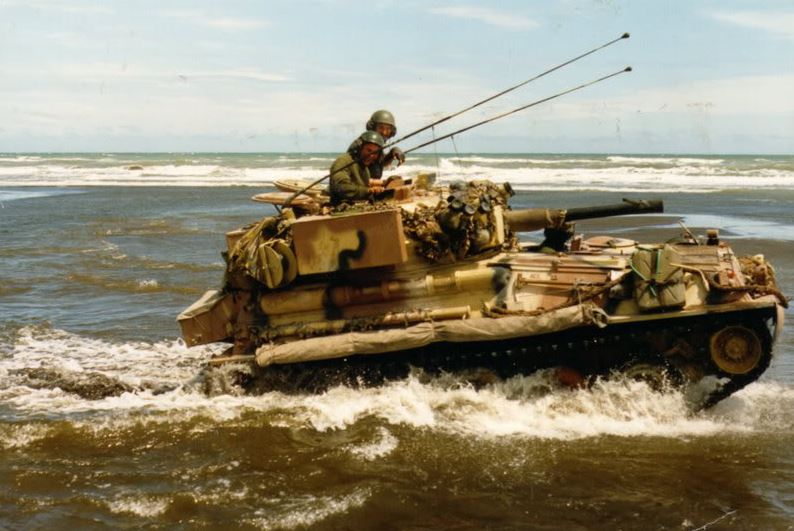
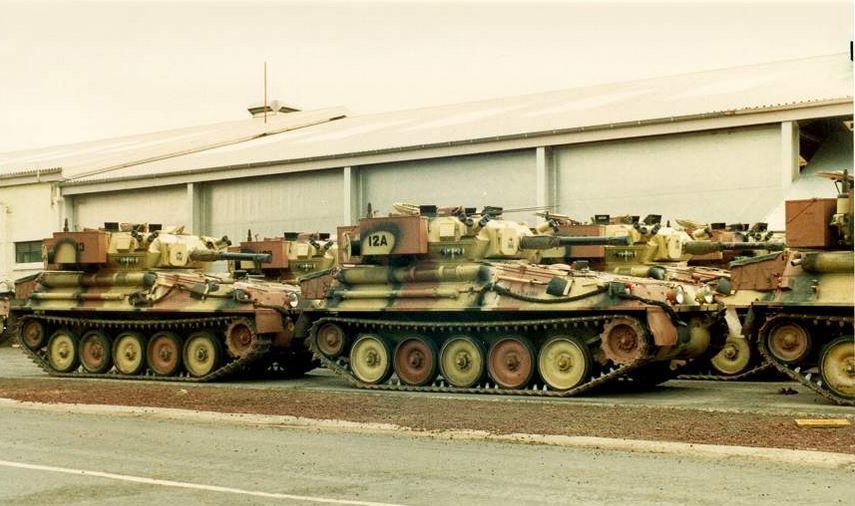
Some photos of New Zealand Scorpions in service. Originally green until later painted in Merdec disruptive cammo scheme.


.jpg.9bfba7547b126d1111edfb828e8dd247.jpg)
(002).jpg.97bbb4b10c5b1471eb40a35a4fd38893.jpg)


Scorpion/Scimitar Restoration in New Zealand
in Blogs of MV restorations
Posted · Edited by philm1
From enquiries my understanding is that unless our barrel is welded in some place then it should pull out.
The breech ring has interrupted screw threads which attach it to the barrel.
There is a metal oval shaped thing in front of the breach ring (technical term 'yoke') which then attaches to the recoil system. the yoke splits in 2 and fits over the bobbins at the end of the buffer cylinder and recuperator cylinder (our recuperator bobbin has been cut off) then the yoke halves reattached. this i understand holds the barrel in place.