


Minesweeper
-
Posts
976 -
Joined
-
Last visited
-
Days Won
5
Content Type
Profiles
Forums
Gallery
Blogs
Events
Articles
Store
Downloads
Posts posted by Minesweeper
-
-
They were young!! I can understand why they might want to double-check their work, but I'm sure the chief training officer of their apprenticeship training school remains confident :-D
That's very kind - and thank you, but the apprentices are now very much more competent than the Chief Training Officer!
Tony
-
Looking at the timing gear I was wondering that with the machine work I have seen done on this site if it would not be easier to remove it from the shaft which will have to be done anyway to replace it, wel d up the teeth that are bad and then machine them back to the proper profile. I know you can't just run out and pick up a new one and to me this would be the easiest repair and you would also be using original parts
Well, it is already off the shaft - and we have a sound spare from the "half" engine so that will take care of that! There are some pictures to follow, but that was all very straight forward. It will be put away somewhere safe - "just in case"! But thank you for the suggestion!
Tony
-
Something came to mind when reading this. Many years ago, I had a header tank leak on my '52 Land Rover, the only thing I had on me that was vaguely sealant was some glaziers putty, so I applied it to the leak, it sealed straight away and gradually hardened. The "temporary" repair lasted several years, at least until I'd sold it without hiding the repair! Before writing this I looked up "traditional glaziers putty, I knew it container linseed oil, which is a drying oil, but I wasn't sure what was mixed with it. This turned out to be chalk. If the putty is painted over with oil paint it can take thirty years to harden and remain flexible. It is used for joining materials of different expansion rates Completely reversible (with solvents), it could be a substitute for lead/tin solder!
A passing thought!
Regards, Matthew
Thanks Matthew - another way!
Tony
-
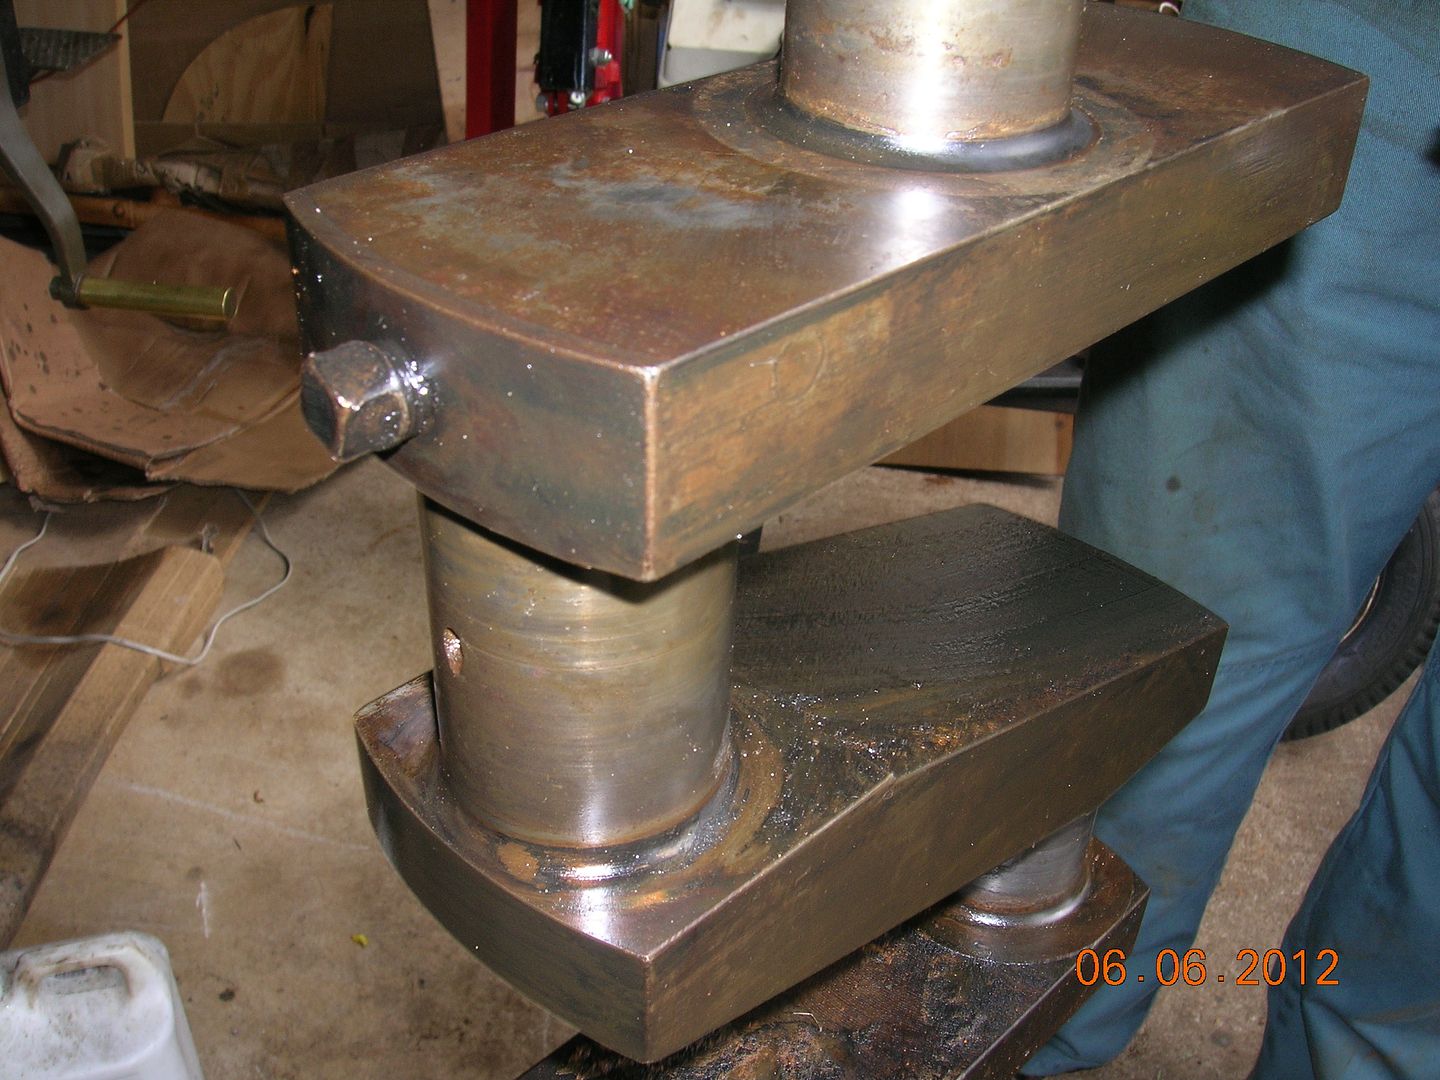
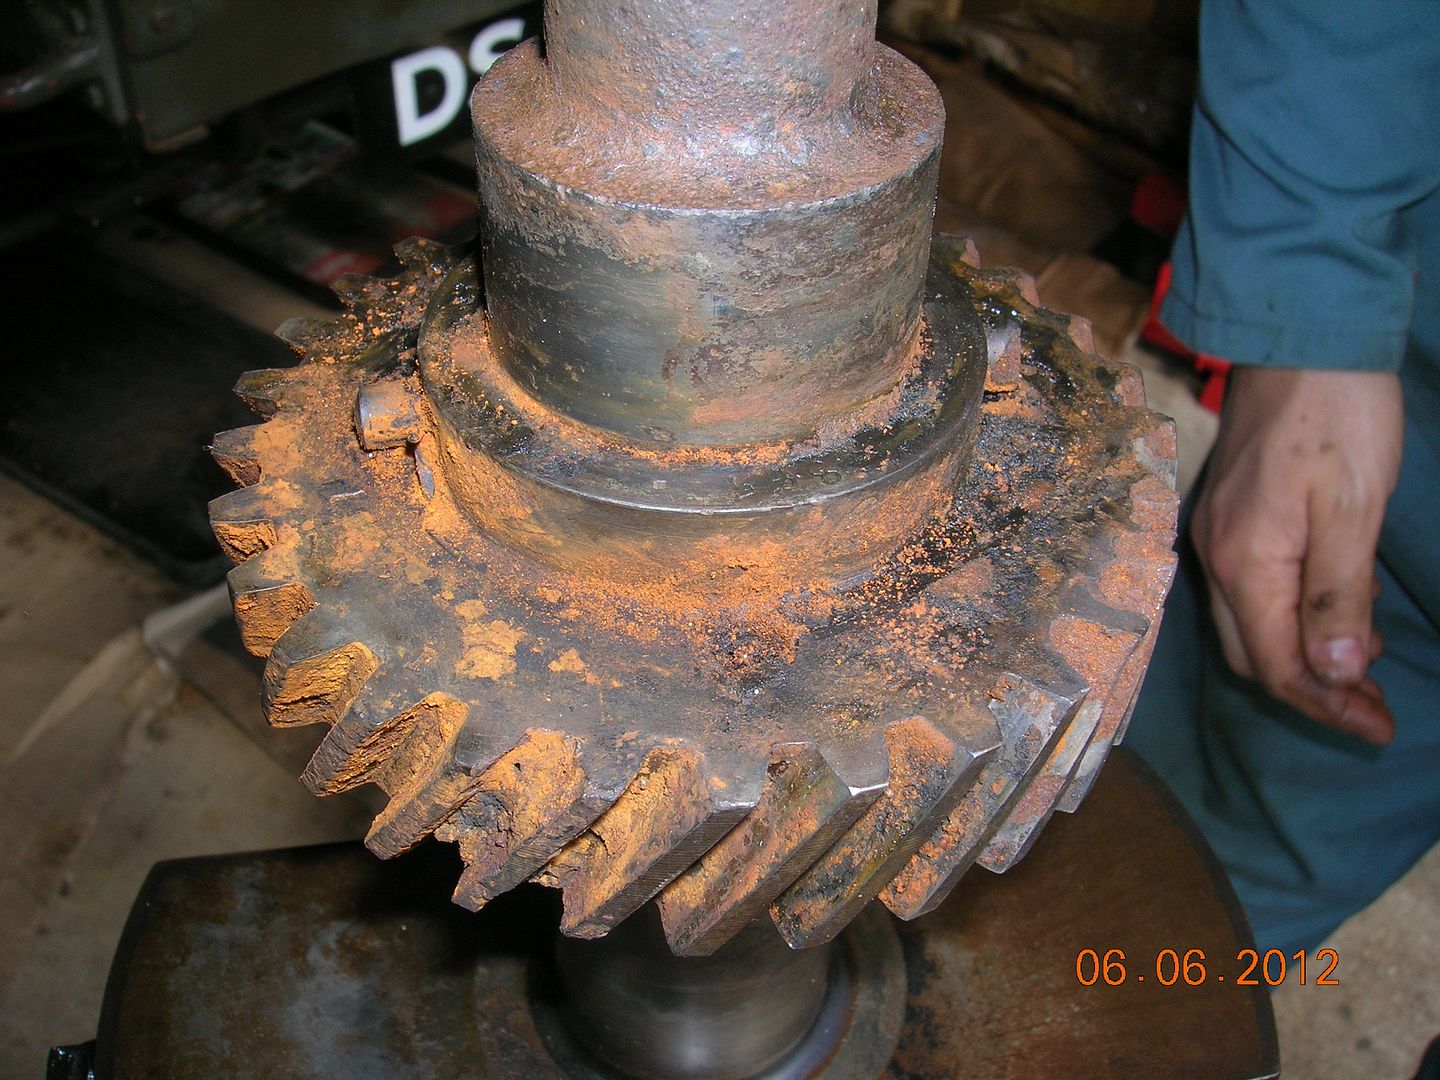
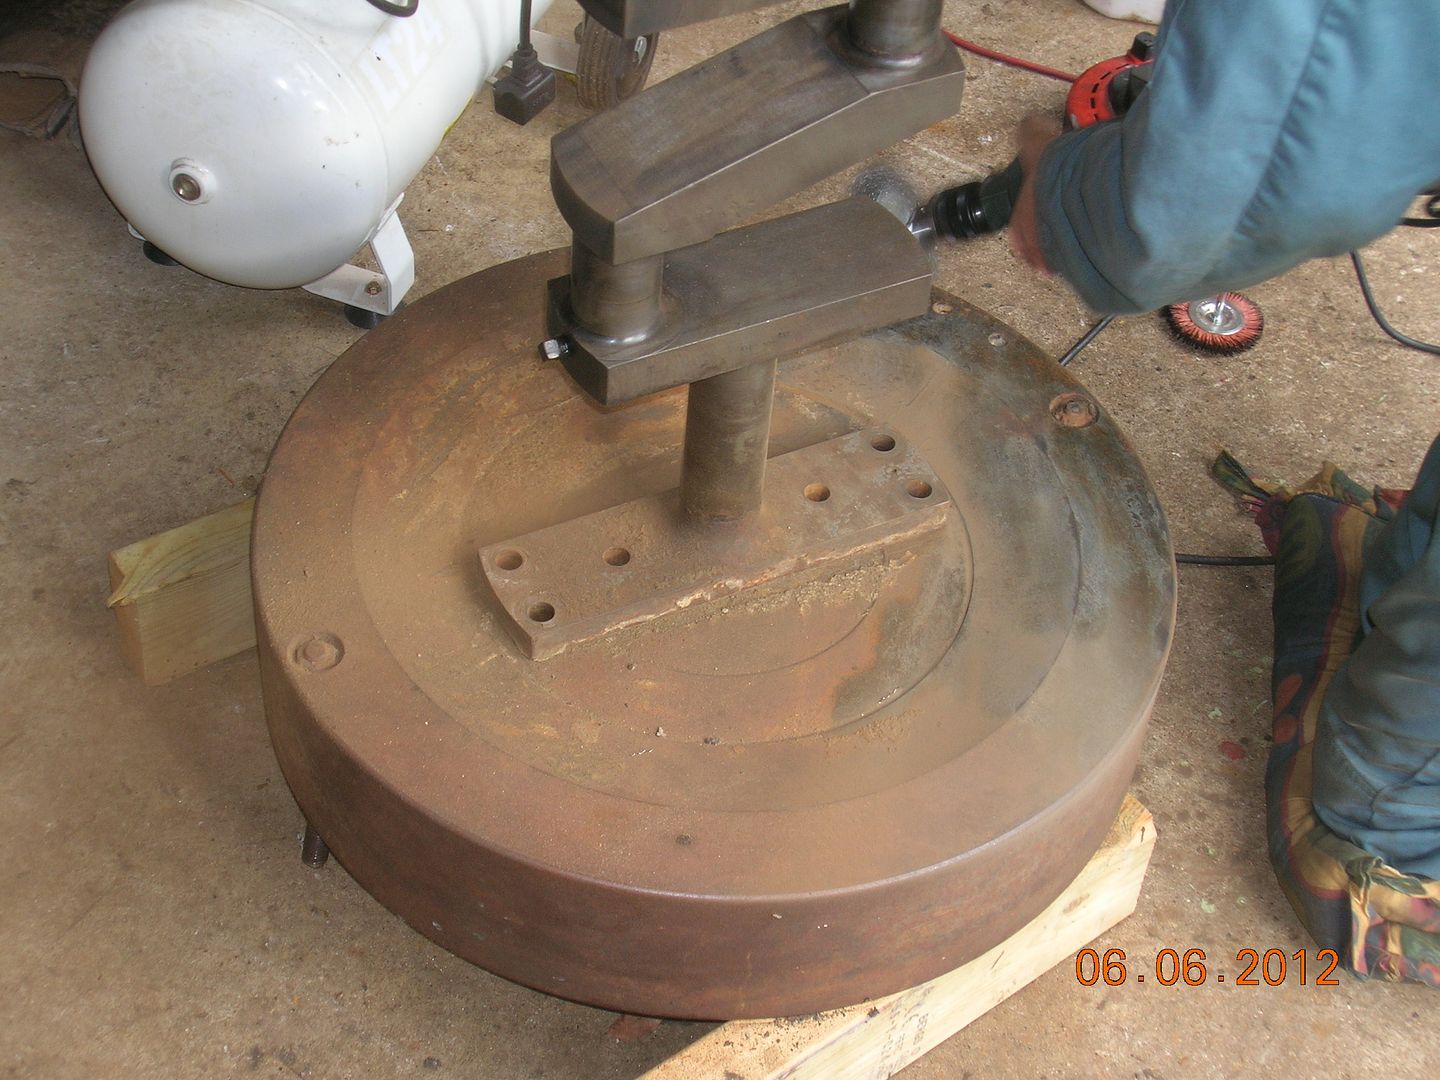
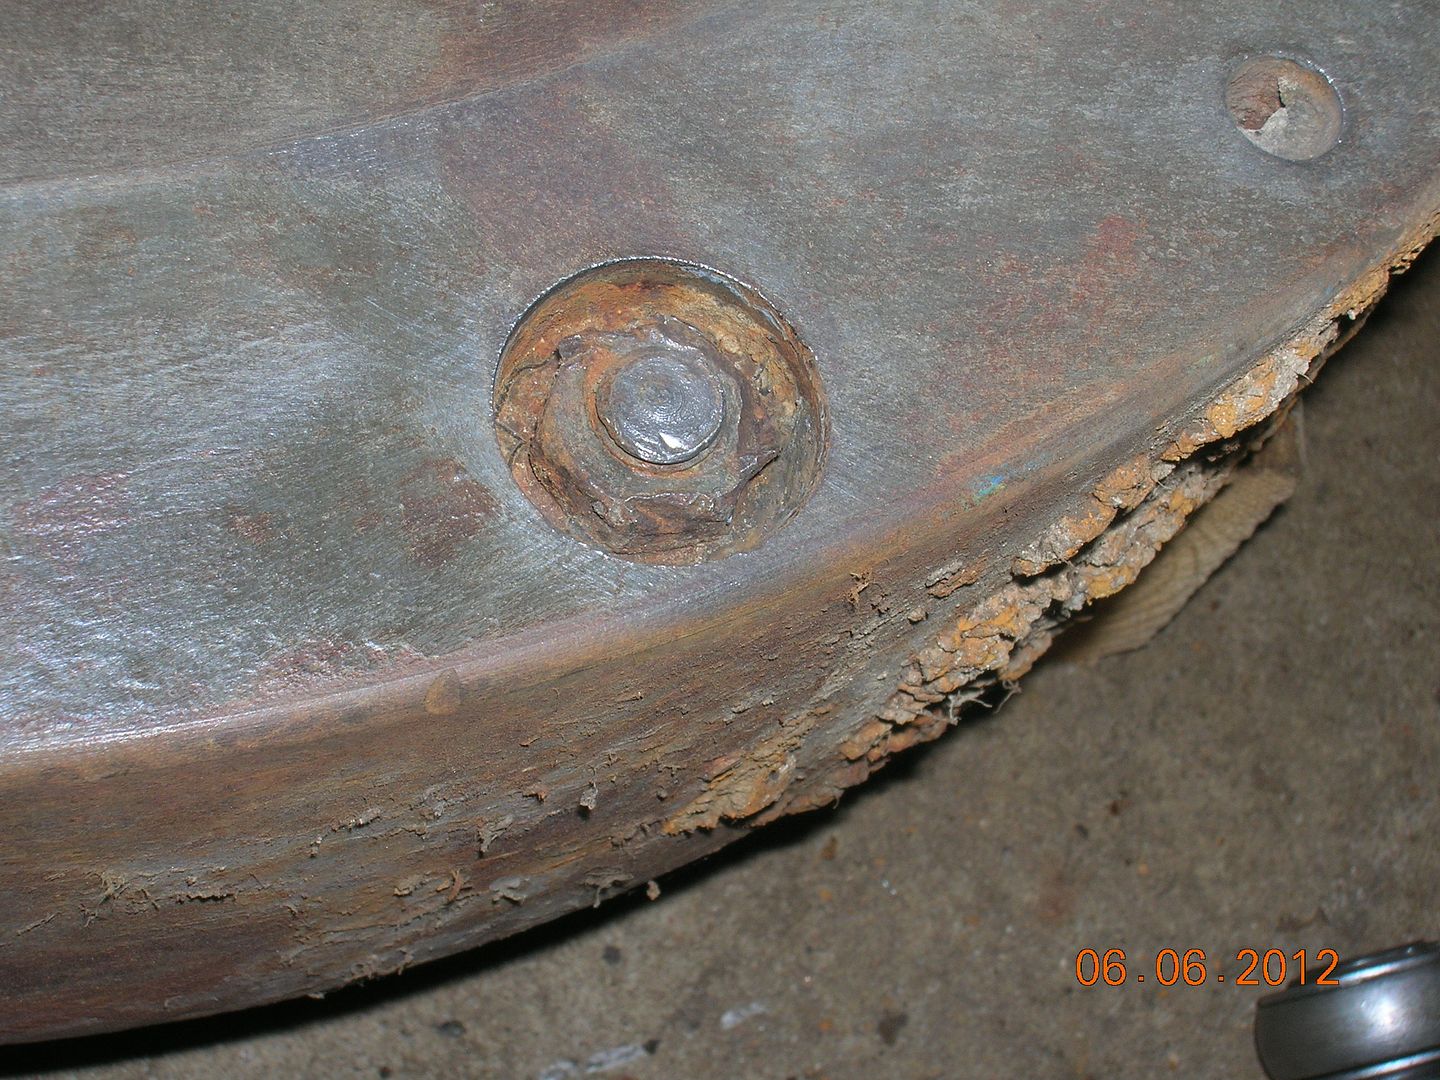
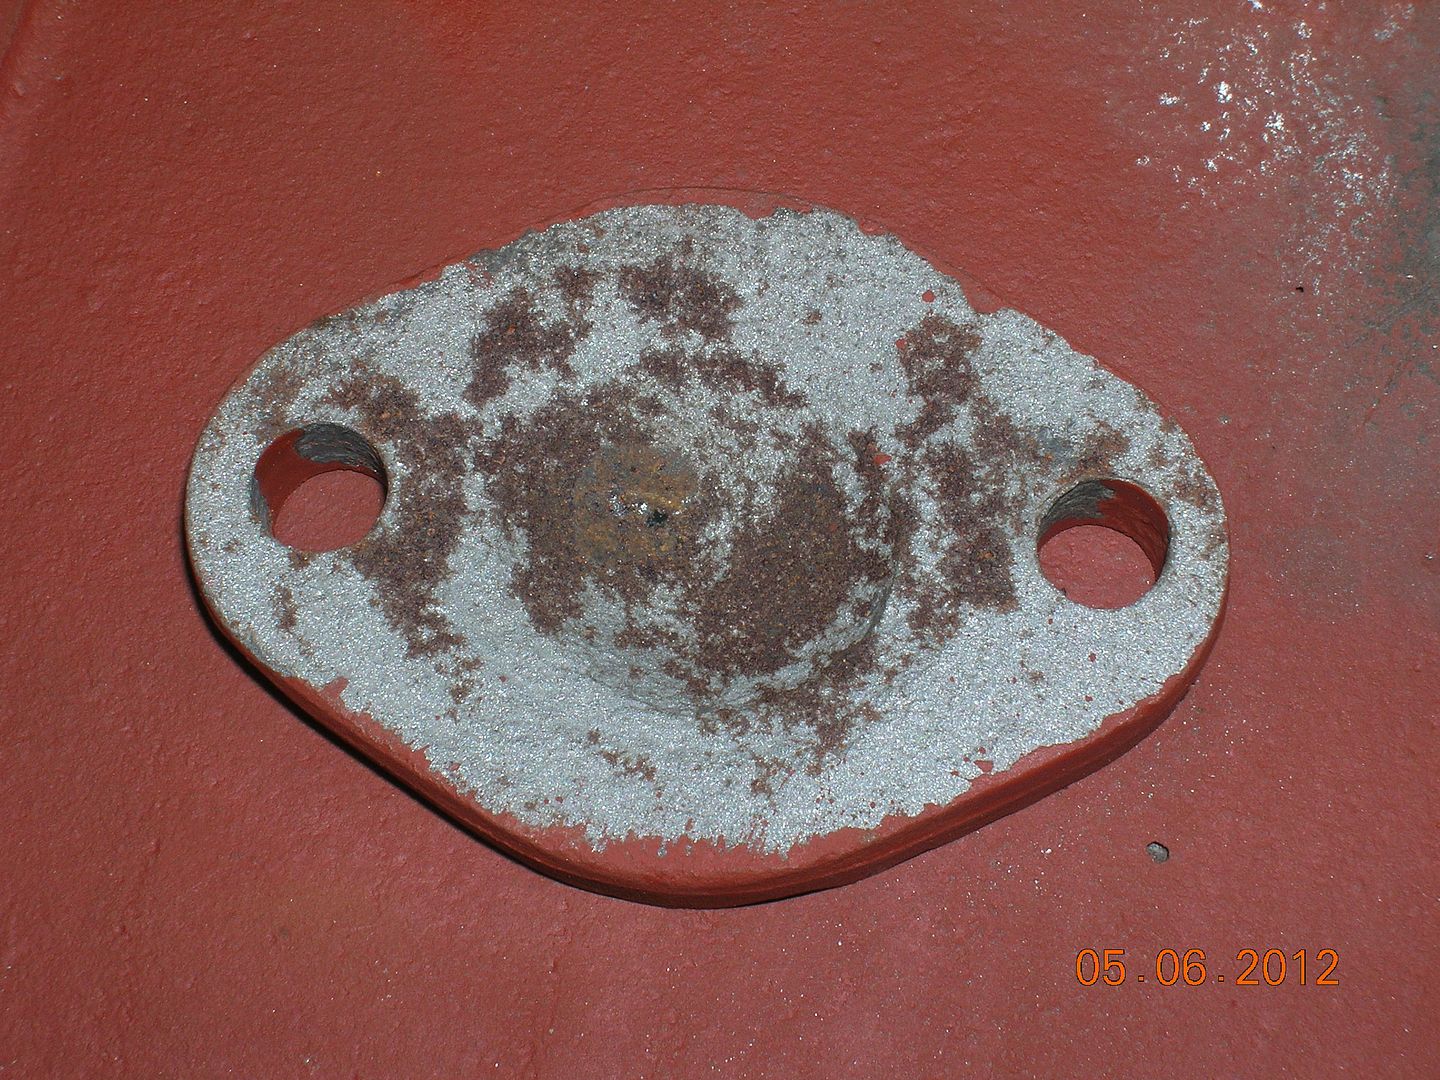
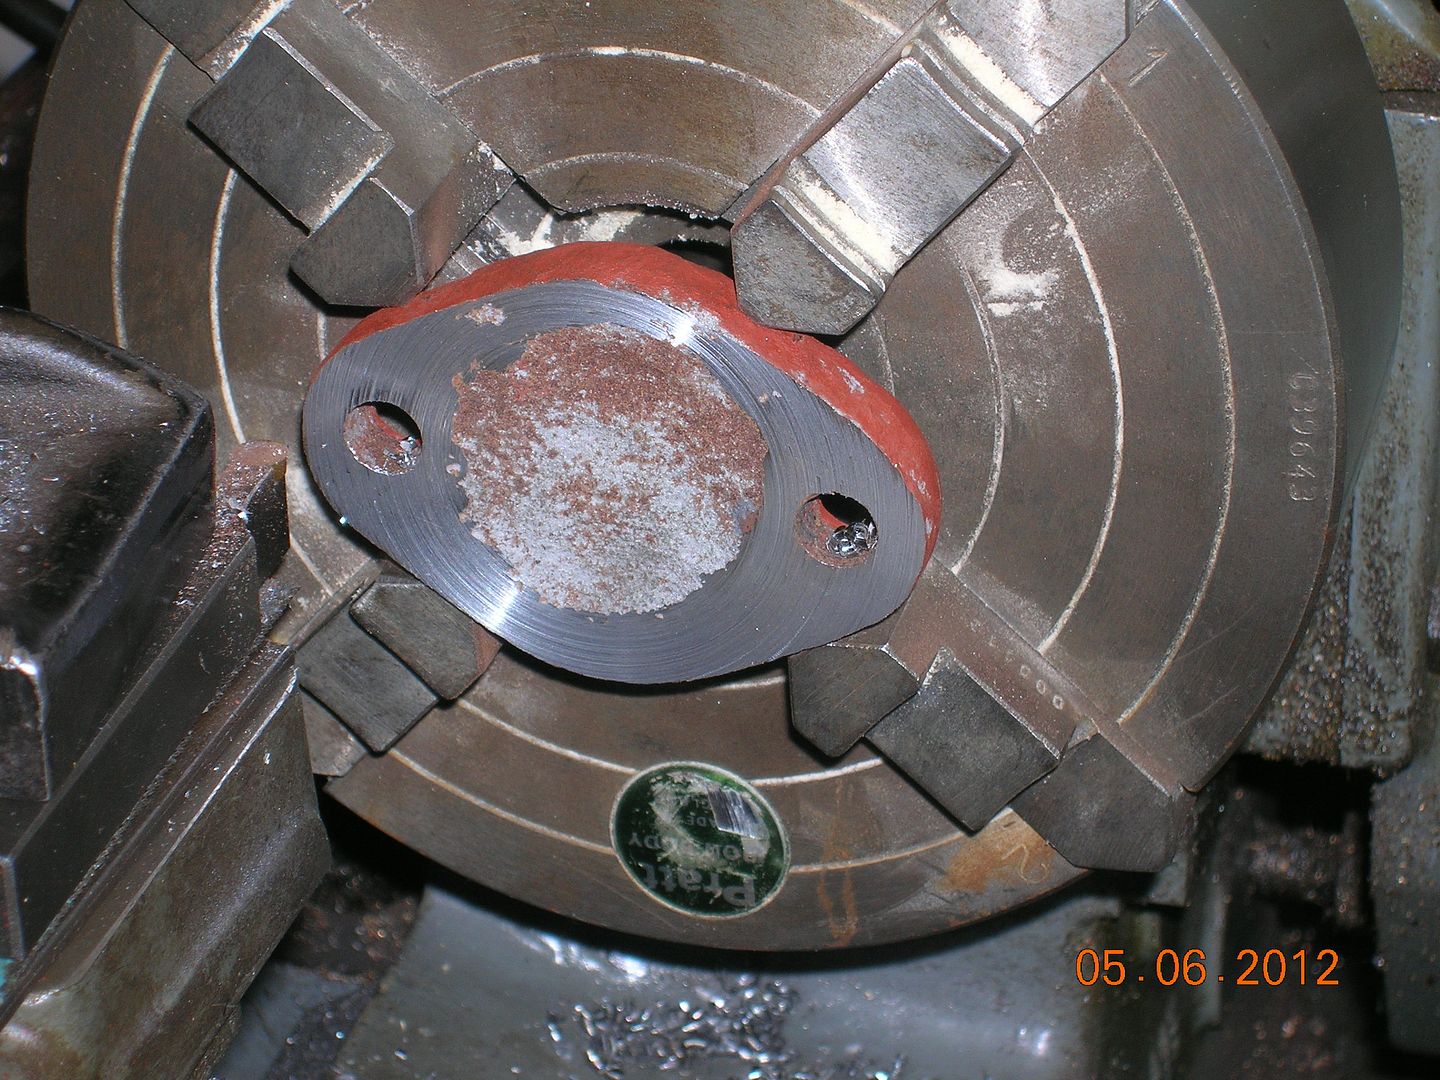
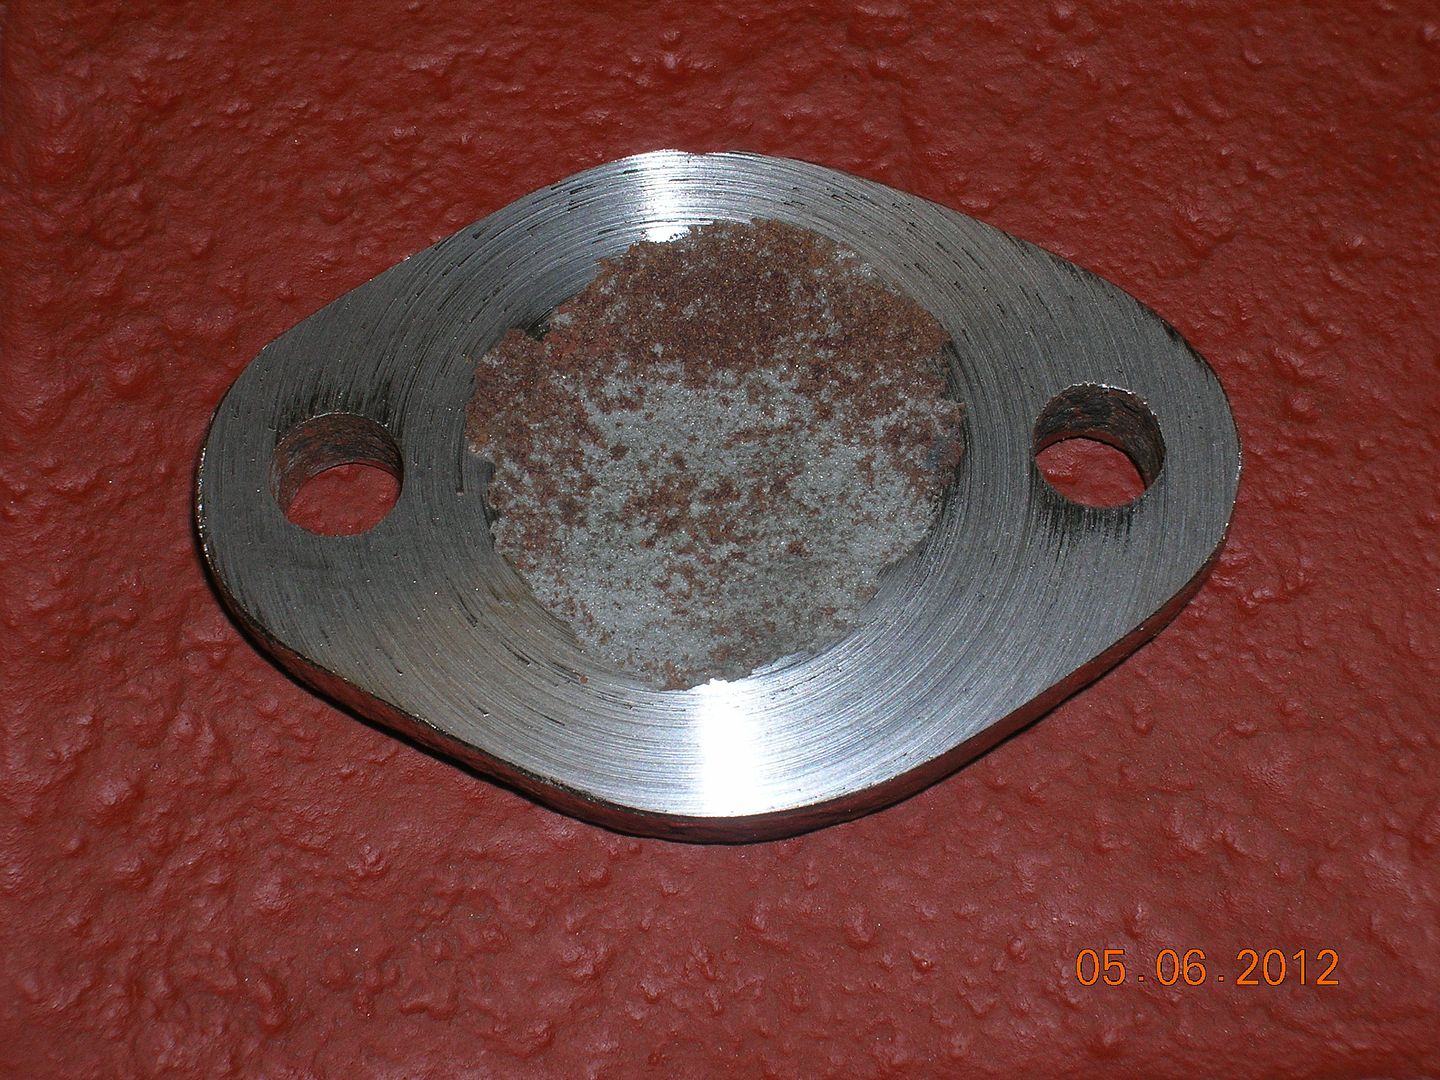
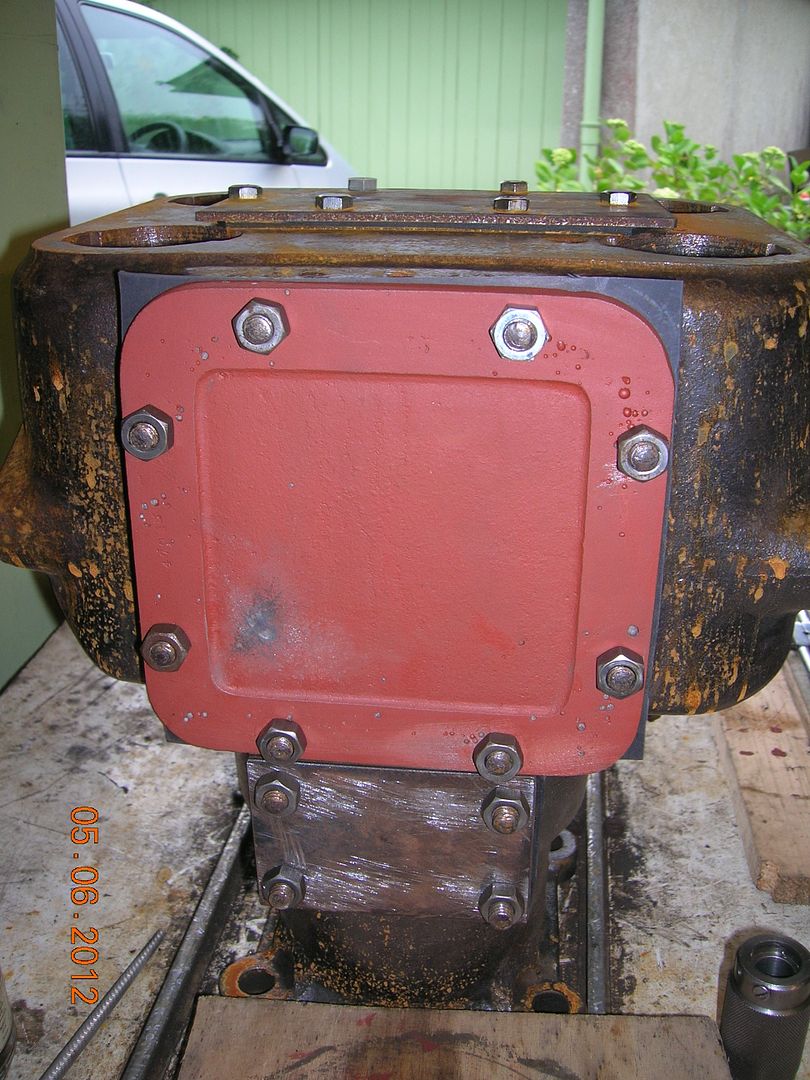
Another job slipped in today was a preliminary clean up of the crankshaft. We have two of these but the Timing Gearwheel on the end of the better one is in poor condition whilst the one on the inferior crank shaft is good. So again we have to do a “Mix and Match”. We had thoughts of taking the Fly Wheel off, just to make the crankshaft easier to handle in the re-setting up process as this crankshaft came out of the other crank case and it will have to be set up from scratch. The Fly Wheel would not budge so rather than waste more time on it, we opted to leave it where it was on the crankshaft and work with it as a whole. The air hose was applied to the oil passage ways and they were found to be all clear.
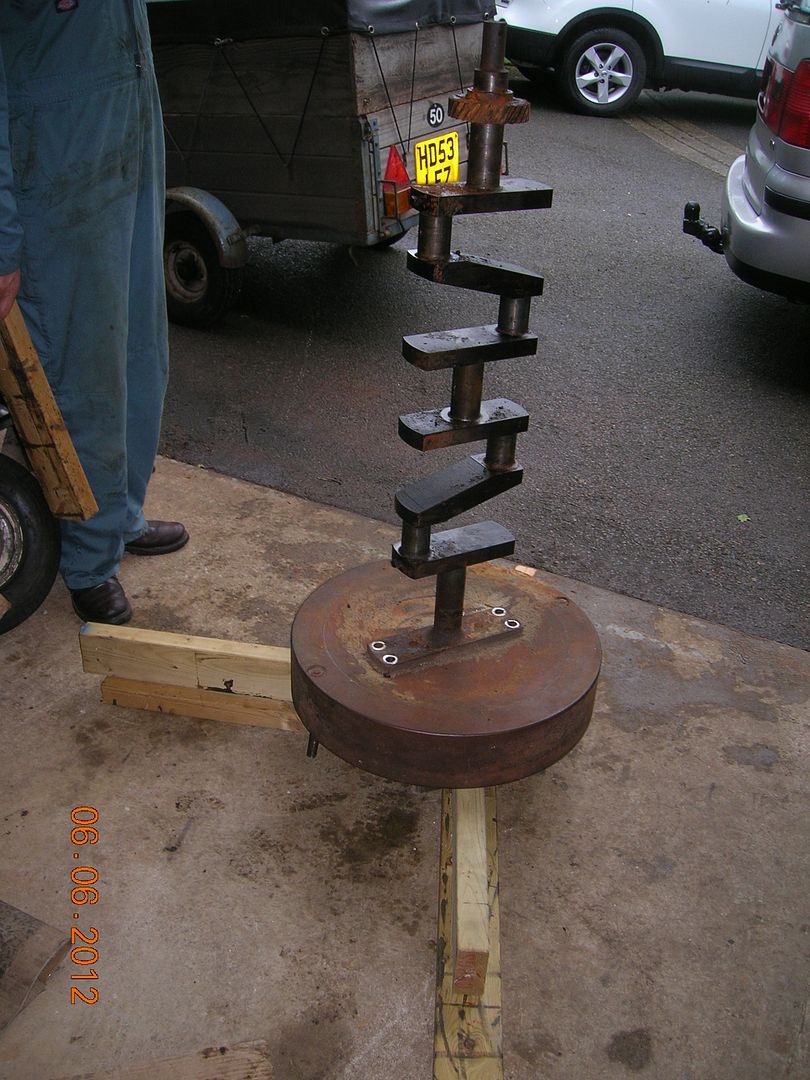
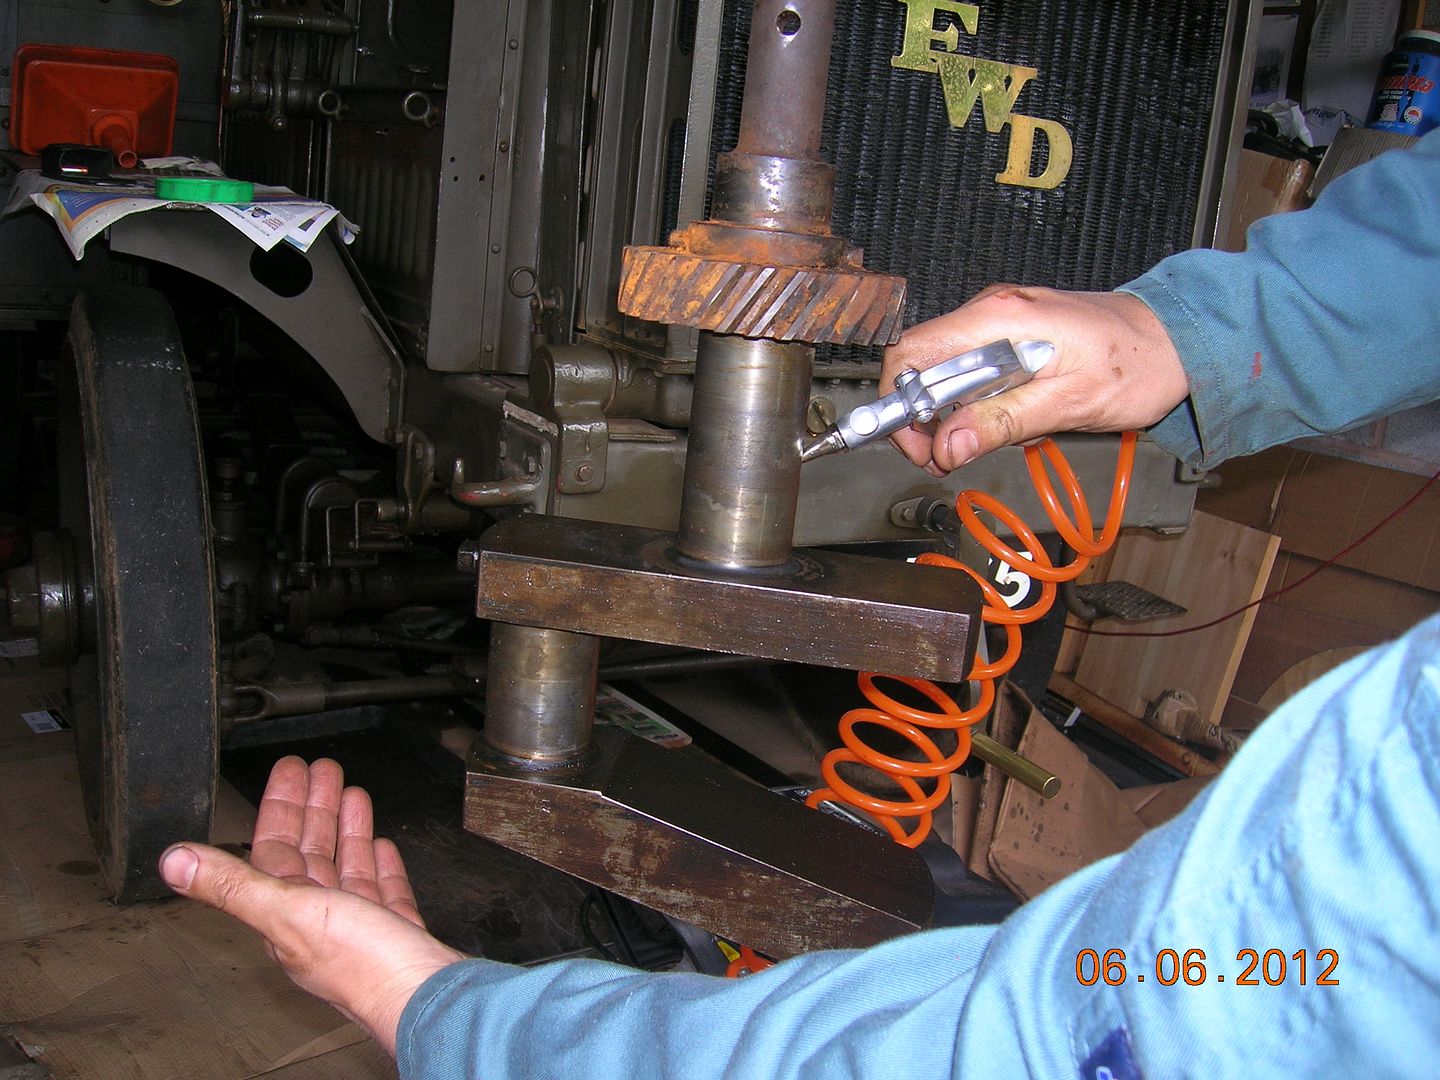
These two pictures show the poor condition of the one Timing Gear Wheel that has to be replaced.

The first of these three pictures show the initial progress in cleaning up the Fly Wheel with a wire brush on the hand drill.
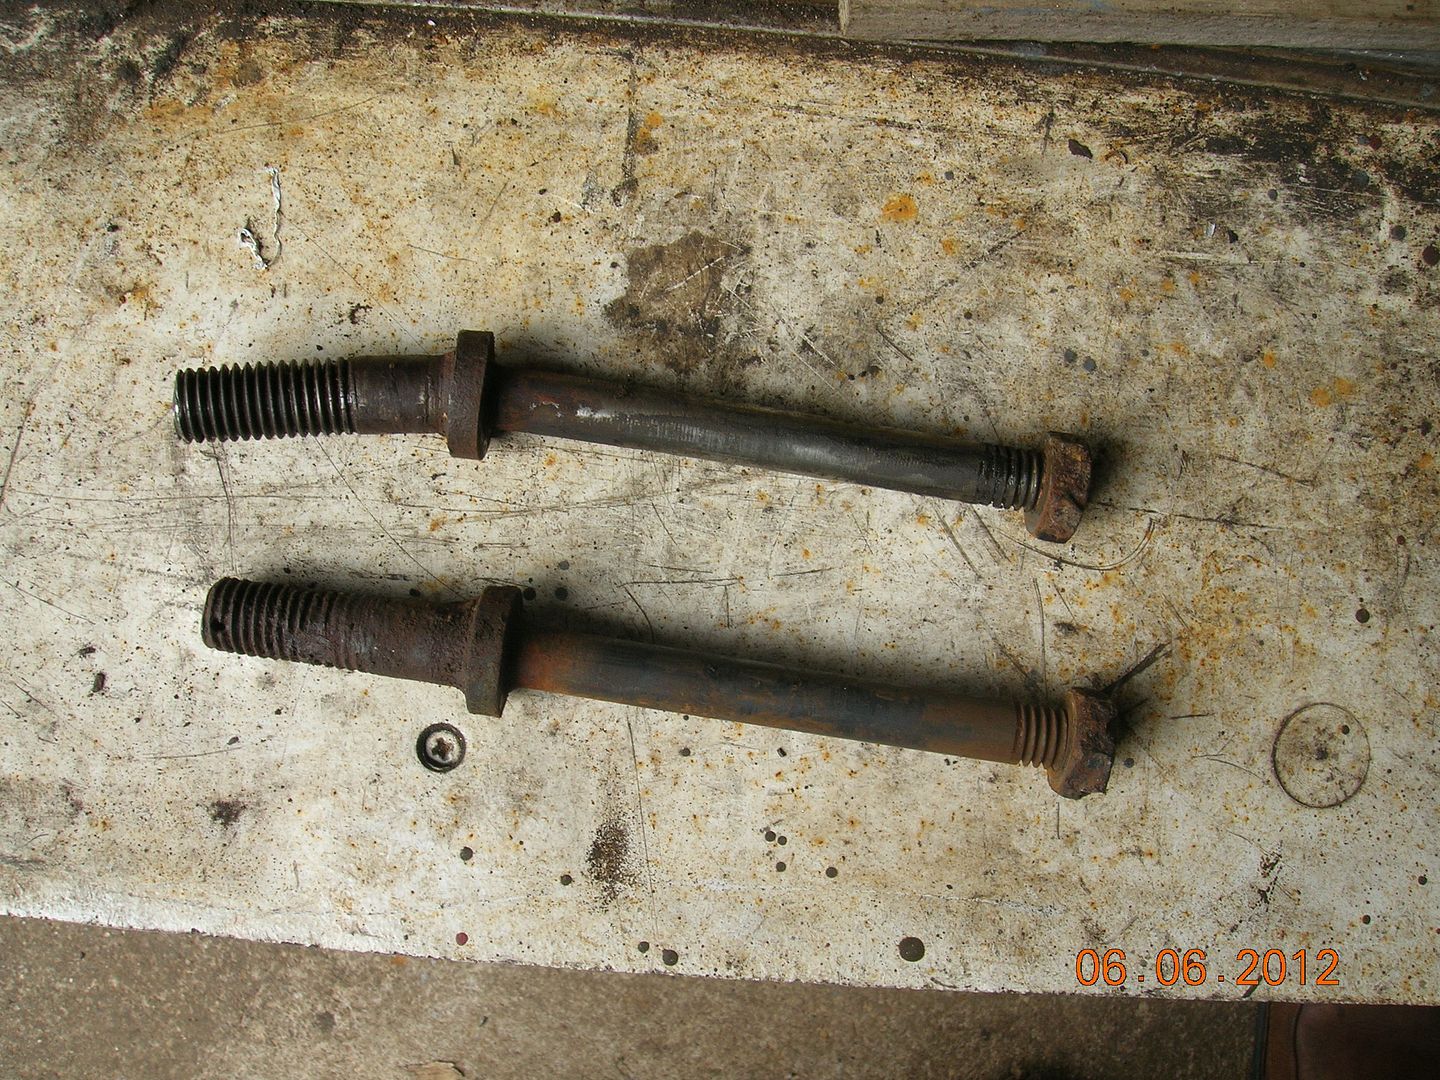
There are two studs protruding from the flywheel rim to take the clutch springs – both are in poor condition and are bent, but they undid easily and were removed so that they can be used as patterns for the replacements.
-
Quote - "If silver solder is a no go then a dab of devcon on the outside could stop the weepage".
Interestingly, the cylinders on our Military Autocar are cracked and have been repaired or just sealed with soft solder! Presumably this was done in France where it spent most of its working life - and these have never shown any signs of leekage!
Tony
-
Got time to quickly elaborate on the reason for this please? I can't find anything in the threads. Thanks.
Sure! Look back to Page 2 of this thread and the series of pictures commencing with no. 20. At that time, Steve had just bought the Thorny bits and he was eager to get going with it. The most complete thing that he had was the Gearbox, and the first picture in that series, no.2, shows Steve and Tim when they were both in their very early 20's getting into their first ever restoration project. No proper press - just a home made improvisation!
I am quite sure that the Gearbox is perfectly alright - but Steve wants to just look inside it again to see what was done all those years ago, just to make sure that everything was done properly then, in the light of his further experience!
Tony
-
Well, things are moving on quickly - David has telephoned this morning to say that the cylinder Blocks have been presented to his friend for skimming out the bores - and that no problem is anticipated over that - at this stage! When they come back, we can start thinking about getting the sleeves made as they will have to be "specials". The final diameter of the bores will be 4 1/4" - reduced from 4 1/2".
As far as an anticipated completion date is concerned, then realy we cannot say at this stage. Quite a lot has already been done - the gearbox was stripped down some years ago and rebuilt with all new bearings - though we might want to have a look at that again in the light of all the experience that we have obtained since that early time. We have that wonderful Diff from NZ that appears to need little work - we have no Prop Shaft so that will have to be made. We have no Radiator but there is a full set of castings for that tucked away - already mainly machined. So that will have to be made - together with a core. We have front tyres - but no "backs" so they will have to be made. New front wings and rear mudguards are already in store. The water pump has to be completed. And, of course, a correct pattern steering wheel!
The chassis - recovered from under a Shepherds Hut is tucked away but we have done nothing to that since we got it. It needs to be stripped down, thoroughly cleaned and sand blasted and I anticipate machining up a new set of shackle pins - but we shall see!
So unfortunately, it is too early to give an estimation of the completion date - but I do hope that it will not be 10 years away!
Tony
-
Well, an unexpected development! Yesterday, we took the two cylinder blocks to show our old friend, David H, to seek his advice and opinion for the way forward. David is well past retirement age but is a superb Motor Engineer with a lifetime’s experience in dealing and repairing old engines and has been a wonderful friend to have had in the background in the years gone by when we restored the previous four lorries. Helpful advice was always there when we needed it and was always greatly appreciated.
His first comment on the Thorny blocks confirmed our opinion that we should avoid welding the blocks if possible. Secondly – and this was the surprise – we should not trouble to try to stitch the cracks – just ignore them! He commented that the cracks were quite insignificant in this engine and that to stitch them would mean putting more holes in the blocks to take rivets. The cooling system is not pressurised and with such large lumps of iron, he did not anticipate that the cracks would worsen or cause us any great problems. So this is what we have decided – carry on with no remedial work done to the two cracks.
With regard to the bores, then David is arranging through his own contacts for all four to be skimmed out by just the minimal amount necessary so that the “barrelling” is taken out and the bores returned to a true diameter throughout their lengths so that they can be sleeved down to 4 ¼”.
-
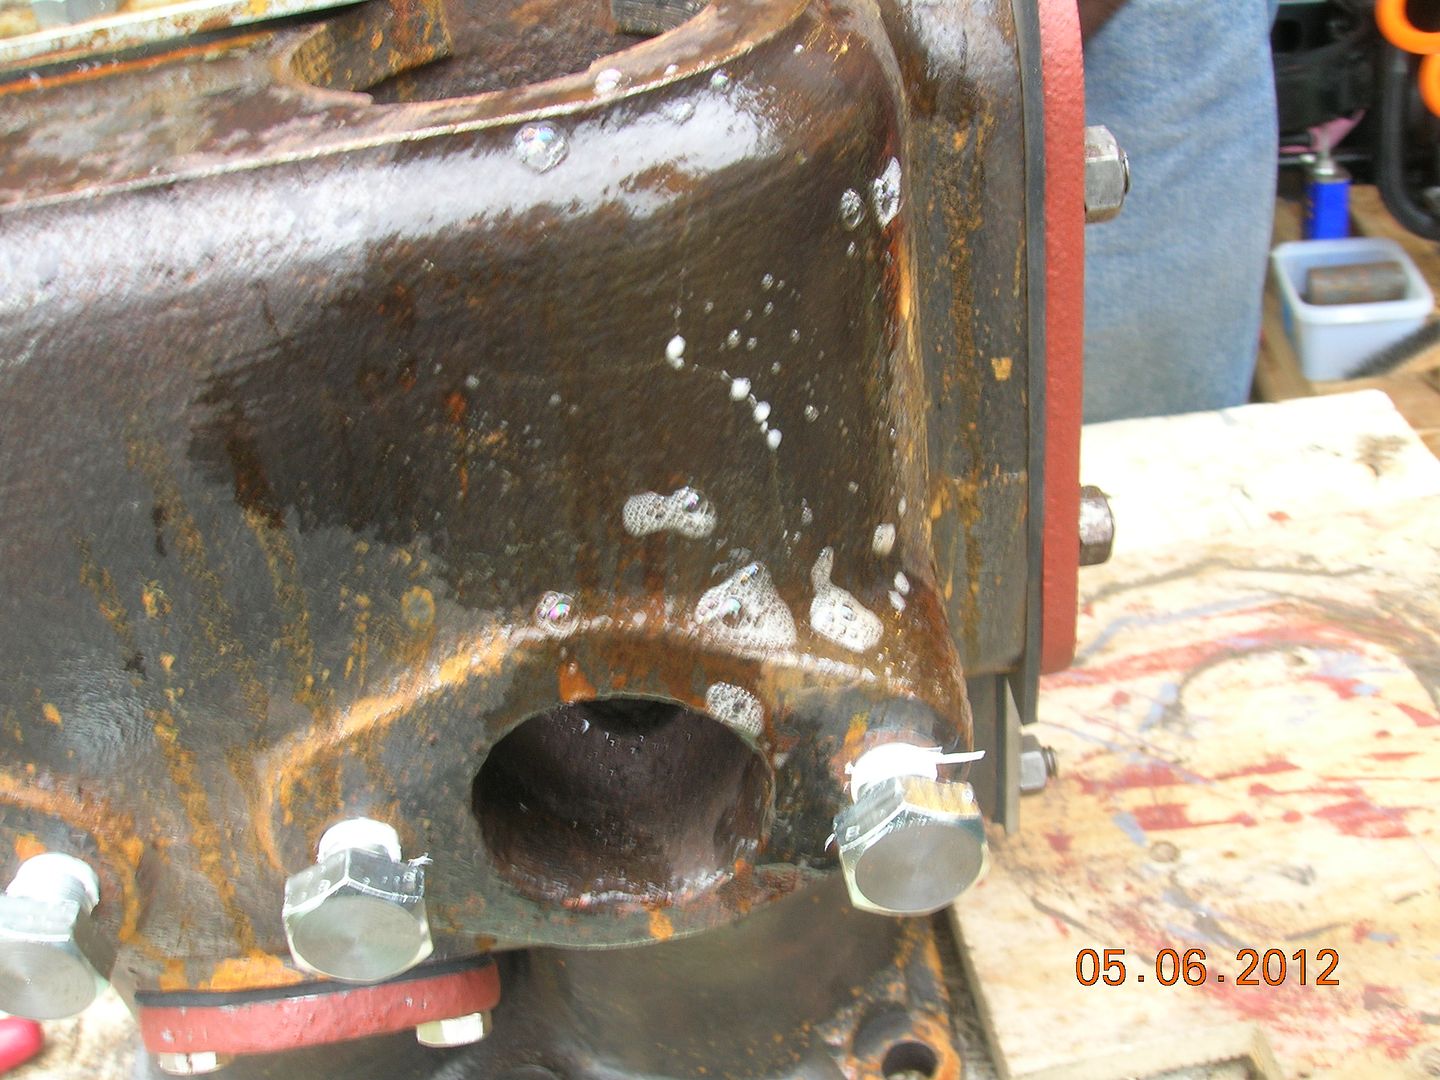
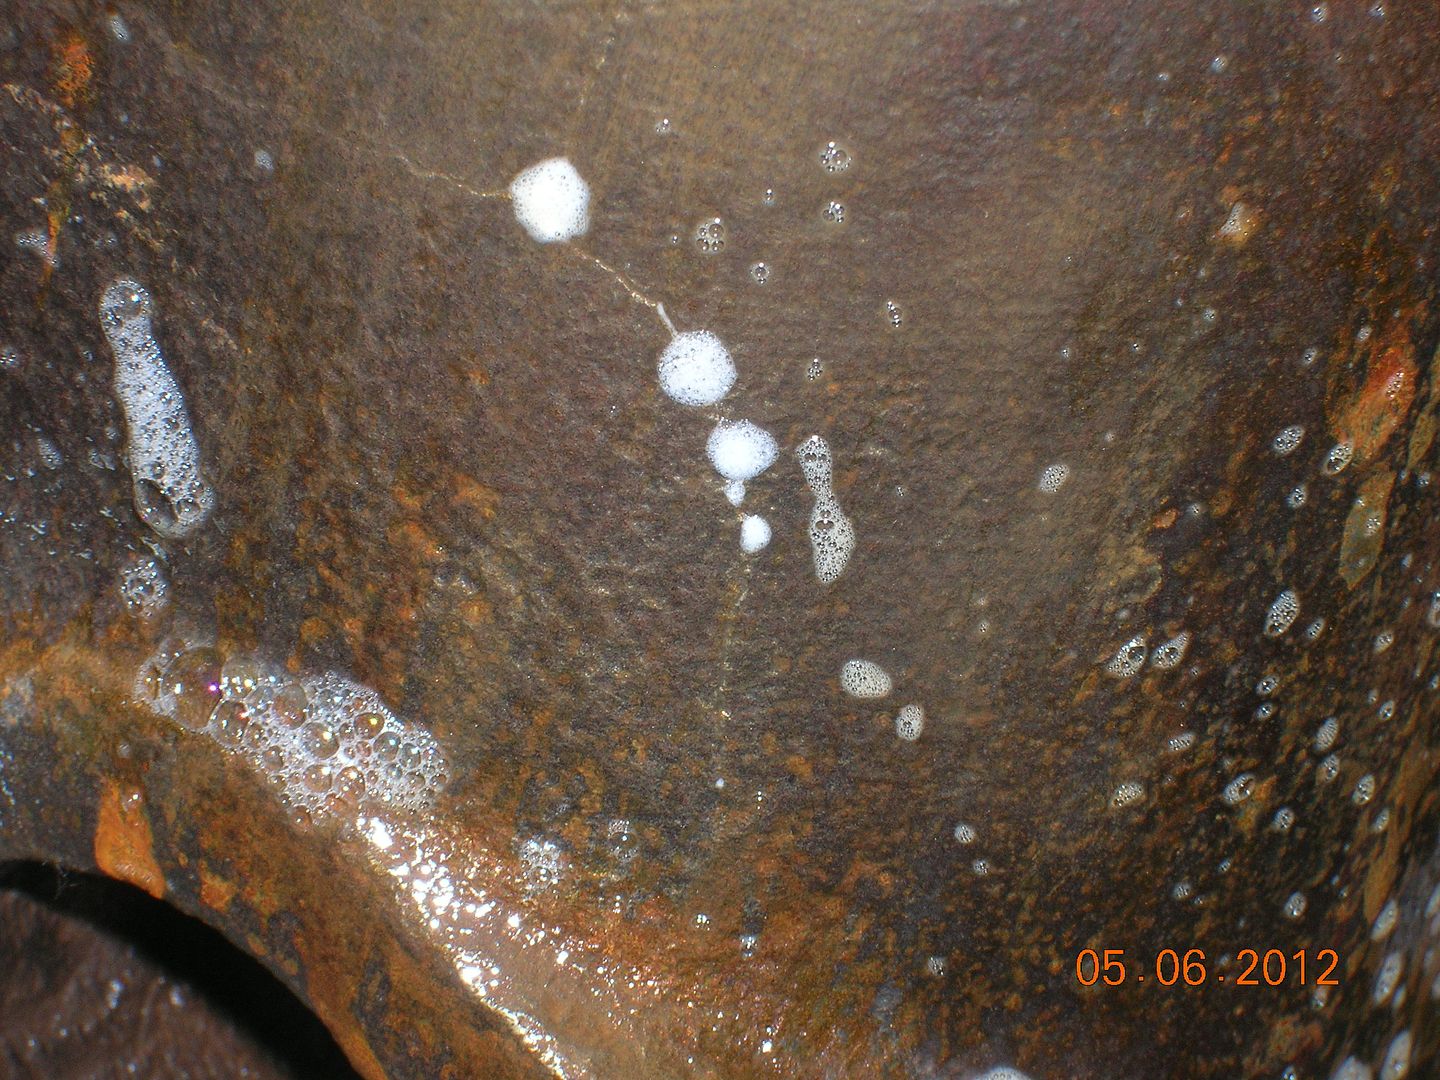
The same process was then repeated on the second block, and much to our surprise, there was no sign of any “bubbles” over the second previously identified crack – or anywhere else on the casting.
The plan now is to put the Blocks back in the car and visit our local guide and mentor, David H. who has years of experience and is a very fine craftsman and engineer. We want to talk to him about having the cylinders re-bored and the appearance of the cracks in the blocks. Further report to follow!
-
No other bubbles or lines of bubbles appeared in this casting – either inside or out. We were relieved!
-
Sorry to keep you waiting for the answer. Each time i post a response the forum crashes and i have to start again. I will break it up into smaller chunks.
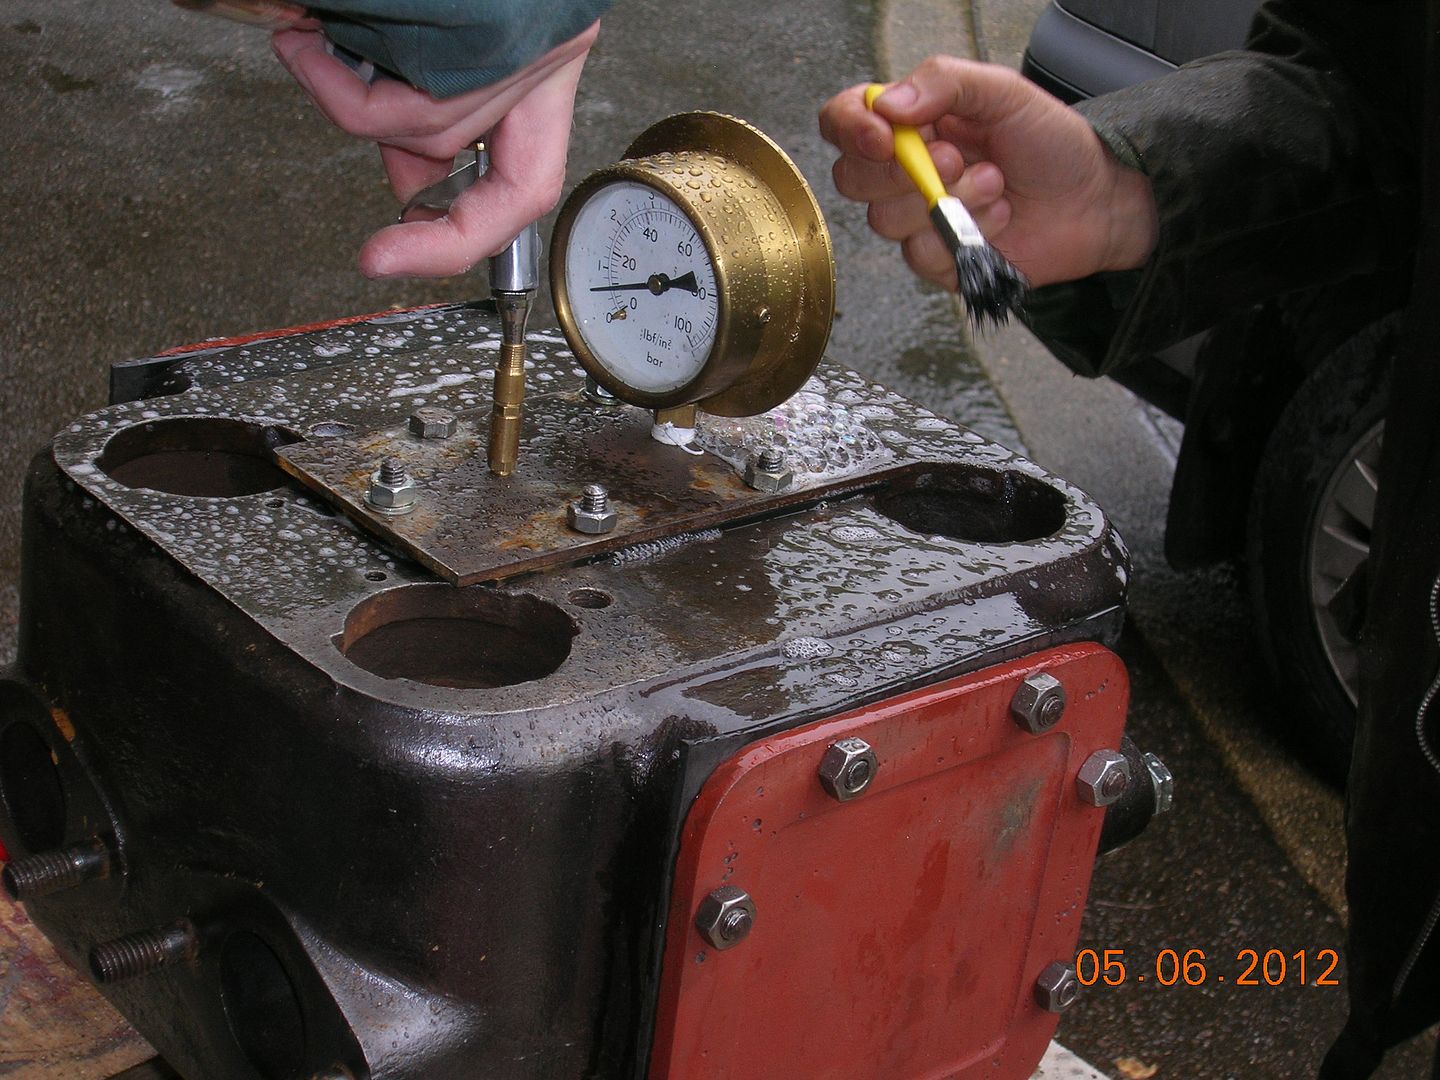
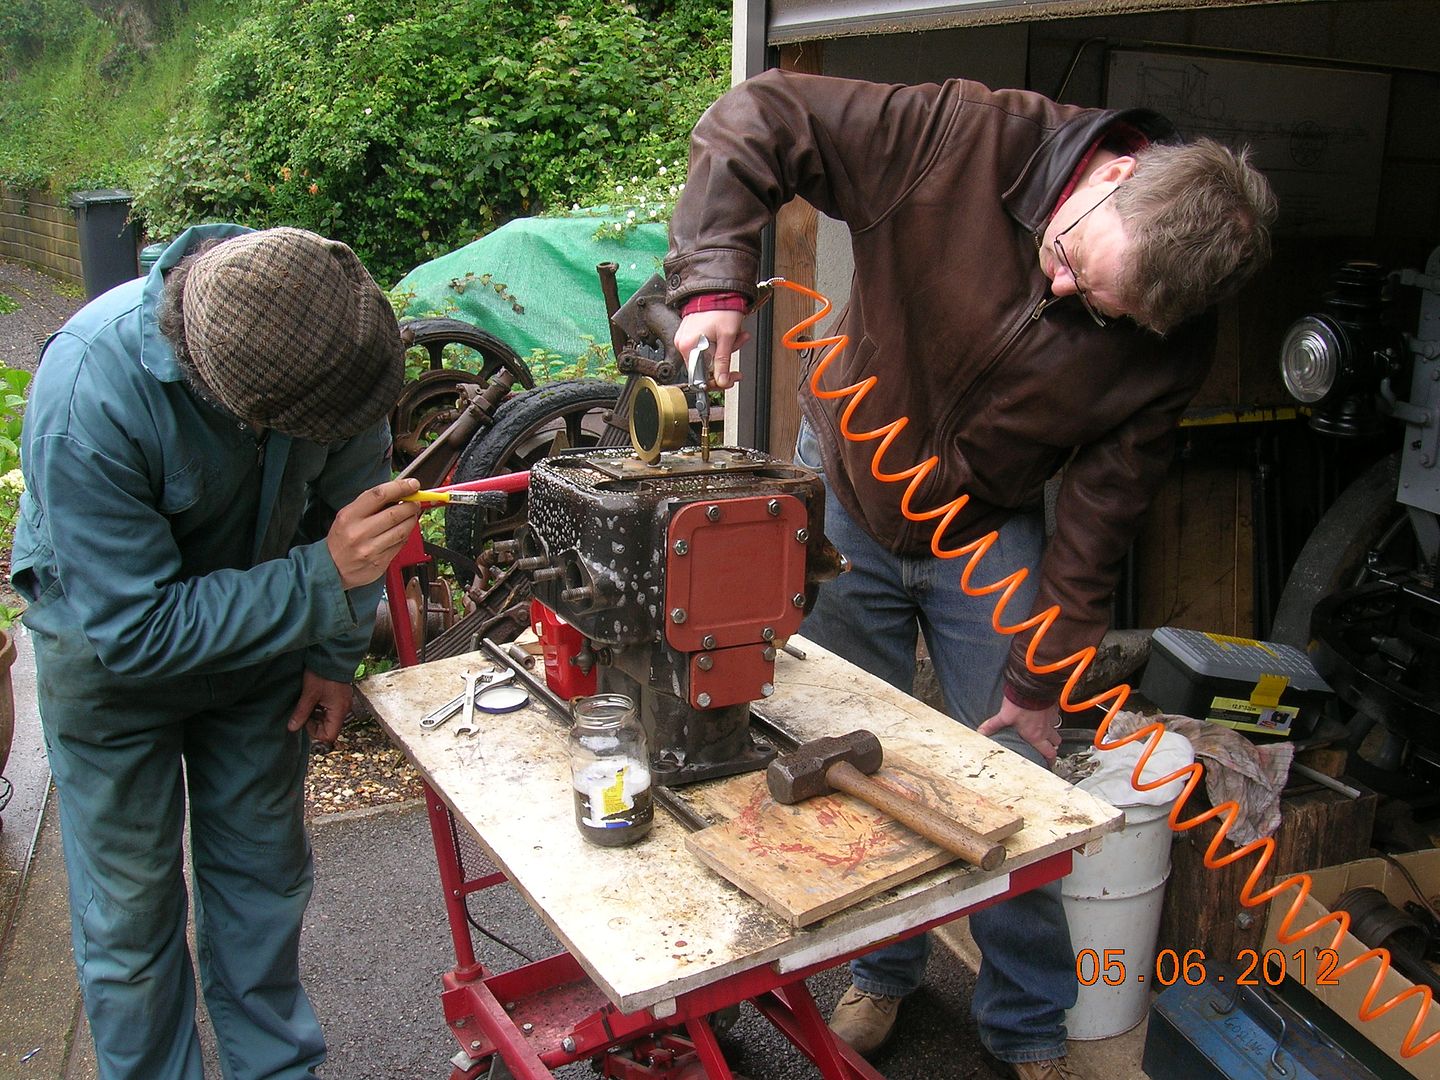
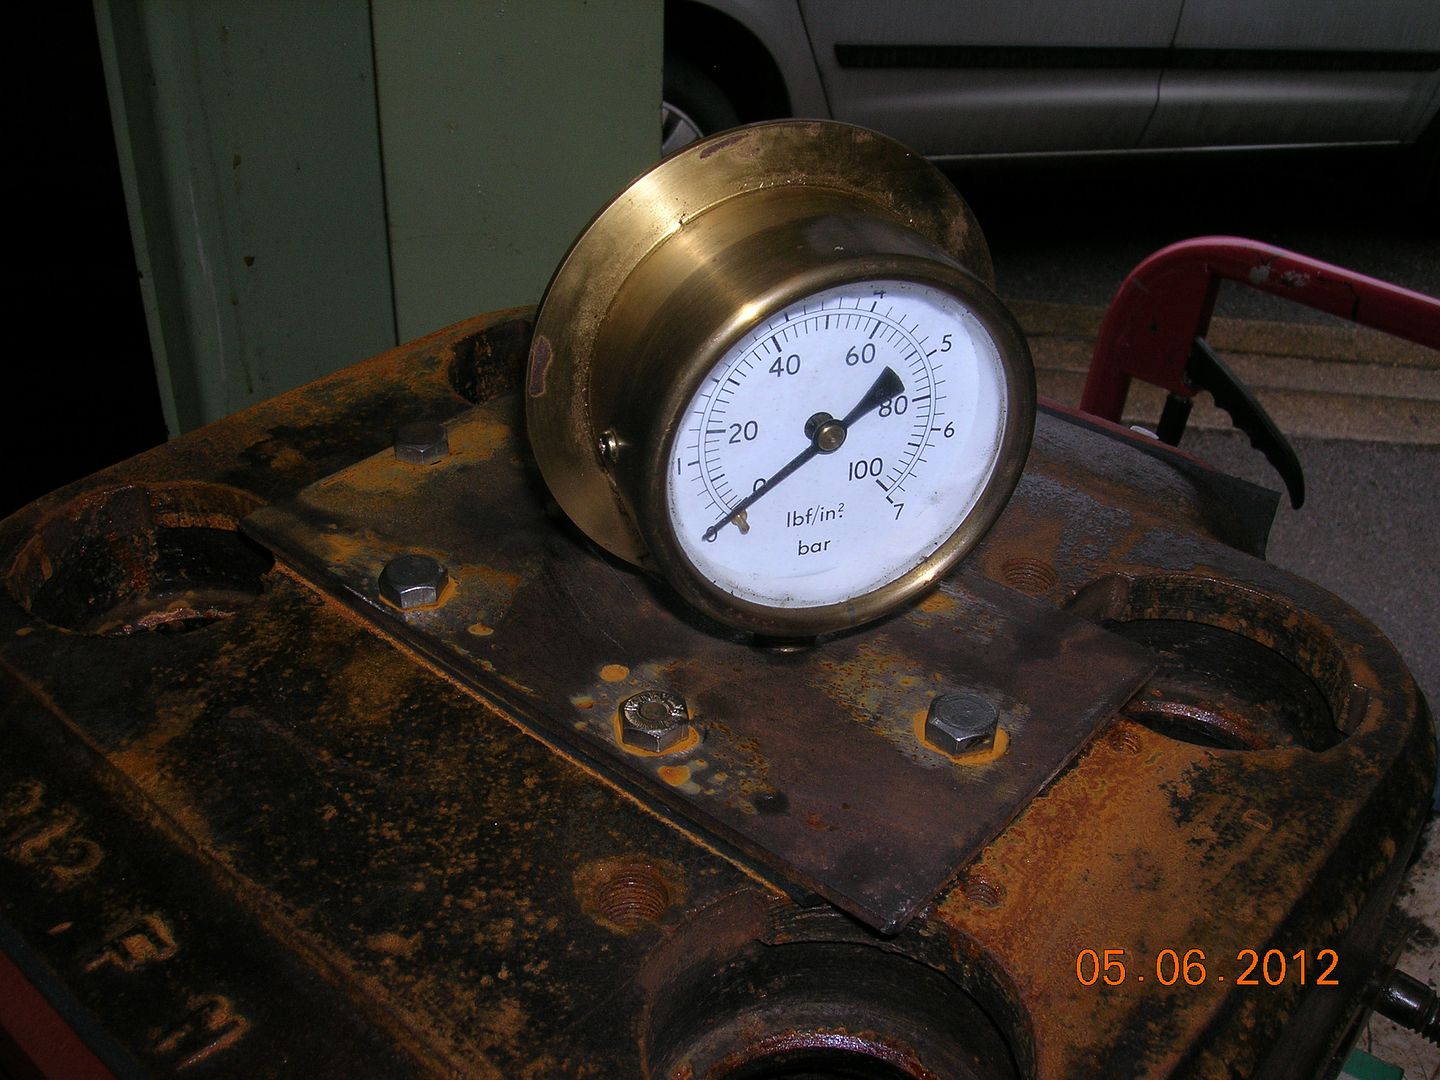
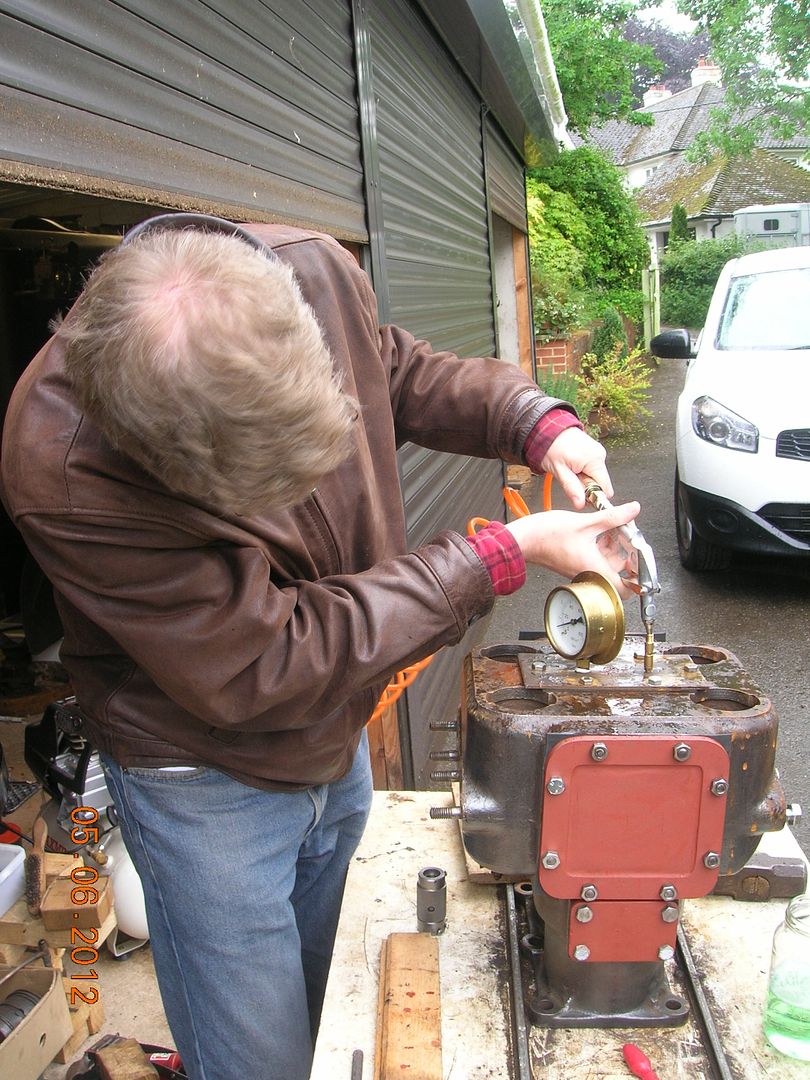
The air hose was applied to the top of the non-return valve and the pressure applied was very carefully watched to make sure that did did not exceed our specified pressure of 10psi.
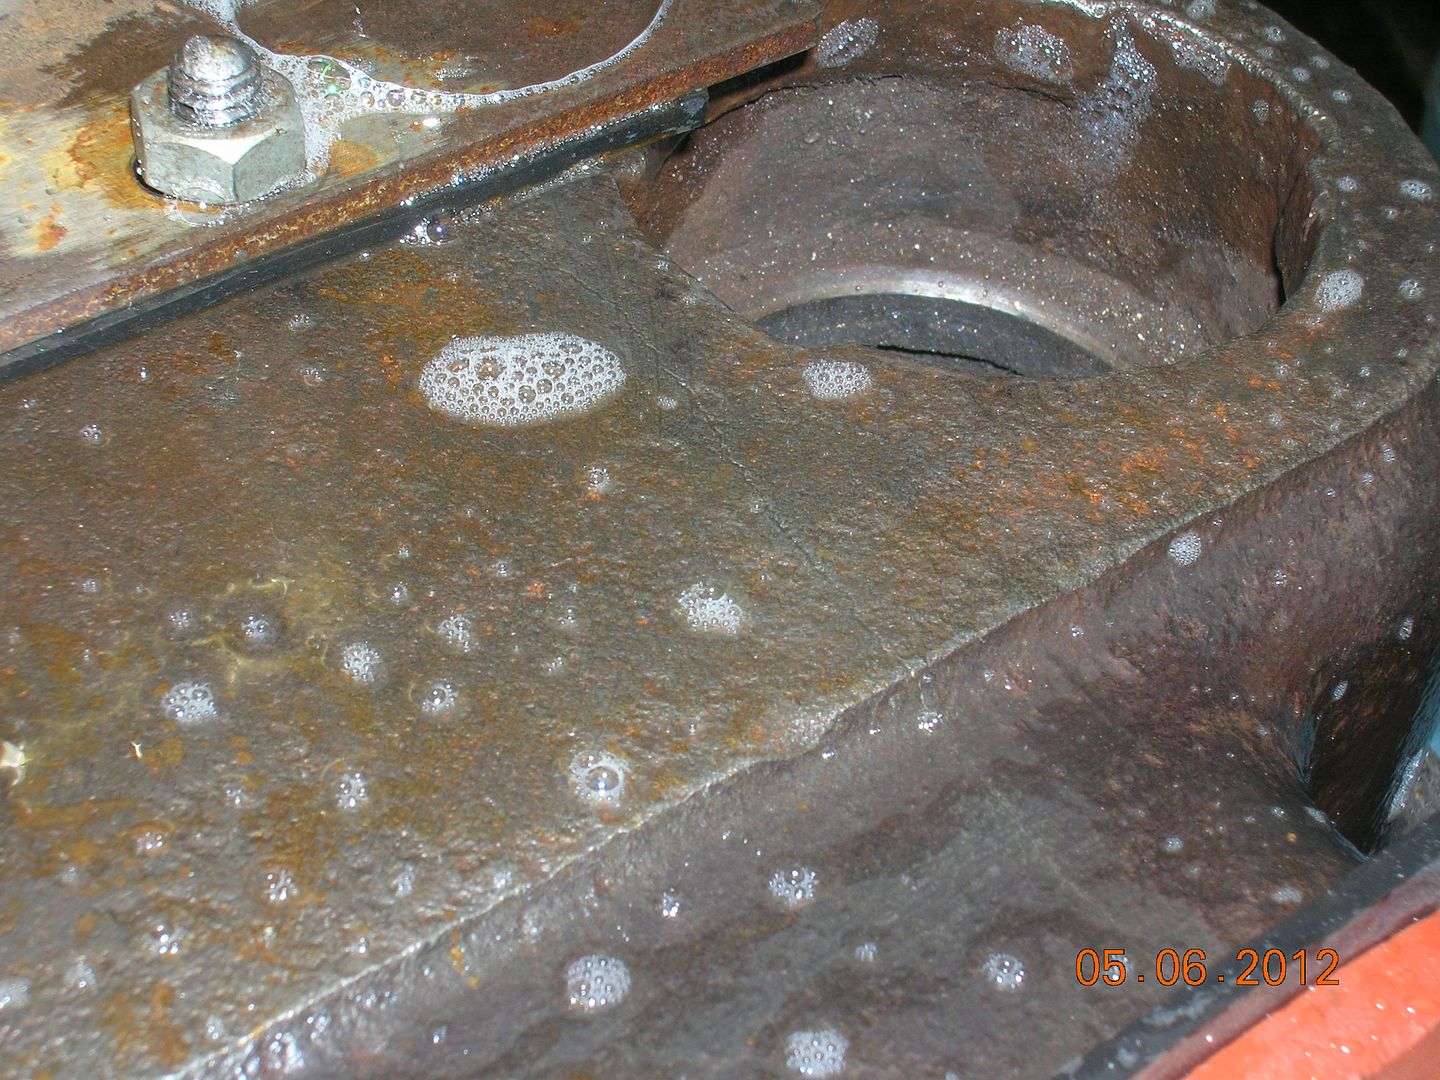
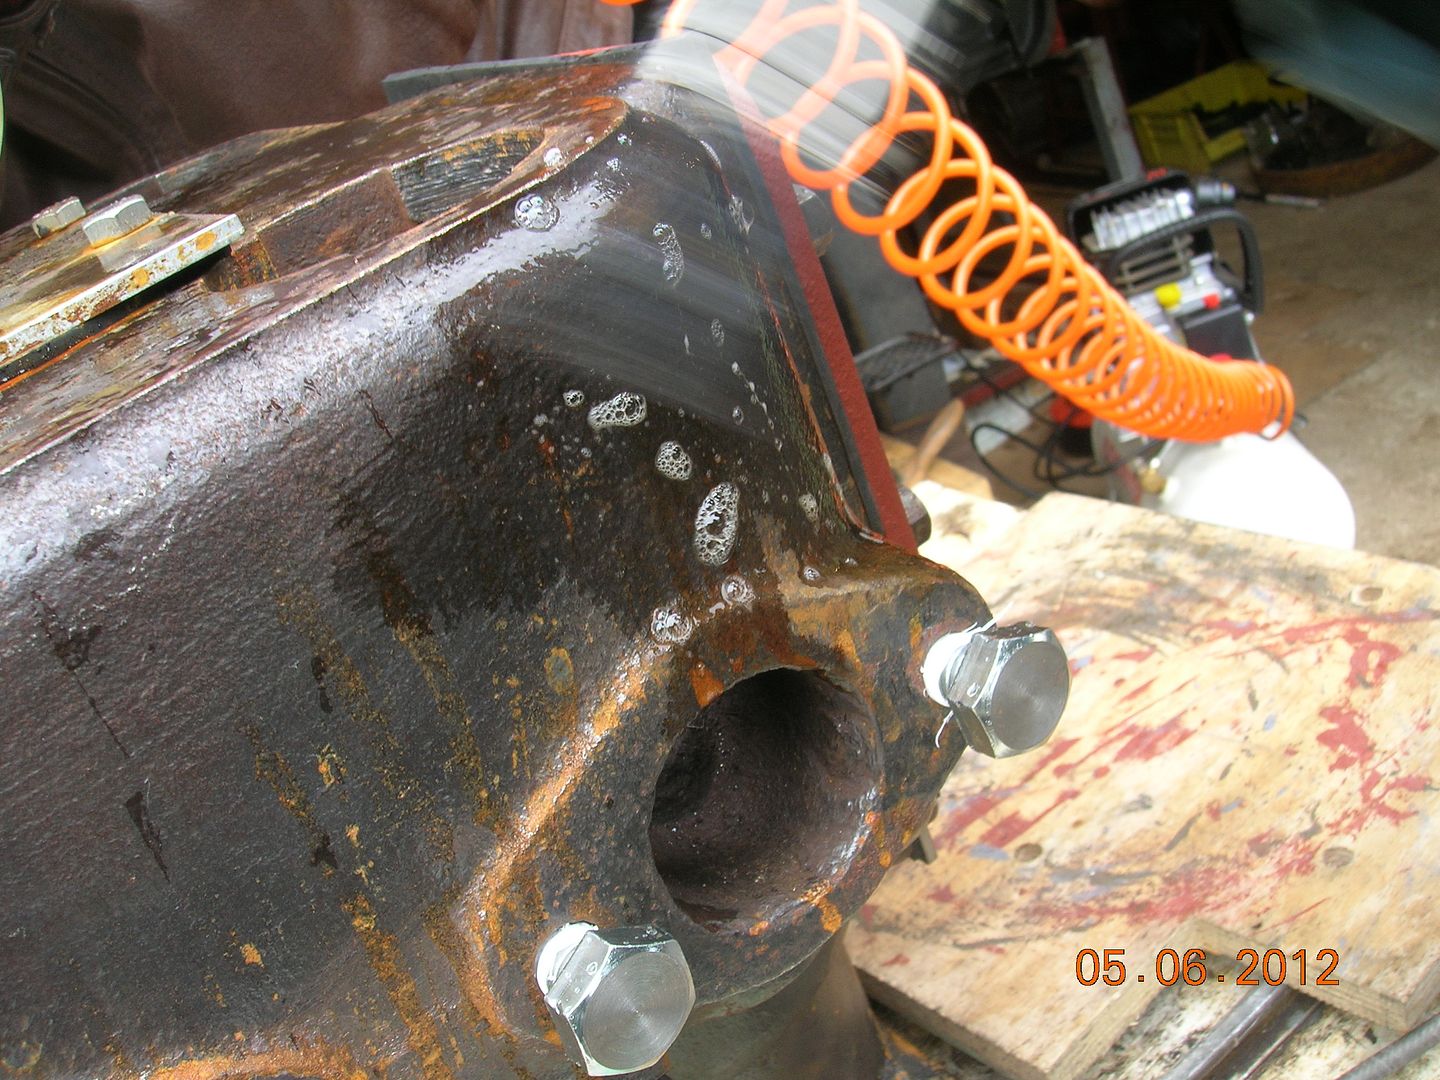
Soapy water was brushed on the first previously identified crack and as we anticipated bubbles appeared.
-
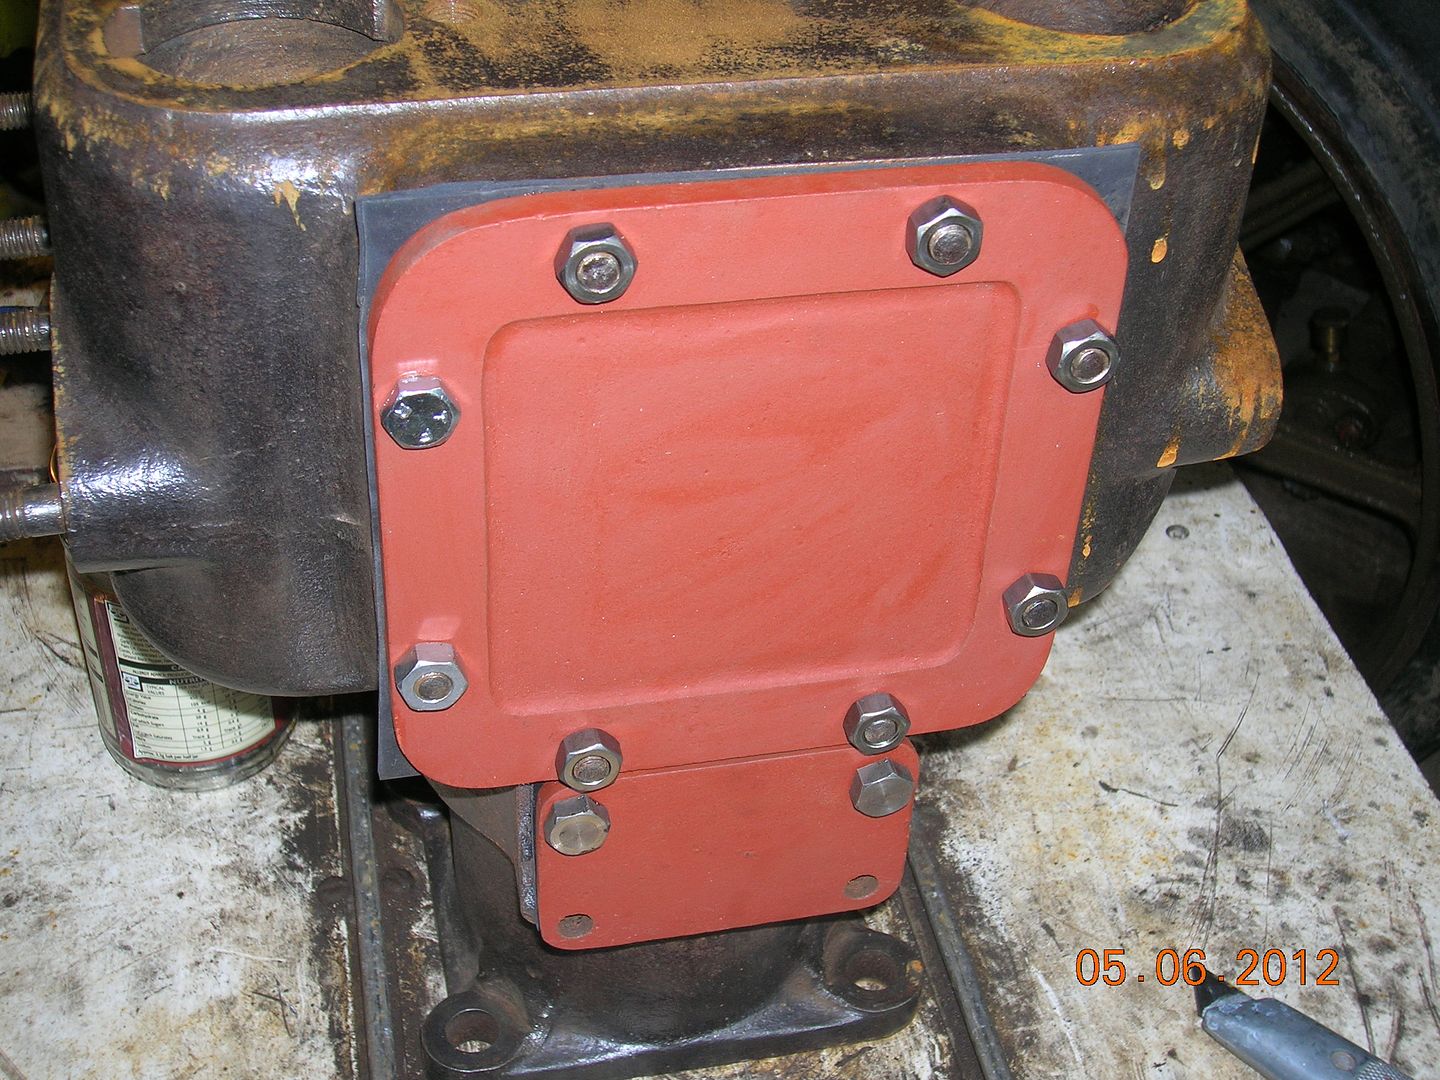
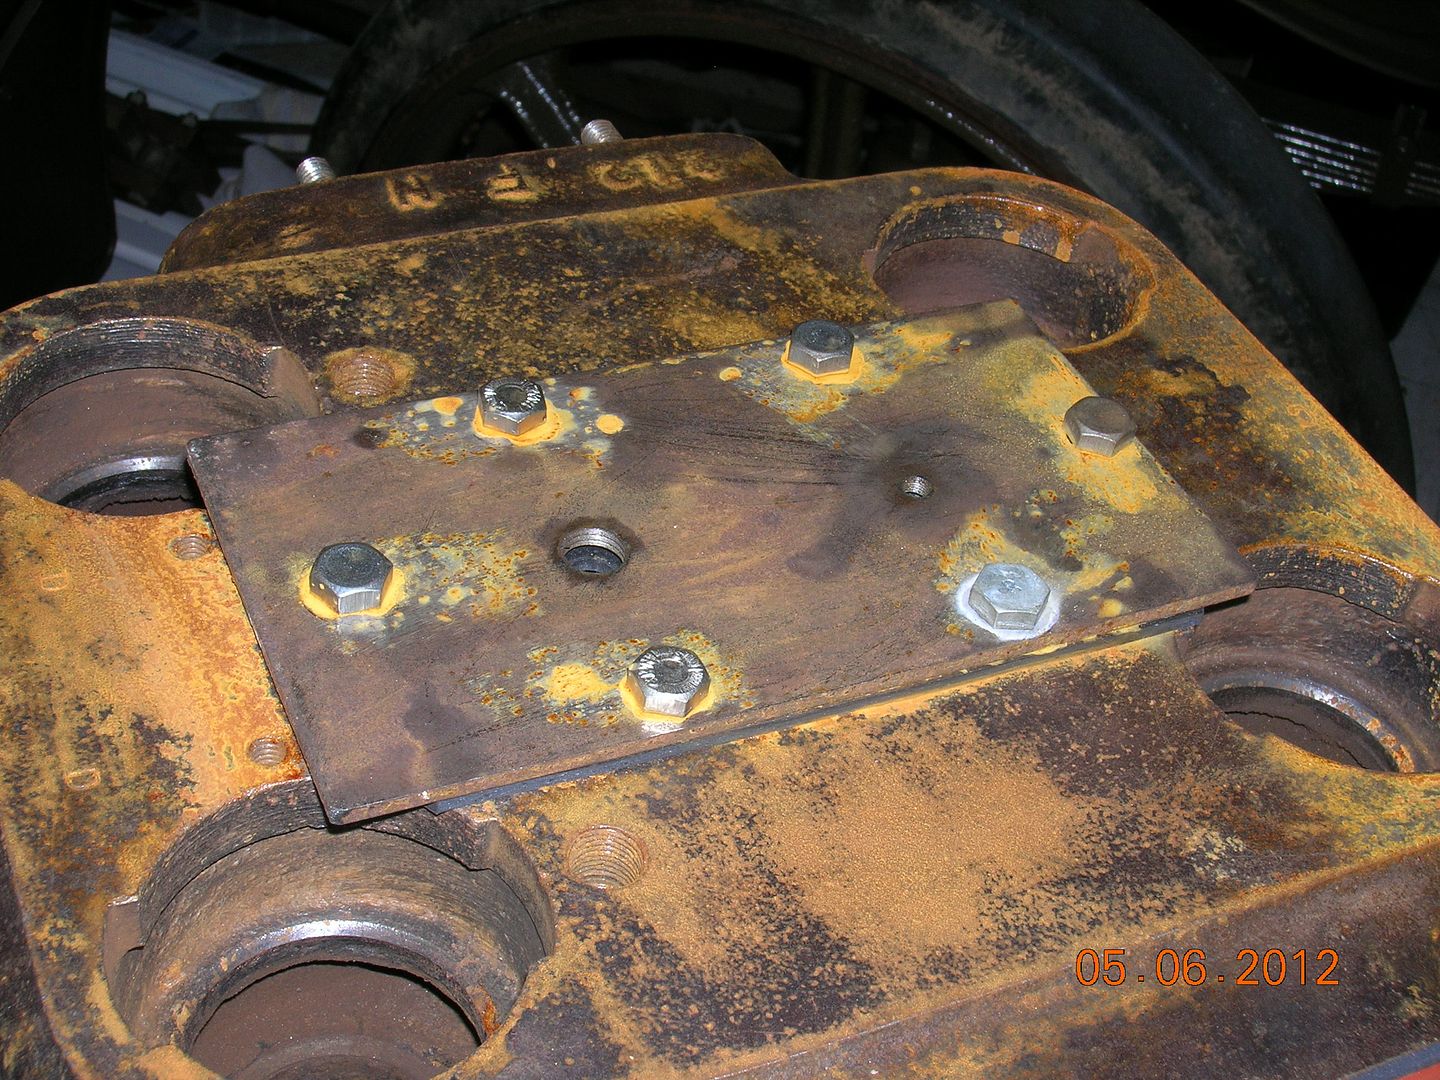
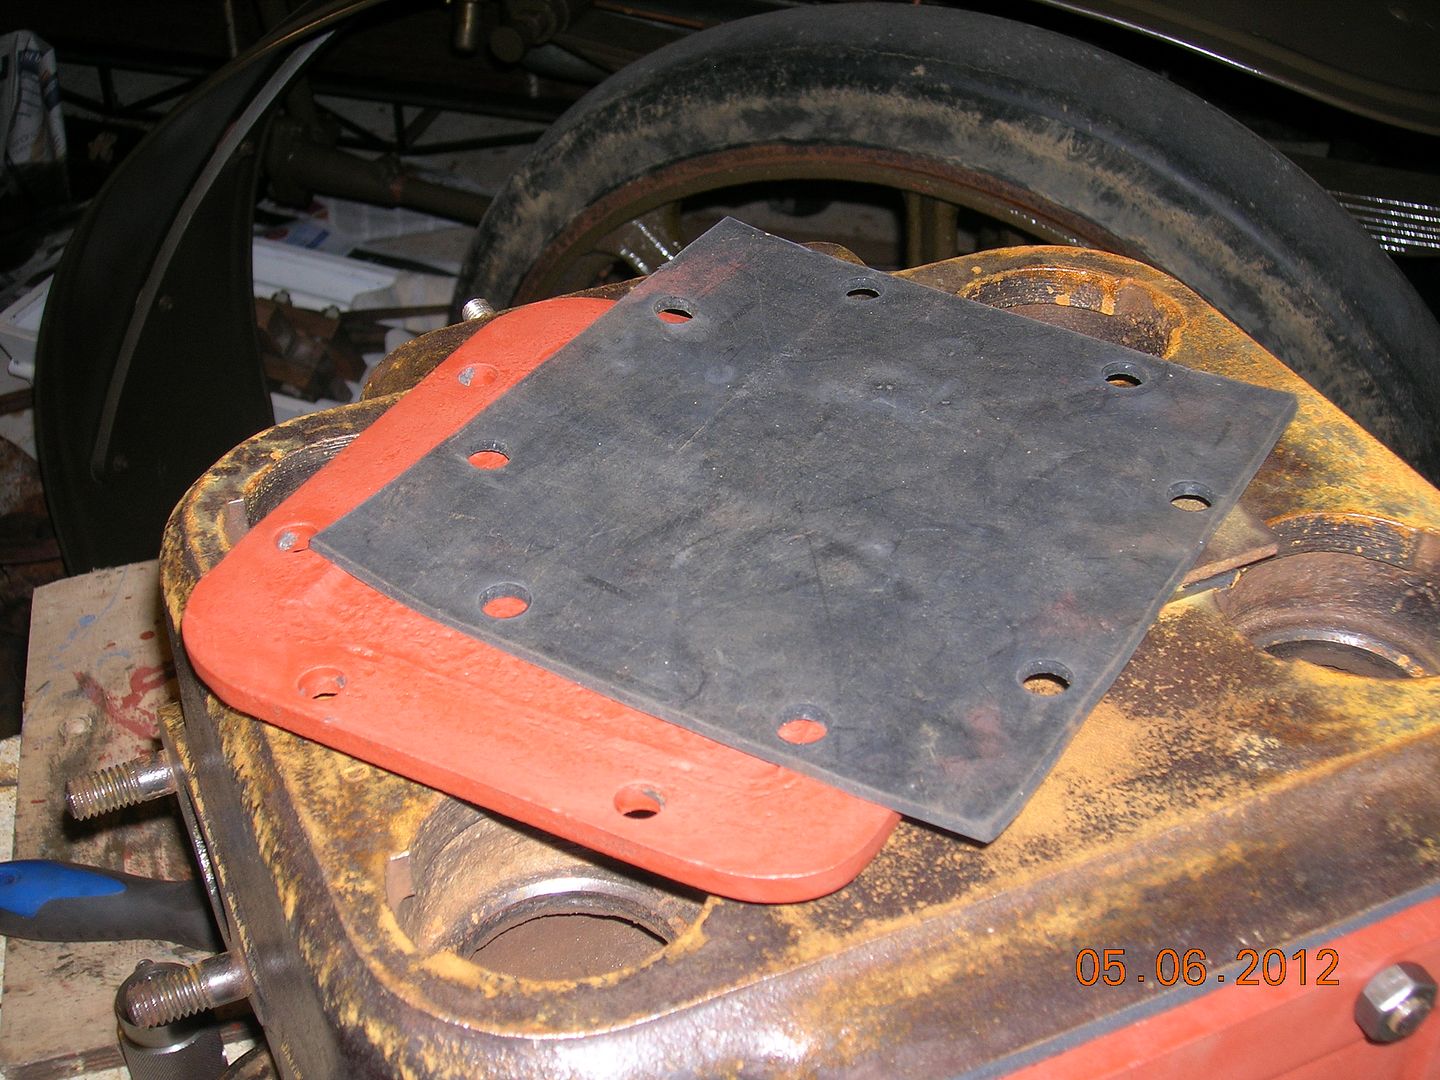
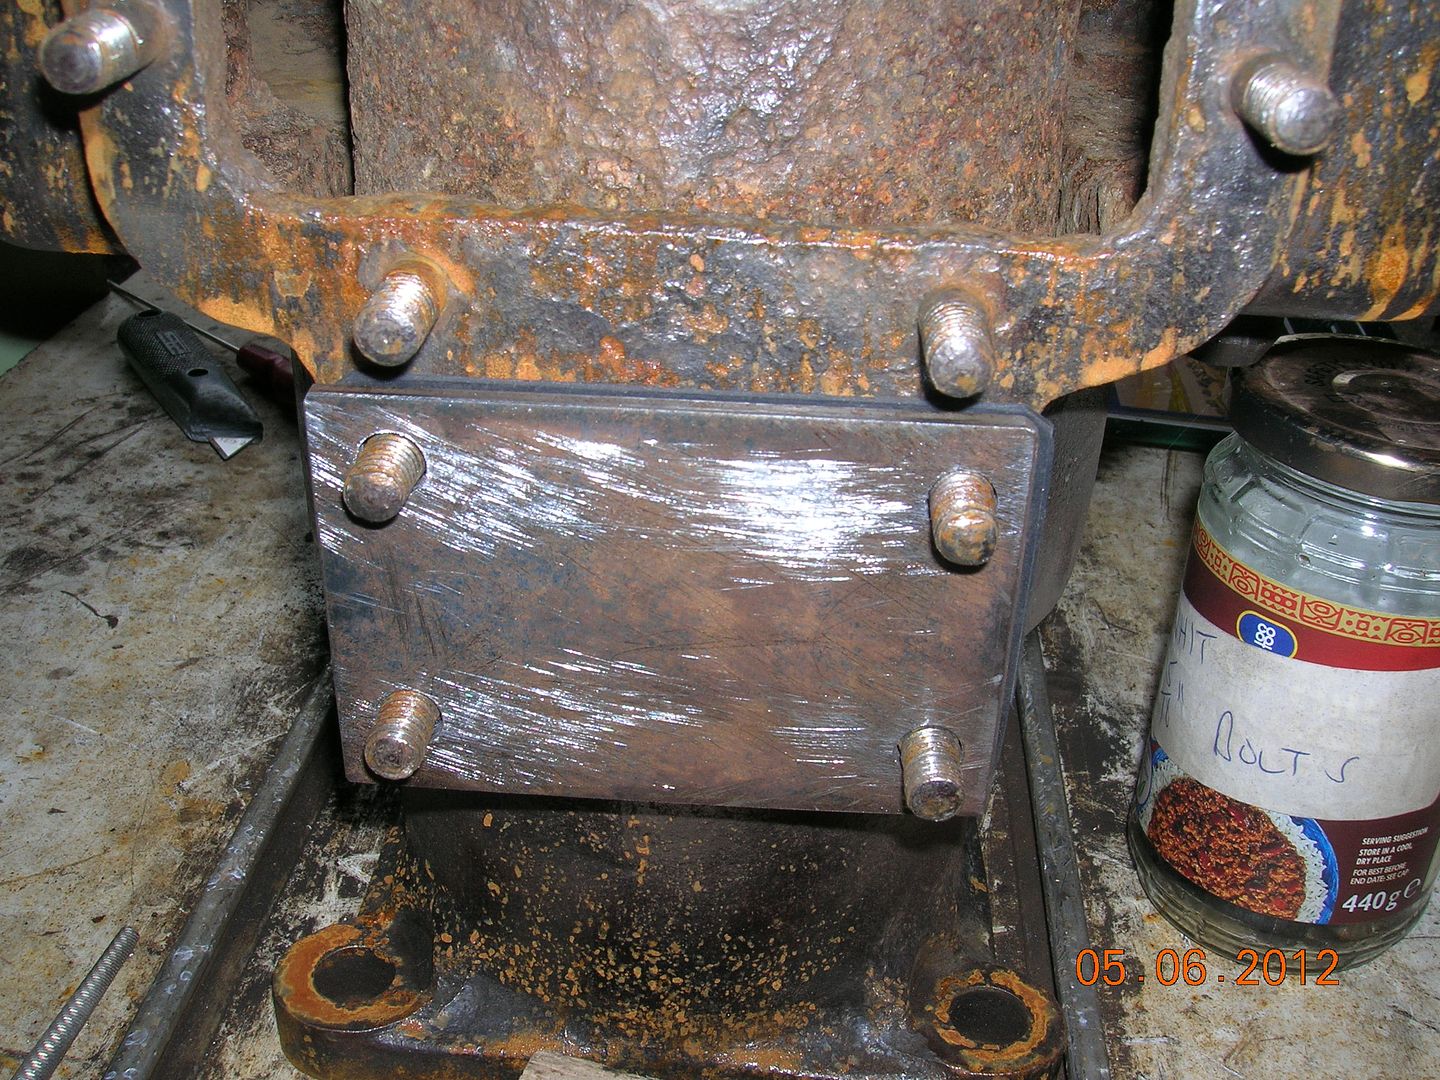
The prime objective this weekend was to pressure test the cylinder water jackets up to 10 psi – to see if there were any further leaks or cracks that we had not seen in the first clean up – and to find out just how extensive they are. The method to be used was to pump them up with air after sealing up all of the relevant orifices – and then just “paint” the exteriors of the water jackets and the insides of the cylinders themselves with some soapy water to see if and where the soapy water bubbled, indicating a “leak”.
Some of the original plates covering the various holes were themselves pitted and corroded so it was necessary to clean them up first so that we could ensure an air-tight fit.
Some plain steel blanking off plates had to be made to cover the fitting place of the water pump and also the water manifold. A thick rubber gasket was used to aid sealing. The top plate was drilled and tapped for a non-return valve and for a Pressure Gauge – we were determined not to exceed 10 psi as that should be quite an adequate pressure – and we did not wish to risk stressing the blocks further
-
[quote name=
There can't be that much still to do on the Dennis' date=' surely? I remember the radiator tanks were still a little suspect.
Gordon
When we filled the Radiator yesterday, several of the small leaks re-appeared - the filler that we put on them last year has "given up" - and really not surprised at that! So the plan is to clean them up and then put a similar seal on them again for this year - and pattern make this winter so that the new tanks will be ready for next year. At least that's the plan! So much going on at the moment with the Thorny engine!
Tony
-
Auctioneer sent me some photos... if you're interested I have his details regards Robert
Thanks, Robert - not "J's" I think - something newer and smaller. No doubt when Tim and Alan (Runflat) come along, they will identify them exactly!
Tony
-
Thanks, Mike!
HMVF is marvellous - we have so many members with so much extensive knowledge about so many different things and I am convinced that there is not a question that cannot be comprehensivally answered by some one!
So now we know technically "why" - but the bottom line realistically remains that the answer is still to make new tanks and start again. I guess that if new ones last another 100 years, then we will not worry too much about it!
Tony
-
Tony, how did moisture get between the Devcon and the top tank? Can you tell me the page number on the Dennis thread? Thanks. (I found the short Dennis rad. thread. The inside of that radiator looks familiar...)
Look at Page 3 - 27 Feb 2006 onwards - those early photos are not very good. And then look at Page 141 - 25 Apl 2011 onwards.
I would have thought that it would have been impossible for water to get through all that "fortification" - especially in the early stages of running - but it did!
Tony
-
Your 'blanking' plates appear to be aluminium (alloy?) and similar to my Leyland equivalents that are severely corroded with deep pitting on the inside. How would you prepare these for replacement? Would you consider an aluminium epoxy over a corrosion treatment? It could be machined flat. Alternatively, fibre glass? I have the same problem with the radiator bottom tank. Any thoughts? Robert
No, they are not ali - all cast iron!
Your description of your Radiator problems is exactly the same as we encountered with the Dennis -very deep pitting within the top and bottom tanks and we were resolved at the time just to repair them - which we did by cleaning out all the aluminium oxide, plating the inside of the tanks and then sealing the gaps between the new plates and the old original aluminium tanks with Devcon, an aluminium putty. And then finally painting the whole of the inside with a couple of coats of an expoxy resin. We thought that there was no way of water penetrating through that lot again!
Now these aluminium radiators seem to be the perfect recipe for corrosion - a mixture of aluminium, copper and brass (unlike metals) - and then with the whole thing being continually flushed through with hot water when working so that you have an electrolytic reaction. At the time that we were dealing with this, an experienced friend who had previously dealt with other aluminium radiators said that we were wasting our time and that we would never be able to repair an aluminium radiator - the best thing to do was to make new tanks.
And although we were confident that the job was done and completed successfully, we found that he was right! Numerous fresh leaks - mainly pinholes appeared which we were temporarily able to seal from outside - and which are quite unsightly and we just wondered how that could have happened after all that trouble was taken.
So, on the list to do, is to make patterns for new top and bottom tanks to be cast as replacements. The whole story of this is related "chapter and verse" on the Dennis thread.
I am not sure what your plates look like, but if they are just plain aluminium, could you not cut some aluminium sheet to suit? If they are lettered or have a pattern of some kind cast in them, then bite the bullet and make a pattern and have some new ones cast!
Over the years, we have been collecting bits for the "Thorny" and waiting for us to get around to the job, we have all the new castings for a new Radiator - as we did not have an original!
Tony
-
There was no sign of any water seepage through the cracks!
Tony
-
Yes, that is something that we have thought about in depth - but we do not think that it is something that we cannot cope with. I think it best that I leave it to Steve to fully set out our thinking as he will be able to reply to your question in greater detail and far better than I can!
Tony
-
The FN cast into the block!
Well, that was unobservant of me! No idea - perhaps the initials of the Foundry that cast it?
Tony
-
Any idea what 'FN' stands for?
Marcel
In what context? I think of the Army Rifle - the SLR. When it was first introduced, I think it was it was known as the Belgian FN Rifle - Fabrique Nationale........
Tony
-
QUOTE/ and also made the locking nuts for all the brake rods the threed is 5/8 BSP does anyone else have fine threads on brakegear and again no pic as camara flat when charged will take some pics.
DAN AND JEN
BSF on the Dennis, Dan...................
Tony
-
If you look at the January 2012 pictures in this link http://www.bluebell-railway.co.uk/bluebell/locos/atlantic/latest.html you will see stepped liners being used in a new-build steam locomotive. They have followed the method used on BR Standard locomotives, and have also fabricated (rather than cast) the cylinder block. Some would say thats cheating!
A really fascinating website - thank you!
Tony
-
To ovoid damage to thin liners we used to, in my motor engineering days, use a liner with an undersize bore; press it in as normal and then bore to the finished size, this then removed any chance of the liner splitting whilst it was being pressed in.
Some liners were pegged and you could do this by using a tight fitting (oversize thread) screwed peg or pegs through the side of the cylinder and through the liner, low down in the area where there is no water jacket. This should, of course, be done before boring the liner to size.
John
Very pleased to see your first posting John! Lots of members of this Forum can and would like to benefit from your knowledge and experience!
Tony
WW1 Dennis truck find
in Pre WW2 vehicles
Posted
Hi John,
Well, thank you for those kind comments! We have always said that it has only been done for fun - but after putting the continuing "tale" on HMVF - and then finding others getting so much pleasure and interest out if has been a bonus for us. We have always been concerned that we might bore others - but so far, so good!
Thank you, again!
Tony