


Niek Baecke
-
Posts
42 -
Joined
-
Last visited
Content Type
Profiles
Forums
Gallery
Blogs
Events
Articles
Store
Downloads
Everything posted by Niek Baecke
-
Happy days! Seat arrived back from upholsterer. Really pleased with the end result. Couldn't help it, I also put on the lubrication chart to see how it would look. Now stored away because I won't need this part until the last steps of the project.


-
On the wartime Husky engines, the spark plug hole is located at the side of the cylinder head.

-
Frame and rims are off to the sandblasters. Meanwhile some work on the body. Mostly panelbeating and getting the side louvres back in shape. I also had some time to look at the engine. The dataplate says it's a 17M71, which would make it shortly post war, most likely from a series 52 or 53A. The original would have been a 15M71. Biggest differences are the kickstarter, vent shroud and cylinder head. Luckily there was a correct cylinder head and kickstarter included with the engine, so i just have to swap them over. Carpenter Cushman also make the correct shroud, so no big deal to put it back to correct specs. Before i disassembled the Engine, i checked if it had ignition. It had a good spark at the plug so the ignition coil should be ok. The ignition is a 6V rotating flywheel ignition made by WICO. Later Husky engines are 12V and have 3 coils (ignition + lights), this one only has 1 coil and uses a separate generator to power the lights. This generator is powered by a belt running from the clutch. I pulled the cylinder head off the engine to take a look at the piston and bore. Fortunately it looks really good. Valves also look good. The piston is +30 oversize. Looks like it'll only need new seals/gaskets and a good clean. Expecting some parts to arrive from the US soon, including a new 47 tooth sprocket for the rear wheel.


-
Some period pictures of USN Cushman's in service. Found on google and various FB groups.


-
Another day working on the project. Started with welding the surplus holes in the frame. The frame is now ready for sandblasting. Once that is done, we will weld the new floor on. This week i've made a new wooden base for the seat and painted the seat springs. These are now gone to get reupholstered, curious to see the end result. Most period pictures of model 32/34 Cushman's show them being fitted with a horn. A couple of weeks ago i managed to find such type of horn on Ebay, it arrived from the US this week. It's in good working condition, but needs a new coat of paint.


-
@Le Prof Thanks for your research. I bought the bike in the Netherlands. However it was imported into the EU from Indiana, US. I've did some research too. I managed to find an Ex US naval air station about 200 miles from where the bike came from. The Naval air station is now called Grissom Air Base but it was originally named US Naval air station Peru in 1942 and changed name to Naval Air Station (NAS) Bunker Hill in 1943. It was used by the US navy as a training centre from 1943-1946, later the buildings were leased to civillian contractors but during the korean war it became an active USAF air base again. Unfortunately I haven't found any other markings to prove my theory.
-
Some more pieces of the puzzle of this little Cushman's past uncovered. I was searching for more markings underneath the paint. I was surprised to find black paint underneath all the yellow. It was another registration number, but to my surprise it did not start with USAF but with USN. After lots of careful sanding i managed to find the whole number; USN 205943. The very first layer of paint turns out to be grey, which I guess is US navy grey, then overpainted in yellow with the USN number in black paint. I think during WW2 this Cushman must have been used at a Navy air station. Which later became part of the USAF once it was created in 1947, this could explain the 2 registration numbers I have found.


-
Apparently this Cushman is less civillian then I initially thought. Underneath layers of paint i managed to find a USAF-number. The USAF wasn't created until 1947. The Cushman series 30 stopped production in 1945, which must mean it was in the United States Army Air Force before 1947. I wonder if it would have been olive drab originally and post war painted yellow. I can't find any traces of olive drab or any other wartime markings. Also started removing the floor. Which was a good decision. Lots of mud and rust underneath it.


-
After loosely assembling the cushman, we started to break it down again. We now have a bare frame. Seems a different engine was mounted in the frame, this might explain the excessive wear on the rear wheel sprocket. We had lots of problems removing the tyres. Water had gone inbetween the rim halves and created a crust of rust. The inner tyres were stuck to this crust. After a lot of effort and swear words, they came loose. Normally the series 30 only have 1 spring on the rear suspension swing arm frame (at the end of the frame). This suspension type proved to be too weak and after the war the series 50 had double sideway mounted springs. It appears at some point in time the single spring suspension broke and one of the previous owners welded double spring mounts onto the frame. I will try to bring the suspension back to the original configuration. Unfortunately the original floor is beyond saving. However Carpenter Cushman makes replicas. A new one is on it's way to Belgium.


-
Hi all, Since our Dodge WC52 "Michigan" is nearly done, i went and found myself another project to work on. I had been looking for a Cushman for some time now. The airborne Cushmans are a bit out of my budget range, but i've managed to find a 1944 model 32. This is a civillian model, but also used by the US army, US navy and USAAF. The model 32 uses the 4HP Cushman ''Husky'' engine. It does not have a gearbox. The engine is connected to the rear wheel using a centrifugal clutch. When i collected it, it was a basket case of parts. Today i loosely assembled it to see what was missing. All in all, it's quite complete. Only missing an oilbath aircleaner and some smaller parts (gaskets, tyres,bolts,...). I had to make 1 front fork out of 2 bad ones. Engine has good compression but will disassemble it anyway, just to be sure. Rear brake assembly and centrifugal clutch need sorting out. Also removed the crudely welded non original footboards. Some welding will need to be done to the frame and floorplate. Body work is in decent shape for its age. Trunk lid and side panels have a couple of dents but nothing too bad. Throttle handle is stuck and will need fixing. Plan is to recreate a military model 32, i'm not 100% sure yet of color/specification. Will post more updates as the restoration progresses.


-
Ah, now i see the pictures of the front, yours appears to be a No1 MK2 too. We're happy to help if you need any pictures/measurements.
-
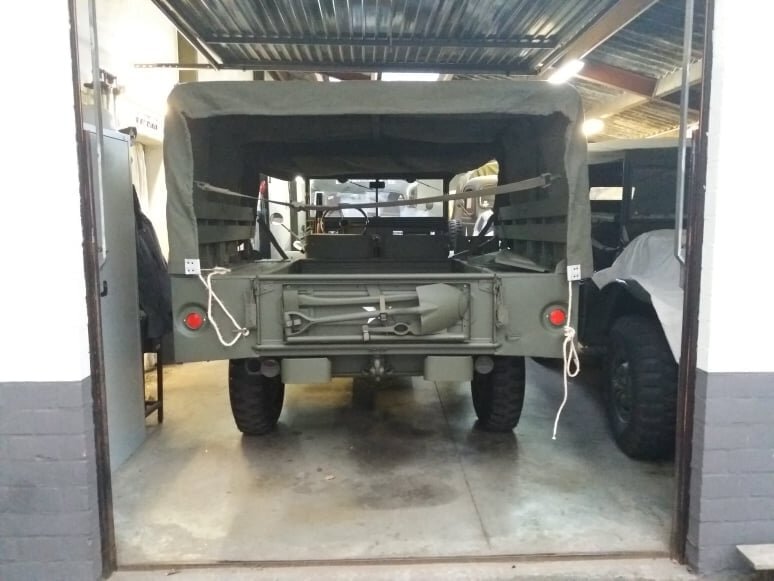
Good to see another one being saved. Yours appears to be the no1 mk1 type with fixed front/rear panels. Any dataplate still present? We found this one about 7 years ago on the border of France/Spain. No idea how it got there but it's a July 1944 No1 Mk2 made by Orme & Evans. Also attached is one of the only photo's of this type of trailer i could find in service during ww2.


-
restoration A Dodge called Michigan
Niek Baecke replied to Dodge'40-'45's topic in Blogs of MV restorations
Gathered all my courage today and started on the stencils. First off is the blue drab hood number. I got my stencil from Dataplates4u in NL. It's a perfect match to the original font. The blue drab paint came from Jemax which was made of a sample of original blue drab paint. Despite being a little on the cold side to do this kind of work, i think the result came out nicely.


-
restoration A Dodge called Michigan
Niek Baecke replied to Dodge'40-'45's topic in Blogs of MV restorations
Another day on the WC52. And the end of the project is in sight... The replica sealed beam bulbs arrived today. When the Dodge arrived it had norwegian lights on them. I still had one NOS Dodge headlight in stock, but had to buy one replica headlight housing. I started with the replica headlight and installed the bulb, all went smooth. Then i tried fitting the replica sealed beam to the original headlight. Aaaaaand it didn't work... The replica bulb is tiny bit bigger and it won't fit correctly. Luckily i still had the working original bulb. I tested all the electrics and was relieved to see that all is working as it should. After the test i mounted the grille. Below is the end result of todays work. Next up will be the markings.


-
restoration A Dodge called Michigan
Niek Baecke replied to Dodge'40-'45's topic in Blogs of MV restorations
Well, another update. Last batch of small parts has been painted. Only thing left to paint now is the wheels. Assembled the windshield wiper motors. Also put on the pioneer rack, running boards, jerrycan holders and rifle holder. Now busy with the lights. Still missing a set of 6v sealed beams, seems like they're hard to find. Most european dealers don't seem to have them in stock... The electrics are almost done, just the trailer socket needs to be wired. i've wired the Dodge to the original schematic, so only 1 normal tail/stop light and only have stop when switch is completely pulled out. Correct font Blue drab hood number stencil has arrived, but i'm having trouble finding a correct shade of paint...


.thumb.jpg.06ee6e1082a8730c2485fb1e247eca7f.jpg)
-
restoration A Dodge called Michigan
Niek Baecke replied to Dodge'40-'45's topic in Blogs of MV restorations
Well, time passes quickly... About a year or 2 ago the DODGE project was put on hold, because some motorcycle projects came inbetween... But we're back on track now! And we're really starting to see progress. Long story short, the woodwork of the cargo body was a real pain. We had to refabricate everything (including Bows, lazy backs, floor...),. Luckily we still had a pattern to work with. A couple of weeks ago we prepared the DODGE for it's final layer of pain. We got a new supplier for paint, so the color is a bit different from what we started with. However i feel like it's a better match to the original paint we found and a lot easier to spray. So here's where we are today, we fitted the bows and lazy backs and test fitted the canvas. Fitted the seats and completed the dash. What still needs to be done: -The wheels still need a layer of OD. -Trailer socket needs to be fitted and wired -Headlights/Blackout/marker lights/taillights need to be fitted. -Headlight grilles need to be fitted -Markings need to be applied. As for markings: my friend (who's an expert on US vehicle markings) and me did some research. We started with the original markings we found on the DODGE: -Shipping stencils - Really big invasion star (+gas detection paint) - Caution left hand drive / NO SIGNAL (indicating this Dodge was in the UK for some time) - The name ''Michigan'' - ??-736? on passenger side bumper and STAR ??9 on the driver side front bumper -Bridge plate and POM code White-Yellow-White 49793 - USA 2219960 in blue drab and white The POM-code is not in the known list, but combined with the 736 found on the bumpers we made a researched guess that Michigan belonged to 20th corps, 736 field artillery. A FA batallion using 8-inch howitzers/ M4 High speeds tractors. A DODGE WC52 would be used in the Service battery or Headquarters. This We can't be 100% sure unless the POM-code can be deciphered. I've decided to go with XX-736F SV-9. I'll be doing blue drab/ white numbers and big invasion star. More to follow soon... Niek


-
restoration A Dodge called Michigan
Niek Baecke replied to Dodge'40-'45's topic in Blogs of MV restorations
Thanks for your interest in this blog. We're still busy restoring Michigan, but a lack of time has caused me to somewhat forget about this blog. we're currently working on the woodwork of the rear body.


.jpg.c61dbc5235ce91c6ada4161522e6fae0.jpg)


