


okdoky
-
Posts
188 -
Joined
-
Last visited
Content Type
Profiles
Forums
Gallery
Blogs
Events
Articles
Store
Downloads
Posts posted by okdoky
-
-
Even though I've seen it in the flesh, & read the whole feature prepped for print in a magazine, I still find it an amazing piece of work Tony. Cracking work mate & I look forward to thrusting a 432 kit under your nose.
Best regs........Howard @ KFS
Great combination of intricate multi media kit and precision scratchbuilding !!!!!!!!!!!!!!!!!!
Fantastic
Nige
-
Hey Andy
Nice to see some more progress on the old lady !!!!!!!!!!!!!!! Starting to look the part again !!!!!!!!!!!!!!!!!!!
Nice 1:1 modelling !!!!!!!!!!!!!!!
Nige
-
Tony
It is the knock on effect of something small at 1/24 scale is just as bad because it shows up very easily (after the fact) when you try to fit things in and around !!!!!!!!!!!! Less opportunity to fudge things as in your case you have a massive skylight left on it for everyone to see right in there !!!!!!!!
That wiring looks cracking and the switches !!!!!!!
Nice
-
Memories of TAPOC course and on the ranges at Barriebudden where your mind was supposed to be on important things like, where are the enemy, point your rifle, shoot, dig a ditch, stand in it, fight, run, etc !!!!!!!!!
Half the time was spent restling with kit, especially the daft tin lid that had a life of its own !!!!!!
Lie down fast ,,,,,,,,,,,,, helmet beats you to the ground !!!!!!!!!
Look down as you are digging ,,,,,,,,,,,,,,, pick helmet up from the ditch !!!!!!!!
Lie down or crawl with your back pack on ,,,,,,,,,,,,,, you can't bloody well see where you are going as the helmet always gets shoved forward !!!!!!!!!
Try to shoot with your back pack on, even kneeling ,,,,,,,,,,,,,,,,, !!!!!!!!!!!!!!!!!
But trying to do anything with the amount of clobber you had to carry around in the field !!!!!!!!!!!!!!!!
Glad they changed the helmets ,,,,,,,,,,,,,,,, glad I was not Occifer material ,,,,,,,,,,,,,,,, GLAD I CHANGED ROLES FROM FOOT SLOGGING CANNON FODDER to RICKSHAWS, CAMMELS AND TAXIS !!!!!!!!!!!
Chuck the heavy stuff in the motor and drive !!!!!!
How the real soldiers did and still do it always amazes me !!!!!!
RESPECT
Nige
-
Hopefully of some use. No idea what diameter these were, but the poles were 1.2m lengths.

Nige
-
Hi Tony
I tried to make hinges in the same way, but aside from the fact that nothing seemed to stay in place with any of the glues, I am too hamfisted to get the bits to sit still long enough !!!!!!!!!
It is defo gonna be a military !!!!!!! I would love to get some photos or reg plate numbers suitable for the vehicles that were in Dunfermline while I was there, but that will likely be a long shot !!!!!!!!!!! But will be hopefully with Canvas on the hoops and back flap up and seats !!!!!!!! I presume the seats will be the same build up as the Bedford MK !!!!!!!!
It was simply the fact that the truck in Linlithgow that I went to photograph happened to have been a re-paint in red !!!!!!!!! Mine will be green and with a black cammo, the brown fabric screens hung on the sides !!!!!!
I will probably go for a slightly weathered and touched up look because I can't remember the trucks having a very new paint scheme like the DROPS !!!!!!!!!!!!! Probably had seen a longer service by that time and were long due a repaint !!!!!!!!!!
If you have the mushroom sizes please add them to your blog and a close up of how you go about building them !!!!!!!!
Ta
Nige
-
Tony
I think the way you have it looks just fine !!!!!!! I suppose if you were looking for alternatives that you could vary your display by having portions unwrapped, it would be more important to get a scale look and hang,,,,,,,,,,,,,,, but it would be a shame to hide all the detail you have spent ages in getting so accurate !!!!!!!!!!!!!!!!
Our unit used a lot of that woven plastic fabric in brown !!!!!!!!! Will have to keep an eye open for something that has a tight weave !!!!!!!!!!!!! If I could have mastered the art of working hinges, I would have looked at having the DROPS side locker loaded with camo netting and the folded brown fabric !!!!!!!!
The DROPS did not have the luxury of all the hanging points of the Bedfords to drape the screens in a ready fashion and we had fold it and unfold it and jam it in doors and crevices when in location !!!!
Best I can do is have the camo netting rolls up on the roof or locker as if about to get erected with the poles and rings !!!!!!!! Might have to improve my soldering techniques !!!!!!!!!
Will be looking at your pics when I get around to hanging the screens on the TM !!!!!!!
Wonder if any one else looking in on your build might have pics with the brown fabric I am talking about on Bedfords to get the look of that rather than the hessian !!!!!!!!
Nige
-
Tony
I came across those very same comms cable drums by chance when I was at the Hogmanay concert at the Castle when I was inspecting the stage as part of my job !!!! Was able to see and appreciate what work you put into making them !!!!!!
Nice to see the side skirts hanging from the bodywork too ready for dropping when neaded. What did you use to make them ?????????
A great combination of the KFS detail and your own !!!!!!!!! Shame that Howard is sold out of them till March !!!!!!!!! Phoned to order one as I have the money layed aside !!!!!!!!!!!
Will have to put it back into one of my slush funds so SWMBO does not get her hands on it and squanders it on something less important such as food, clothes or the likes !!!!!!!
Nige
-
-
Hi NOS
I will get the drip tray under her ASAP !!!!!!!!!!!!!
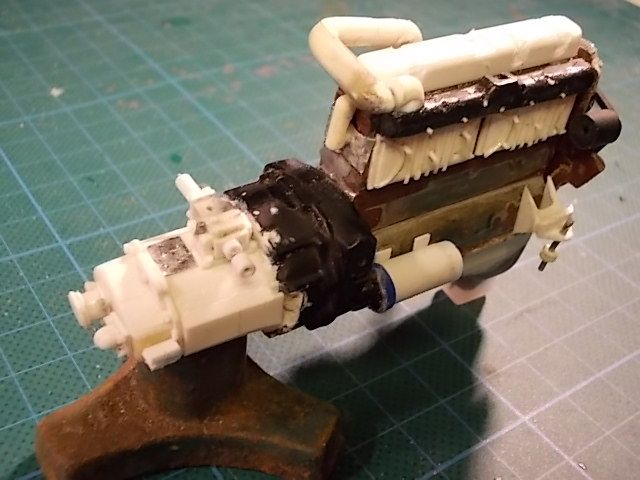
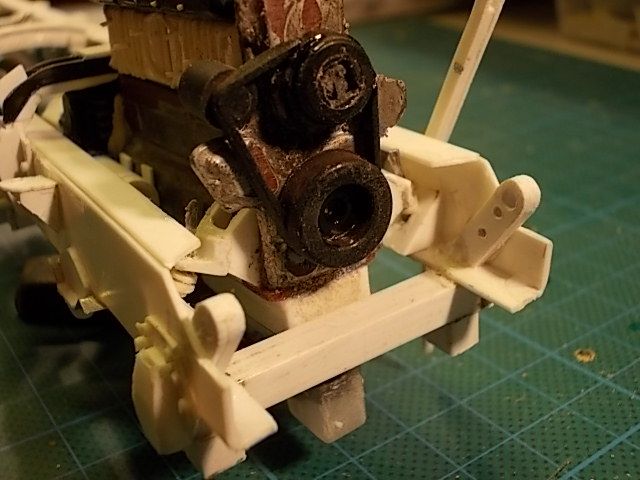
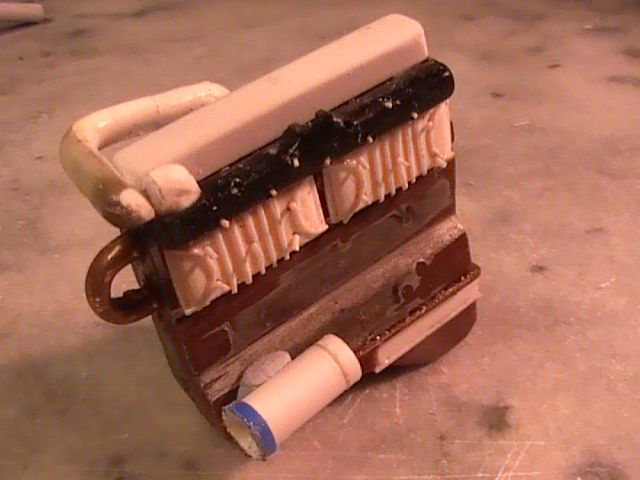
Adding a few more leaky pipes to busy up the lump
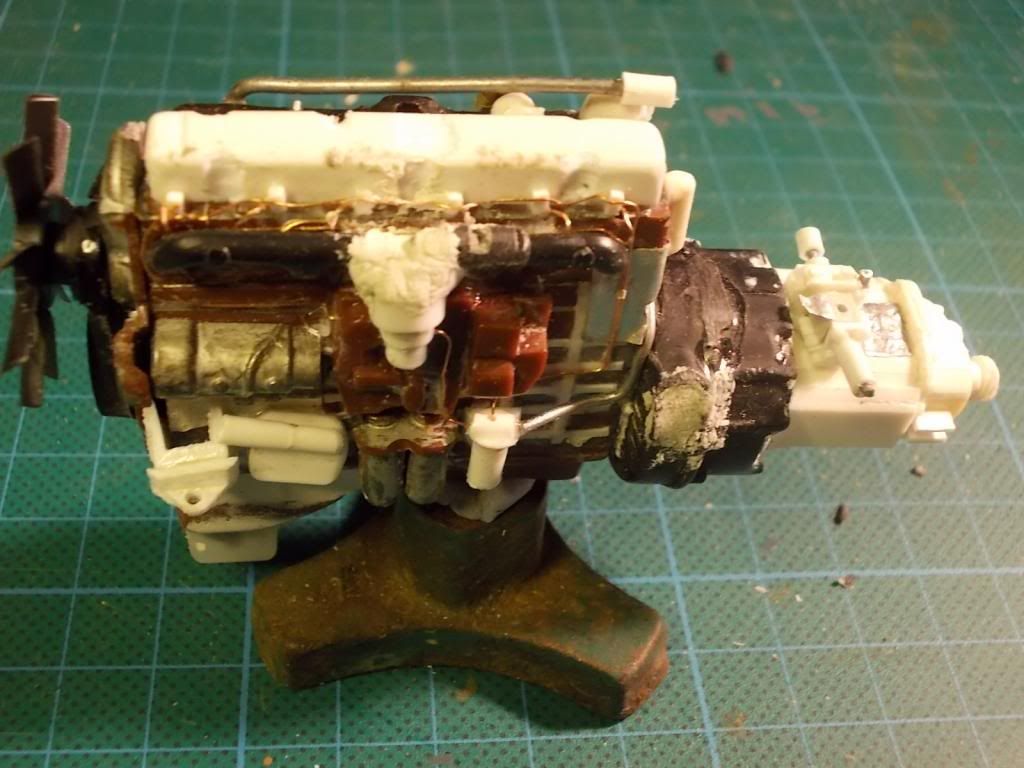
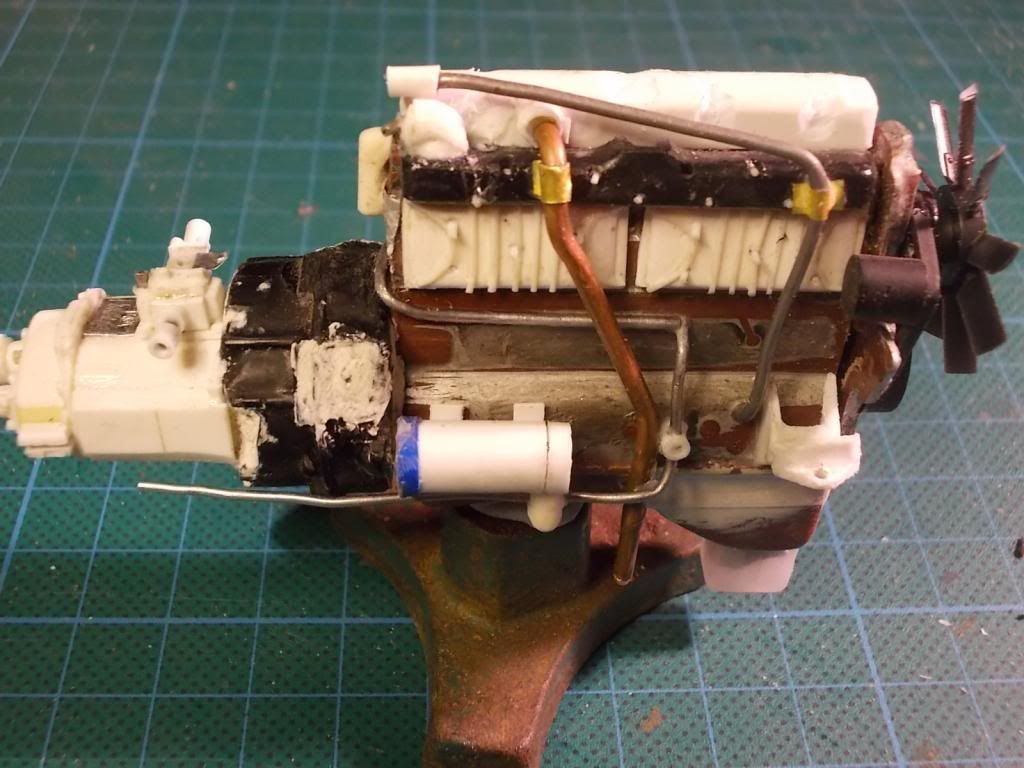
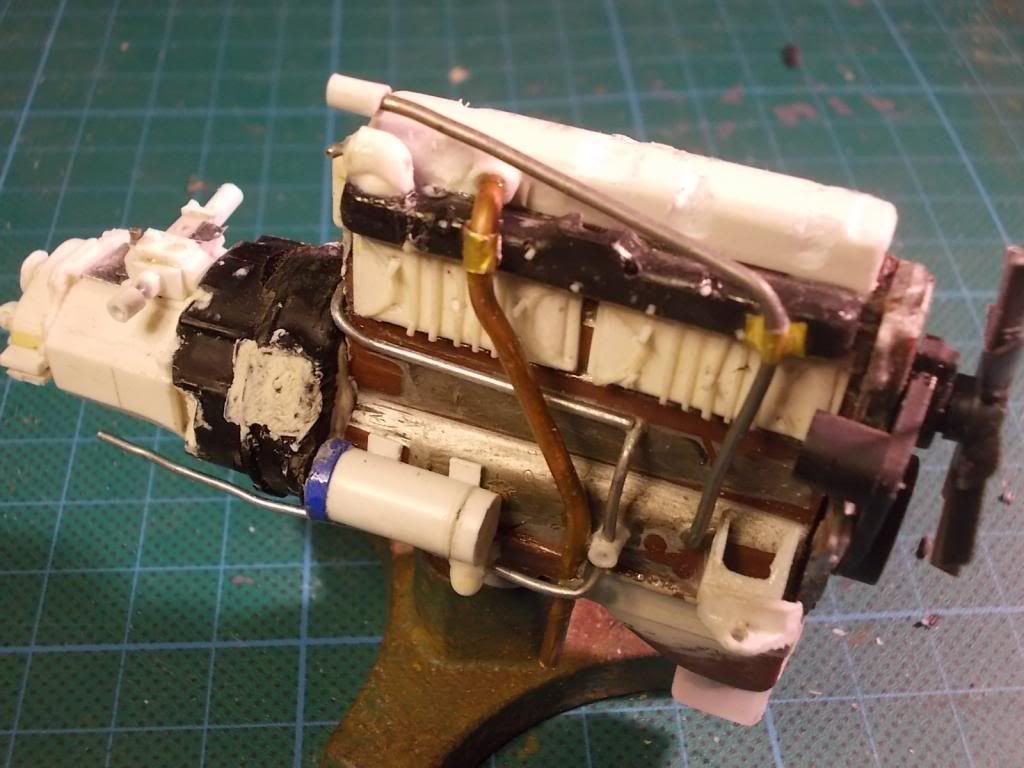
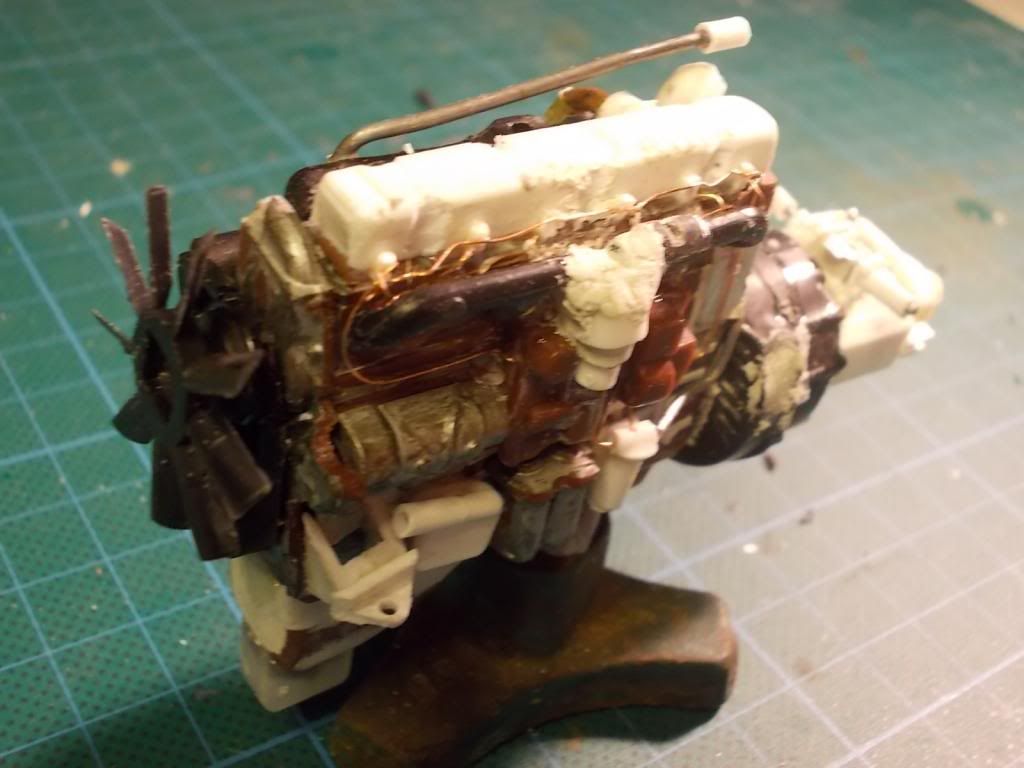
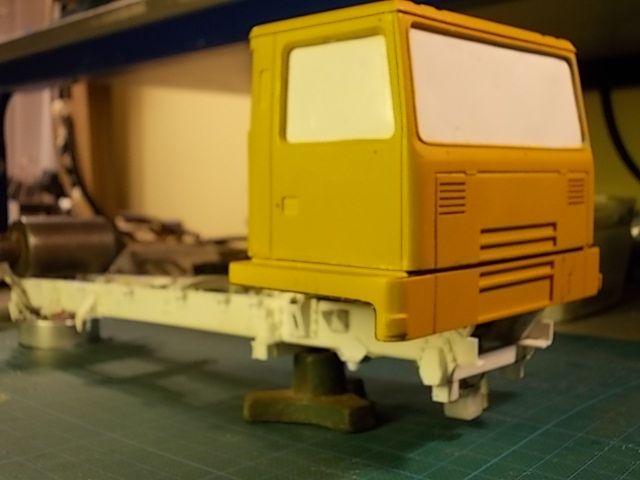
Lump will fit but I have to leave off the fan to get the radiator to sit in front and allow the cab skin to go over it
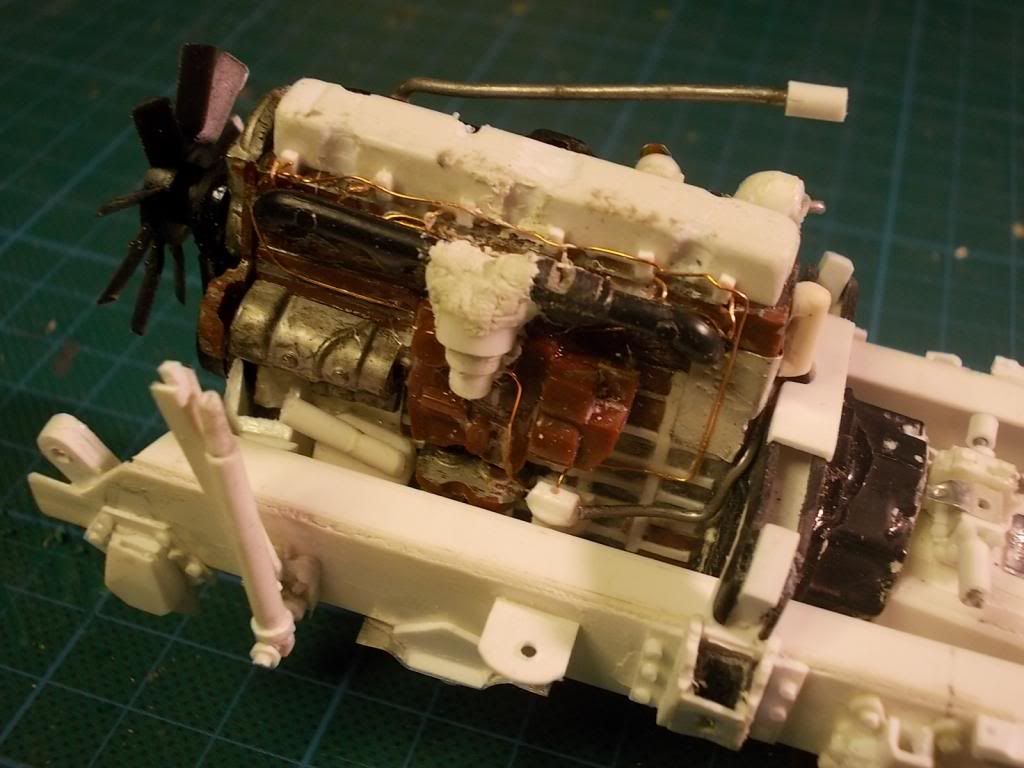
Suppose that might be because an 8 cylinder engine is longer than a 6 and I don't have the actual engine length to work from

There has to be some sacrifices to accuracy if I am to get this done
Nige
-
-
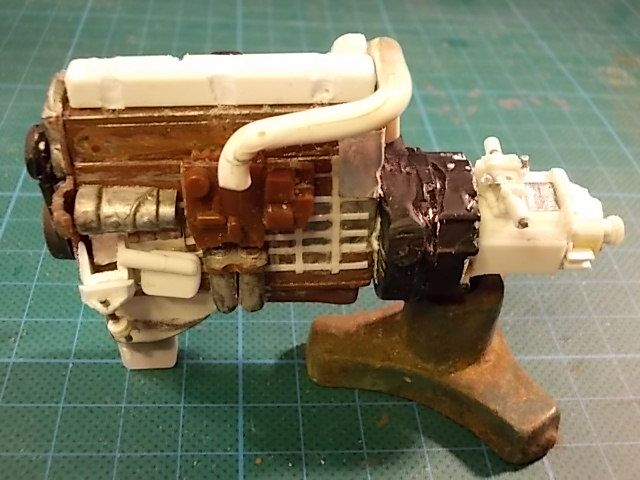
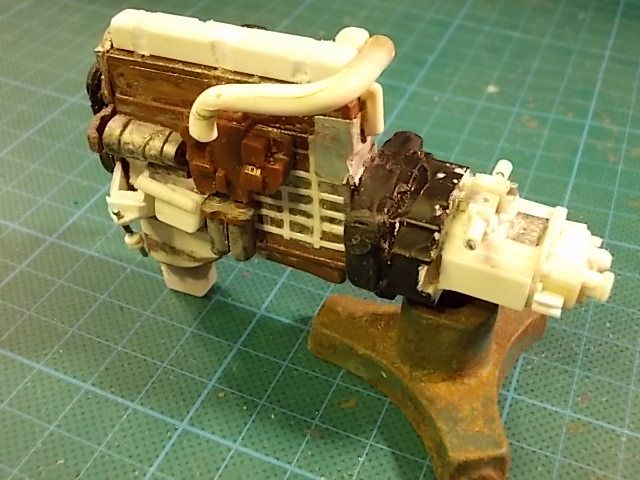
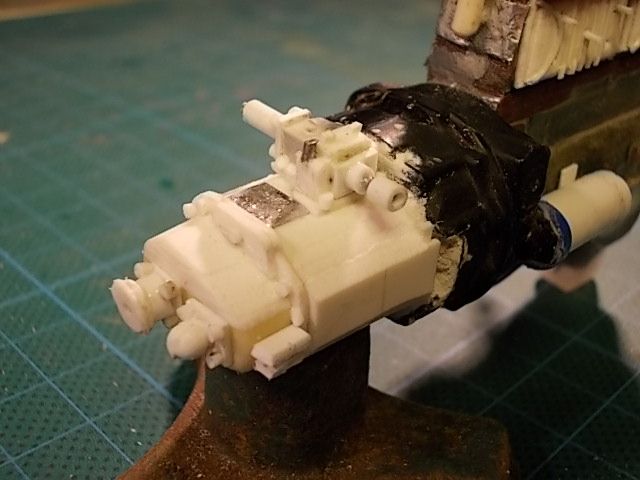
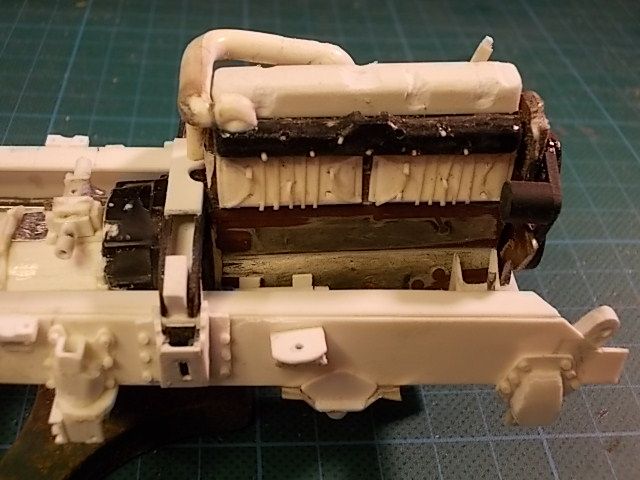
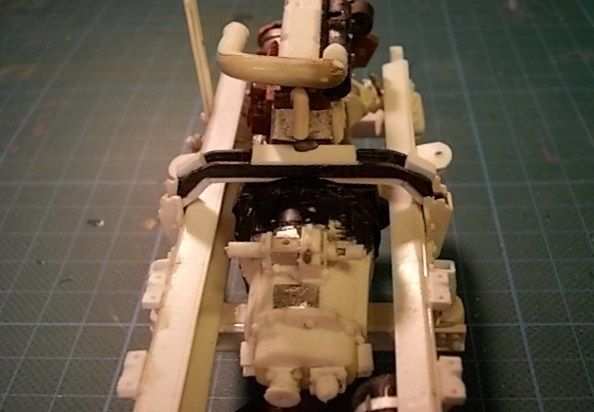
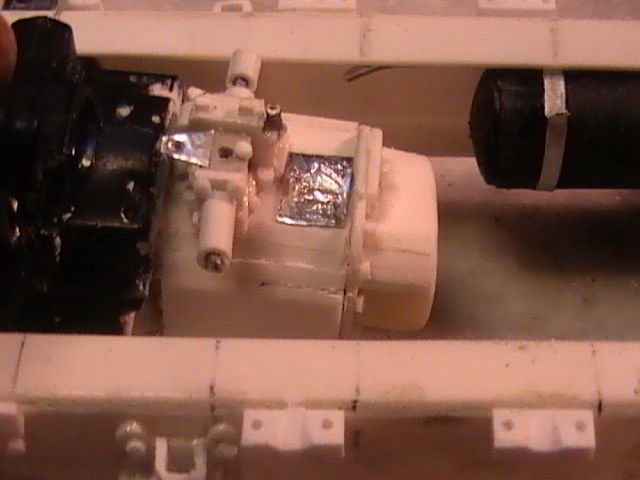
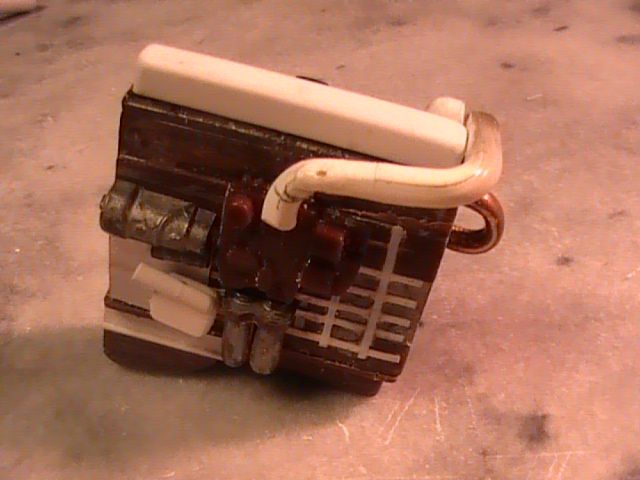
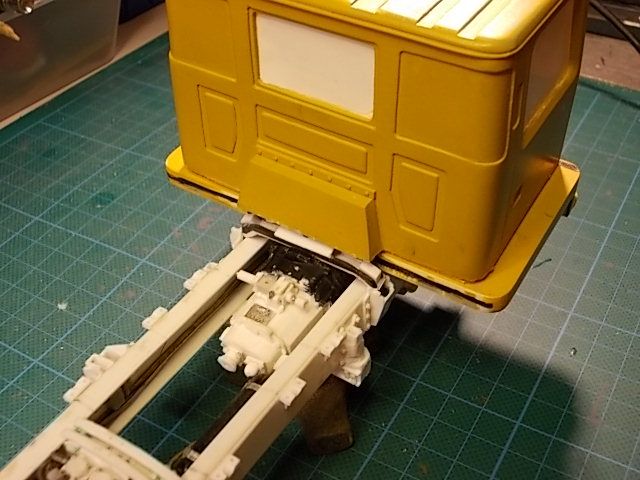
Added some more detail to the engine and gear box and first dry fit to see if it still fits !!!!!!!!!!
Nige
-
Have you got a background of mechanics and micro engineering ??????? That aray is so precise !!!!!!!!! I would have been tearing my hair out when the first bit of metal sheet had probably bent and split at the first touch of the drill bit !!!!!!
And the soldering is so tidy !!!!!!!!!!
Nige
-
That is very precise building there Tony !!!!! Where did you get all that scale tread plate ???????
Nice to see the working parts you built in too !!!!! Surprised you not fitted a couple of speakers in it and lights for an all round sense explosion !!!!!!!!!
Looking forward to the next installment !!!!!!!!!!!
Nige
-
Back onto the workbench after all the pies and pints from the festive season !!!!!! No headaches though thankfully !!!!!!!
Also after appearing worldwide on live TV with my family at Stirling Castle New Year Concert with the Proclaimers !!!!!!!!! Don't worry, my head not swelling too much as was only a bit part with 6000 other people !!!!!!!! Ha ha ha ha ha !!!!!!!!!!
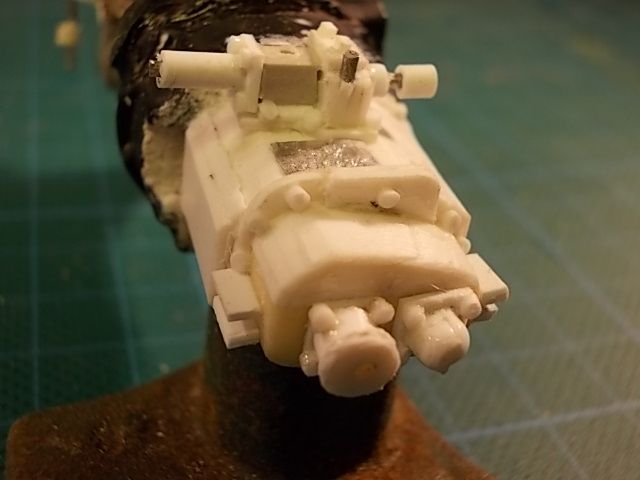
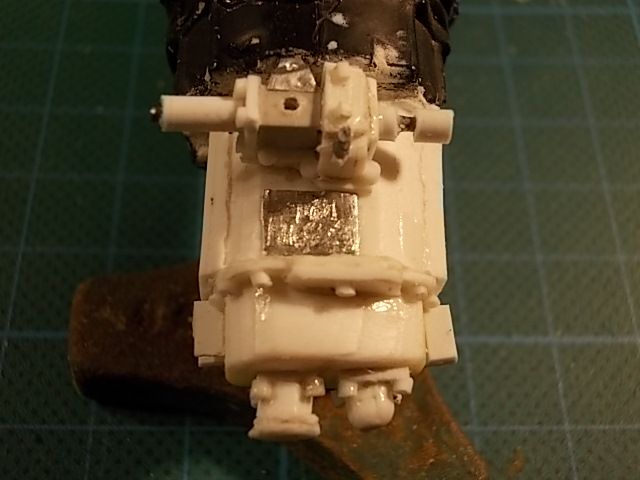
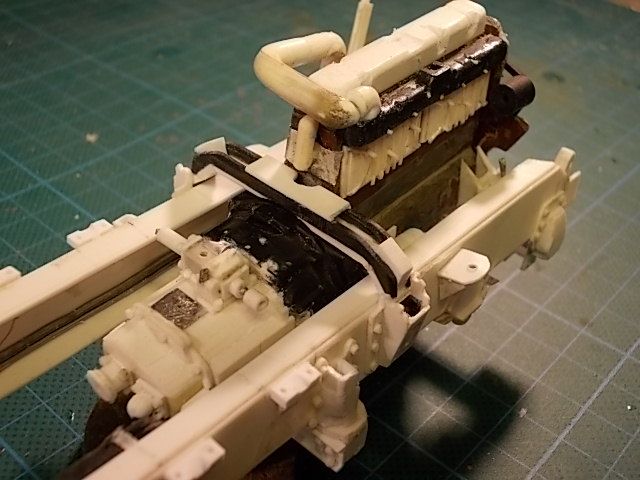
Had a go at making the gear box and actuators and fitted it to a donor clutch housing from another kit engine lump that looked similar !!!!!!!!!
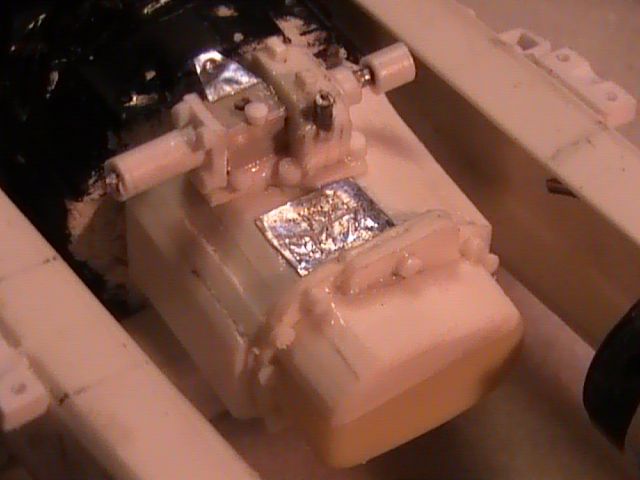
Hope these work as it looks like Photobucket may be getting unstable and losing or mixing up pics in my folder !!!!!!!!
BLOODY TECHNOLOGY !!!!!!!!!!
Nige
-
That Coax drum looks amazing !!!!!!!!!!!!! Would love to see that in close up and get a better idea as to how those tiny parts all went together !!!!!!!!!!!!!!! What forms the hub or centre of the drum ??????????? And what does that then sit on ?????
Great seeing the build now after seeing the finished model !!!!! Makes me want to see more again as you reveal each bit !!!!!
Nige
-
The spray job....
[ATTACH=CONFIG]70840[/ATTACH]
I used Halford's spray primer on everything.
I spent more time cleaning the spray gun than actually using it & it was only 2 weeks prior to finishing the project that I found out that acrylic paint was water based (not like enamel), so I could've cleaned everything with water rather than acrylic thinners (that I used sparingly) lol. But then again, I was sold acrylic thinners when I first started & if you don't know otherwise? & no doubt......I've still a lot to learn?
Tony
If you still have more to learn ,,,,,,,,,,,,,,, I am going back to train spotting !!!!!!!!!! That detail and finish is award winning mate !!!!!!!!!!!! I wish I had half the talent to get that sort of exactness !!!!!!!!!! I struggle to get the small bits looking as neat and tidy as you have !!!!!!!!!!!!! And my my fine detail painting stinks !!!!!!!!!!!
Looking forward to the rest of the build blog posts !!!!!!!!!!
Nige
-
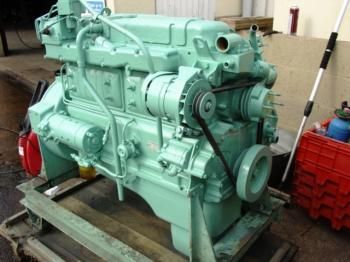
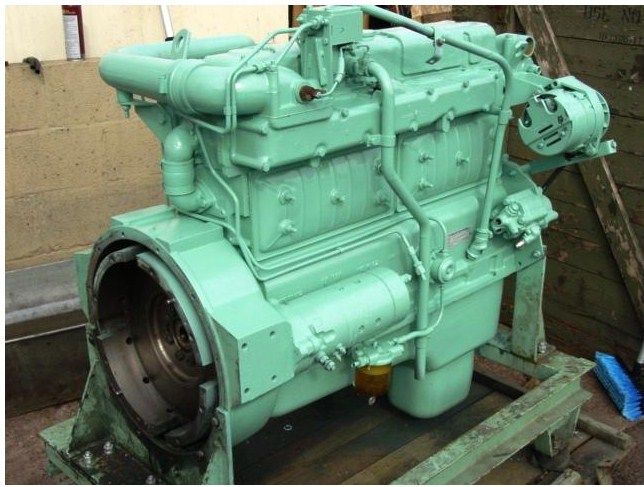
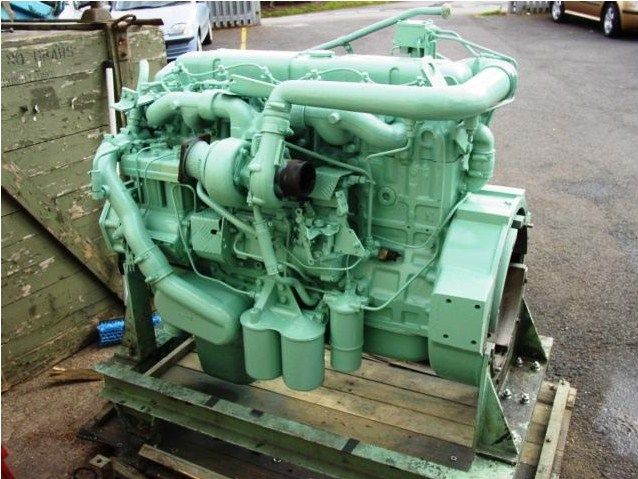
Thanks Enigma
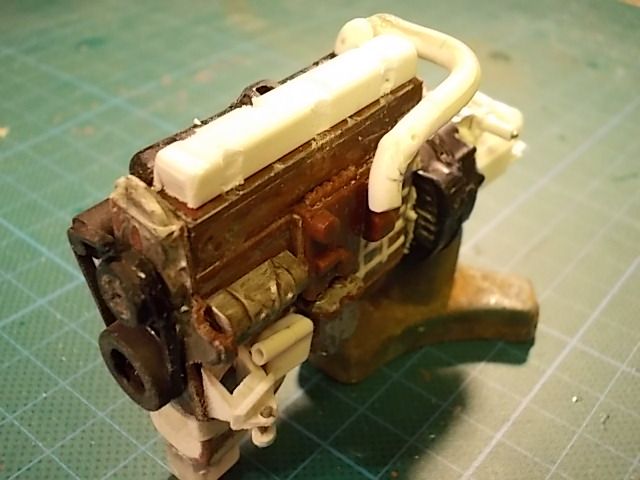
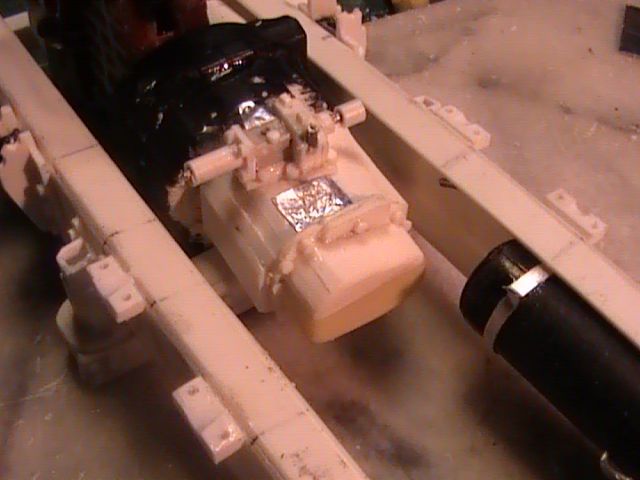
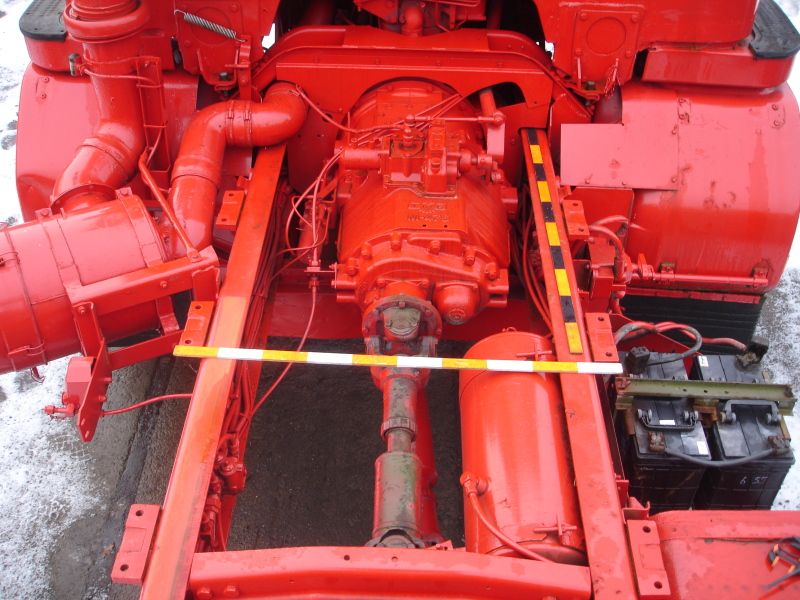
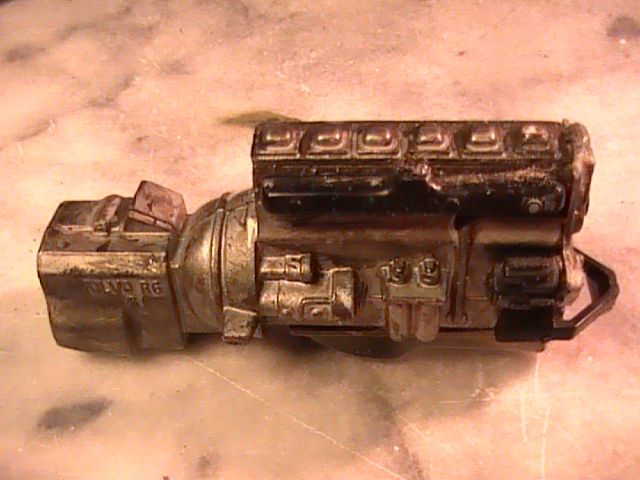
Made a start on the engine block and chopped up one from the spares box that must have come from a Volvo. At least it was a 6 cylinder block so had the basic size and shape I needed
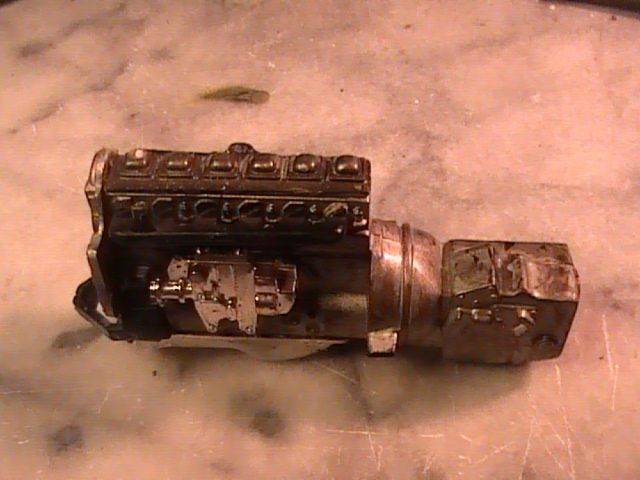
This is what I hope to get it looking close to
Chopped it down losing the gearbox, sump and ancillaries leaving the basic shape
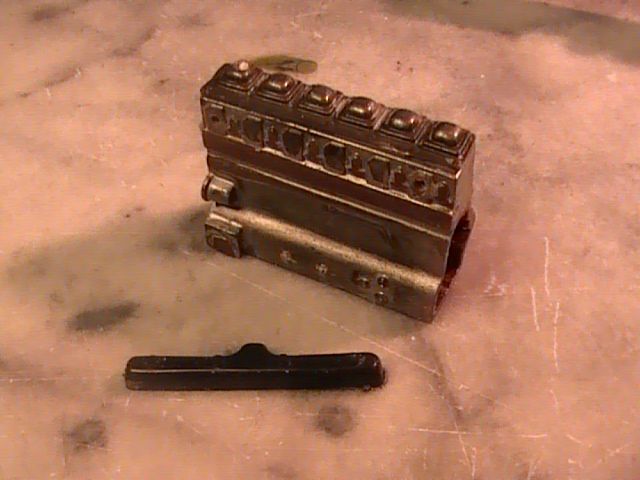
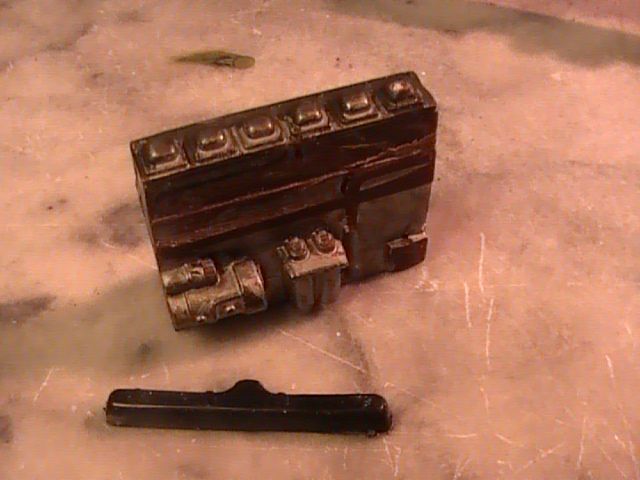
Where I am so far
Also got around to starting on the axles and again canibalised a couple of axles from the spares box and chopped off the square half shaft housings leaving only the circular diffs. Basic tube through them which will need refined like all the other bits
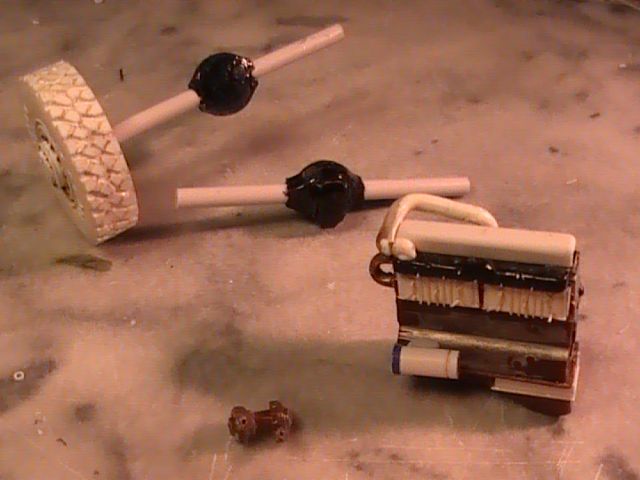
Some bits will get more refined than others depending on how prominent they will be, or how visible they might become if I display the model without cab or cargo bed fitted.
Nige
-
Tony
Thanks for posting up your build photos !!!!!!!!!!!!! Your build and painting makes this look so damned real !!!!!!!!!!!!!!!! Amazing attention to detail and can't believe this was your first !!!!!!!!!!!!!!!!
You hit the mark on this one !!!!!!!!!!! Any plans for a second vehicle ,,,,,,,,,,,,,, maybe another comms or supporting role ??????????????
Looking forward to seeing more
All the best
Nige
-
:thumbsupup:
Hope you all get something good and that it will be up on the forum quick time to make us all envious !!!!!!!!
Have a good time but stay safe ,,,,,,,,,,,,,, stay well ,,,,,,,,,,,,,,,, and for those that have to be at a wheel over the festive stay sober !!!!!!!!!!!!!!!!
Plenty time for model building while I am off on leave so hope to see what you all manage to churn out during your break !!!!!!!
All the best
Nige
-
Hi Howard
Is it madness ???????????????? Is sending me mad at times !!!!!!!!!! But how mad can I really get ???????????
I have been lubricating my pipes with much needed amber necter and soothing a husky throat ,,,,,,,,,,,,,,,,,,, well that is my excuse if ever I needed one !!!!!!!!!!
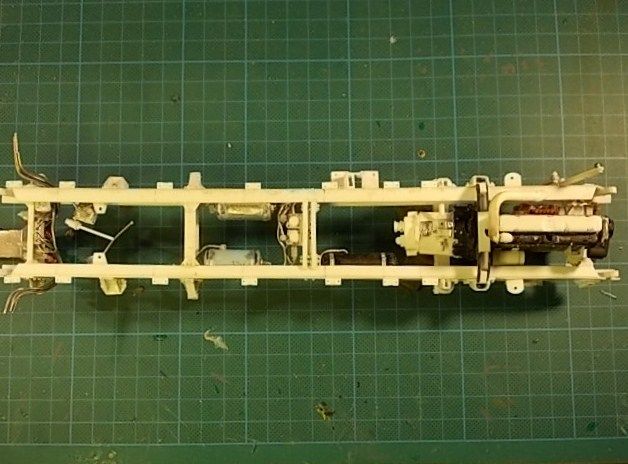
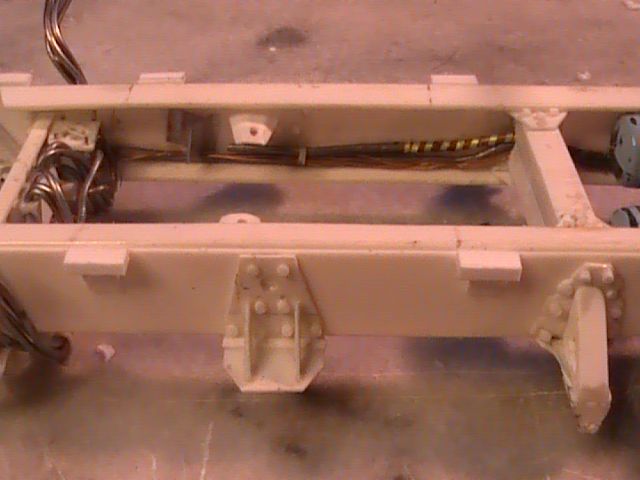
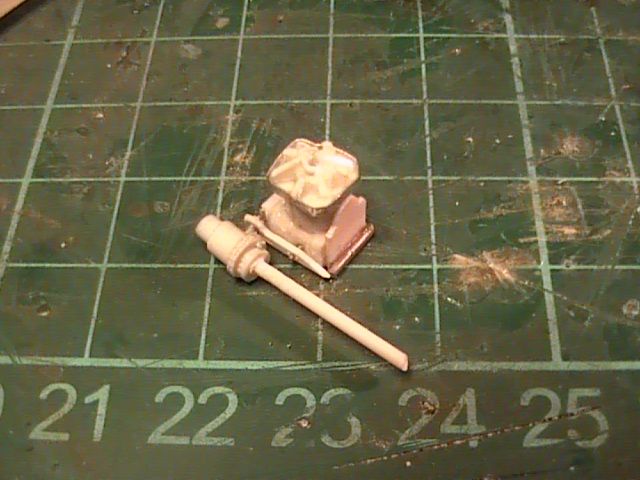
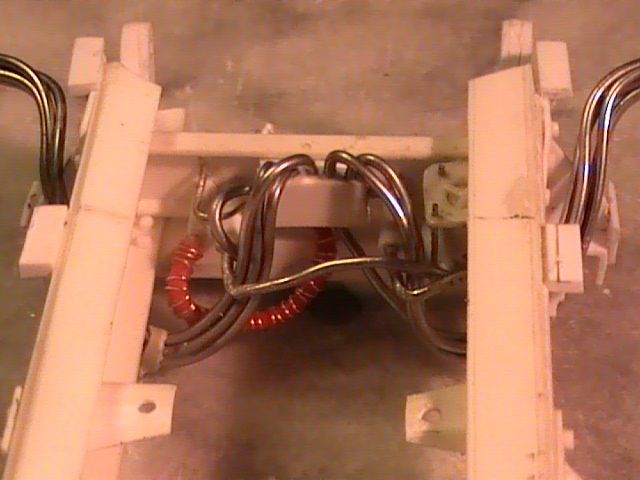
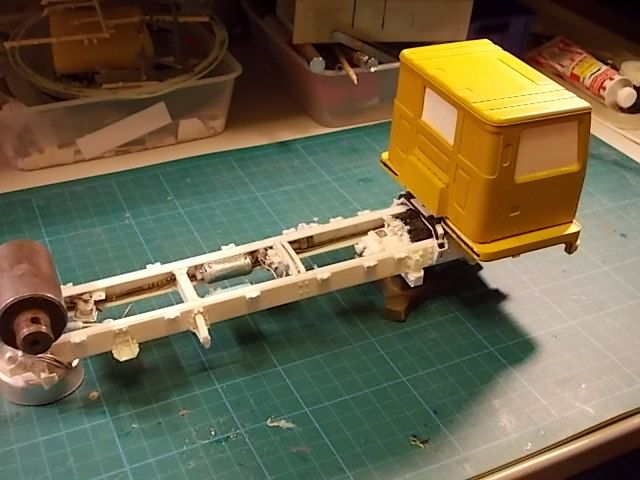
Just in case I display the TM with the cargo bed off, I have drilled out the bracket holes and shaped the centre slope in the middle
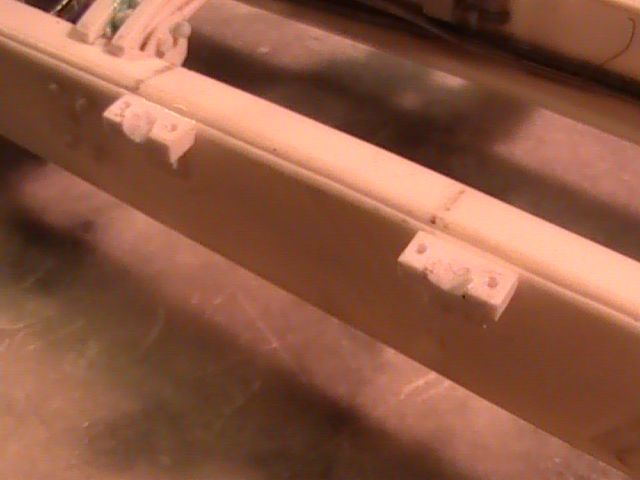
The two main air tanks plumbed in (third one made but do that tomorrow)
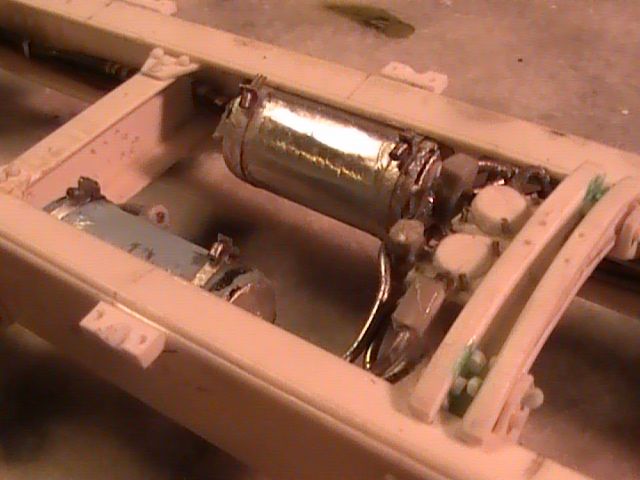
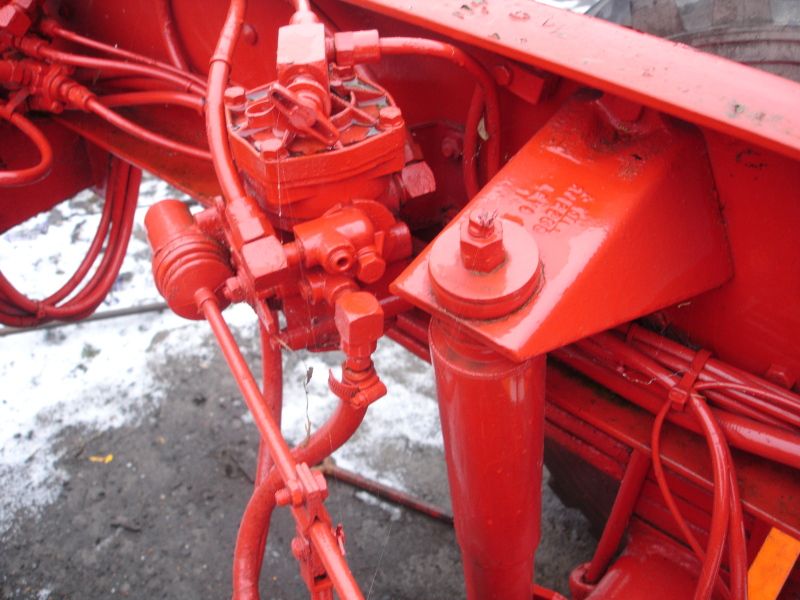
The load sensing valve and fittings plumbed in and secured to chassis Very fiddly angle to place it at

Chassis filling up nicely now
Hope you like
Nige
-
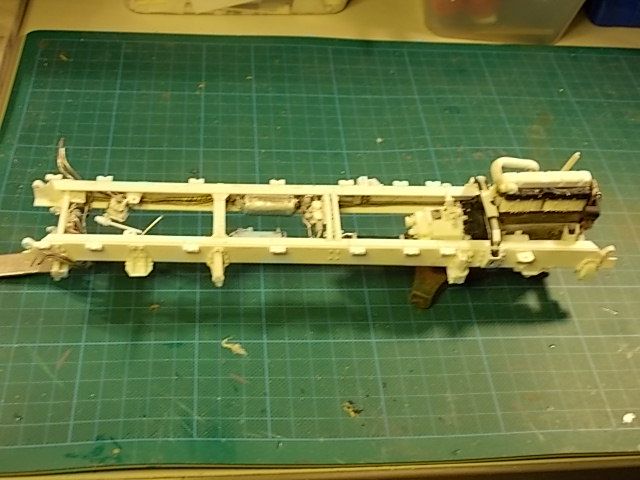
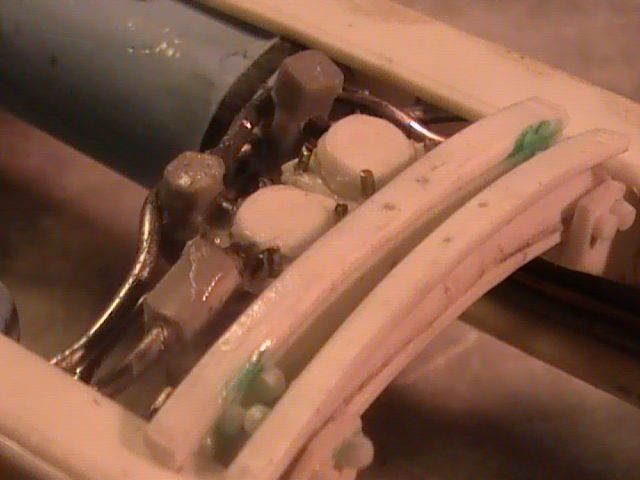
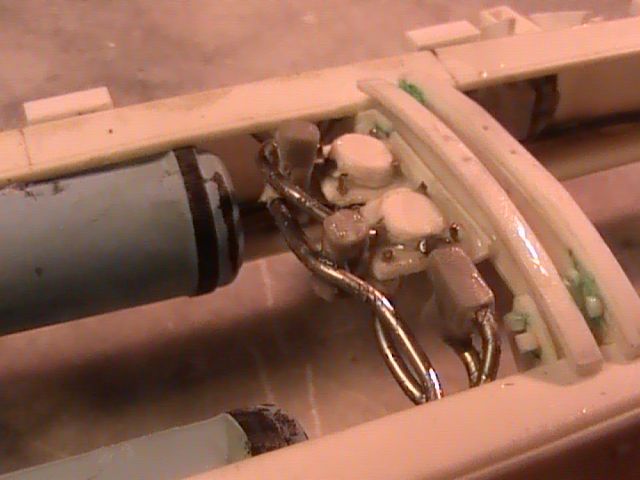
Like everything else, it will be my representation as close as I can get to the tangle taking account of what I can fathom out from the photos!!!!!!!! But it will be by no means perfect, like the masters of the art, as some bits just get too hard to handle and will be fudged accordingly !!!!!!!!!!!!
But that is hopefully where a coat of primer and a few coats of paint will mask a few of those glaring mistakes !!!! It will hopefully look good from a distance !!!!!!!!
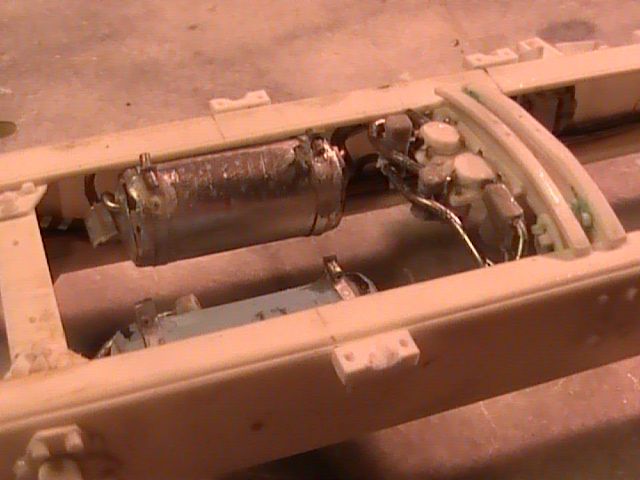
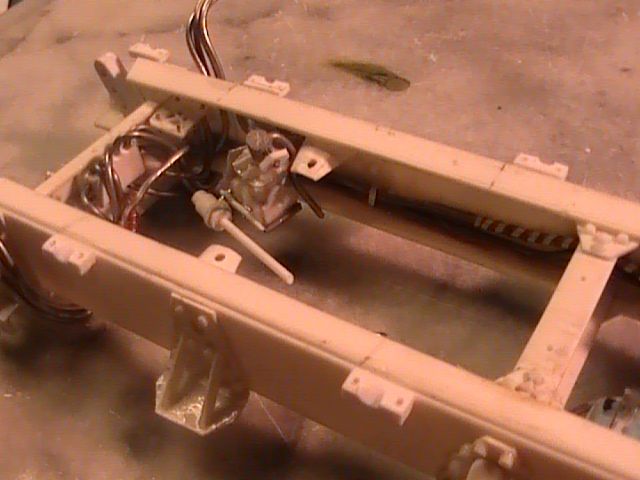
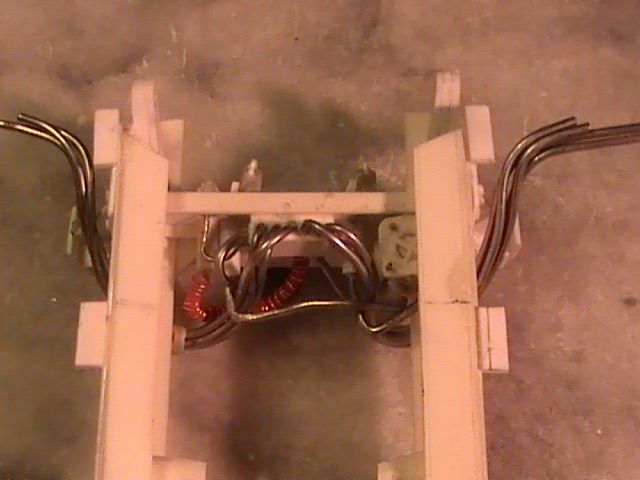
Start of filling up the chassis side rails
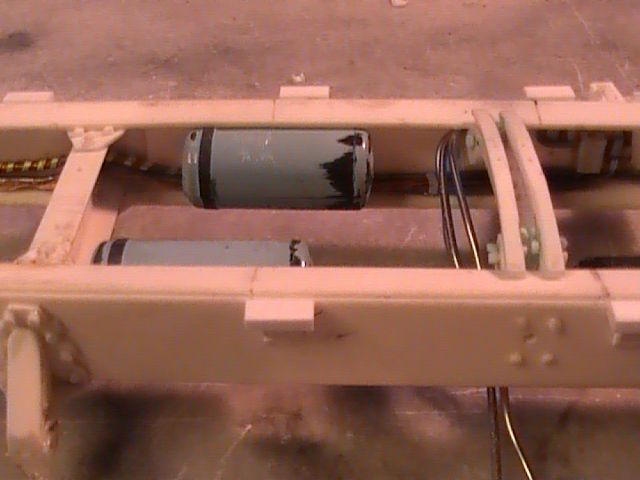
And the relay valves and pipes (assumed serving part of the air brakes system and possibly air actuators for the gearing and transfer box)
Nige
-
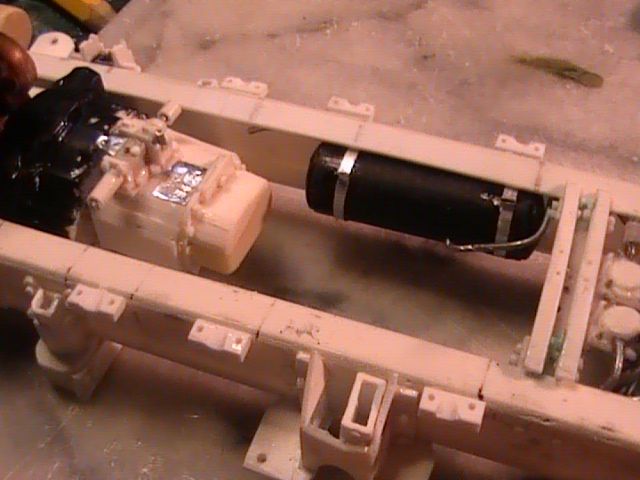
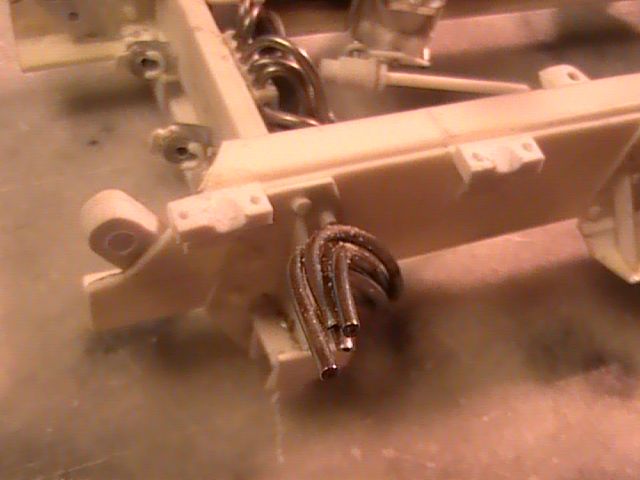
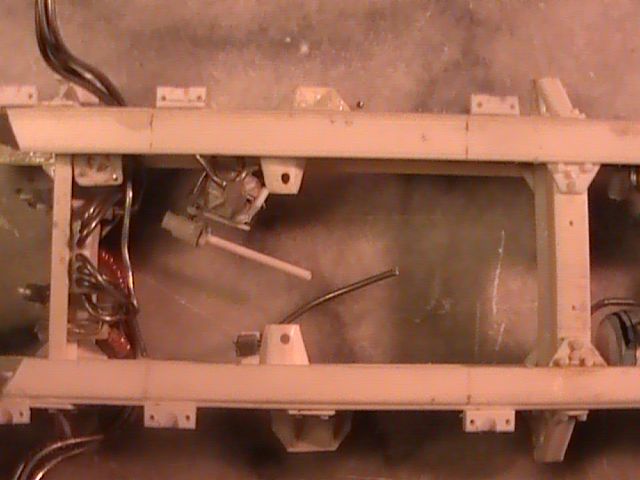
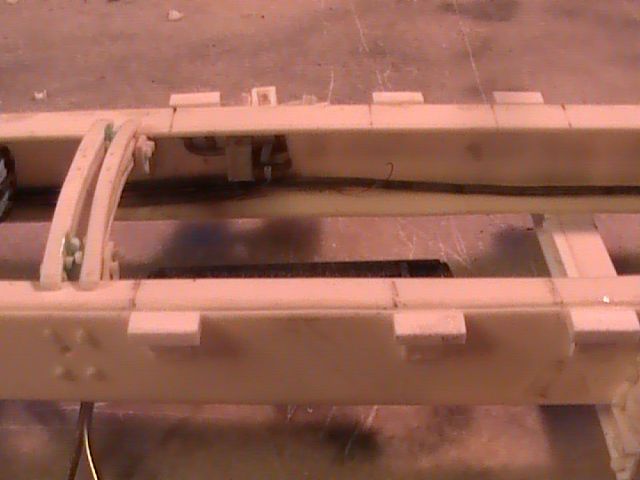
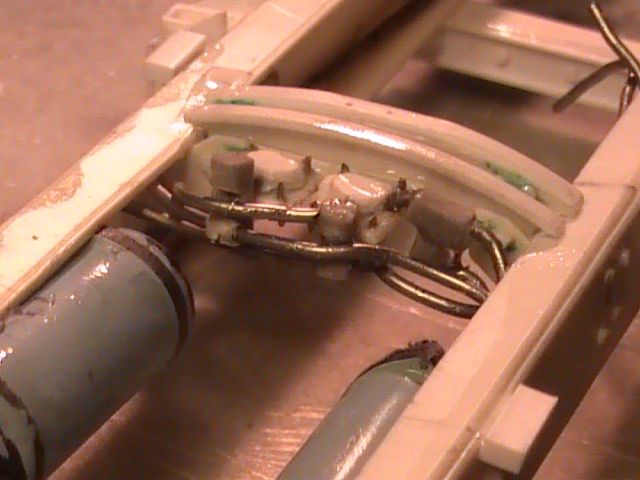
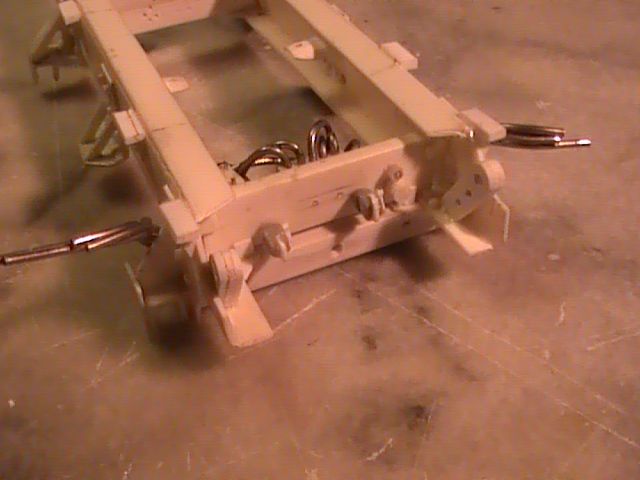
Load sensor started. Pipes feed through it on the chassis rail just around the nearside rear axle
Fiddly for adding pipes to all areas
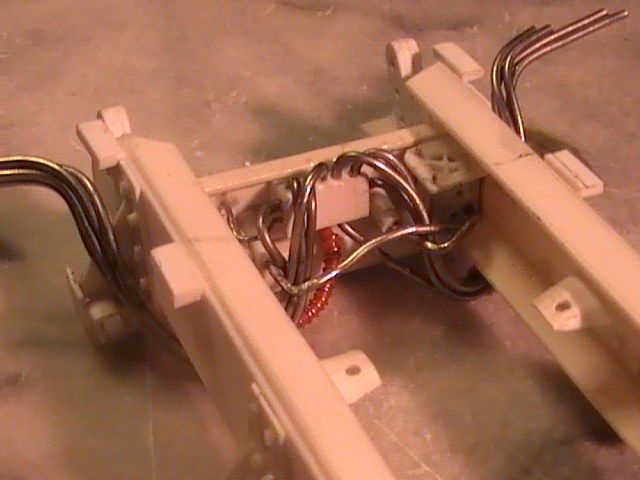
Trying to unravil spagetti junction !!!!!!!!
Nige
-
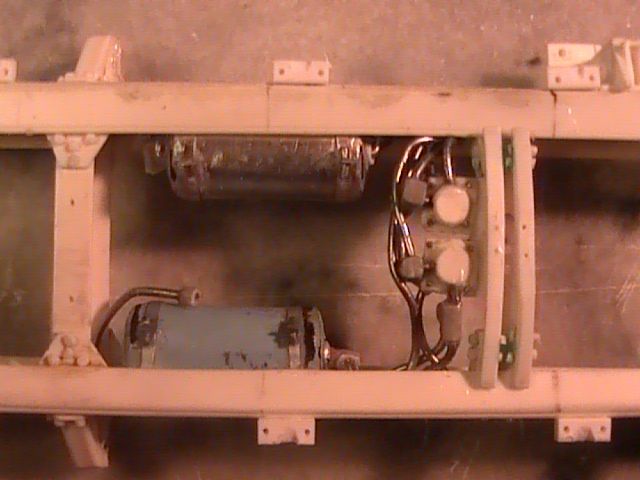
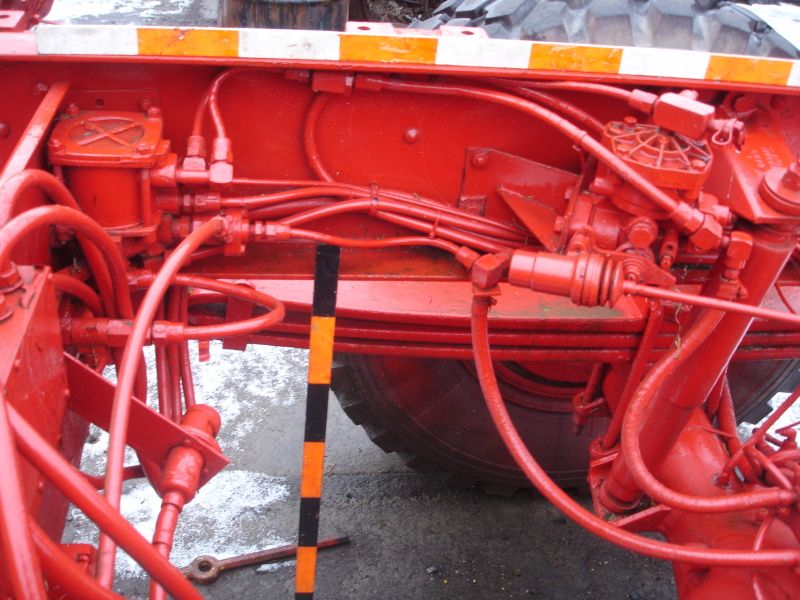
Rear cross member with electrical junction box, air pressure relay valve, trailer air and electrical couplings.
Nige

Ptarmigan Comms Wagon
in Military Scale Models
Posted
As if you had taken the roof off a real one !!!!!!!!!!!!!!
Love seeing more of these close ups !!!!!!!!!!!!!! Are you coming to Perth model show perhaps ??????????
Would love to see this close up !!!!!!!!!!!!
Nige