


ivor
-
Posts
50 -
Joined
-
Last visited
Content Type
Profiles
Forums
Gallery
Blogs
Events
Articles
Store
Downloads
Posts posted by ivor
-
-
-
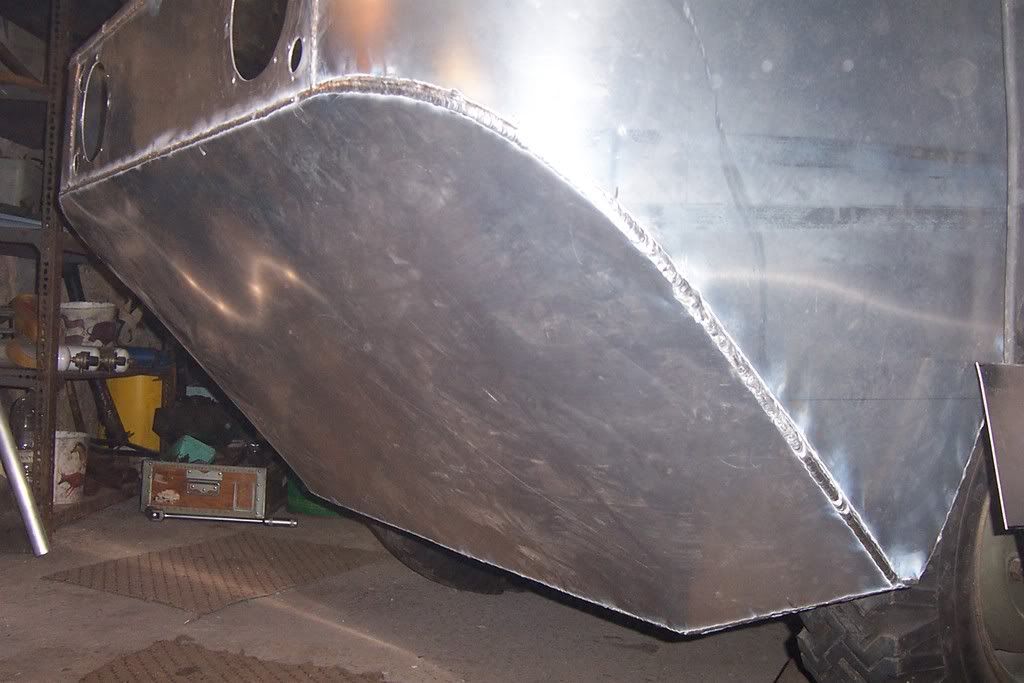
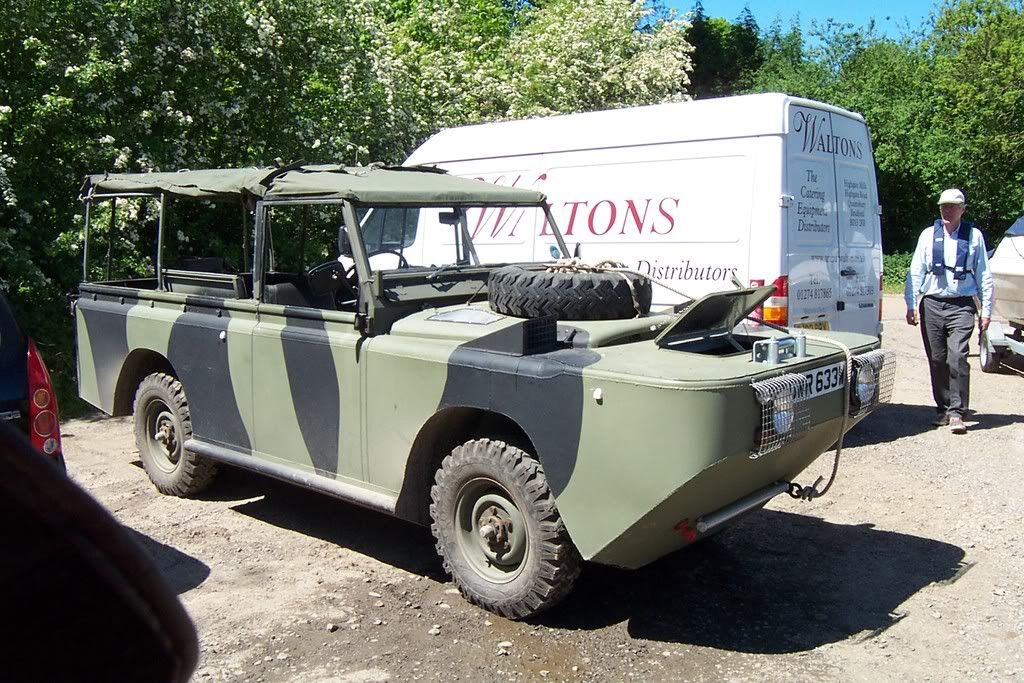
bow fitted and fitting sides
-
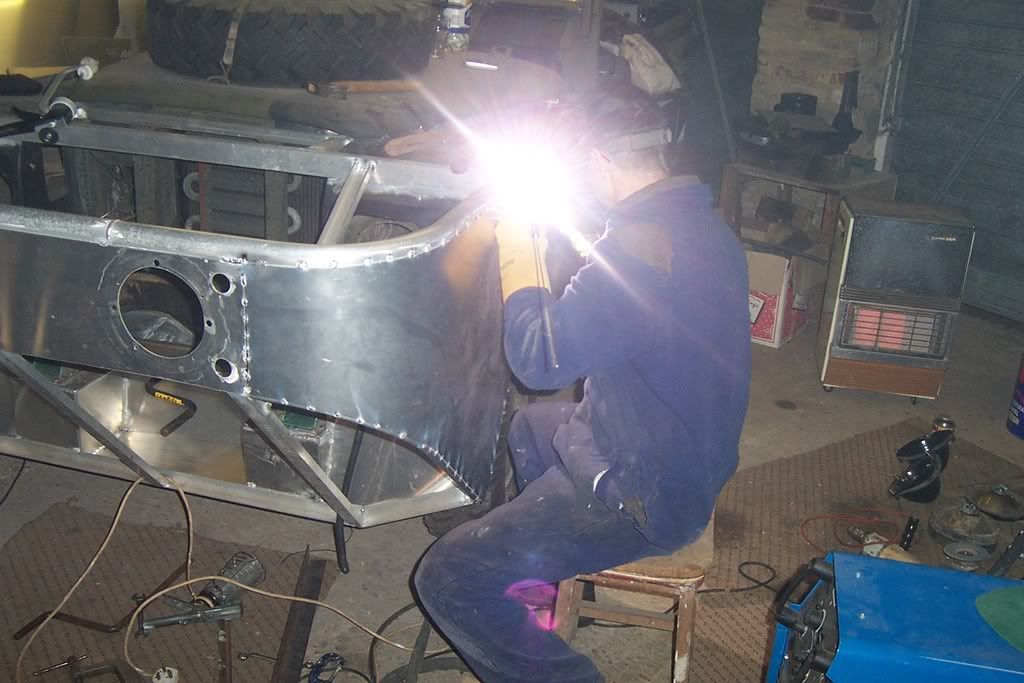
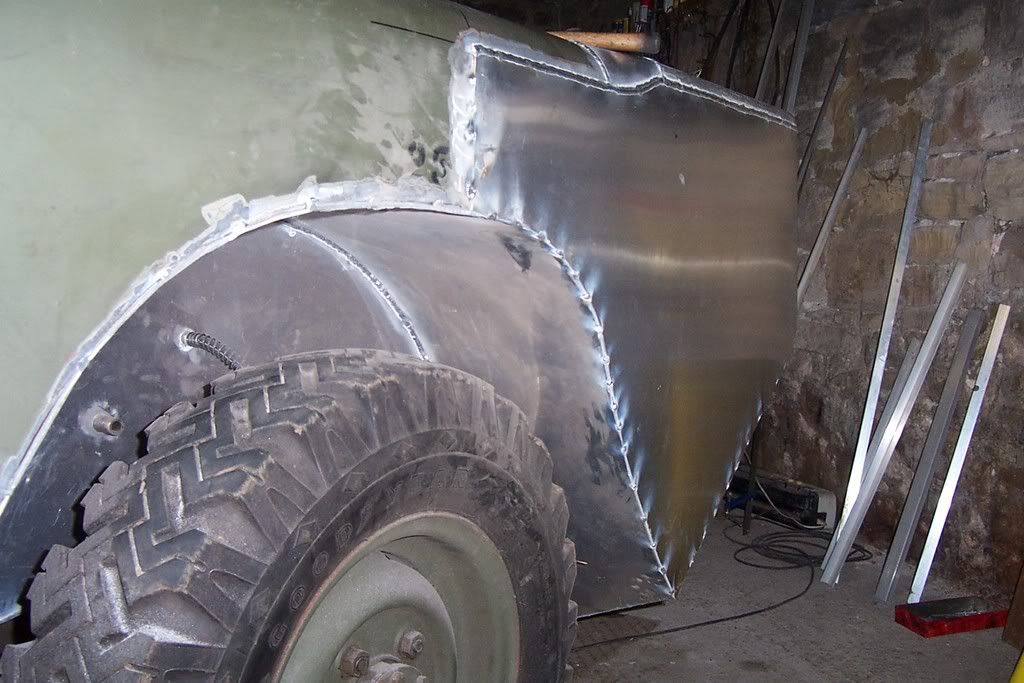
fitting extension to front and welding panels up
-
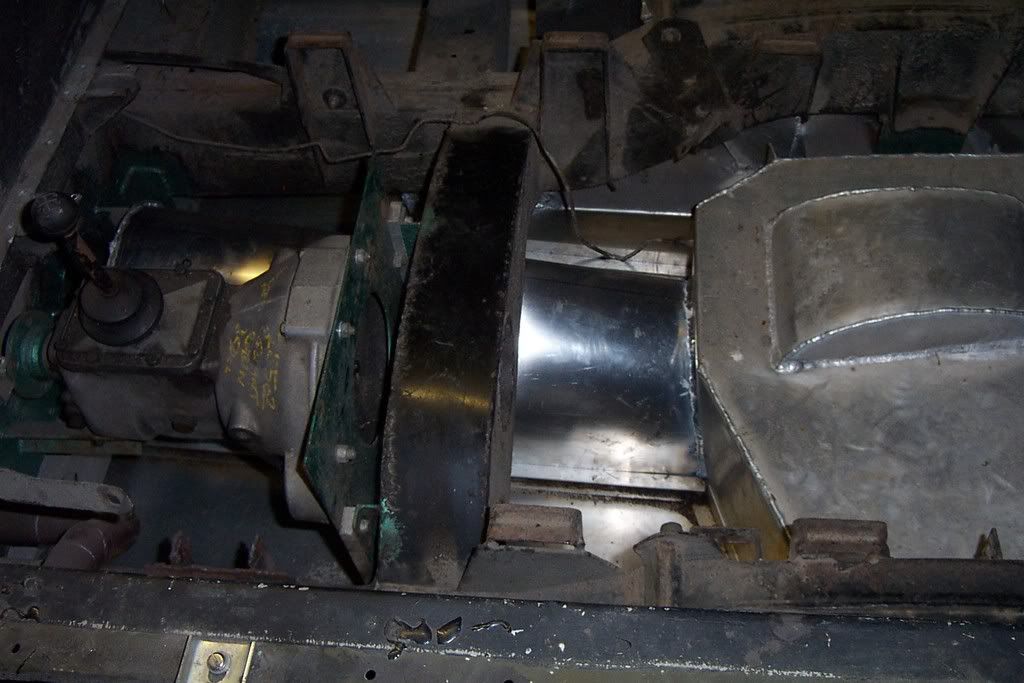
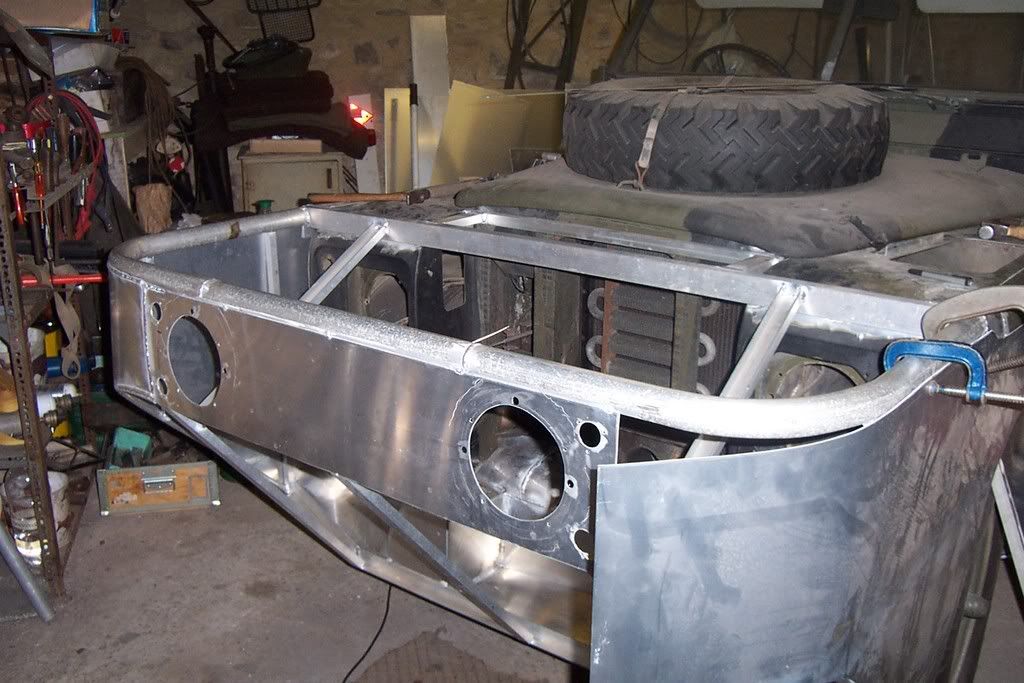
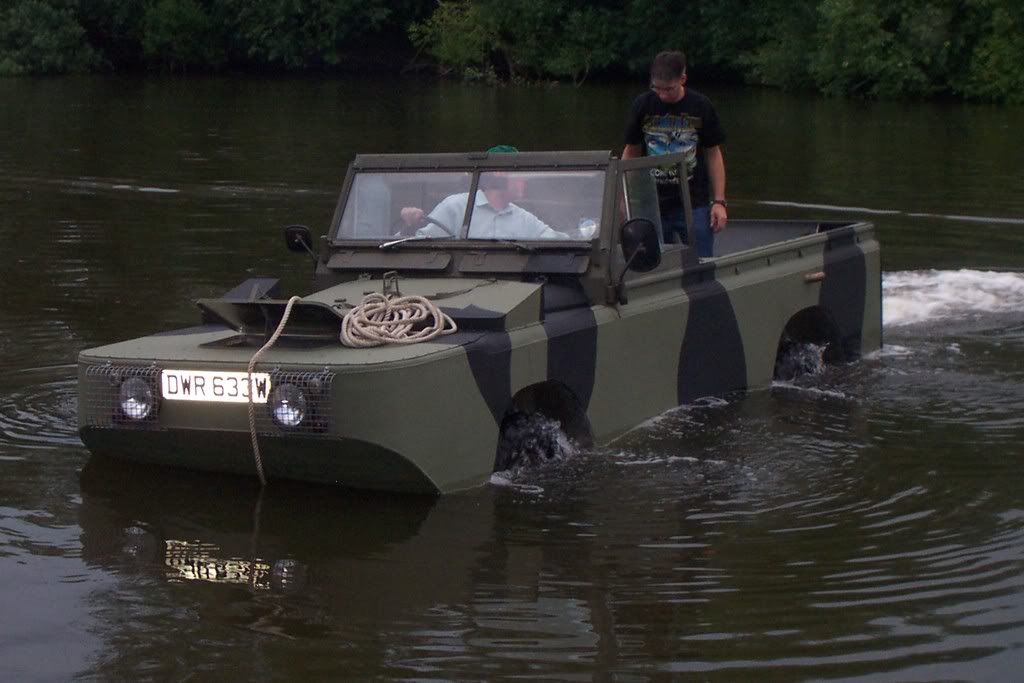
Before and after pics of tunnel welded over prop shaft. Axles and props run in the water same as a dukw
-
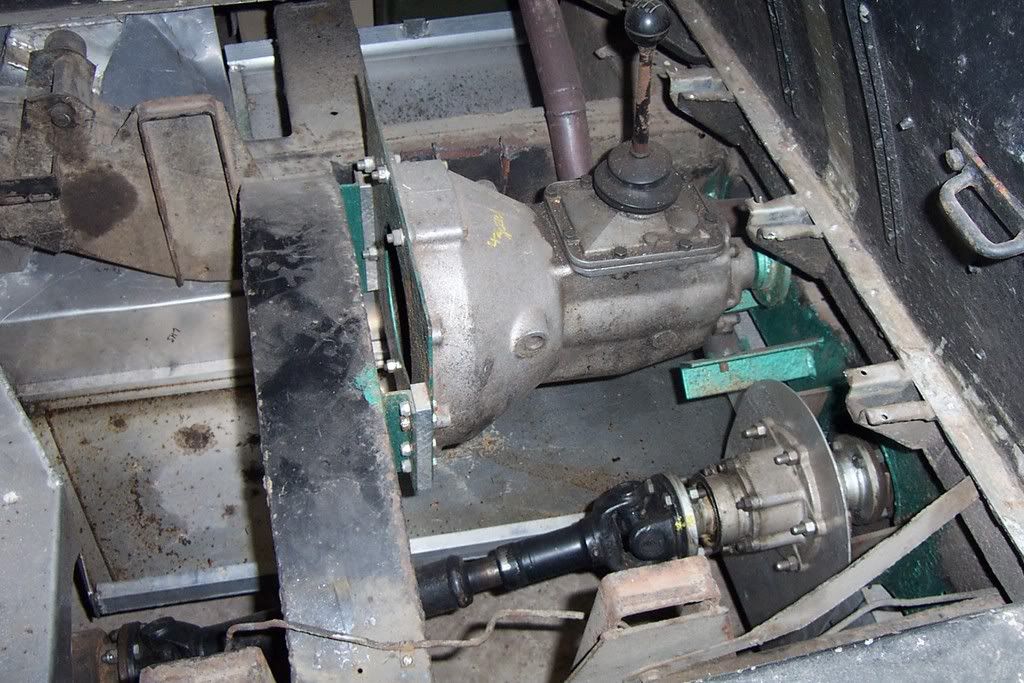
Diff cover all welded up and robin reliant gearbox fitted. The gearbox is driven off the PTO so we can alter the speed of the dowty but keep the engine running at best performance for cooling etc. Sheets welded to underside of landy can also be seen.
-
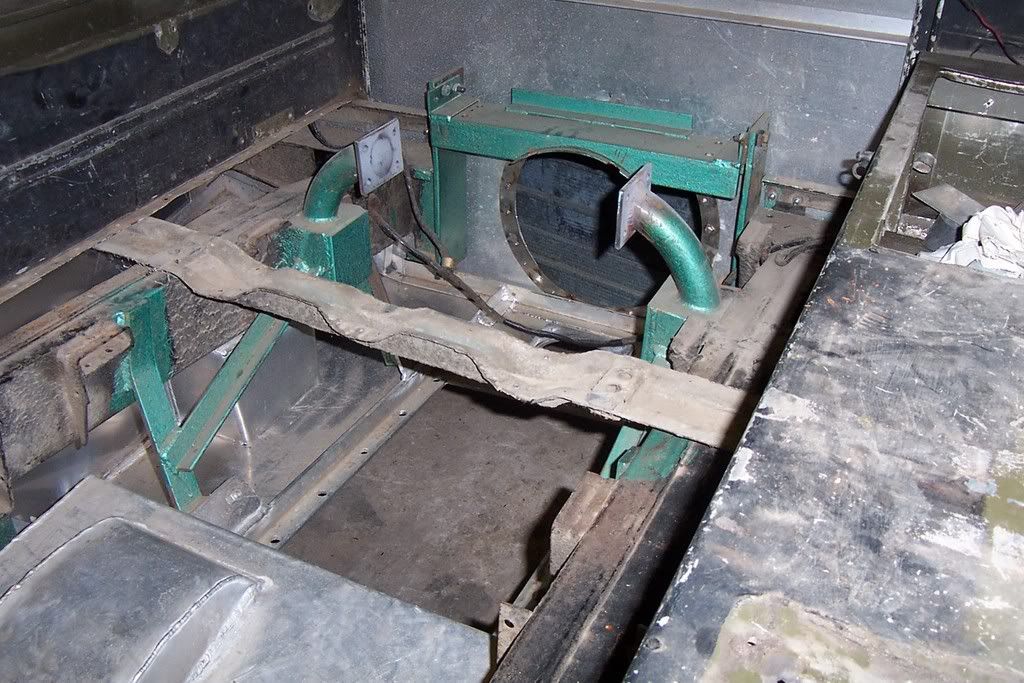
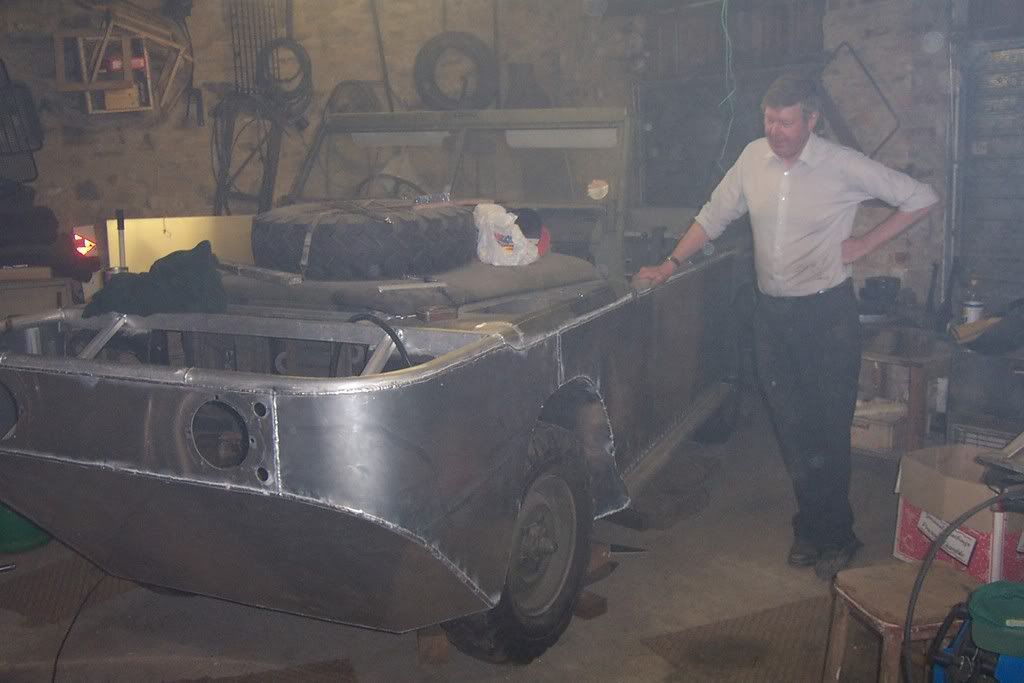
For those of you interested in the Landy amphib we built, this is a few weekends work into the project. Bottom of load bed cut out,rear cross member cut and bridge put in to go over the dowty pump out of a stolly that we used to power it in water. The frame for the pump can be seen at the bottom.
-
Hi Ivor,
Think quite a few of us would be interested in hearing about this build. :-D
Many Thanks,
Andy
Pics and build details of amphib net week, away at the moment. Ivor
-
Is there going to be, (or already) an article on how this vehicle was converted/built ??
Great to read it, if so........

Andy
I can tell you the story of how we did it and show the pics if you are interested.
-
109 amphib
-
http://www.polarinertia.com/july06/bunker01.htm
have a look at these, some of the best I've seen
-
http://i255.photobucket.com/albums/hh130/ivor_04/LRCchassis2.jpg[/img]
http://i255.photobucket.com/albums/hh130/ivor_04/LRCchassis.jpg[/img]
http://i255.photobucket.com/albums/hh130/ivor_04/LRCfrontbulkhead6.jpg[/img]
http://i255.photobucket.com/albums/hh130/ivor_04/LRCnearside7.jpg[/img]
Here are a few pics of the start of the LRC project. First you get your old humber box chassis that has been on a golf course for 25 years, you clean it up and then you start chucking 2 ton of 6mm plate at it, course it should be thicker in the real world, but we figured nobody would be shooting at us so we went for a bit less weight!!
-
Very Nice ,Ivor ...... You must have spent a lot of time to build it . Do you have any more photo's?
We borrowed one to copy, I measured all the sheet sizes and ordered the steel up. Took 6 Saturdays to cut it all to size and tack it up. Then 1 and a 1/2 days to weld it. Dave put the finishing touches to it himself. I do have a vid of us doing it but thats missing aswell.
-
http://i255.photobucket.com/albums/hh130/ivor_04/img001.jpg[/img]
http://i255.photobucket.com/albums/hh130/ivor_04/img002.jpg[/img]
http://i255.photobucket.com/albums/hh130/ivor_04/lrc.jpg[/img]
Here are som pics of the full "set"
-
:-) Great Pic's Ivor.
What did you build A/c on, Humber chassis or something modern ??
We had a spare FWD chassis that came off a golf course so used that. The original chassis on a LRC is slightly different but all measurements end up the same. Rear axle is a bit heavier aswell. Have got pics of building it but can't find them at the mo. Will post when they turn up.
-
Nearly got it right! The armoured car was for a mate of mine who had 4 humbers and he wanted one of these for the "set". We copied it off pics of one that the King and Queen had hence no turret. He died a few years ago and the collection got sold off, the PU that he owned was also at Beltring now owned by Tobin Jones but didn't get a pic with mine as he got flooded out and had to go home so missed our humber photocall. Alex is the one lacking hair!!
-
[iM
http://i255.photobucket.com/albums/hh130/ivor_04/Humbers.jpg[/img]G]
[iM
If this works, this is my humber staff car and the armoured car I built at Beltring this year.
-
A long shot,.............maybe's; Does anyone have any drawings/plans for this vehicle....
I don't have the plans,but I did build a copy of one for a mate of mine in 96. We borrowed one and I used it as a template. It is in Colchester now owned by Alex Scott. When I can suss how to do pics I'll post some.
-
Thompsons water seal, spray it on with one of those plant sprayer things and let it dry. The dogs doobries!! Take the canvas off to do it, my lawn is fully waterproof now!!
-
Finally found some NOS trakgrips for my humber, got them from a bloke in Kent ,he has more if you want his number drop me a mail. They are off ferrets but are in good nick.
-
I have a Humber Heavy Utility Staff car which is in need of new tyres and am aware of the bead problem beteen Brit rims and US rims. A freind of mine runs US marked tyres on his Humber PU without any problems. You can get them on with plenty of tyre lube and over inflate to press them on to start with. I think the main problem is with post war one piece rims as opposed to split or combat rims. I am going to fit some US marked tyres and will let you know how I go on.
Landrover Gallery.
in British Vehicles
Posted
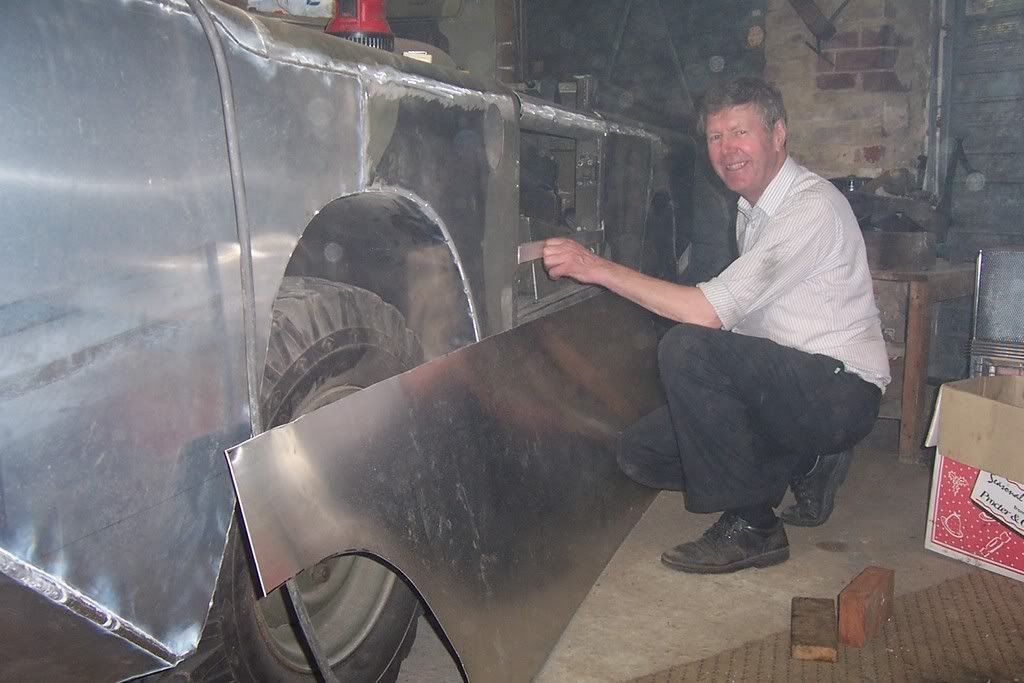
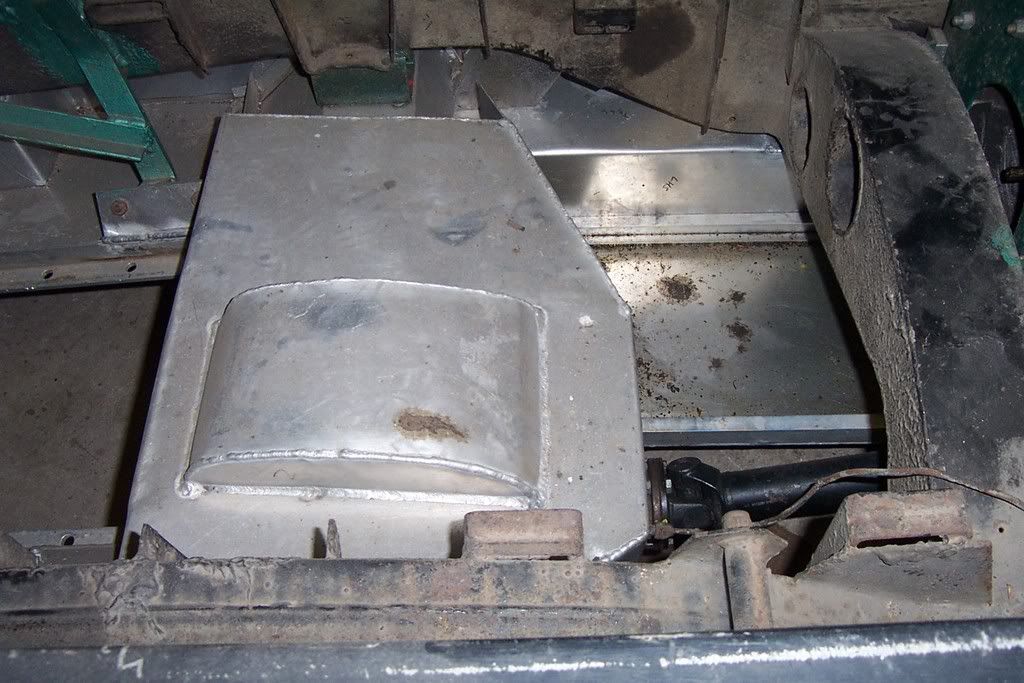
A coat of etch primer and starting on front fresh air intake, a lot of work in these last few pics