


NickAbbott
-
Posts
128 -
Joined
-
Last visited
Content Type
Profiles
Forums
Gallery
Blogs
Events
Articles
Store
Downloads
Posts posted by NickAbbott
-
-
These pictures of any use?
Nick


-
HCVS London to Brighton run on 6th May has the following info from the entry form:
"With 2018 being the closing year of the First World War commemorations across Britain, as previously announced, our 2018 Special Class will be for any members’ commercial vehicles built up to and including 1918. Whilst we are hoping to receive keen interest from the owners of WWI military vehicles from across the spectrum of Services and types, we welcome members non-military entries of any type built before 1919."
Nick
-
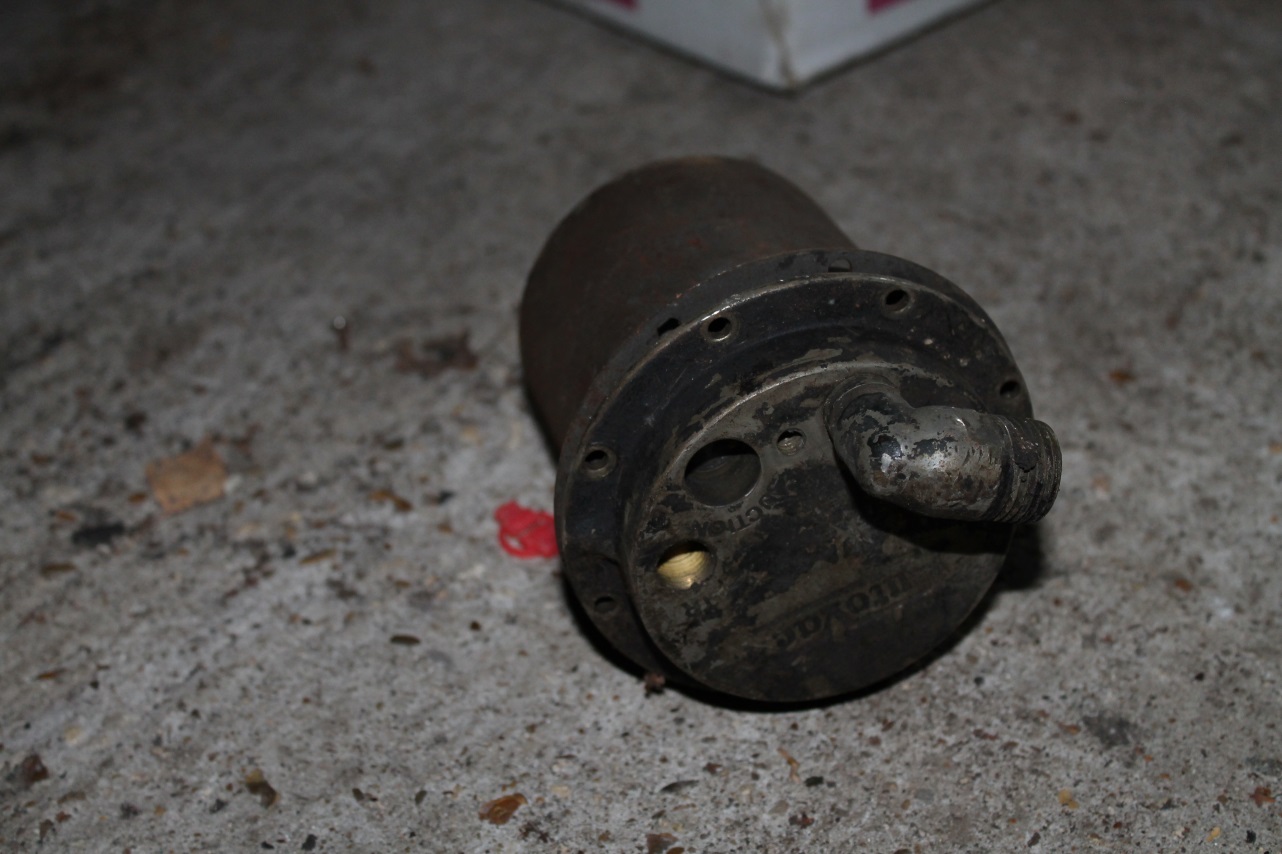
I have one of those filters fitted to my early Matador aswell - pictures show it without the felt inside.
Nick


-
Not really got any updates that are worthy of posting pictures - lots of little bits have been cleaned up and painted, but restoration has slowed down quite considerably over the last year, mainly due to family commitments. Hopefully be able to start progressing again in the new year.
Nick
-
This is what the Manual says - tippers and tankers are different though.
Nick

-
This is what it tells you to check the value.
Nick

-
I also have a few Militant manuals, and each one has a different diagram in for the air brake system!
Is this the component that you are looking at?

If it is, the drivers handbook has a procedure to check it's operating correctly - it's main use seems to be connected with the operation of the trailer brake lines.
Nick
-
I sent them an email about the event - never got any response!
Nick
-
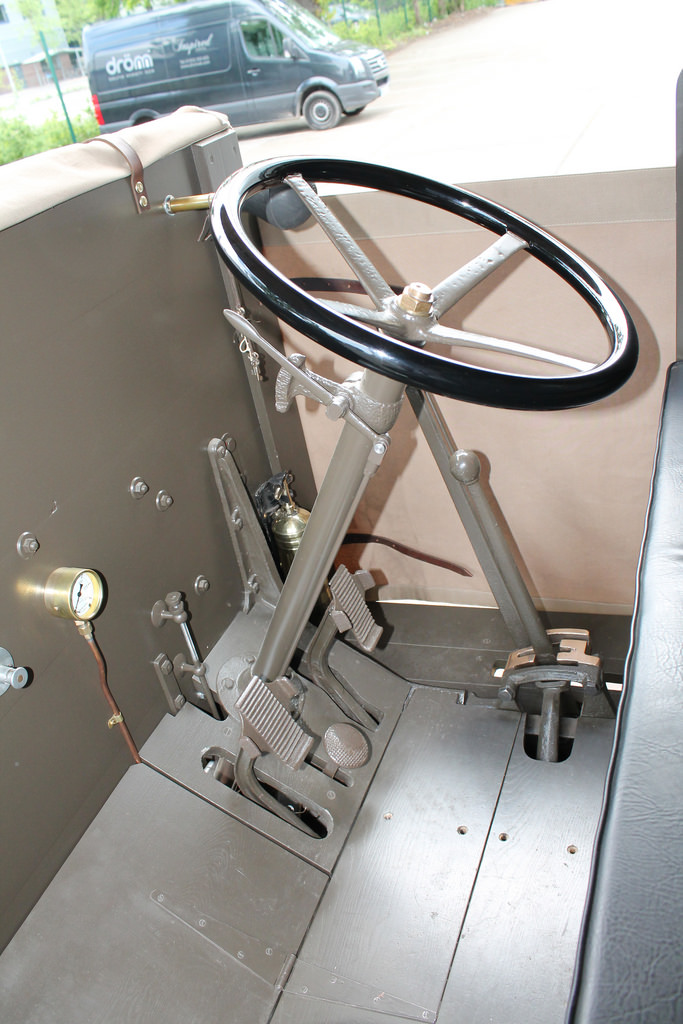
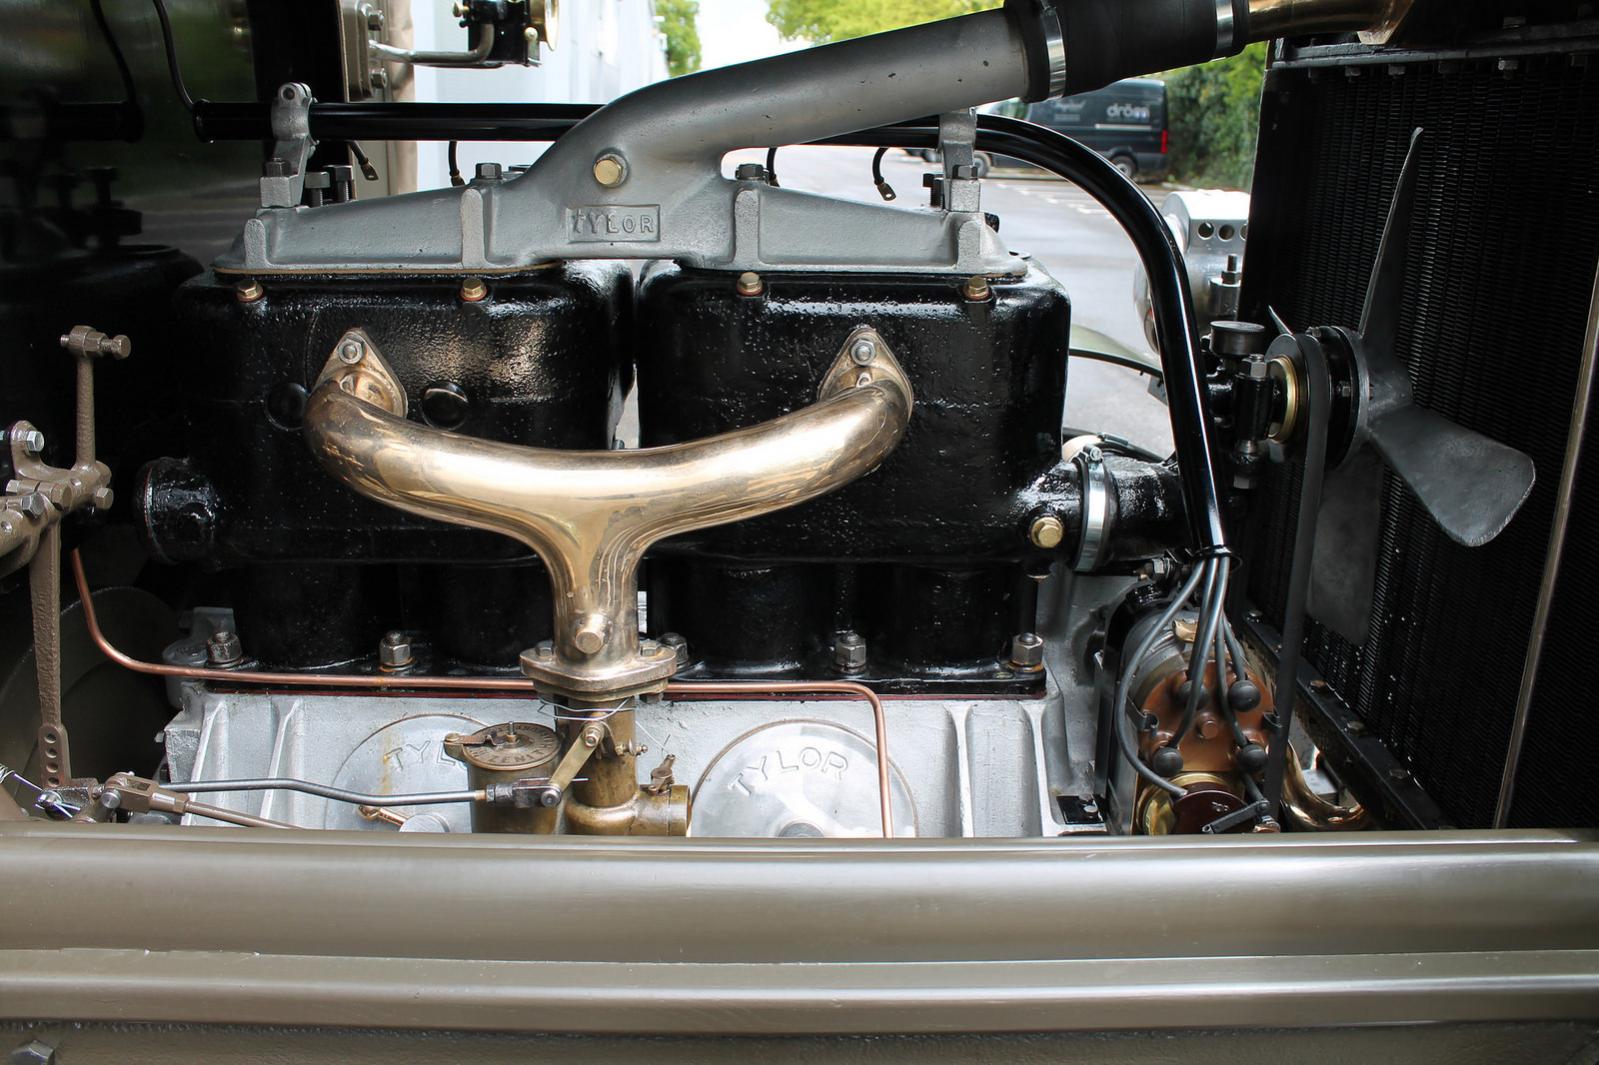
Here are a few comparison pictures for you - they show the cab and controls of an AEC Y type, and the Tylor engine, which has the inlet and outlet manifolds on different sides, and an AEC engine as fitted to an AEC S type, from the early 1920s - this looks to be very similar to the one shown fitted to the chassis. I suspect the engineless chassis is definately a Y type, but not sure about the other one.
I would recommend the "AEC Vehicles - origins to 1929 by Brian Thackray" book, as there is a lot of useful info in there.
Nick


-
This is what it should have, according to a document I have.
Nick

-
This had been "weathered" for a film role - I think it looks really effective. Just dirty water apparently.
Nick

-
It looks like one of these Doug - for starting in really cold conditions. This is the picture from the drivers handbook.
Nick

-
Doug, Here is the drawing for the badge, as fitted to Matadors and Marshalls - they should be a matt brass finish. The chrome ones fitted to other AECs are also brass under the chrome. I guess it's easier to paint the radiator and badge in one go, without taking the badge off than it is to take it off! It's only the early ones that are supposed to have badges fitted, but I suppose the radiators got swapped around, so any of them could have ended up with a radiator with a badge on.
If you look at the note on the drawing towards the bottom, it says that sheet steel, rejected by the canning industry would also be suitable if properly protected - I've never seen a steel AEC badge.
Nick

-
This is the number painted on the sump of my Matador (it's the only number I've found painted on the engine), I don't know if it refers to the part number of the sump, as someone else suggested, as mine is fitted with an A193 petrol engine, and I don't have a parts manual that covers the engine, and the diesel engine sump is not the same. The engine colour is also light grey, as can be seen in the picture.
Nick

-
Hi Doug, what numbers did you find on the sump - I found some numbers painted on the sump of mine when I cleaned all the grime and muck off it. I can't find anything they correlate to though. I'll try and find a picture.
Nick
-
Here are a couple of pictures of the engine in Sebs Y Type:


Nick
-
Not immediately useful, but worth having, I managed to get a spare engine over the winter - it's basically a kit of parts, but will hopefully yields some useful bits. The most useful being a newly re-profiled cam shaft. The current cam shaft is severely warn towards the back of the engine, as it only appears to be lubricated from the front.

AEC A193 petrol engine in kit form!

Two spare blocks:

Also included was a spare carb

Spare magneto - this is an earlier type to the one fitted, but will be useful anyway.

And spare autovac assembly
I'll hopefully be able to make more progress over the next few months.
Nick
-
 1
1
-
-
Done a bit more over the winter, but after finishing painting the front of the chassis, the weather hasn't been that good for painting, so not a huge amount of visible progress. So here is a picture of the chassis, once the hubs were also painted.

Radiator also coming along nicely - been pressure tested and had a long drill run down each of the tubes to make sure they are clear.

Cleaning the sump has revealed a painted number on the bottom - not sure if it's the sump assembly number, as I don't have a parts manual for the petrol engine, and the petrol sump is different to the one fitted to the 7.7 diesel engine.

Nick
-
This is from the Matador drivers handbook, and shows I think most of what has already been written - the hawser needs to be tight when the wheel is on the scotch to stop everything moving, and that the scotches are intended to be used both ways up, depending on the surface they are used on.
Nick

-
Thanks for the info Dave, I'll give them a try.
Nick
-
We replaced the bush's and brush's on the starter and the same goes for the Dynamo brush's and bearings, also the connections on the coils need insulating with some shrink sleeving and a good polish up of the internals.
Where did you get the replacement brushes and bearings?
Nick
-
This advert has the contact details for where I got the tyres - not sure if he has any more, but he had quite a lot at the time.
http://hmvf.co.uk/forumvb/showthread.php?43647-1400-20-Goodyear-Bargrips-NOS-18-Ply
Nick
-
I have those, in red, fitted to my land rover - I had to replace one as it had faded quite considerably, and the MoT man didn't like it, as it was more orange than red. The one you have there, it hasn't faded really badly has it - doesn't really look like it, but I've only ever seen them in red as well!
Nick
-
I have only uploaded a very small selection of pictures, I have loads more if there is something specific you want to see.
Nick


AEC O854 Coles Crane
in Blogs of MV restorations
Posted
The standard Matador track is 6' 3 1/8", according to the manual, and the back is 5' 10 3/4" - will have a look at the 6 wheeler manual and see if they are the same - the front should be the same, but not sure about the back.
Nick