


samc88
-
Posts
31 -
Joined
-
Last visited
Content Type
Profiles
Forums
Gallery
Blogs
Events
Articles
Store
Downloads
Posts posted by samc88
-
-
Goodto know you sorted it and its a nice simple fix

Having a 2.5NA in a series 3, turbo systems are a bit of a black magic to me along with electrics haha
-
Blue smoke can be caused by a couple of things (not just turbo). The most common one is the valve stem seals let oil pass down to the combustion chamber.
Another could be rings of course allowing oil to pass
As much as it would be a pain you could try running the engine sans turbo and I it still emits blue smoke you know its one of the above. Valve stem seals are pennies and easy to fit but is a head off job
-
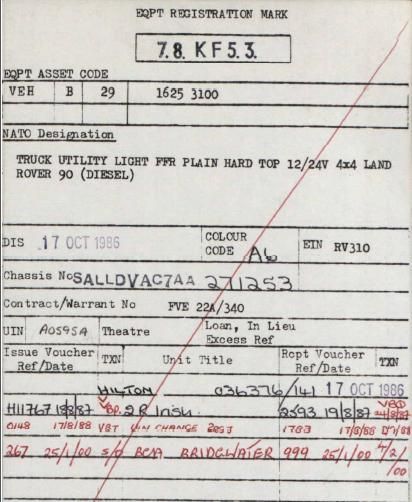
I did get a merlin report but the only thing i got was a vehicle spec sheet
-
Evening all,
Got the history of my brothers FFR 90 and seems it was with 2 Royal Irish Rangers in 1987 and then with 2 Royal Green Jackets from 1988 till 2000. My question would be is there a way of finding out a bit more detail into its history like where it was based with those 2 regiments over the years it served with them?
Sam
-
As above, rebuilding my brothers FFR 90 which served in Gulf War 1. Its going sand but would like to know what they actually looked like in service (markings, equipment etc). Can find bugger all on google, plenty 110s and leafers but not so much 90s, any pictures and advice would be greatly appreciated,
Thanks,
Sam
-
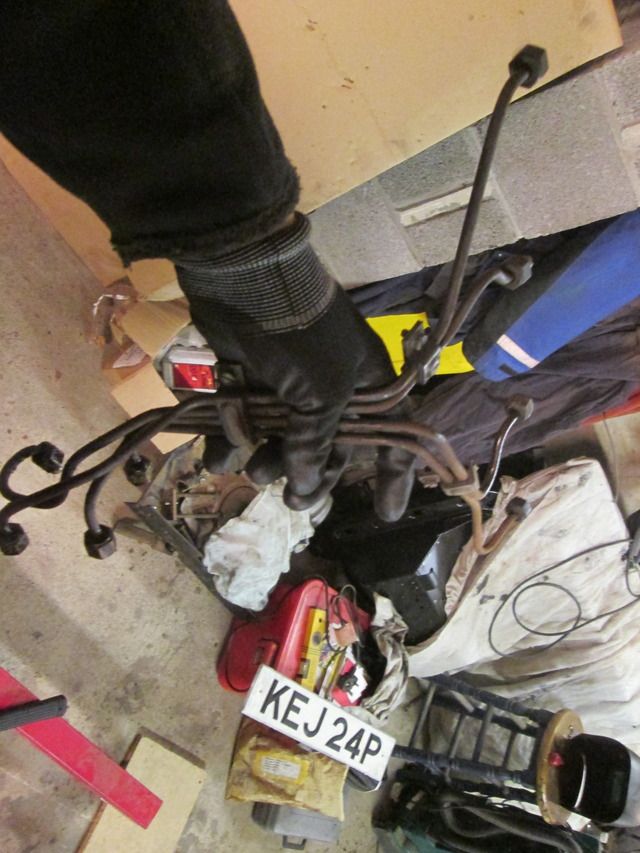
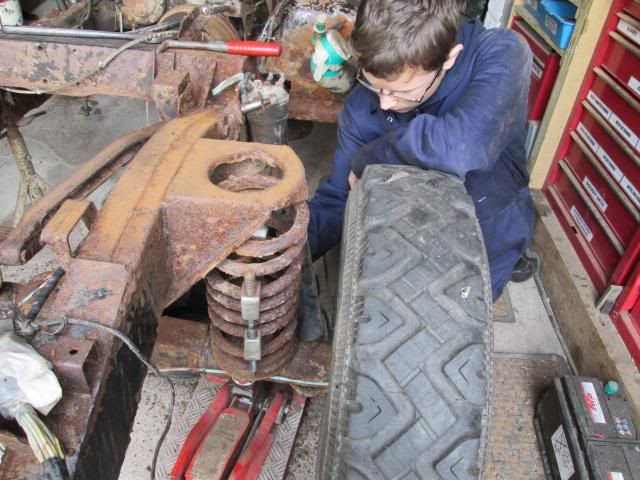
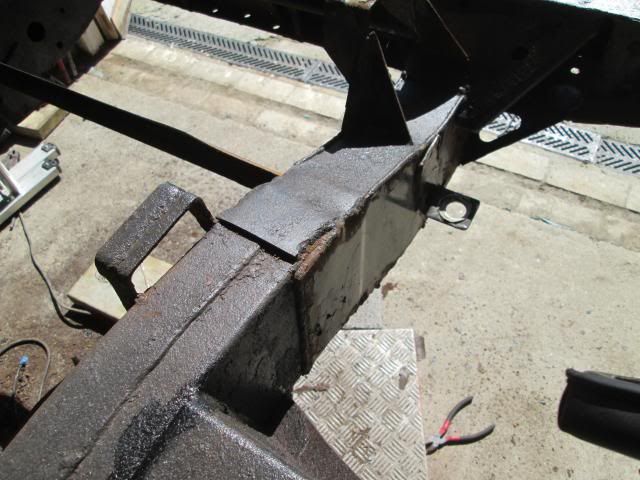
Next job was to move the rear lifting bracket out of the way so as to gain access to the banjo bolt for the head oil feed. This was done with a 10mm socket.

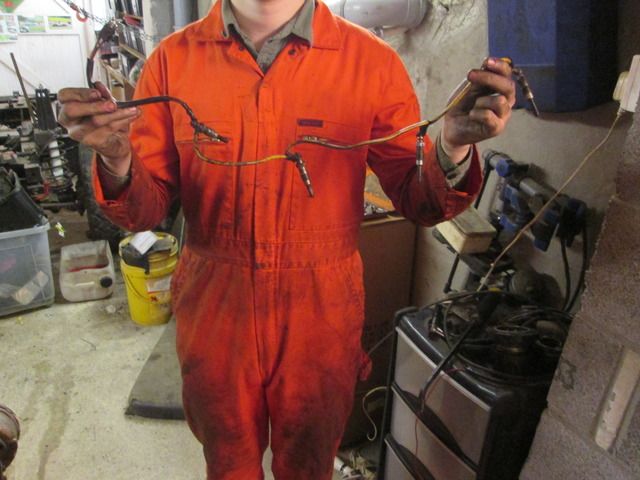
Next an 8mm socket was used to remove glow plug wiring
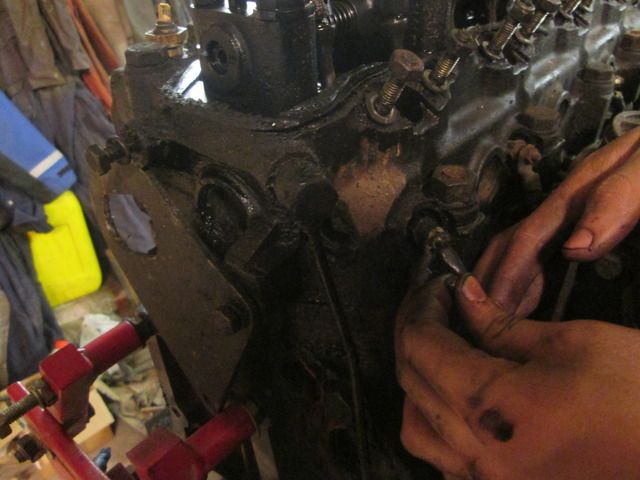
Then the oil feed pipe was removed using a 19mm socket on the 2 banjo bolts, one in the head and one in the block
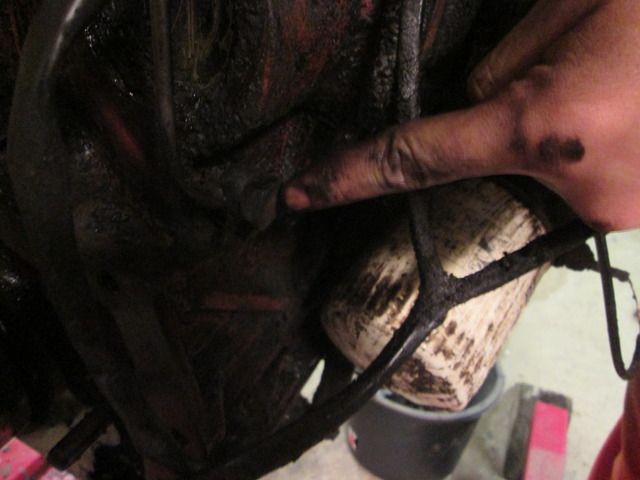
The glow plugs were then taken out with a 13mm dep socket and strung together with the wiring, at least now we cant misplace anything
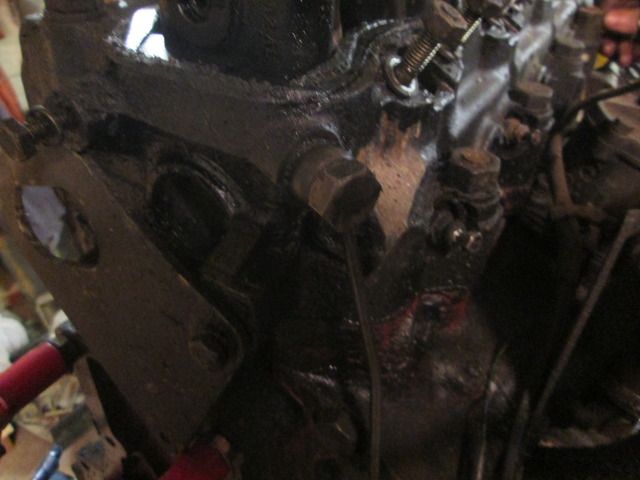
Next the 13mm bolts holding the rocker cover to the head are removed (the smaller more gold looking bolts seen in this pic)
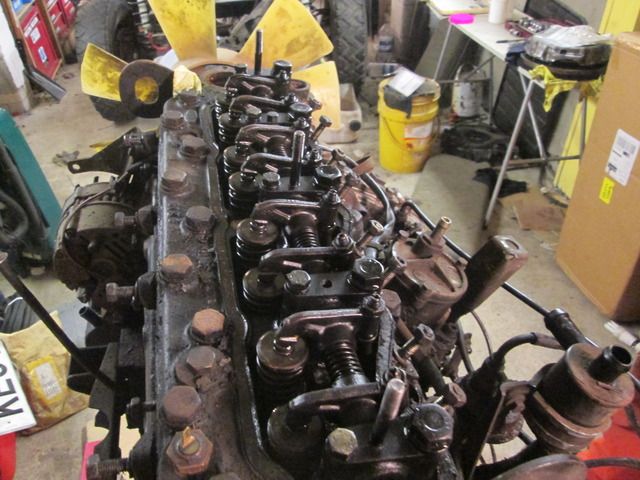
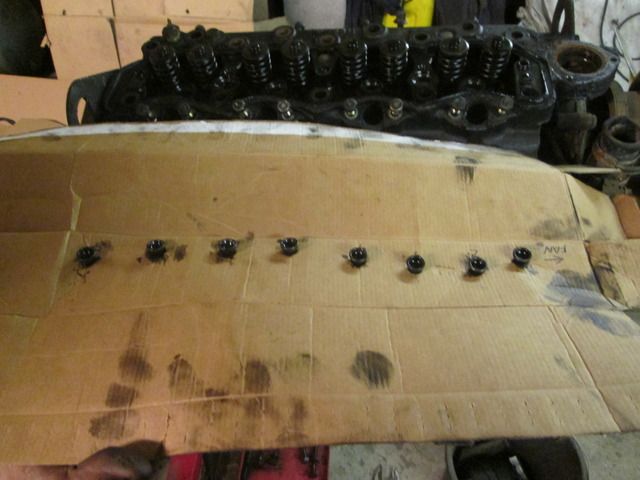
Once this was removed, the pushrods were taken out and placed into cardboard in order numbered 1 - 8. It is important not to get these mixed up
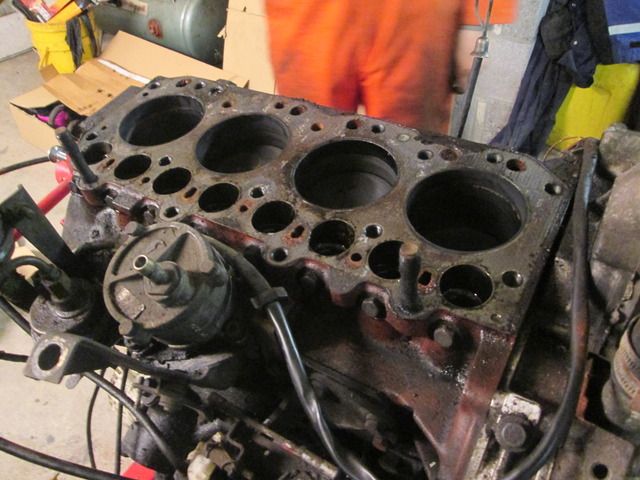
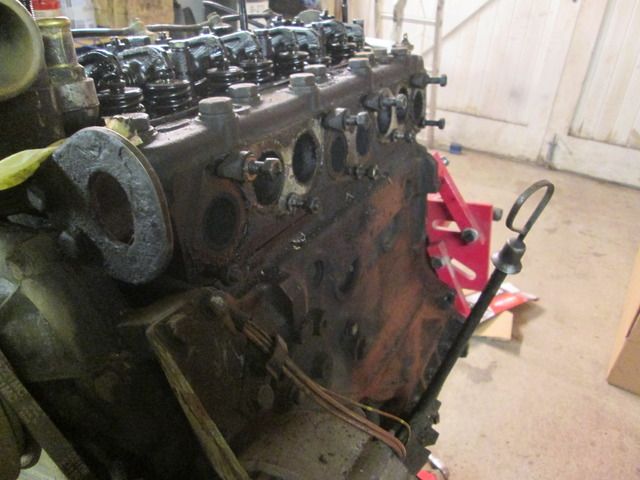
Once everything is off, the head bolts can be slackened off evenly going by the book to get the order for bolt removal
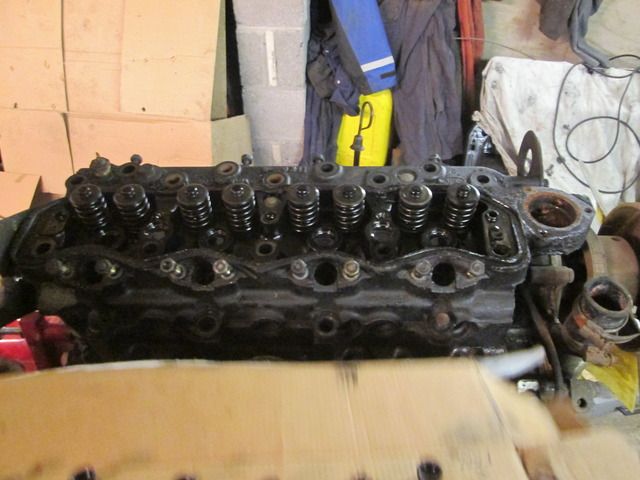
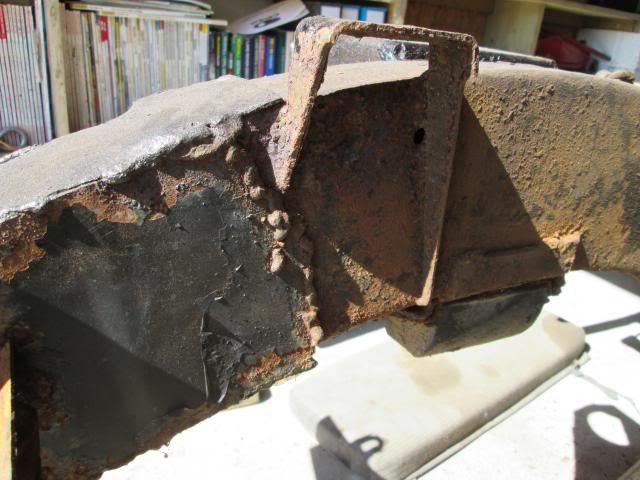
Can then be lifted off, ready to be serviced later, the hotspots have some large cracks going through them and theres a lot of crap in the water jacket
-
Stage 2: Removing the cylinder head
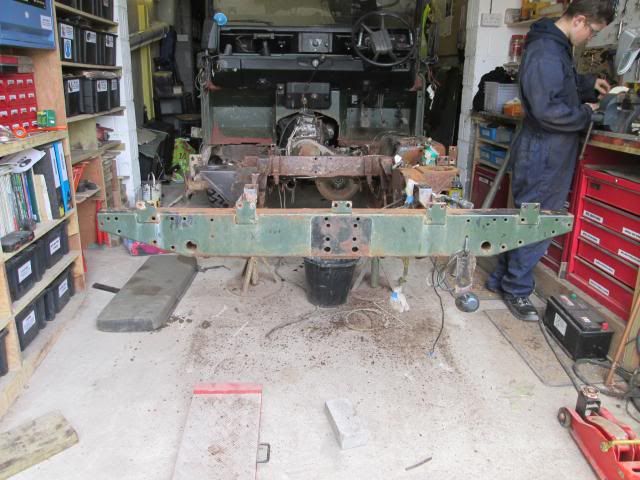
More progress, the engine stand was still set up for my 2.5N/a when that was on the stand which made life simpler. (Needs turning round in the photo)
Next up is to remove the breather pipes. These werent standard jubilees on this one, instead they were 6mm hex
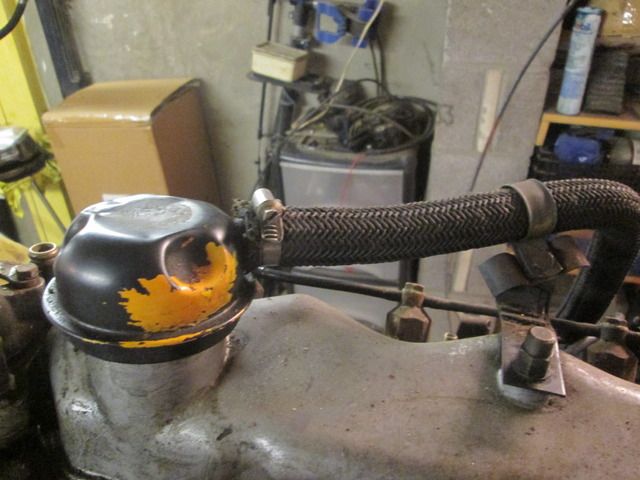
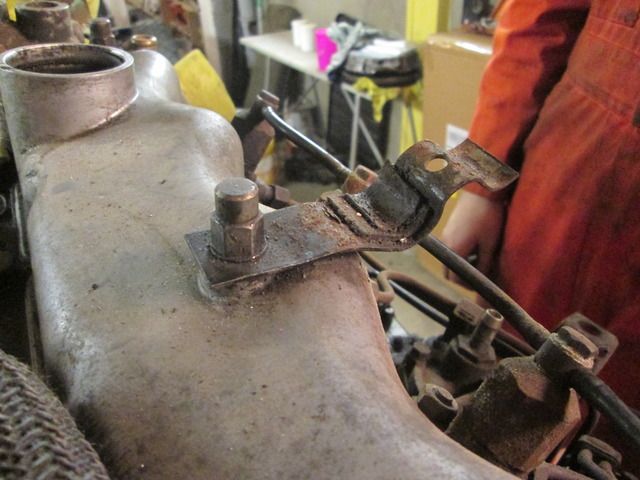
The pipe going to the filler cap is held in place with this bracket which is removed with a 10mm socket/ spanner
Once these were removed, it was time to remove the rocker cover nuts with a 13mm socket. The rear one holds the other breather hose in place, and the middle one has the bracket on it for the heater pipes and filler cap breather hose
Rocker cover should then lift off. If its stuck a tap with a mallet usually frees it
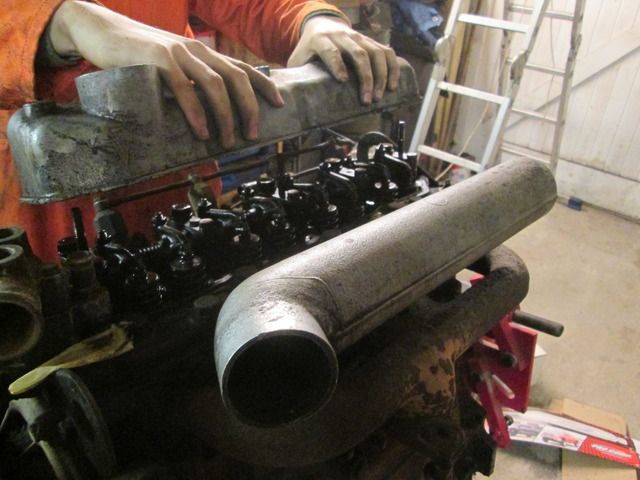
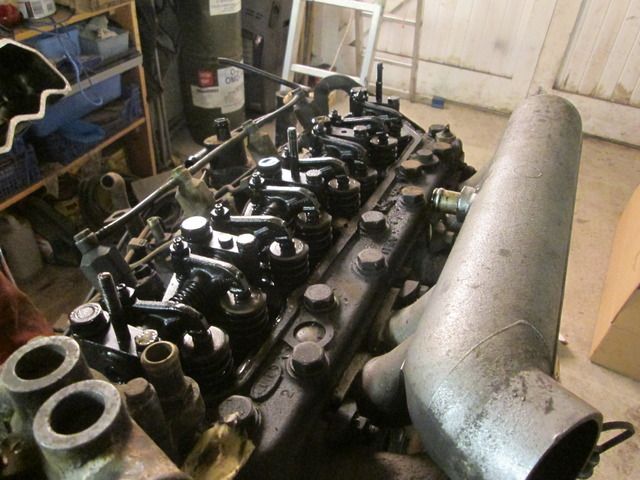
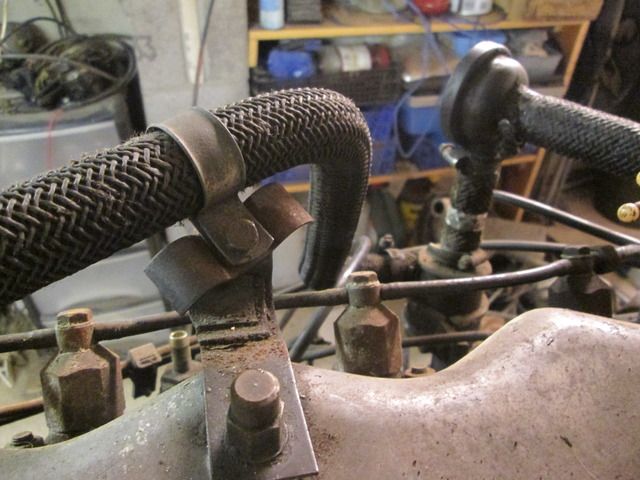
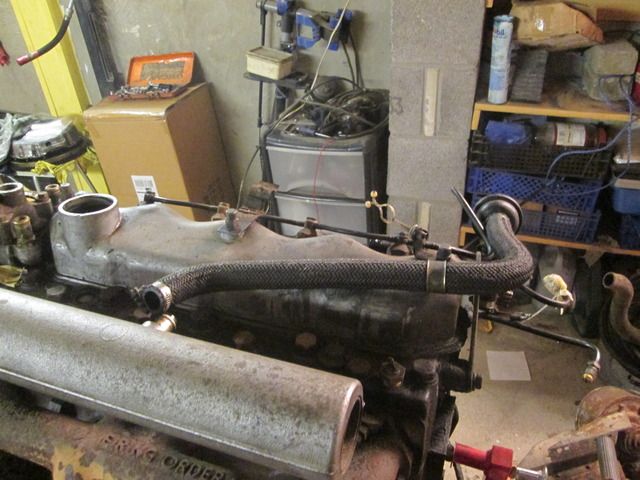
Next step was the exhaust and inlet manifold which are removed using a 13mm socket on an extension bar
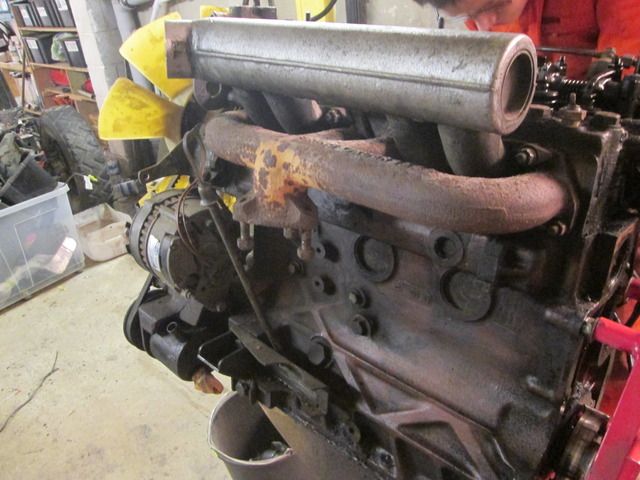
The image below shows the clamps on the top and just nuts at the bottom
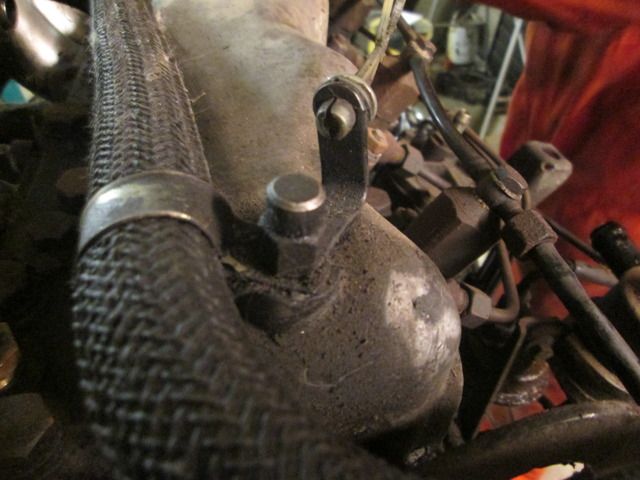
Next up was the thermostat housing. This is removed through using a 10mm socket on the three bolts on top. These are very long and thin so if they're corroded then they may snap, luckily these came out easily
Then it was the turn of the injectors, first the pipes were removed

For the injectors, the spill rail was first removed using a 10mm socket to remove the banjo bolts. Next a 13mm socket was used to remove the two injector bolts. To get the injectors out the bore, a brass drift was used on the underside to knock them up gently, then a pry bar was used to lever them out being careful not to damage anything and being careful that it doesnt fly out the bore and land on the floor.

My brother has since taken his injectors to college to test, all are fine cracking off slightly above 135 bar but one has a little injector dribble so will be having a look at that later on
-
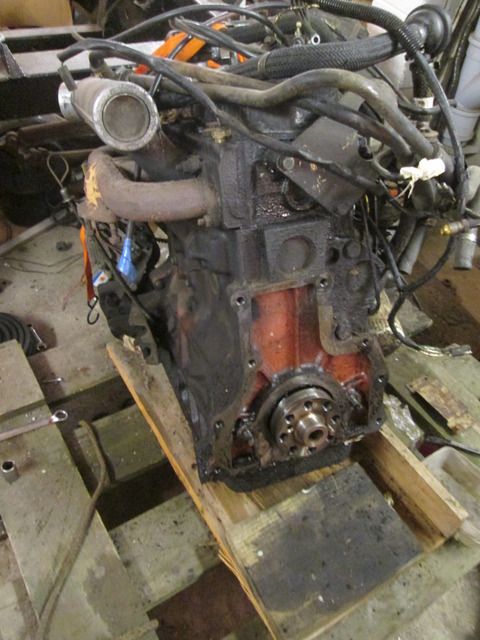
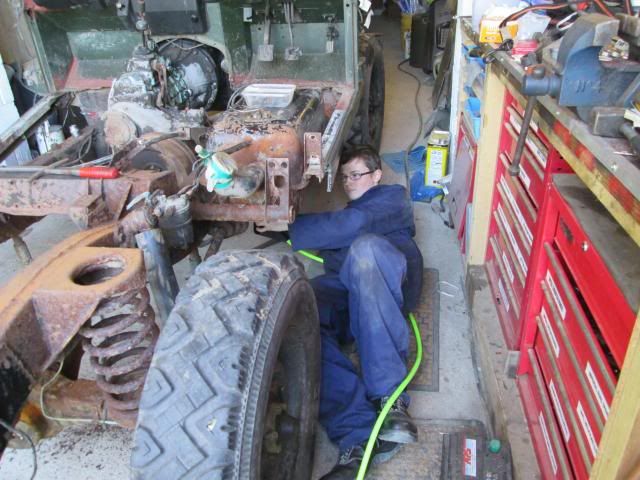
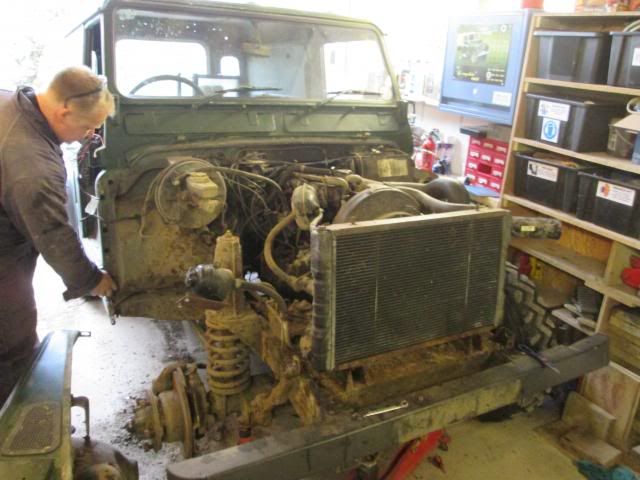
As some of you may know Im currently doing an ex-FFR 90 with my brother and its come to the engine rebuild stage so thought Id share what we've been up to and hope it helps some of you or interests you at the very least.
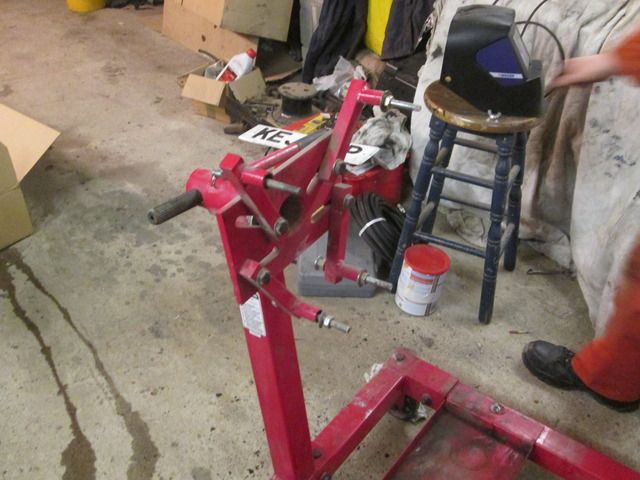
Stage 1: Getting the engine ready to lift onto the engine stand
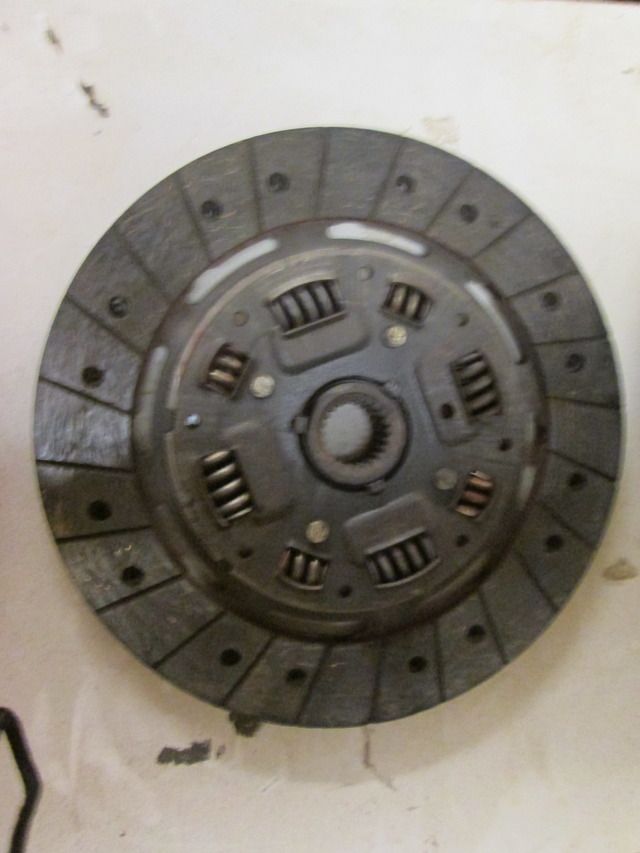
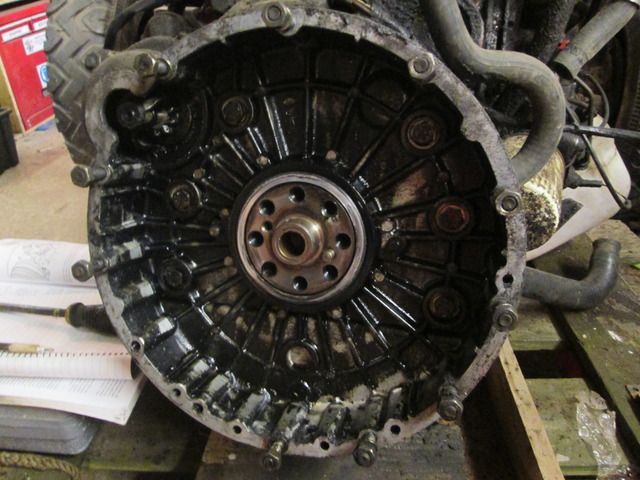
Before doing anything, mark up the clutch and the flywheel so you know which way it goes when re-fitting. It makes life much easier if there is a chance of different hole centres in the clutch - just something I learnt through my own experience in work. The first thing to take off will be the clutch assembly
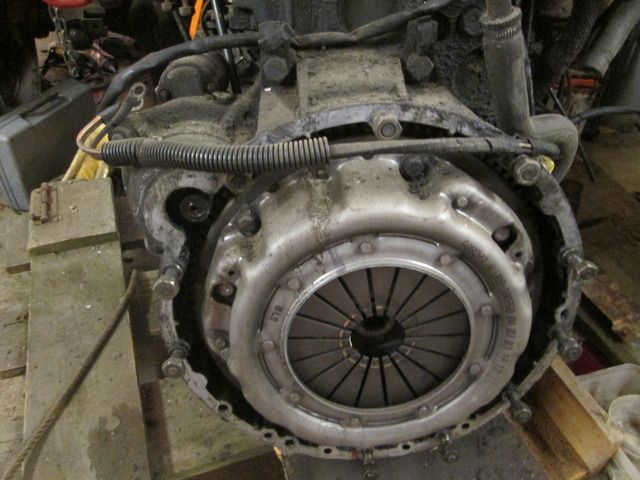
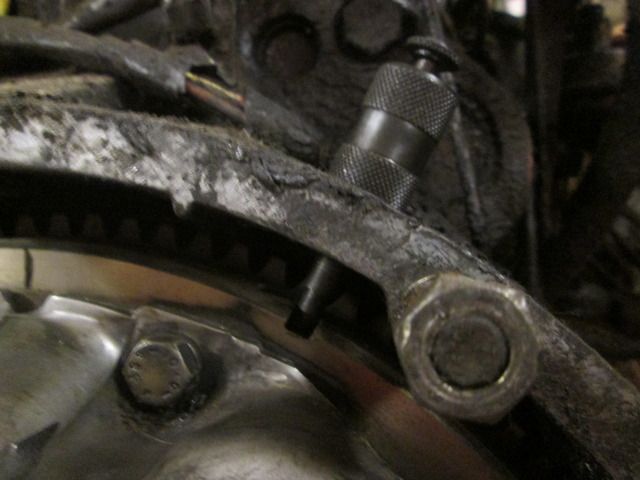
As the engine spins when you try and crack open a bolt, the proper timing pin was placed into the flywheel to hold it in position to stop the engine turning. (you could also either have a socket on the crank pulley or jam the ring gear if starter is removed)
The 6 retaining bolts were then removed using a 13mm socket
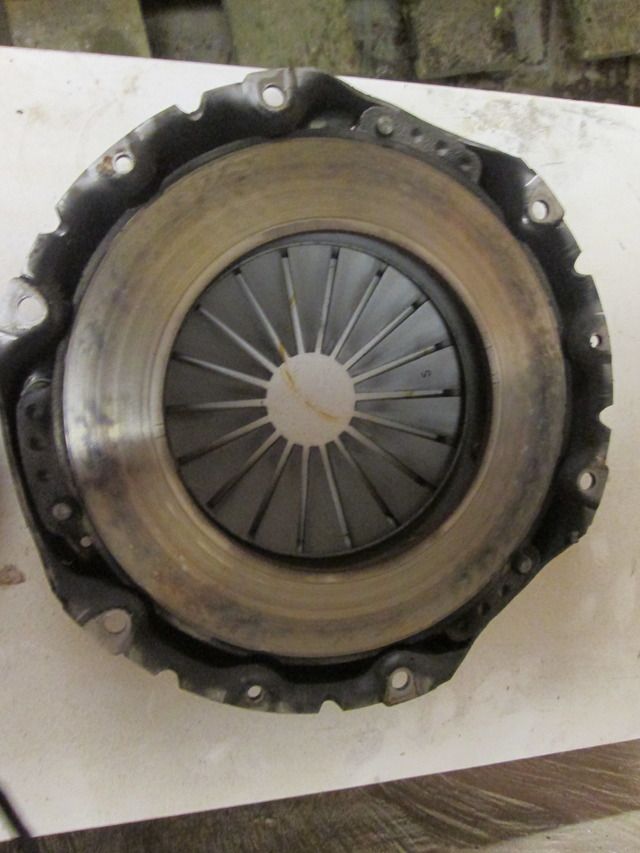
Once the assembly was removed, the bolts were put back in place so we dont lose them.
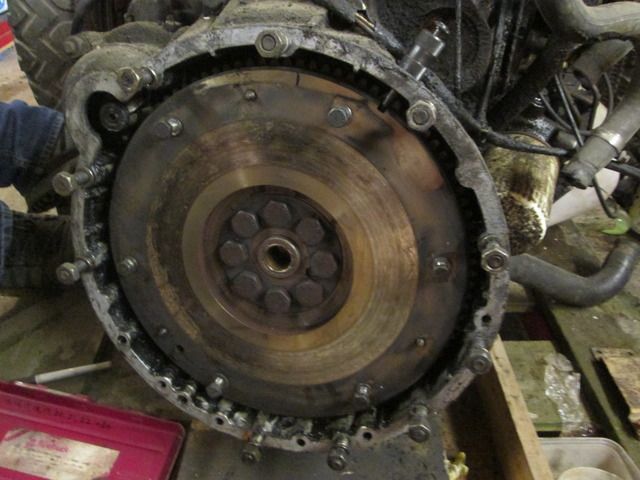
The flywheel bolts were removed using a 22mm socket on air driven impact gun, note the big retaining plate/ washer behind the bolts along with the dowel meaning the flywheel can only go back on one way
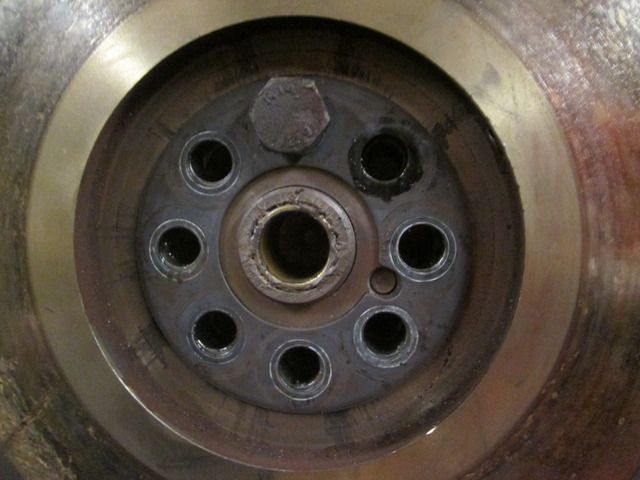
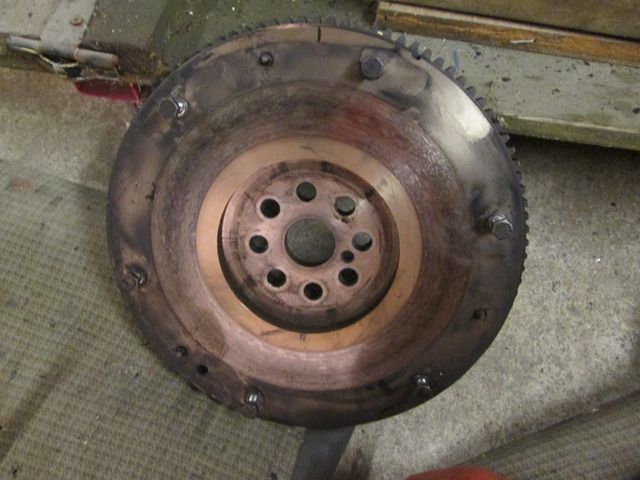
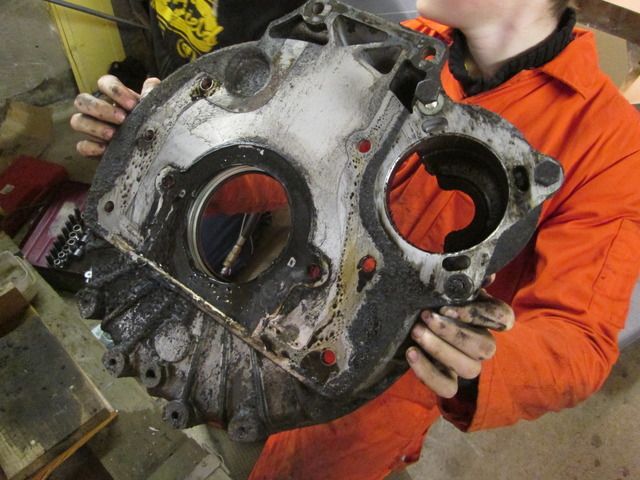
Revealing a rather oily flywheel housing, comfirming my suspicion that the rear crank seal is passing oil
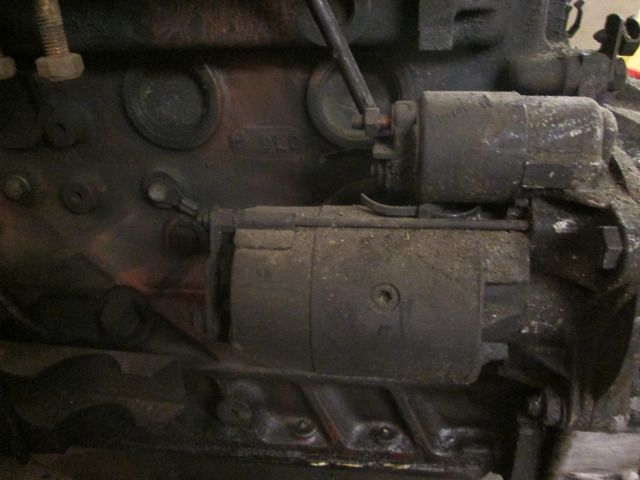
Before taking the housing off, the starter motor was removed using 17mm socket and spanner. The earth bolt for the cable from the block to the motor is removed with a 13mm socket.
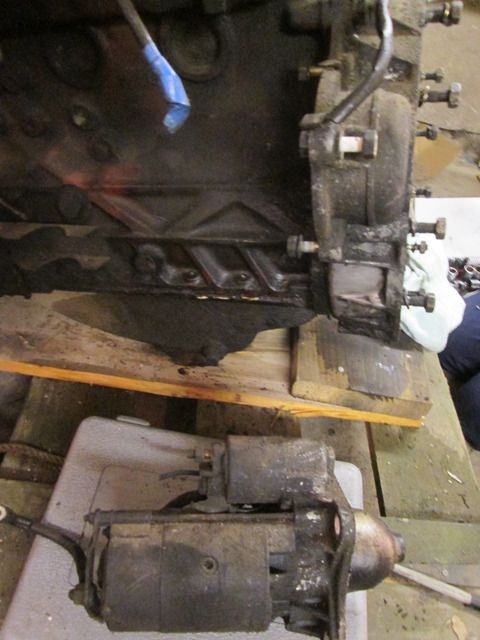
Next the flywheel housing itself is taken off, again with 17mm socket. There are 6 bolts inside the housing and 2 above. These 2 bolts have a bracket on them to hold wiring. These are also longer than the other 6
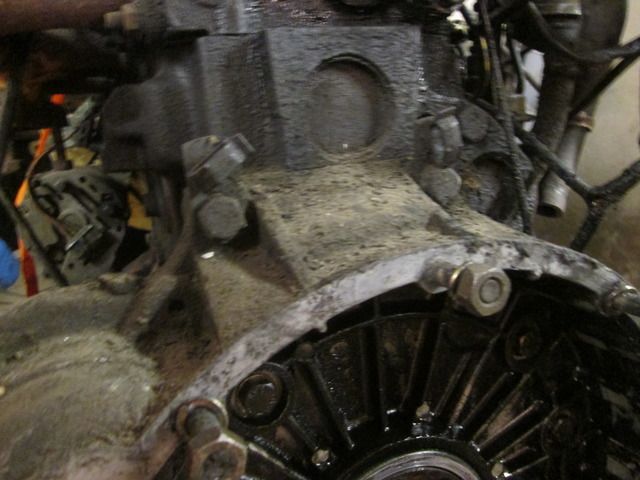
Its all pretty oily
Ready for lifting tomorrow evening
Tools needed:
Clutch assembly - 13mm socket
Flywheel - 22mm socket
Starter motor to engine block earth bolt - 13mm socket
Starter motor - 17mm socket and spanner
Flywheel housing - 17mm socket
-
Congratulations on sorting the o-ring
You may have to bleed the system now though if its run that low on fuel. I cheated a bit on mine and jump started to the golf and had my dad keep it cranking while i cracked the injector unions until diesel came through. The starter gets quite hot though so you have to give it a break occasionally. The 2.5 seems to take forever to bleed through for some reason
-
Sent one off, thanks for that
-
How do you go about getting a merlin report? Im interested to find out the history of our 90. I know it was in the first gulf war but would be good to know what units its been with over the years
-
Thanks for that I have a friend of a friend who apparently refurbs them so hopefully sorted there but I am still considering a tdi transplant...
Hopefully you'll find this useful, it's a thread I did when I rebuilt my 2.5,
maybe the pictures will be helpful
https://www.landyzone.co.uk/land-rover/sams-2-5-n-a-diesel-strip-down-and-rebuild-thread.242186/
-
In case you didnt know, its a Lucas CAV DPS pump. Theres tonnes of stuff on the DPA as found on 2.25s but I couldnt seem to find a lot on the DPS otherwise I would have attempted to do it myself. Got fed up of it in the end and got a recon part exchanged
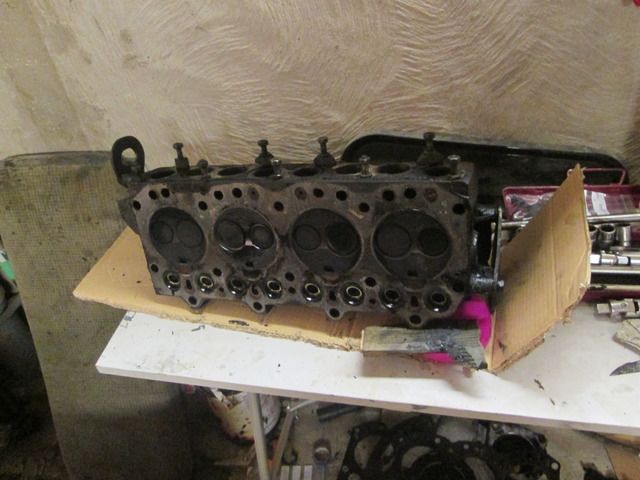
Oh also, its worth whipping the head off to check the precombustion chambers, I found mine ran well but they all had massive cracks running across them
-
Here we go again! Looks a good project, good to see another landy project
Im afraid you'll need a recon injector pump if its leaking that bad from the body. Can you see where it leaks from? The one on the 12J in my series leaked badly, in the end i had to fork out and replace it
-
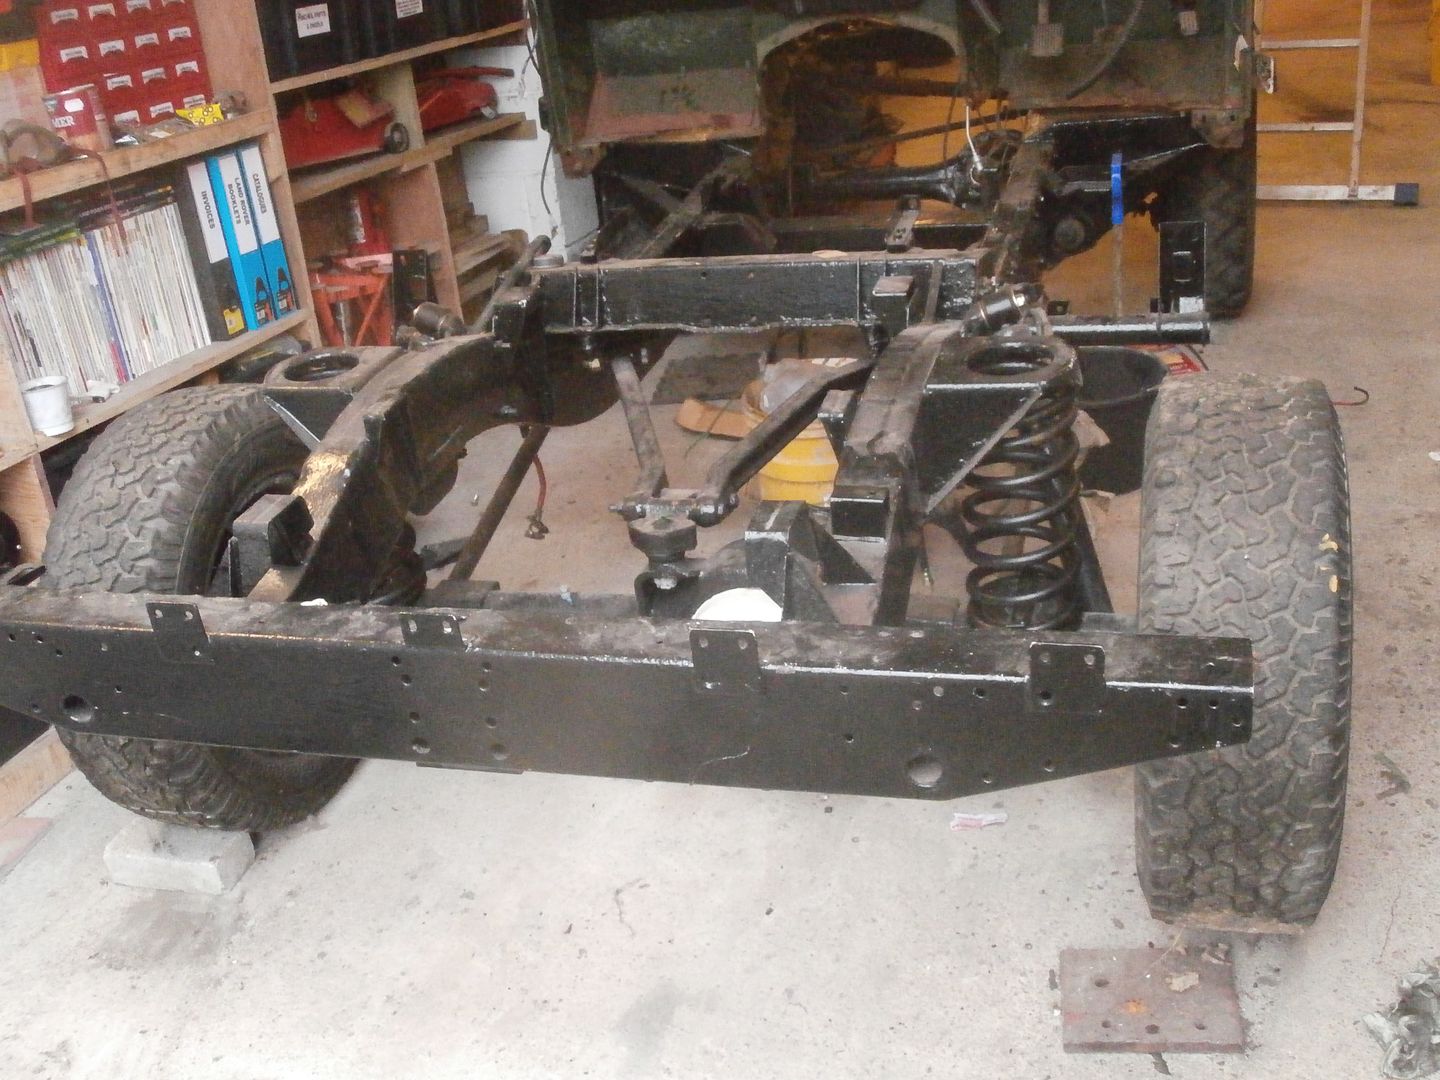
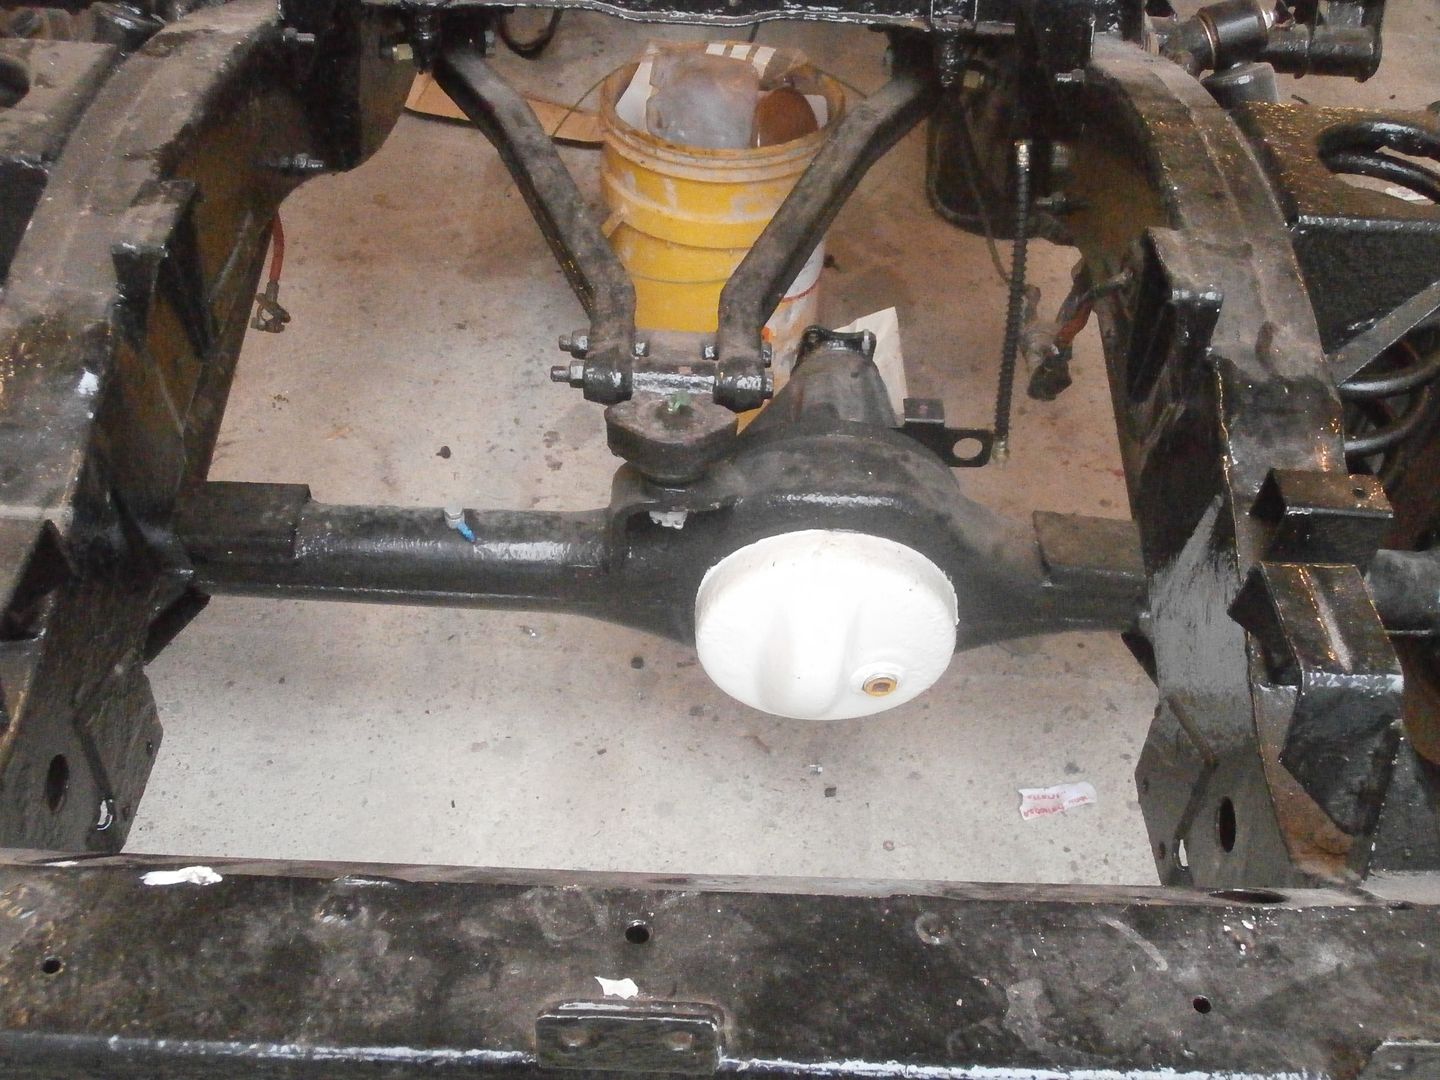
As promised, pictures!
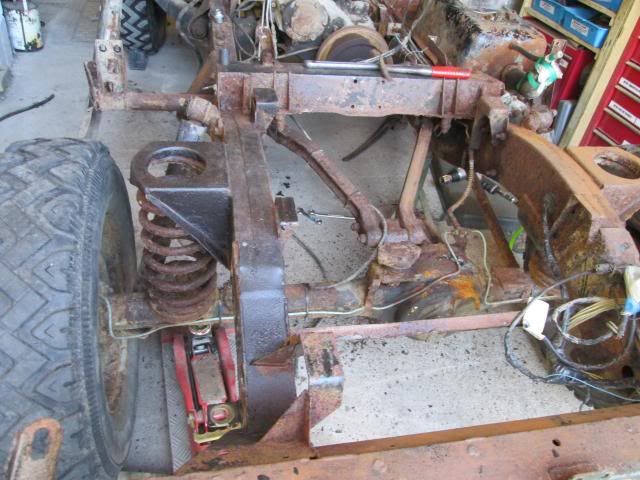
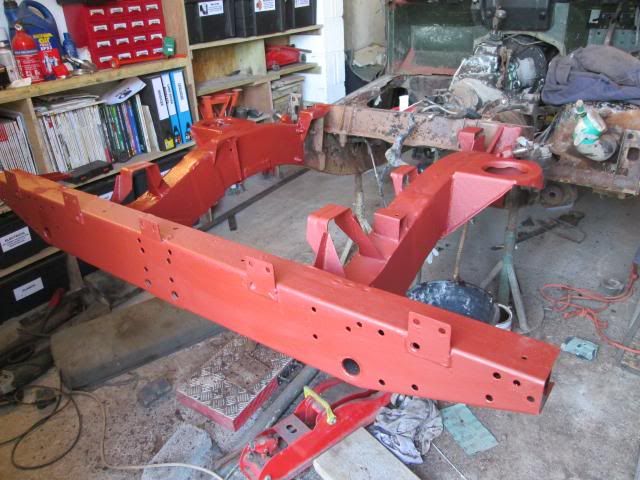
General shot of painted crossmember (Wilkos black gloss radiator paint)
Shot showing the white painted diff pan, the convoy light gets reflected off this
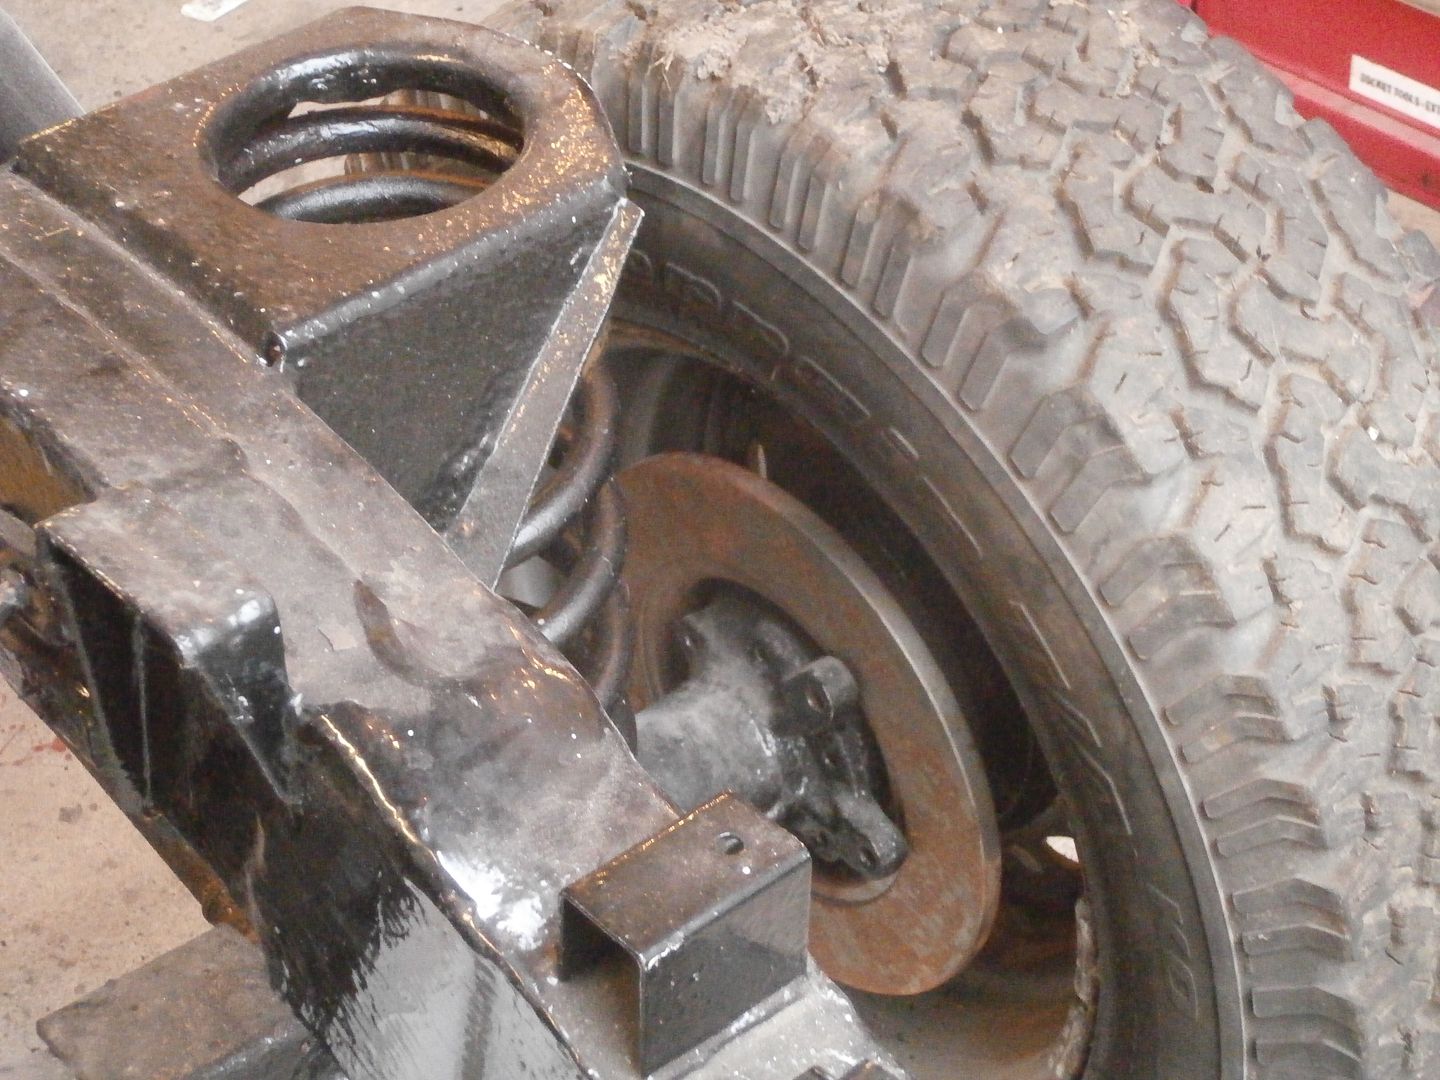
Rear disks, just got to fit callipers and mud shields to the rear
New rear shocks
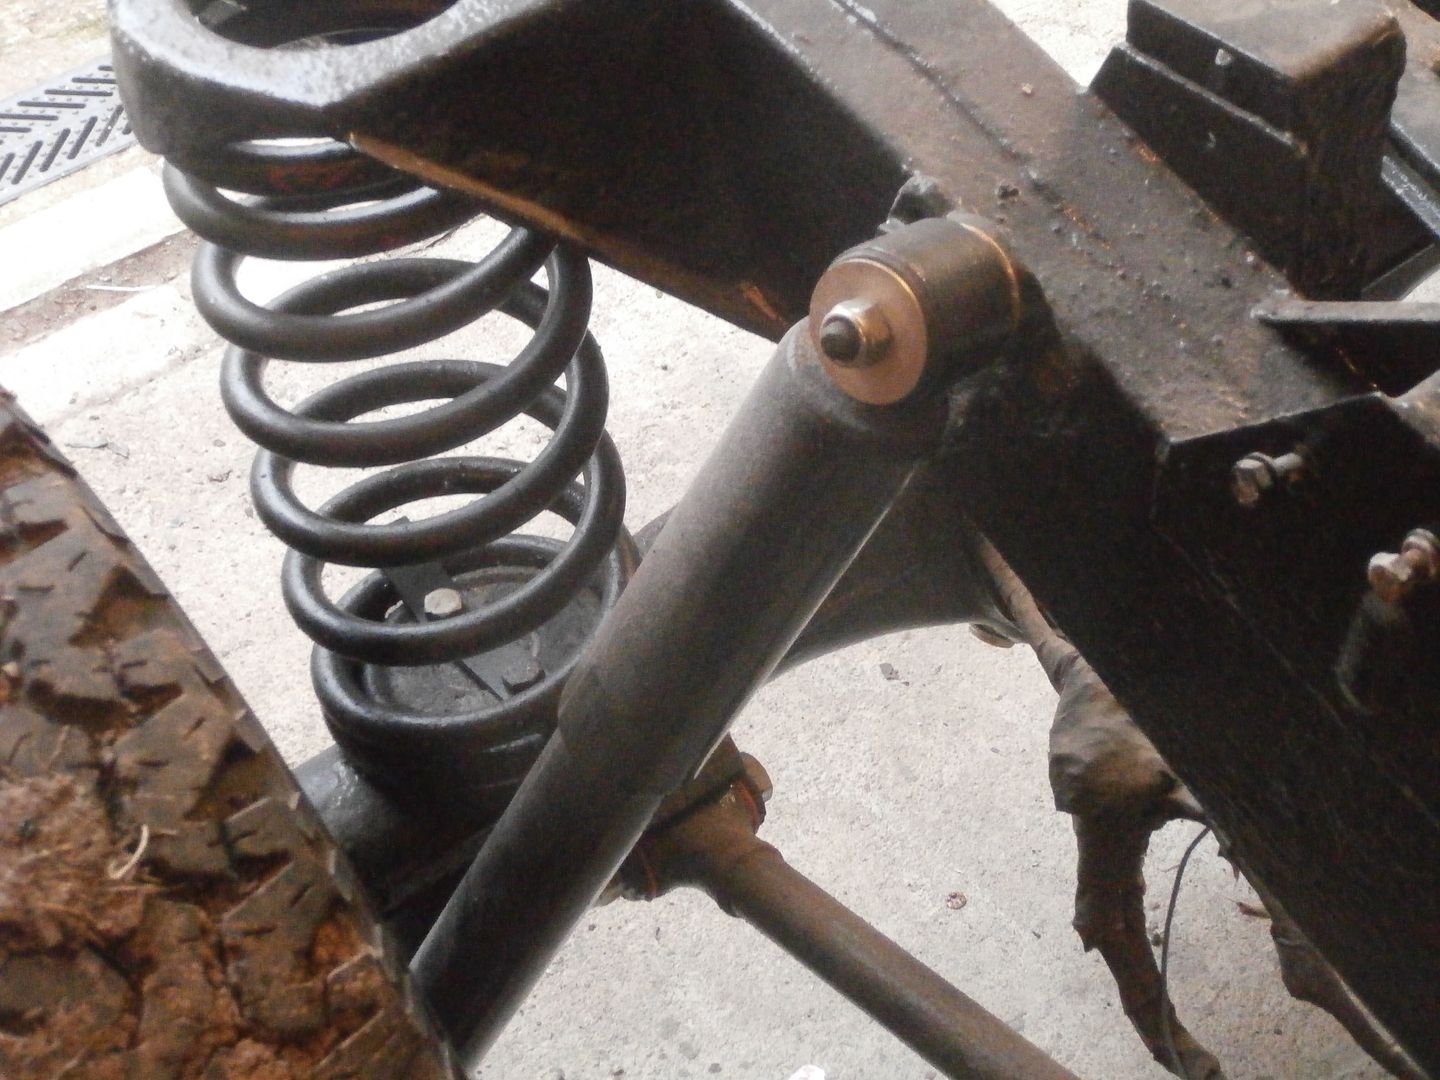
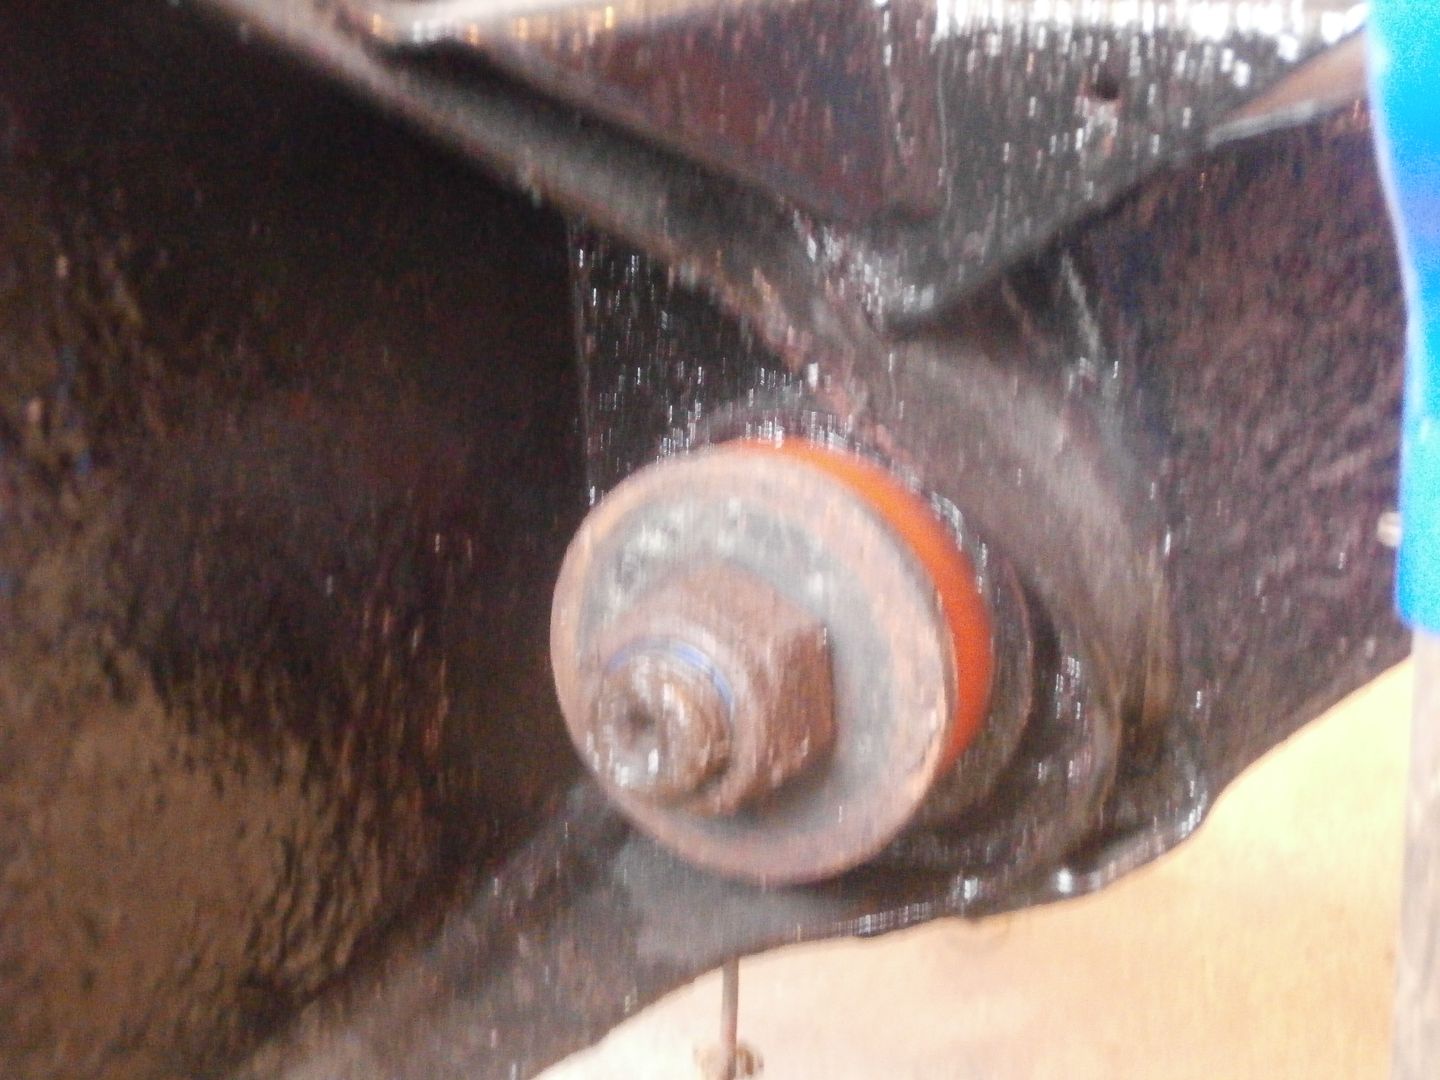
New polybushes have been fitted all round, here is a shot of the panhard rod bush
New shocks and turrets for the front
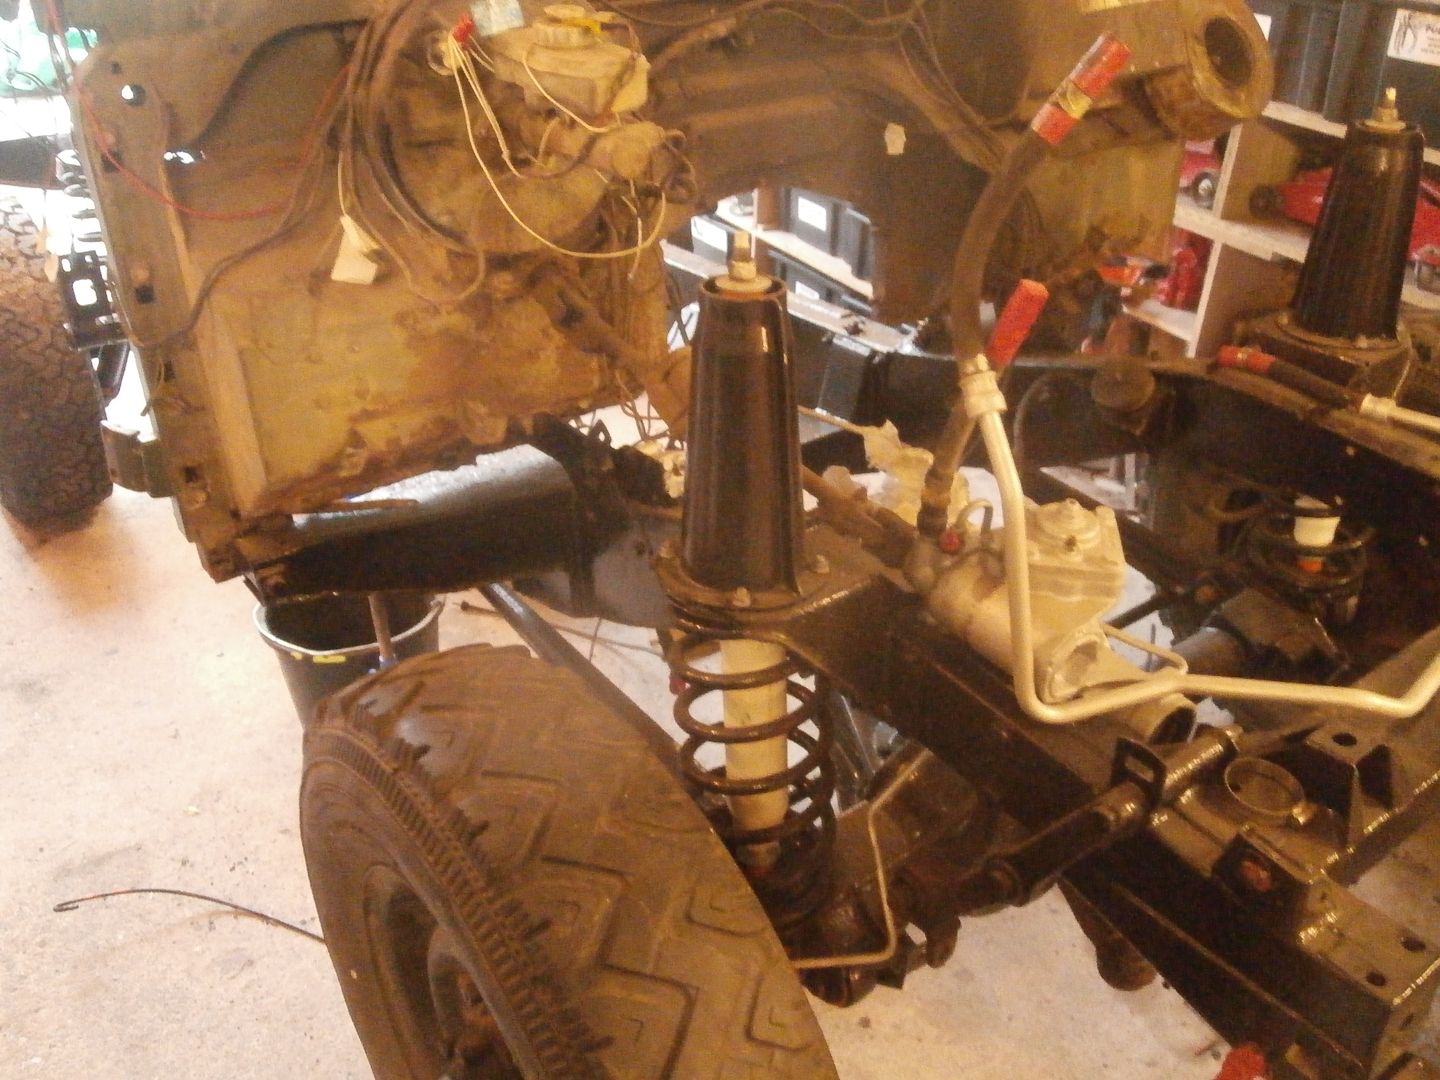
General shot of the front, next project will be the bulkhead, lots of welding to be done on this one
-
Bump: Not been much happening to this due to working on the s3 and other stuff in the house as well as my brother doing A-levels (its his 90 and im reluctant to just dive in without him as much as id like to)
Jobs done since the last update:
Rear axle from a disco has been fitted after swapping the drive shafts and diffs from the 90 axle
Front axle has been cleaned up and painted and new shocks have been fitted
Will get some pics later

-
Probably a daft question but why do you call the series 2 a Rover Mk 8? Was that the military name for it?
-
I'll certainly have a look at that! If i find more info I'll just take it to work and cross drill it there
The transfer box we've got spare is "reserved" for my dads td5 when he gets round to it
 Its still going to be nippier than my series anyway haha
 The proportioning valve stays the same as does the master cylinder (what I've been told anyway). Its a straight swap.
I assume you mean the A-frame ball joint? Yes thats getting swapped and a new set of poly bushes are getting put on (they came in the post today
) -
If I were you I would ensure that the gearbox is improved. Work didn't want to go for the improved gearbox when we did the 90 relife. I think longterm it was a mistake. That pesky cross drilling of the main shaft is worth it.
I understand where your coming from. Great work, enjoy reading your progress
R
Interesting, what other differences are there with the improved gearbox?
Cheers
-
Well it is a restoration but an improvement in the mechanical side of things to make it more liveable with as its to be a daily driver. If we didnt have a spare dsco axle knocking around we woudnt bother. The 2.5 N/A is staying as it is. Everything else is staying as it is I think but that depends on my brother as its his vehicle.
As an aside, my series 3 88" has a new chassis (well it was new 10 years ago, at least 3 engine changes (has a 12J in it now which I really like despite its fuel pump leak), I grafted a servo to a defender brake tower to make the brakes actually work and a gearbox swap once i rebuild my spare (I have a thread for that too on the landyzone forum (sorry to spam) http://www.landyzone.co.uk/lz/f6/1976-series-3-rebuild-202564.html ). It is an interesting discussion though as to what counts as a restoration in the true sense of the word rather than swapping new bits for old
Anyways, thanks for the comments folks
-
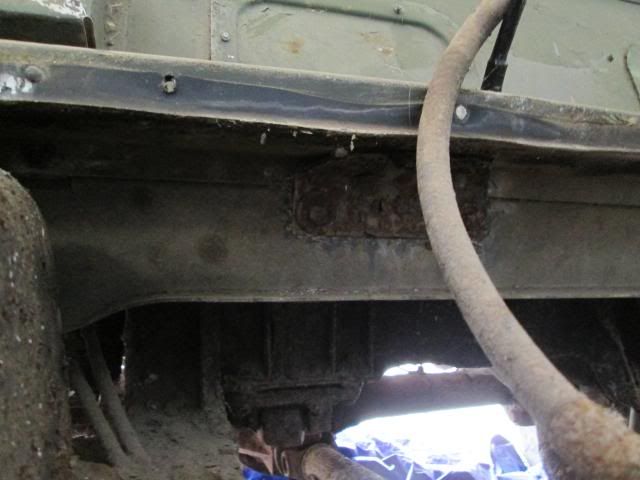
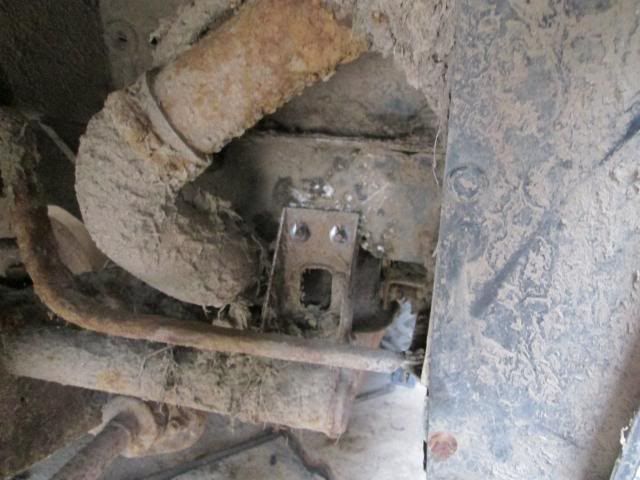
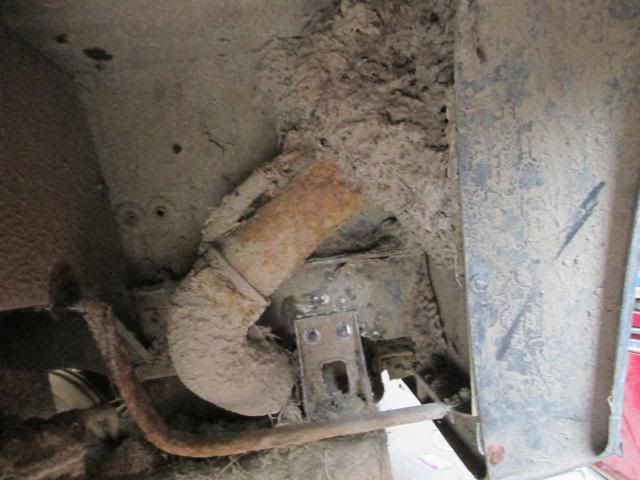
Right then an update at last
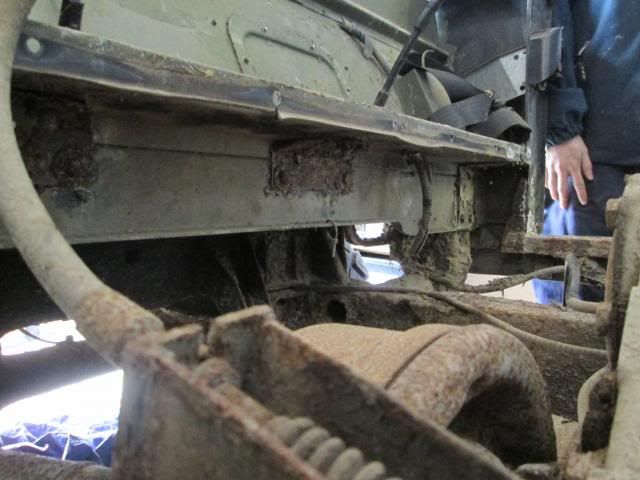
Was on hold whilst my brother had his exams and stuff (it is his after all)The rear section of exhaust was removed first. As you can see, the cross member has been replaced at some point and it wasnt welded all the way across at the top (a lot of the welds were like pigeon s**t too :rolleyes:
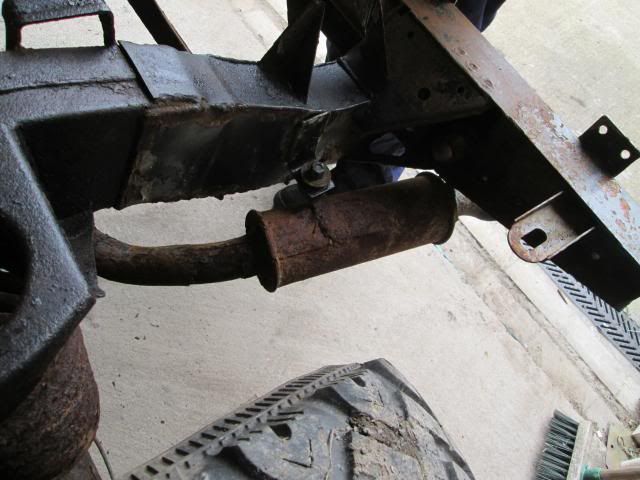
Front section of exhaust (better condition than the back half) also came off
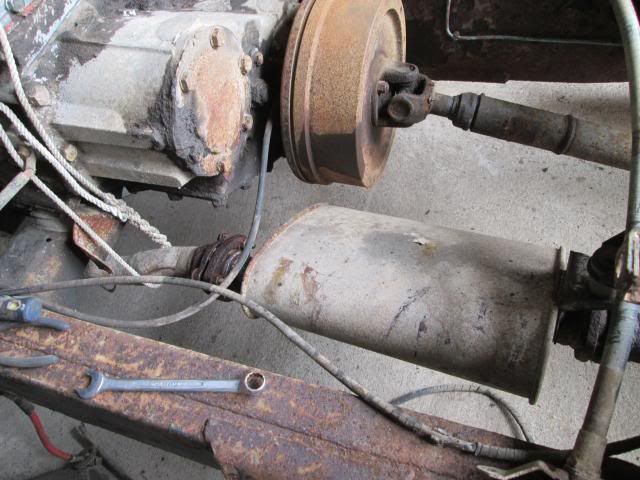
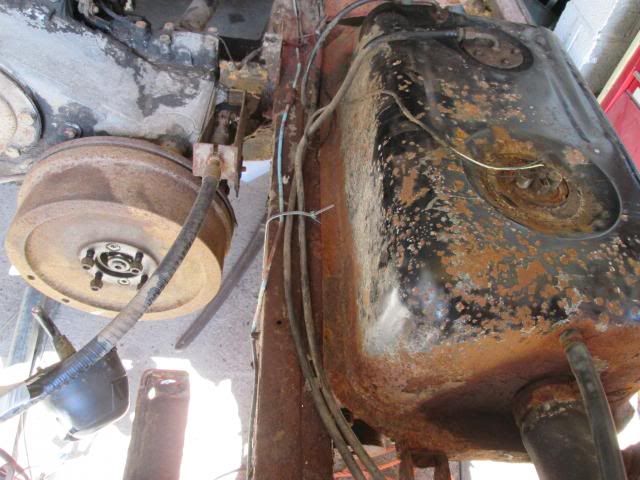
The back axle was the next thing to come off. This will be swapped with the axle off our old discovery 1 so it will have disk brakes all round
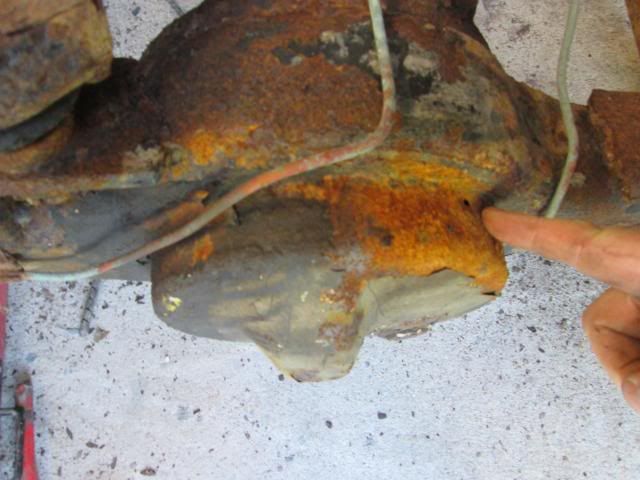
The old diff pan had rusted through
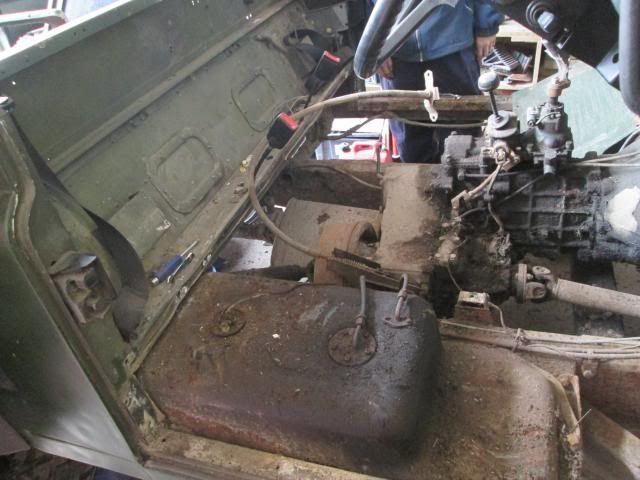
The prop shaft was the first thing to come off
Then my brother took the torsion bars off (i think thats what they're called)
Interestingly, my Dad compared these to the ones off his TD5 defender and they're much thicker! Did MoD 90s have heavy duty versions fitted or something?
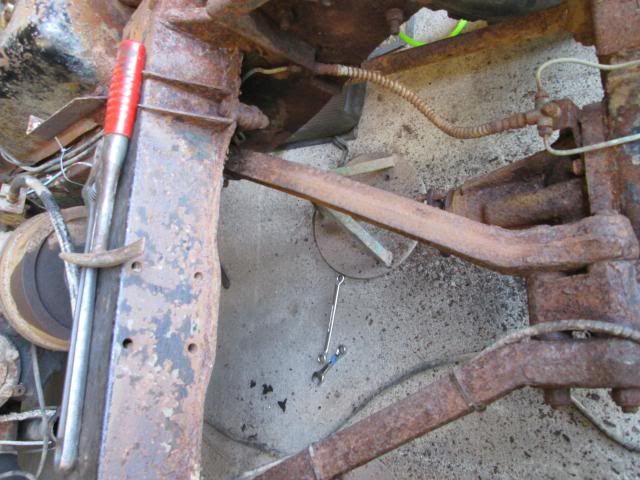
The A bar was also unbolted off the chassis
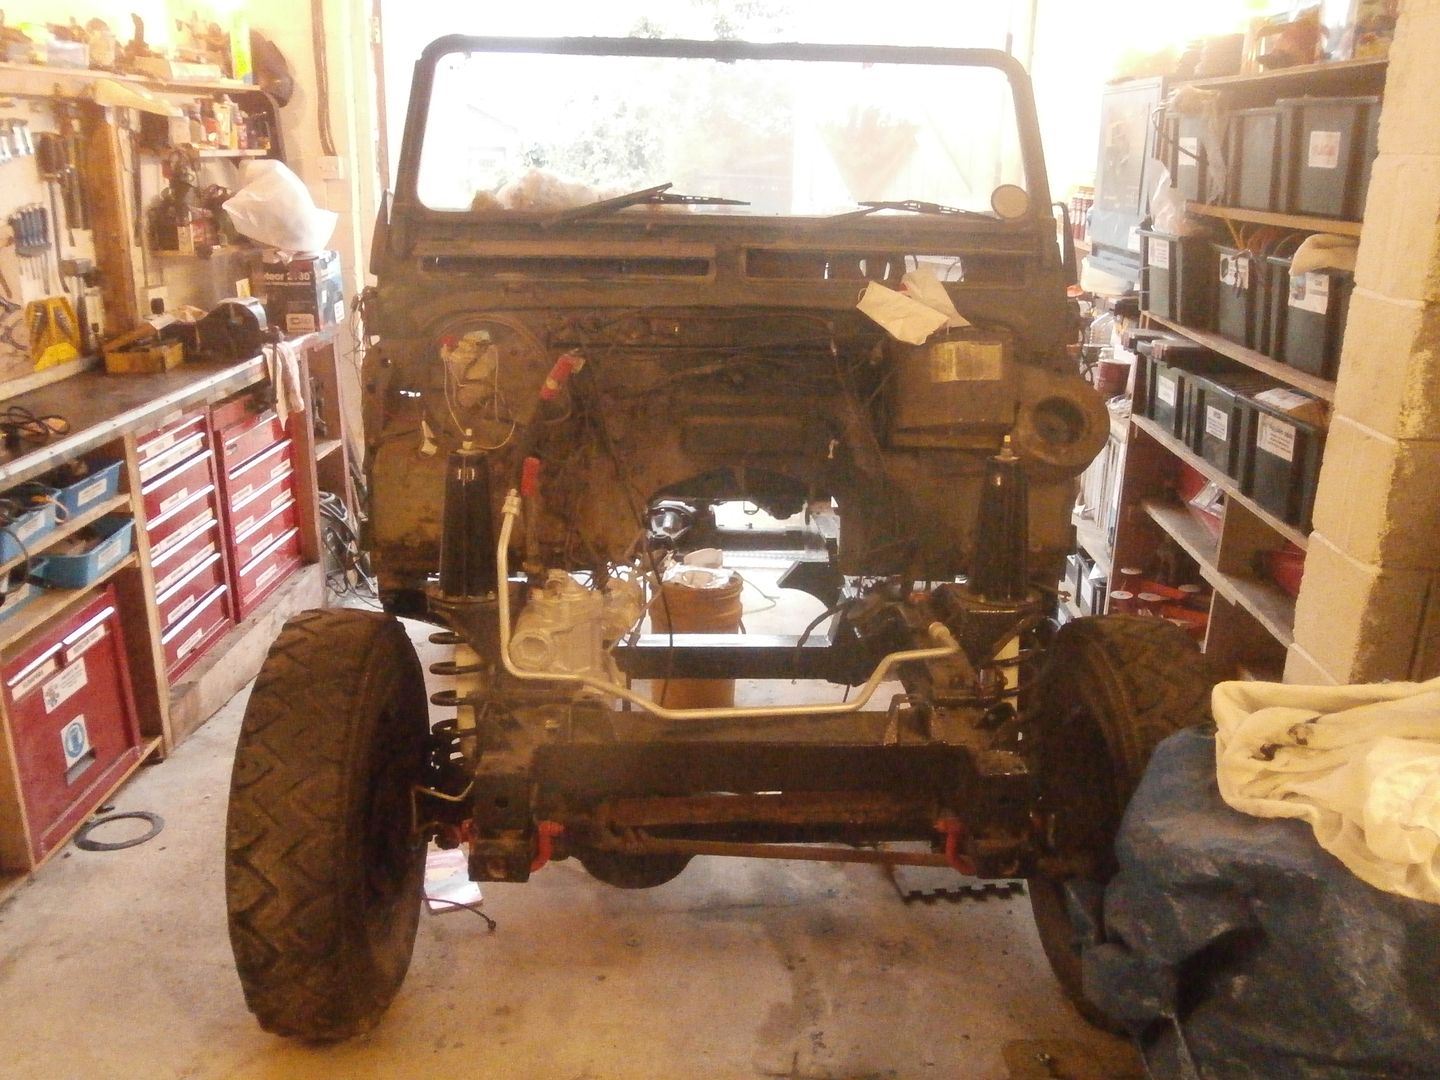
The shocks were removed, the springs compressed and the chassis was put on axles stands before wheeling the axle out of the garage
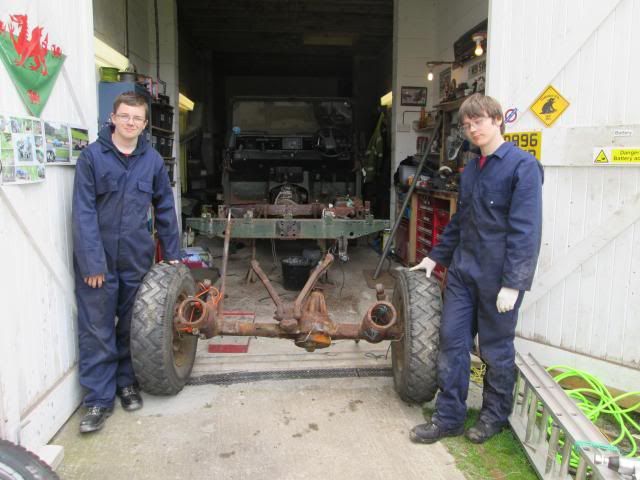
The chassis without the axle in place
Few pics of the pigeon s**t of a weld
We've got the history of the vehicle as it comae from my dads boss and this was done by a professional garage supposedly!
My Dad soon sorted that out when he was off work
Done a great job on it, looks like a proper job now! He also cut off the bar that had been welded across as a sort of jig as it no longer served any purpose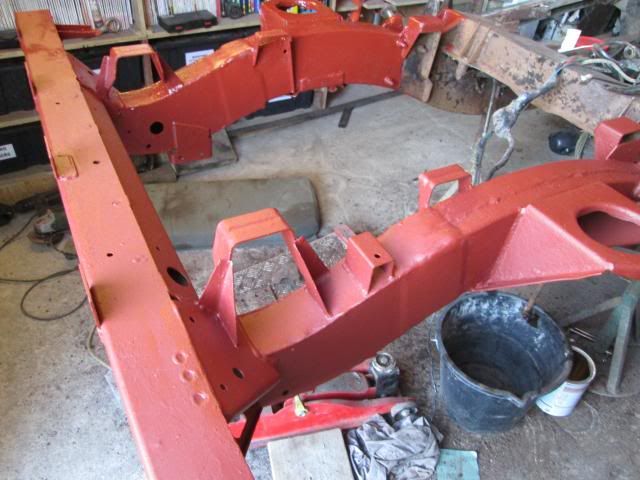
Stay tuned for more updates! It should come along now my brothers finished his exams
Also I bought my Dad a new needle gun for fathers day, much better than a grinder as it doesnt blow all the dust in the air
-
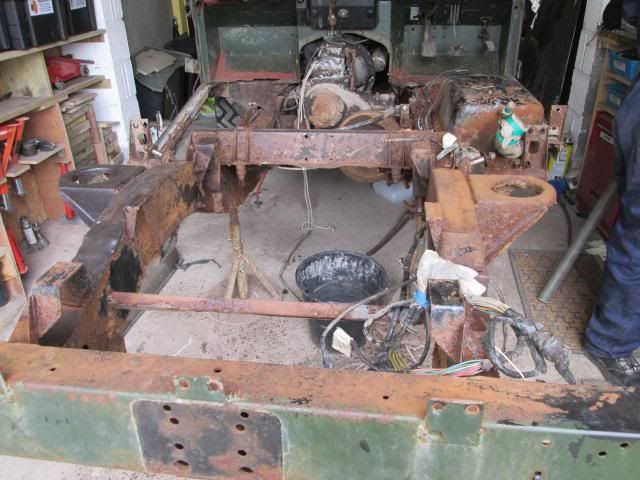
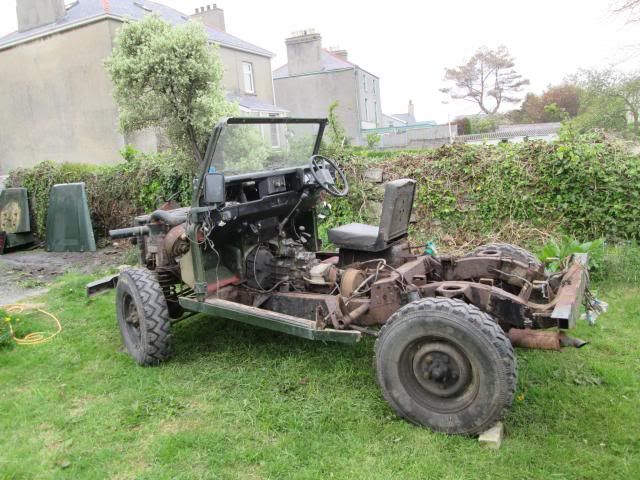
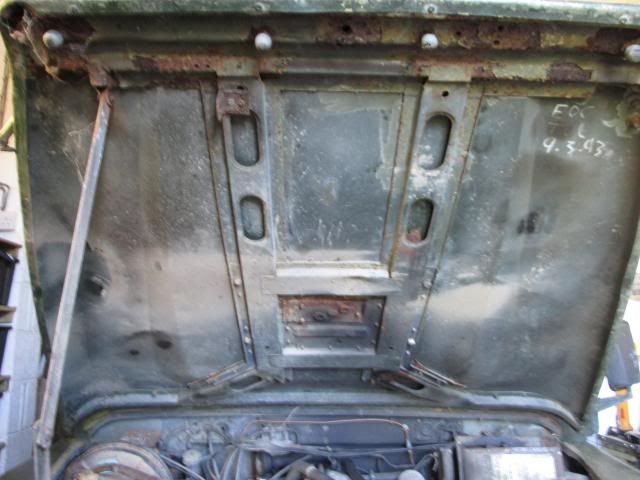
Next job was to take the doors and roof off. The roof has a row of bolta on top of the windscreen as well as a bolt in each corner and a bracket in the middle of the tub sides on top of the capping
Floor was the next thing to come off, a lot of the phillips heads had been rounded so had to be ground off
Next was the turn of the seatbox, theres a row of bolts at the back and along the sill panel as well a couple at the front. All were 10mm (M6)
We could then make a start on getting the tub off by unbolting the brackets, its easier to do than the one on my 88"
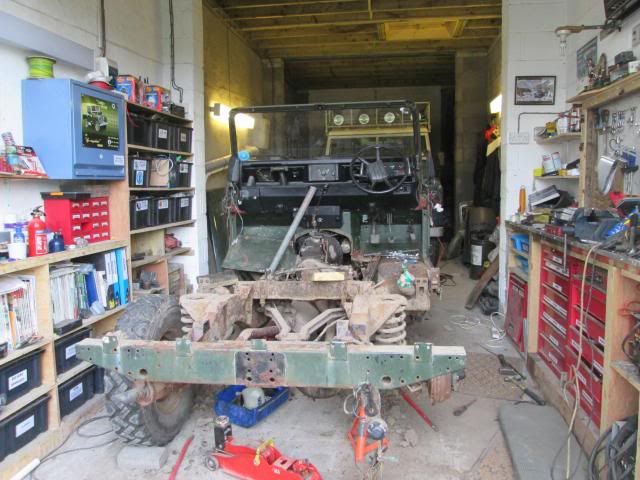
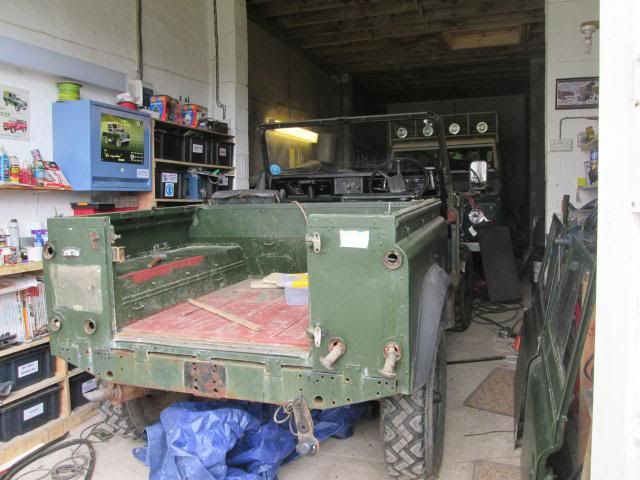
Took it out for a jetwash in the garden and this is where we're up to now
Now for Dad to make his appearance on film driving it back into the garage
-
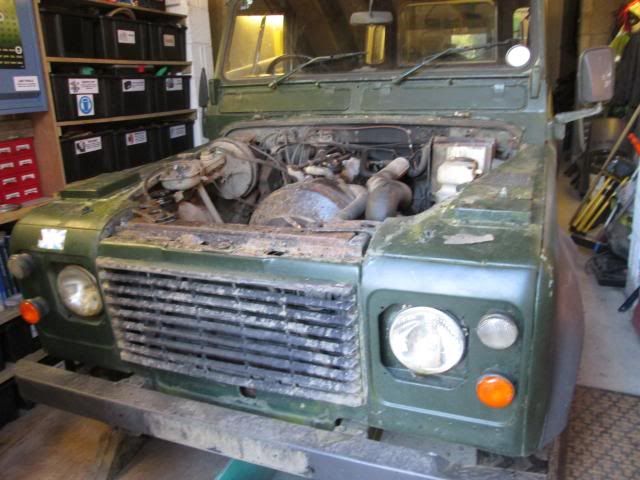
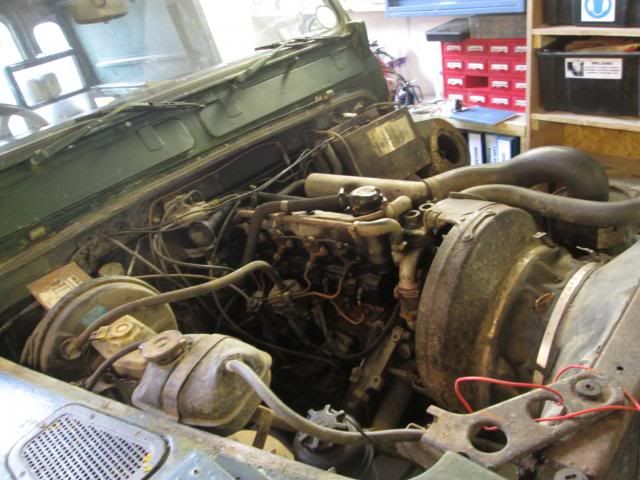
The mighty 2.5 diesel
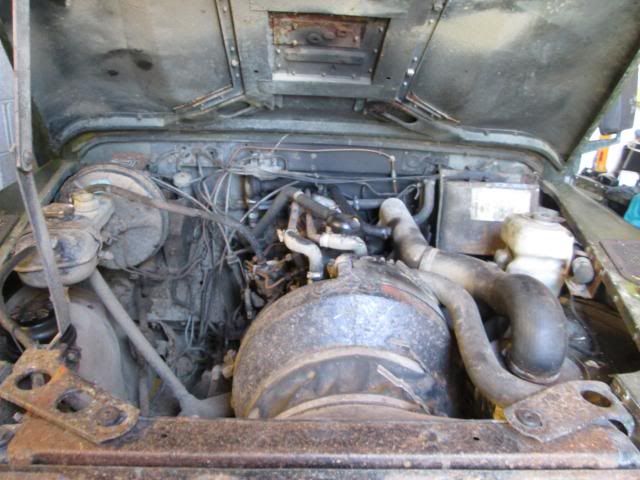
Bonnet will be replaced as we have sourced a good spare. The military fittings will just be swapped over
The bonnet stay was unbolted at the wing end and the bonnet was lifted up out of the rubbers (you have to lift it past the normal open position to do this)
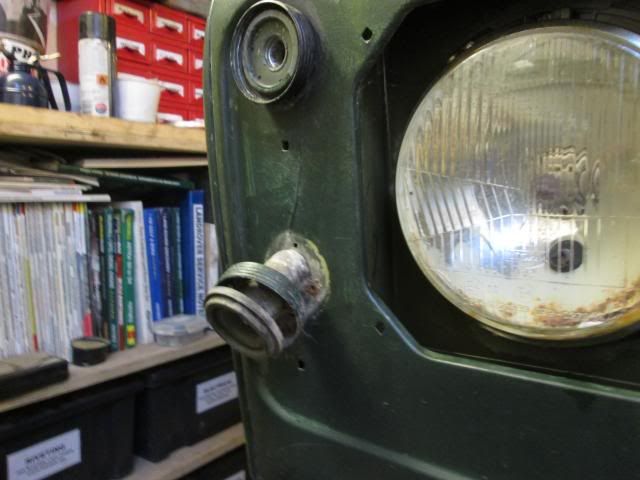
The front plastic grill was removed as was the horn bracket that was inside
Next, the lights and light fittings were all removed
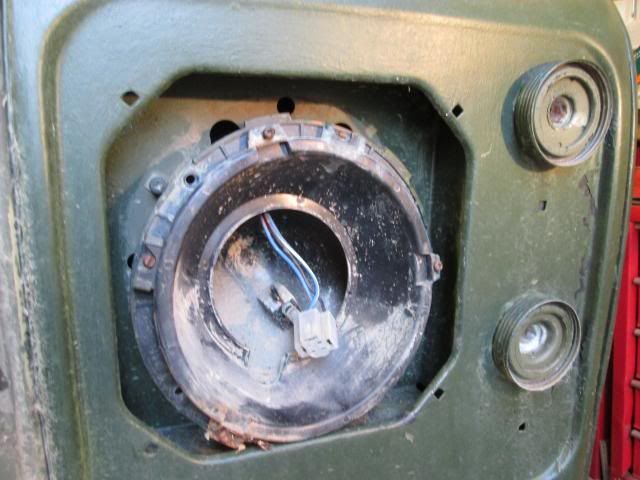
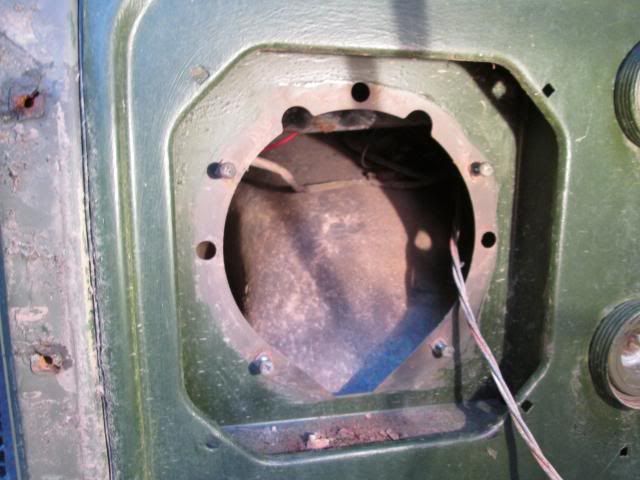
The army side light fittings have a couple of screws and then they should just pull out allowing you to disconnect the wires
Back of the light fitting

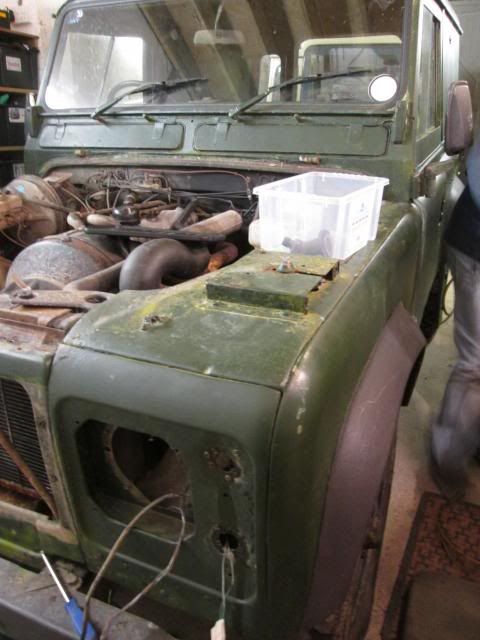
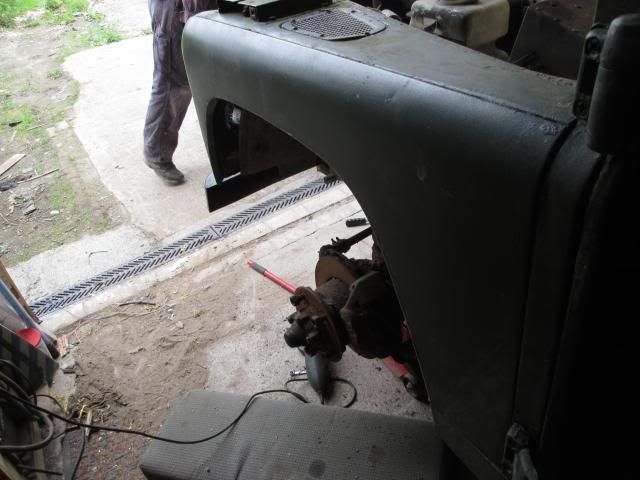
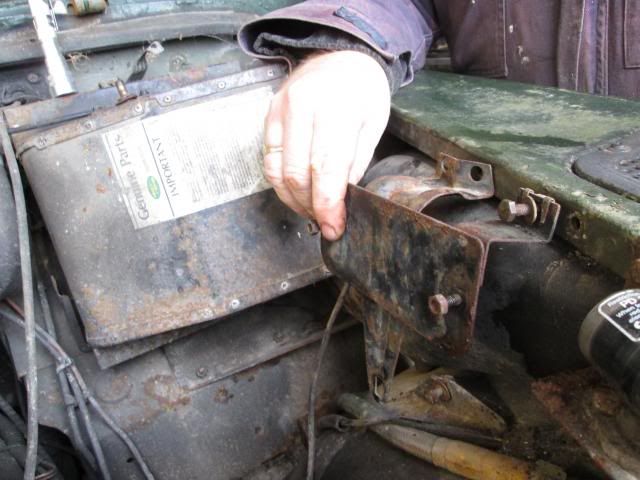
We then started to strip the front end down
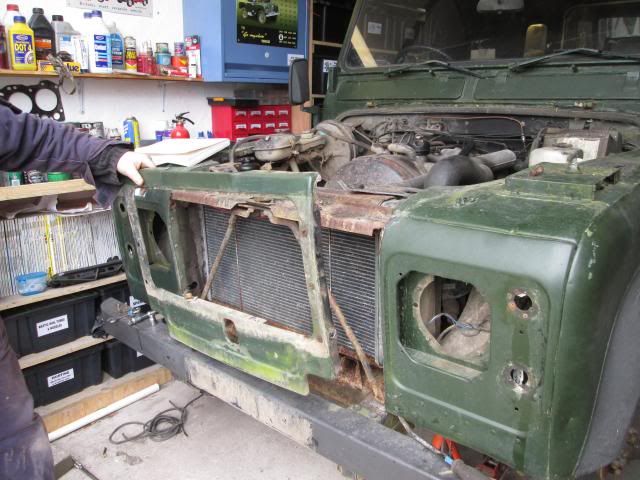

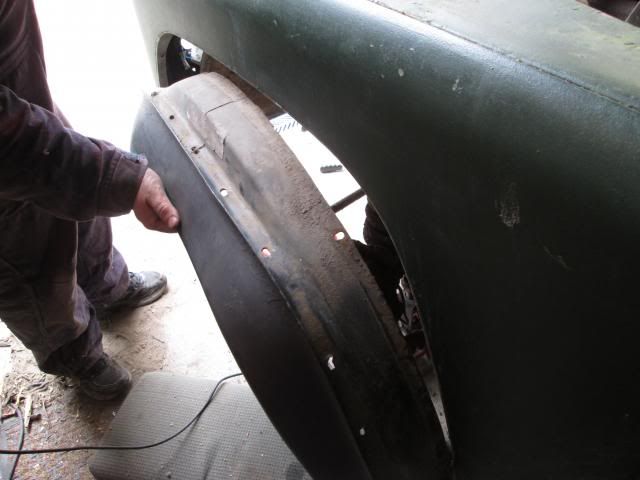
The wheel and arches were taken off to get better access for taking the wing off
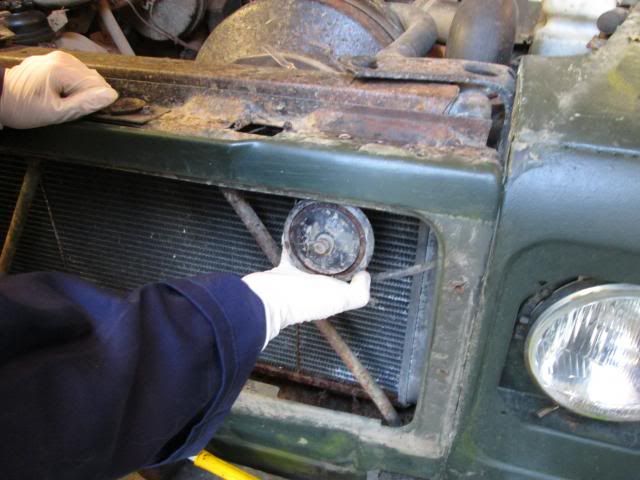
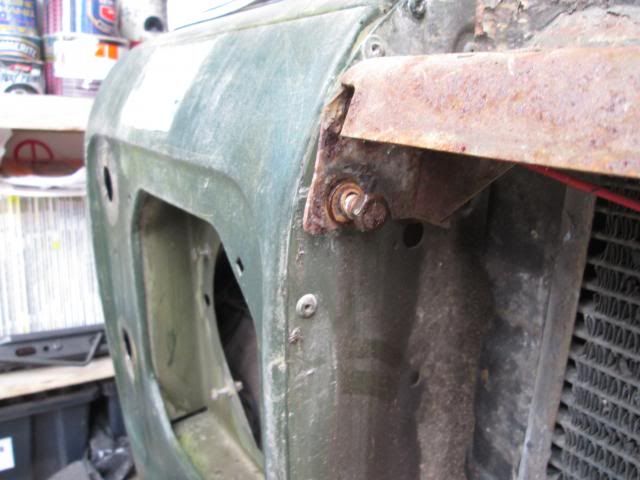
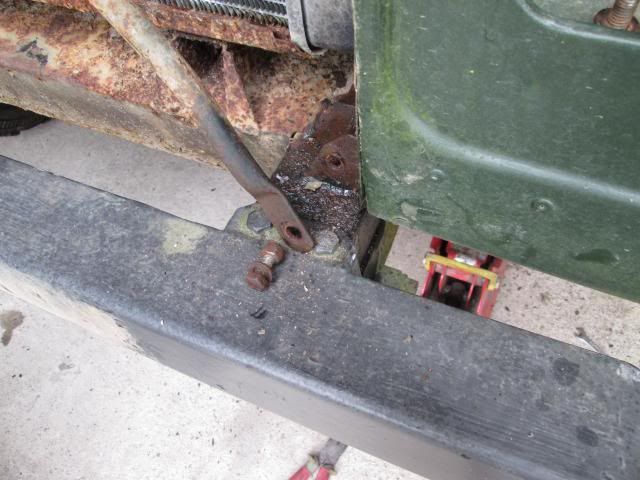
The crossmember piece in front of the rad was taken off first
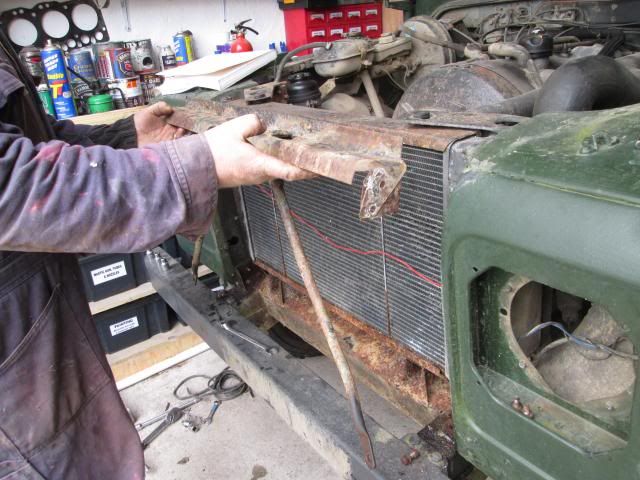
Various brackets had to be unbolted before lifting the wing off
The plan was to fetch the inner wing and outer wing off seperately but then we ended up taking it all off in one go
Drivers side wing was then taken off
-
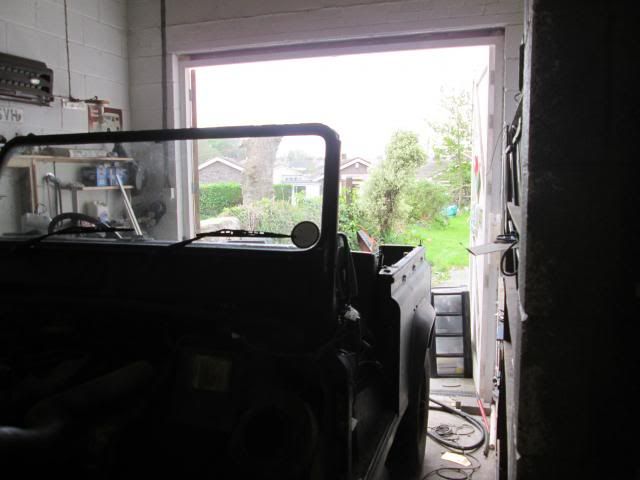
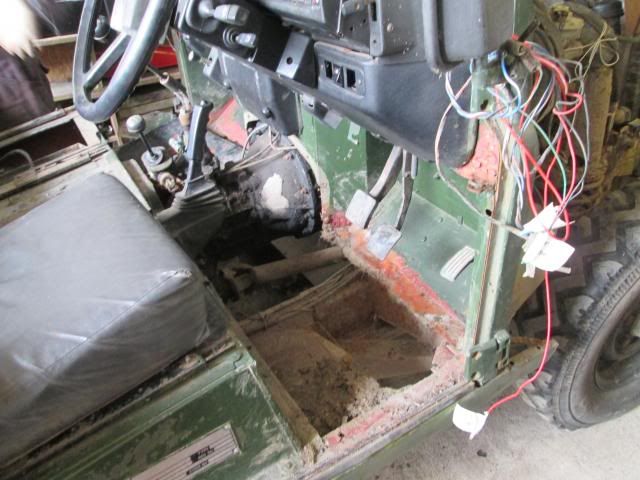
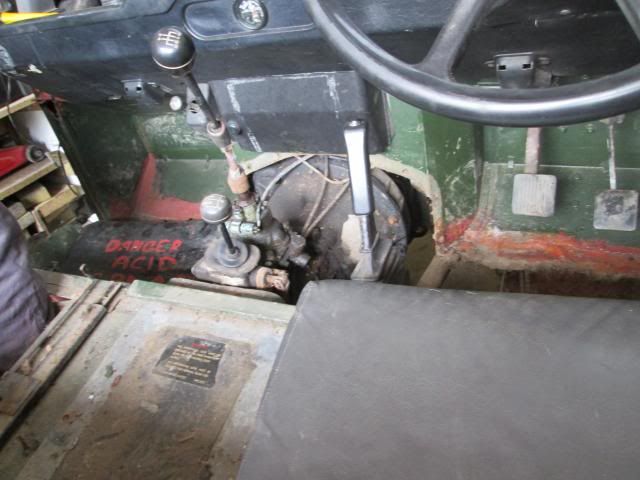
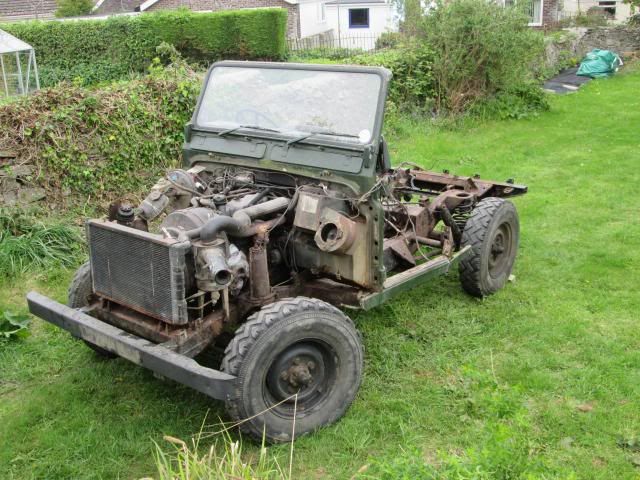
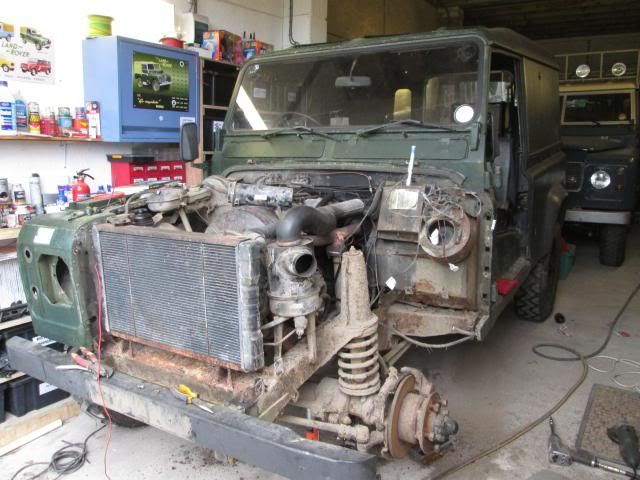
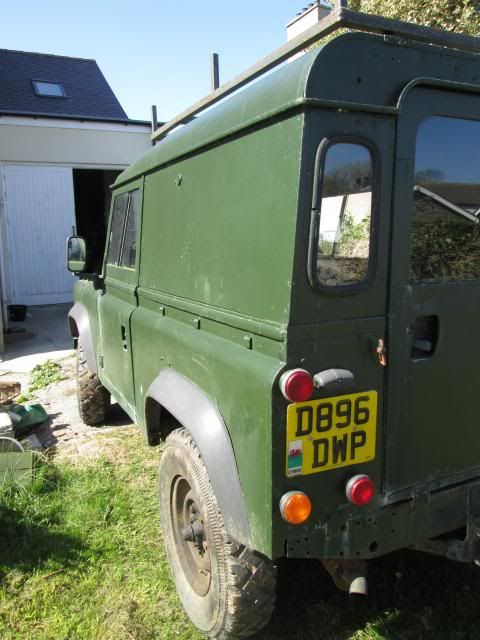
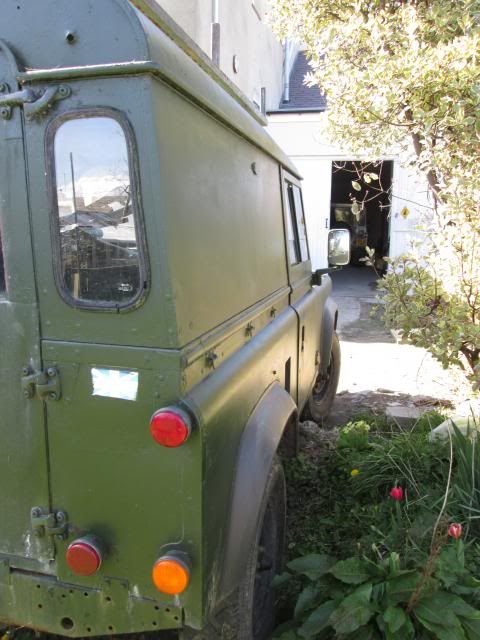
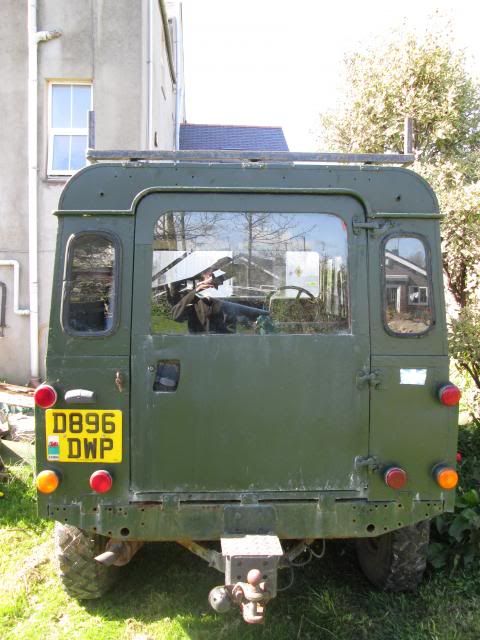
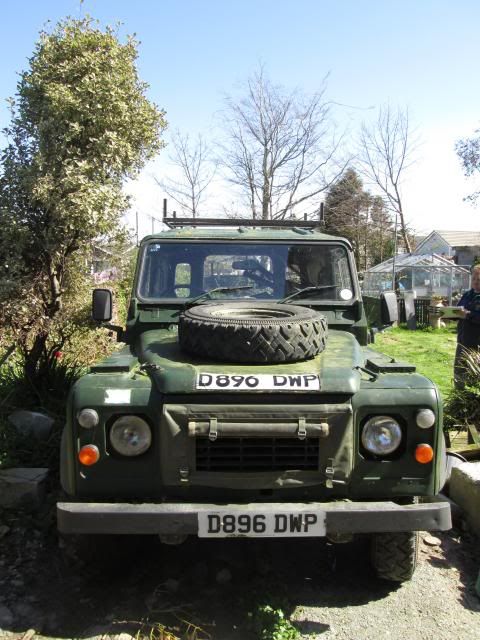
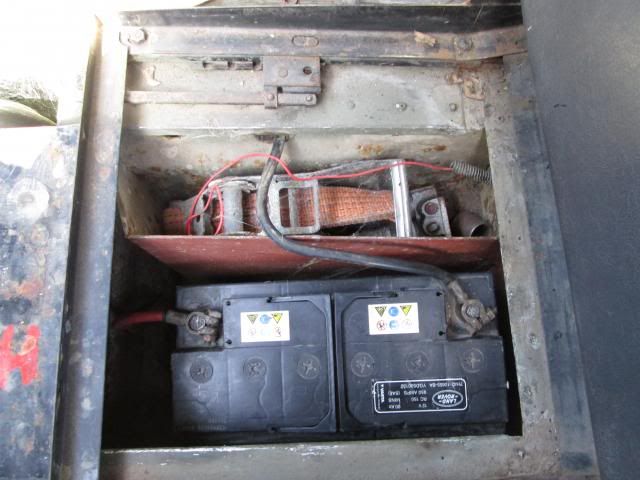
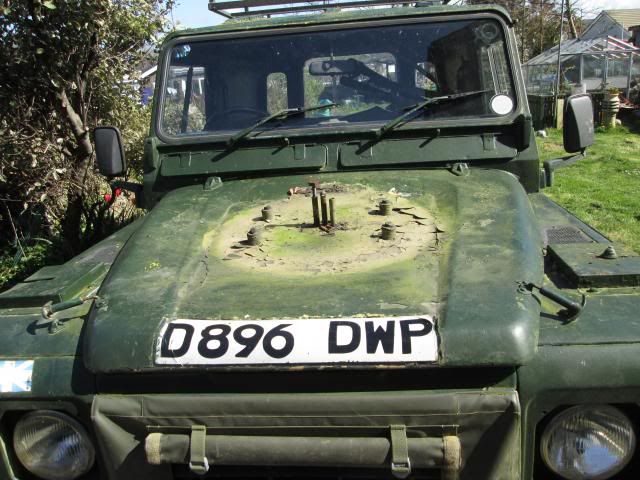
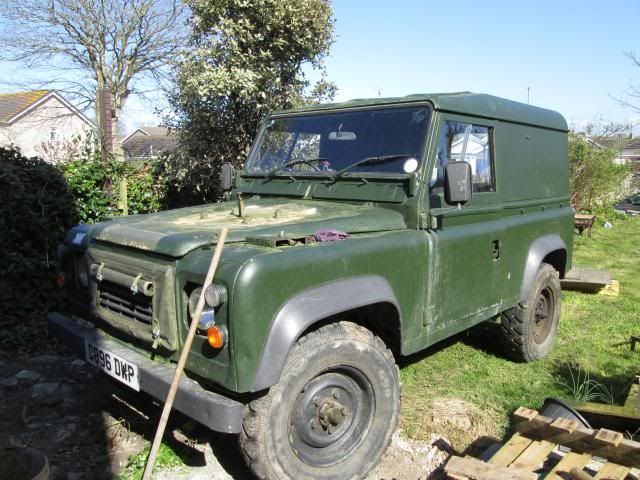
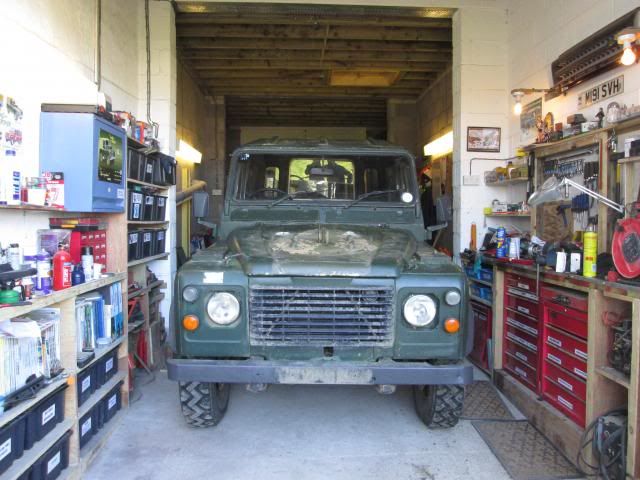
Well now that I've finished the rebuild of my series 3 (link to its own rebuild thread on another forum here http://www.landyzone.co.uk/lz/f6/1976-series-3-rebuild-202564.html ), its now time to be looking at my brothers 90. Its a 1986 (I think IIRC) FFR with all the gear stripped out. Has a bit of history as this went out in the first gulf war apparantly, underneath the green you can still see the sand coloured paint. Bulkhead needs some work (door pillars are pretty shot) and footwells need replacing but all in all its not too bad. Plan is to swap the rear axle to the spare discovery one we have to make it discs all round. The engine in it is a 12J 2.5N/A diesel (same as mine), no plans yet for an upgrade. Right time for some pictures

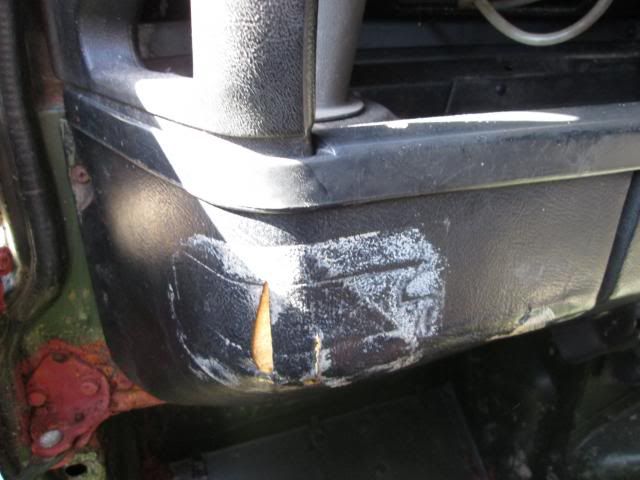
The rotten pillar
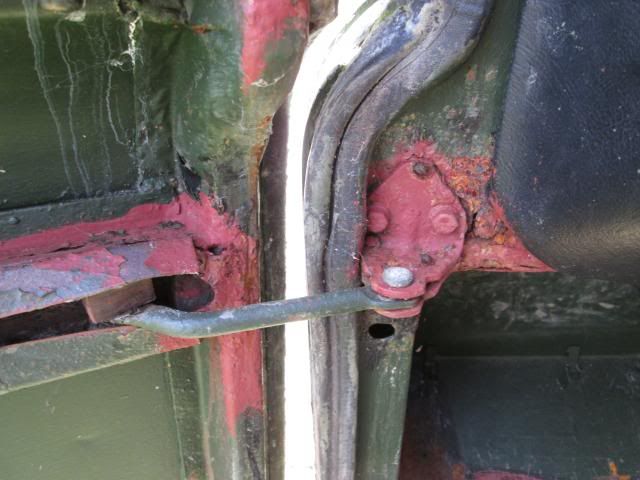
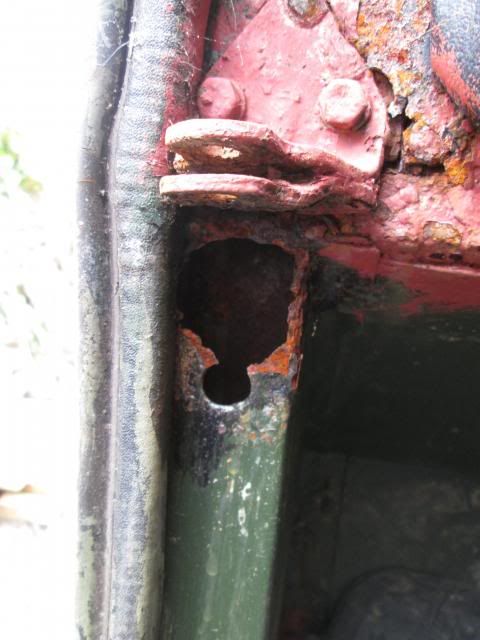
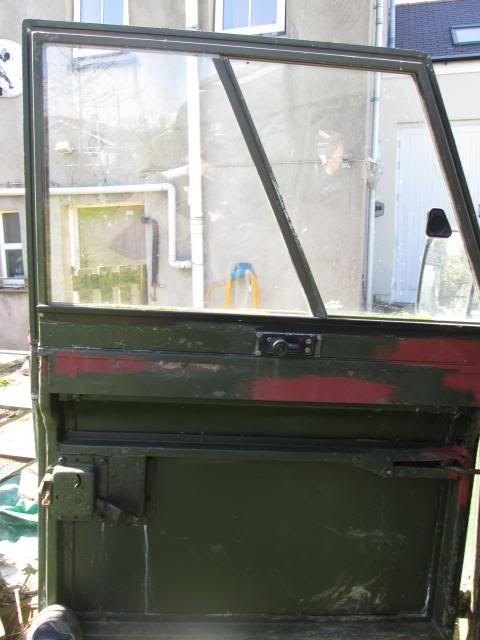
Doors also need a bit of work doing to them
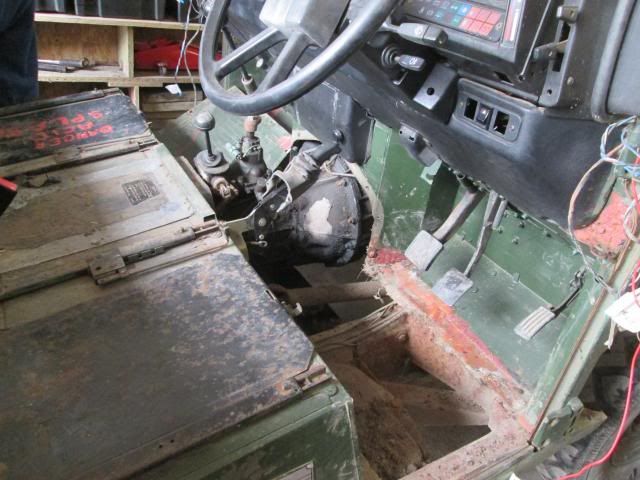
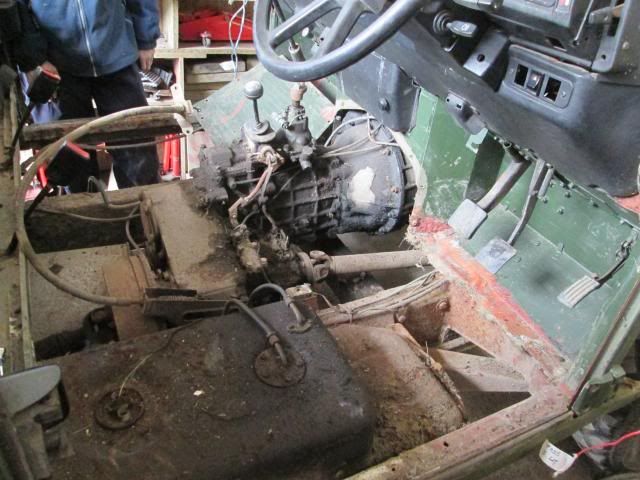
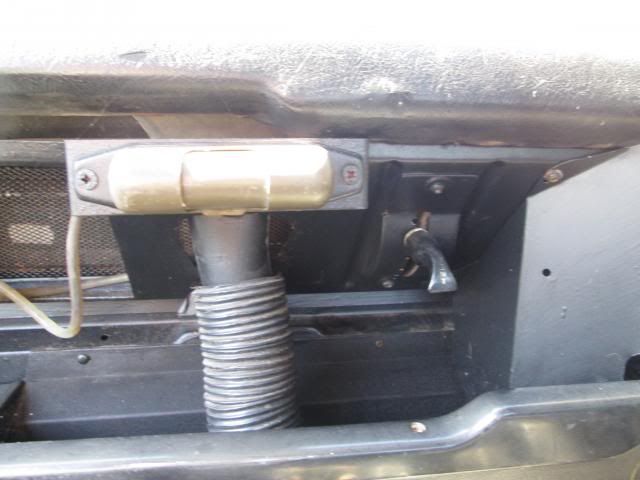
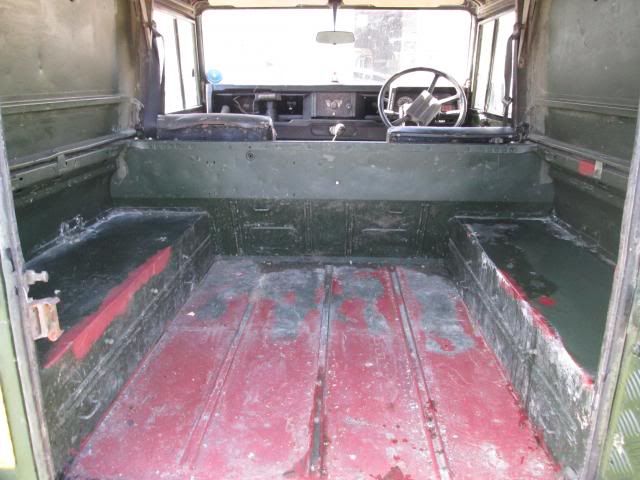
The interior
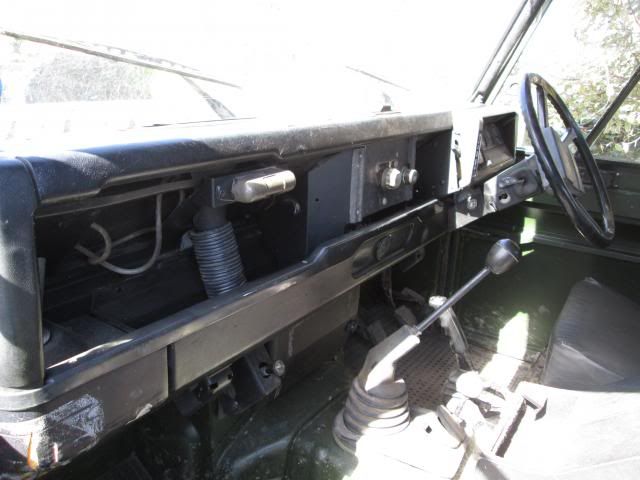
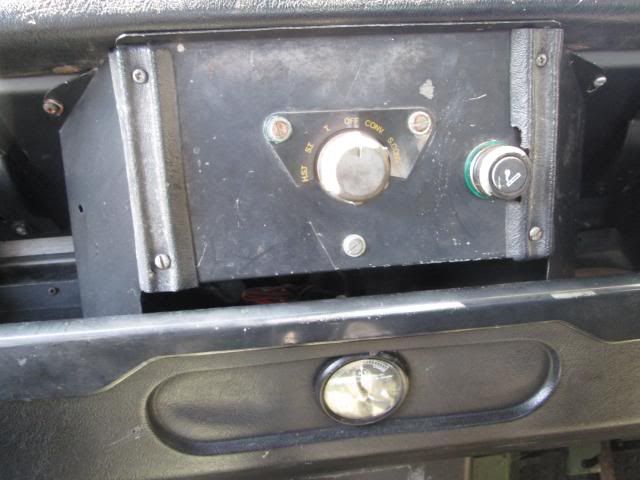
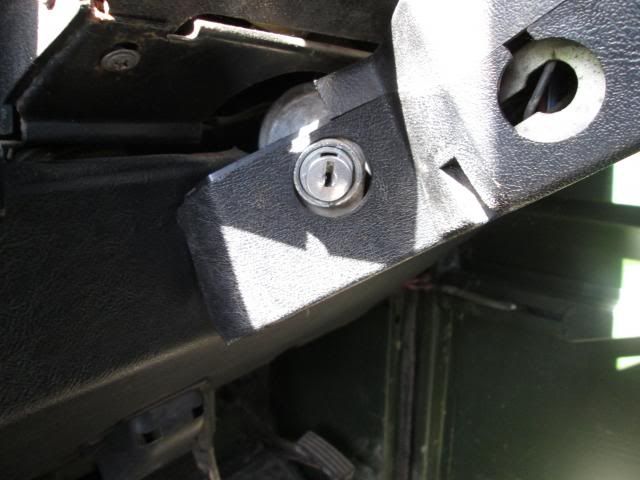
Aftermarket ignition barrel which needs replacing
First thing was to take off the spare wheel, this reveals quite a bit of the sand paint


1944 Morris C8 / Landrover 2.25 petrol engine conversion.
in British Vehicles
Posted
Really interesting conversion. Just in case you didn't get an answer its a 3 bearing (5 bearing has strengthening ribs on the block above the sump)