


Niek Baecke
-
Posts
42 -
Joined
-
Last visited
Content Type
Profiles
Forums
Gallery
Blogs
Events
Articles
Store
Downloads
Posts posted by Niek Baecke
-
-
A lot has changed in my life since last post. I've moved out of my parents' house, which means less time for hobbies.
I've also sold my whole WD bike collection, except for the old trusty BSA and the less trusty Harley... And bought an old restoration BMW R75, which might be in a future blog.
Last week was the first time in almost 5 months that I was able to work on the Cushmans.
We had some luck with the weather, so me and my father decided it was time to finally paint some Navy gray.
We managed to paint all parts (except for the bodywork).
We also tried to de-rust the fuel tank for the Series 32. Unfortunately once the chemical product was done, there wasn't much left of the tank. We tried to solder it, but it with tin was too far gone. Luckily a friend of ours is great with metal constructing. He made a complete new tank which looks exactly like the original.
So this weekend, we started reassembling the Cushman. Good to see some progress after all this time.
Sidecar is now complete, and we have rolling chassis.


-
 7
7
-
-
End of year cleanup.
Good time for some shenanigans!
Wish you all a healthy and happy new year.

-
3
-
-
Again been a while since last update, but I've been working on my jeep trying to get it ready for Bastogne (Nuts weekend).
But finally had some more time to work on the project today.
When we tried to fit the sidecar to weld the missing bracket, we found out is was impossible to fit.
If sidecar was level, the Cushman was about 30° misaligned. If the Cushman was perpendicular, the sidecar body was sloped... Very frustrating...
We concluded that the sidecar mounts were too heavily bubbafied (possibly to fit another motorcycle or other model Cushman). Our only option was to cut them of and start from scratch.
The original sidecar attaching frame was made from solid tube. We managed to save some piece of it which we knew was straight. We used thick tube to fit over these pieces and make the new mounts.
Still needs welding up, but so far looks really good.


-
6
-
-
Soooo a year later already, how time flies...
Not much has happend on this project i'm afraid. But yesterday we got the body back from the paint shop and they did an amazing job. They left the original spotwelds visible, like it would have been when new. A very nice detail.
Next up will be trying to start the engine and then disassembling for it's final layer of navy grey.
In the meantime I managed to become the new owner of a very nice 1944 USAAF model 39G.
It's reasonably complete, only missing mudguards and some smaller parts... For now awaiting restoration but might try and get it running in the near future.


-
3
-
-
The GMC CCKW352/353 used 2 types of axles during the production run.
Banjo type and split type.
Another possibility could be a GMC ACKWX-353. Some of these trucks were made for lend lease.
These models do seem to have had the higher sideboards.
-
2
-
-
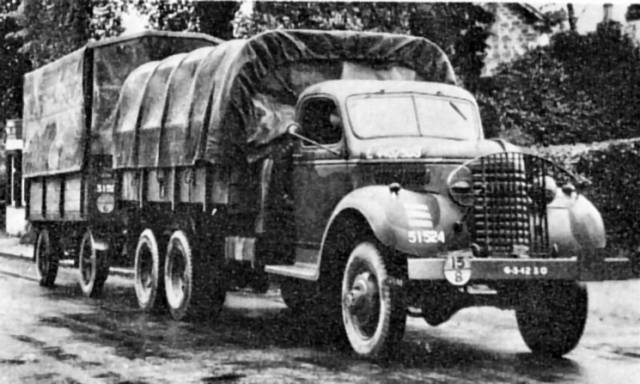
A mystery!
Looks indeed to be a US made GMC cckw 6x6 truck.
Split axles and the american type tow hook, but it seems to be missing it's rear bumpers.
I found a post over on the MLU forum which states 400 GMC CCKW352 (closed cab) were bought early during the war. Could it be one of these?
http://www.mapleleafup.net/forums/showthread.php?t=1785-
1
-
-
Had a day off from work today, but no time for rest!
My brother lent me his bending machine and roller bending machine, so i started making the sidecar mudguard.
I had to start from scratch with measurements I took off another replica so i was pretty unsure if i could do it but i'm pretty pleased with the result.
A few years back i bought a bunch of BSA parts, included in the sale was a bead roller. I didn't think I would ever need it, but it sure came in handy today.
Another ordeal passed. Most of the bodywork is done now. Just need to replicate the sidecar seat, but this will be for later...


.thumb.jpg.af9b34175a185b770e75b882a61aa6cb.jpg)
-
6
-
-
Finally starting to see some real progress. If you look at it from the right angle, it's nearly finished... haha...
The sidecar frame won't need much adapting, just need to weld one bracket and make some spacers.
Couldn't resist to put on the body for a picture.

-
6
-
-
Well, moved the brackets on the front fork about 2 inches down, shortened the rods and finally assembled the front suspension. Works as it should and really pleased with the result.

-
3
-
-
5 hours ago, earlymb said:
Excellent job!
And in case you're looking for yet the next project... https://bidnebraska.hibid.com/lot/134512185/1940s-cushman-lobster-army-issue--runs?q=cushman&ipp=100
😁Very tempting! An original military 39G, only missing the mudguards and taillight it seems.
Unfortunately the next project is already waiting, a 1945 Willys MB. -
After a days work, we now have a push bike!
Before painting the chassis, we decided it would be a good idea to reassemble the front forks and rear suspension to see if it all fits. And lucky we did because it didn't fit at all. The springs and rods for the front suspension i bought seem to be incorrect.
There are 2 models of front suspension:
- the early model which uses short rods, short springs and 2 rubbers.
- the late model which uses long rods, a long spring and a short spring (also used by the early 50 series).
It appears the front fork i have is for the late type while the springs/ rubbers i have are for the early type.
Since the early model suspension would be correct for this bike, I decided it would be best to adjust the front forks to suit this type. Luckily it's not a lot of work. The suspension brackets which can be seen next to the front mudguard only need to be moved a few inches down the front fork.
The rear suspension and wheel fit nicely. The new brake shoes still need a little running in.
While the Cushman is up on the workbench, we'll also fit the sidecar frame and remove the modifications they did to it to make it suit the Series 30 frame.


-
5
-
-
So here we are again with another update.
Brake drum arrived a couple of weeks ago. However weekends have been busy, so only had time today to take look at it.
First job was drilling the new holes for the bolts and rivets to go through. Then welded new bolts into the hub, these hold the wheel on the hub. Then made holes in the new brake lining and chamfered them so the rivets fit nicely.
I started riveting the brake lining when suddenly a moment of clarity struck me: I had forgotten to put on the gear first, which meant I had to start over again because else the gear wouldn't fit over the brake drum... Luckily I was only 2 rivets far.
So then decided to rivet the gear to the drum first. I assembled the complete hub and bearings and put the wheel in my truing stand. There is a minimal amount of play (about 1-2mm), since it's not a board track racer, I'm not too worried about it.
Last weekend I went to an event in De Schorre, Boom ( Also used as location of Tomorrowland festival). It was the first time the local club organized it and they had quite a good amount of vehicles for a first time event. I was surprised to see a model 32 Cushman with sidecar there. I quickly rushed to it and asked the owner if i could take measurements for the sidecar fender. It was a nicely restored example with an engine upgrade. Now that I have these measurements, another big problem is solved.
If the weather permits, we might be able to spray some navy grey this weekend.


-
3
-
-
Hi All,
Show season is nearing it's end, which means more time to get the Cushman restoration back on track.
When we tried to put in the new bearings for the rear hub we made a mistake which caused the old brake drum to collapse... DOH! The old brake drum was already really corroded, so instead of trying to straighten it we decided it would be a better idea to get a new drum machined. The new drum is on it's way from the Netherlands.
We had our local panel beater came by to check out the Cushman body and sidecar box. He did a great job on them, we managed to paint the sidecar box today. We fit a repro lock on the Sidecar box but it needed some adjusting. I'm still looking for a sidecar fender or dimensions to get it made.
The Cushman body will need a minor amount of filler before it gets painted, it had a hard life before. However we managed to save it.


-
5
-
-
Some more work done today.
Had a look at the Harley taillight. Luckily the wiring set I bought for the Cushman included a taillight wire and socket, with some minor work I was able to adapt the taillight and make it fit for the scooter.
Fitted the new Timken bearings into the front hub and put the axle in it. The hub is now ready to use when the front fork is on.
Sidecar frame came back from the sandblasters. Me and my grandfather (85) managed to paint it in primer and gave it a first coat of navy grey. Now waiting for the paint to dry and assemble the springs. We already assembled the hub for the sidecar. The bearings were in real good shape. The sidecar uses the same type hub as the front wheel. Unfortunately some crude repairs were done to the sidecar frame by a previous owner, which means the frame doesn't fit correctly to the Cushman frame. The goal is to assemble the sidecar frame and attach it to the chassis and see how much adapting it needs before final paint coat.


-
2
-
-
Belt for the dynamo arrived. Turns out the size of belt is commonly used in lawn mowers, so i could get one over here in Belgium at a fairly cheap price. Test fitted the dynamo and kickstart. Had to fit a washer on the kickstarter bracket because there was some play on it. Not sure if made this way or because of wear. The kickstart shaft itself does not seem to have any wear. Still need to do some adapting because the pulleys of the dynamo and clutch are not aligned the way i want them to be. Then on to the next problem, which will most likely be the fuel tank which is rather ''crispy''...

-
2
-
-
Show season started over here in Belgium, so little less time to work on the Cushman.
However we did manage to do some more work.
First off, we replaced the bushings in the swing arm, which were very worn. We fabricated the new rear suspension using a threaded rod and one of the old front fork springs. It's a little sturdier made then the original but still has the same look.
Next up we reinforced the body of the Cushman by welding strips of steel on the edges. Still need to grind away the welds on the outside. It is now much stronger then it used to be. We can now start beating the panels and louvres straight.New brake shoes and spring arrived, so rear axle and wheel is ready for assembling. However the new rear wheel bearings are being a pain, so will need to find a hydraulic press to fit them before we can continue...
Refitted the clutch, ignition and flywheel to the engine. Now working on adapting the generator bracket (which is a 50 series) to series 30 specification. The difference being the post war 50 series has an on/off linkage which tightens/slackens the belt to engage the generator. While on the 32/34/39 models the generator always keeps running but has a switch to interrupt the circuit. I managed to find a light switch. Seems like the original company still makes them.
Adapted and painted the new engine shroud, test fitted it on the engine to find out where to put the new engine kill switch.
Sidecar frame is off to the sandblasters.
So far the update on the progress, should have more news to report within a few weeks.


-
3
-
-
New floor now welded on. My welding skills are only beginner level.
Luckily my father is quite a good welder. So he put the new floor on it.
Turned out really nice.


-
Well, floor is not welded on yet. But we have not been sitting idle.
First of all, We did some more straightening on the frame. There was a bad dent in one of the sides.
Then I put the new tires on the rims. They are size 4.80-8. They're a little bit wider then the original size 4.00-8, but these are readily available as this size is used for small trailers and wheel barrows.
Also made a bolt to fit the air cleaner onto the elbow. I opened, cleaned and rebuild the carb with new gaskets.
Next up riveted the NOS sprocket onto the brake drum, needs to get painted now before we fit the new brake lining and new bearings. New made brake shoes are on their way from the Netherlands. The old ones had a bad groove in them which would mean the brake lining wouldn't wear correctly. This model only has a rear brake, so it needs to be working properly.
And lastly today we reassembled the engine with new gaskets/bolts and gave it a new layer of paint.


![20220404_165147[1].jpg](//hmvforum.s3.amazonaws.com/monthly_2022_04/808111181_20220404_1651471.thumb.jpg.2444593c6426ee90eba2ba325a67d33b.jpg)
-
3
-
-
Well, some minor progress today. Painted all the areas that are underneath the floorboard. If all goes well we should weld the new floorboard on tomorrow.
Then had a look at the front forks. Like i previously mentioned the throttle handle was stuck. After use of various tools (including numerous swear words), heat and WD40, the throttle still wouldn't budge. So we had to revert back to ''old trusty'', the angle grinder. Luckily replacement throttle handles are available, seems like i'm not the only one who had this problem...


-
1
-
-
On 3/30/2022 at 11:18 AM, David Herbert said:
Great find !
It is interesting that the numbers are stencilled onto the navy bodies before they were built up into complete machines. This would suggest that there is little possibility to work out the military registration from the frame number.
Looking at the woman's shirt I think that the colours are genuine. Certainly colour film was widely available in America at that time, much more so than in the UK.
David
There is indeed no way to figure out the registration number from the frame number.
From what i read, the problem also is that Cushman did military production and civilian production at the same time as can be seen on the color picture.
For example: frame number 30000 could be a military series 32, 30001 could be a civilian series 32, while 30002 could be a military 53 Airborne scooter,... There are no records on frame numbers as far as i know. -
Also found this interesting photo, seems to be from the Cushman works.
I'm not sure if it's an original color photo or colorized.
A female worker busy working on a series 32. Interesting to see are the 32 series Navy bodies standing in the back.
The stencil font is the same as i found on my Cushman. Also note that these don't seem to have holes for the taillight, while the civillian bodies do have the taillight already fitted.
On most wartime pictures you can see the glass taillight lens missing or broken . Maybe they stopped fitting them later on?
This might explain why mine had some crudely drilled holes and a '37 Harley taillight fitted.
-
1
-
-
Got a call from the sandblasters today. Collected the parts and we put them in a layer of primer.
Now we can fabricate the rear suspension and weld on the new floorboard.
Parts for the engine should arrive tomorrow.
Lots of work to do, so hope we have some process to report by the end of the weekend.


-
1
-
-
Swap meet day! Ktr-beurs in the Netherlands, which means an early start...
Collected the sidecar and some other goodies for the project.
I found a rare Cushman oilbath airfilter on E-bay. It appears they were also used on briggs and stratton model N stationary engines. I managed to get the correct elbow for mounting the filter to the carb today.
Also got a nice replica rear mudguard, I didn't know they had rear mudguards untill i had a look at the parts list. Seems like most restored ones are missing this piece because i've never seen one fitted on pictures.


-
6
-
-
Not much new to report unfortunately. Still waiting on a call from the sandblasters...
Box of parts arrived from the US, along with the new NOS rear sprocket.
Paint arrived from Jeepsudest (France), compared it to the original paint I found on the front mudguard and it's a really close match.
Also managed to find a complete sidecar, which i will be collecting this sunday.


-
4
-


.jpg.31dd03ce0069ee32afa281289263a0ea.jpg)


![20220404_165147[1].jpg](http://hmvforum.s3.amazonaws.com/monthly_2022_04/554323530_20220404_1651471.jpg.24e7c15fd09f65b378e2396e0c96d278.jpg)


USN Cushman model 32
in Blogs of MV restorations
Posted
More progress! I've mounted the engine in our spare series 50 frame. Last weekend I managed to get the engine running. It starts and idles great. Just needs the air filter fitted, some more finetuning and a final coat of paint.