


.JPG.762c1f5adac65fcb8809e65d6355e6c8.JPG)
Tomo.T
-
Posts
456 -
Joined
-
Last visited
-
Days Won
5
Content Type
Profiles
Forums
Gallery
Blogs
Events
Articles
Store
Downloads
Everything posted by Tomo.T
-
Now then, something is bugging me about the cylinder liners and I would appreciate some wisdom from the bank of Knowledge and experience out there, please. I should add, this is a'T' head configuration without detachable heads and the liners are fitted from the base end. When the liners were fitted, they were lightly pressed in and a ring of Loctite applied top and bottom. I asked for bronze pegs to be fitted at the base of the cylinders to provide some mechanical locking, which was not done. I pointed this out on collection and was assured that the chemical assistance would be sufficient. Does the team think this is correct, or should we fit pegs ???
-
The lamp provided a welcome diversion, and I am now looking into the manufacture of a suitable box to contain the set. This would, I think have been necessary at the time, to provide a secure means of transporting the lamps when not fitted. I have a larger equipment box of 1917 which will provide the design if nothing else appears. Anyone seen an original ? Meanwhile work has continued on the cylinder barrels and I eventually ran out of jobs to do, which was a nice surprise ! The rather battered coat of Bonda was cleaned up and refreshed. And a first coat of Service Colour followed suit. The top end is now nearly ready, new valve springs will be fitted and the rings need gapping. Onwards and upwards. Tomo


-
Stan has sent this pic of an old lamplighter at his devotions.

-
Trouble is, proper lamp oil comes from Whales, I believe, the mammal that is, not the Country Wales.
-
We have plenty of use for paraffin on our 1916, 15 ton steam roller, so no problem there !
-
Paraffin is not as readily available as it used to be, but a bit of perseverance produced the goods and the lamps were soon on parade and ready to go. The rear lamp burner is not really happy in it's new home and had to be slightly bodged to fit the larger hole in the tank. It didn't like the knackered old wick I presented it with either and flatly refused to wind it up far enough for a decent flame. This was the best it managed. And finally, ( having just about milked the thread to death,) a quick look at how it appeared a week ago ! I did get a bit involved with this project, but felt it was worth it . Although it has cost much, in terms of donor parts from other lamps, the end justified the means and to have the set together is a very pleasing thing. I hope it's been of interest and I'm sorry I can't include the fumey whiff of a hot oil lamp, you'll have to imagine that ! Tomo.


-
Nearly done, bar a few finishing touches, it only remains to light the wicks for a grand finale. But first, I need to find some paraffin.


-
A good haul by the looks. 🤗
-
The paint department now took up the job and after a light application of filler in the pits, a coat of Bonda was also applied. This marks the limit of progress to date. Andy, as you can see, we have solved the problem of the bezel. Thanks again for your kind offer. However I may need to talk about a possible future spinning job though. So you're not completely off the hook yet. 🙂 Special thanks to Stan for all the wizardry and special skills deployed on this job. Tomo.

-
I've been overtaken by events ! As I had to pick up essential supplies from the paintshop. I grasped the opportunity for a good rummage and discovered untold riches in the spare parts dept. A civilian Miller sidelamp already plundered for it's burner and tank, has now suffered the added indignity of losing it's badge and bezel to a higher cause. Also an old 'Raydot' rear lamp donated it's ruby bullseye which fits quite well in the Miller bezel. The Raydot also supplied a porcelain burner, which is a sloppy fit in the Miller tank. ( work in progress) The tank was far worse than previously thought and Stan had a right job with it, eventualy having to remove the entire base to re solder a leaking joint, which may explain the candle wax ! Stan took up the next challenge and the blow lamp and carefully removed the bezel. It was cleaned up and replaced in the new lamp. Stan also went to the trouble of expertly soldering the cracks in the bezel from behind which has considerably improved the looks and the strength of it. Also Stan had taken out the rivets from the back of the cowl and released the badge. This was done with an air drive burr gently poked into the gap. The badge is shown temporarily fitted to the original rivet ends still present in the new lamp. Once painted, I will attempt to tap over these heads to hold the badge in place. There should be just enough meat left for this job.


.thumb.jpg.2626c9c6ae06abf3ba5b722ae36fe4f0.jpg)
-
Wow ! 20 ton lots of greasers. That gives an idea of the scale of the operation.
-
Ok, Andy, Yes we have a lathe and would be keen to ' have a go', with a bit of guidance. If you could pm an address, I will send you the bezel to take measurements directly. Regards, Tomo
-
Further progress was made today and the remains of the old bezel were successfully removed by Stan with careful use of a blow lamp. The inside was cleaned up and more rust converter applied. I feel we now have a good sturdy base to build on, and with the right parts there could be nice lamp at the end of the tunnel. I have included some pics of the bezel for Andy to see the construction details. 👍 There is a very tight rolled edge at the outer rim ( unwired ) which might provide a challenge! The three oval holes were for the brass locking wire clip, which holds in the bullseye glass. The random round holes were a later 'improvement'. Tomo.


-
Hello Prof, Thanks for the kind offer, if the badge had been any good, I would have gone for it. As it is, there is nothing else there I need unfortunately. Isn't it amazing, after waiting years for one of these, two turn up in a week ! Actually I think I may have got the better of the two, but there maybe someone who wants to take it on. The price is certainly reasonable and there is little doubt that it once adorned the rear of a BEF lorry in France. Tomo
-
That sounds quite encouraging, Thanks. I need to get to my spare lamp parts box and see what I have. ( This may take a while in the present circumstances .) I will pm you .T
-
Hi Andy, If I send you the old one, are you volunteering to do the job ?! Tomo
-
Quite right Doug, In the case of these lamps the patent number remains the same, but the year changes. See above. Incidentally this lamp's identity was finally confirmed by reference to the picture of yours, in the truck lamp thread. Thanks for that. Tomo. Having gone through the collection I now find I was mistaken and all the dates are in fact 1915 and this does refer to the patent application. Doug is absolutely right on this. I should have known better as fire extinguishers have a similar trap for the unwary. Tomo
-
There were clear signs of an original coat of Service Colour,apparently applied straight over the tin plate. Also, visible on the inner reflector plate is the patent number, (refering to the rather natty spring catch) followed by an abbreviated date, in this case 1915, which happens to be the year of the truck. (The two sidelights are 1916 and 1917 respectively.) After a thorough clean up, a light coating of of rust converter was brushed on and the day was over. I may have a suitable replacement bezel, and an original red bullseye lense. If anyone has a spare curved Miller dogbone badge please shout !


-
I've just had what can only be described, as a bit of a result ! Trolling through the updated online stock of an antiques and militaria dealer, ( Waterloo Militaria ) I was suprised to spot a humble Miller W.D. lamp. On closer inspection I realised I was looking at what had once been a rear lamp.( Something I have been after for a while.) The tell tale clear side lenses and single blade connector gave the game away, although the original red lense had long ago been replaced by an ill fitting and chipped clear one. Some work would be required and the burner and 'dogbone' badge were clearly missing, the bezel was beyond help and the condition looked poor. I decided it was worth a punt, and made an offer. This was accepted at 10.30 am yesterday and was on my doorstep at 8.30 am this morning. Very good service. 🏆 Under a layer of rust, the surface was much better than I'd dared to hope. Much of the tinning is still present, the only holes found were on the edges of the lamp oil tank, which was partly filled with a strange waxy substance, tentatively identified as old candle wax !


-
Interesting choice of border decoration, (not yet taken up by the Nazis.)
-
This is a shot of the thread being winkled out of its hole. And another of the cleaned up thread. Finaly , I couldn't resist a pic of my new set of 18mm long reach plugs from KLG.


-
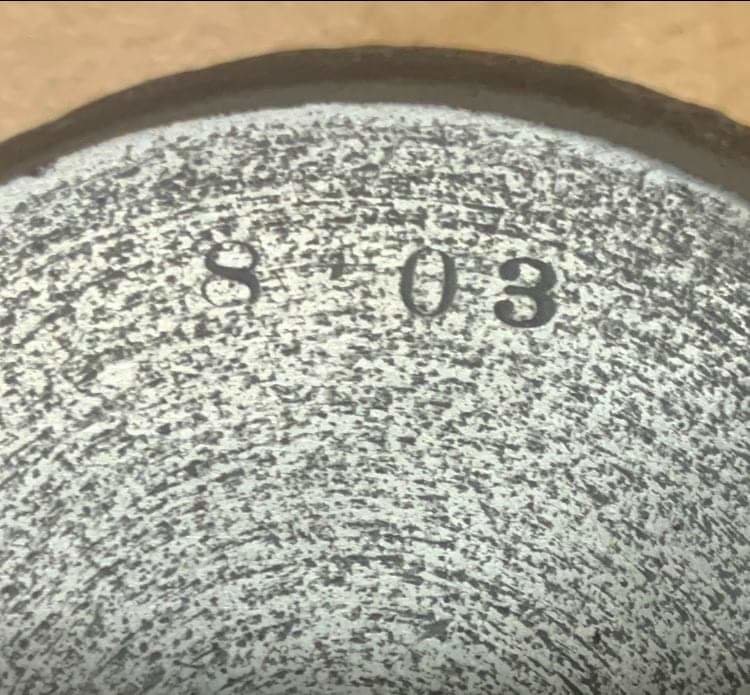
Lost most of the text for the above post but the pictures tell the story. Valves all done, followed by caps ( mystery No. turned out to be part no. of same; 8403 ) Cylinder too big for 24" throat on the mill and was eventually tackled on the floor 'Afghan' style, after search for a collett chuck proved fruitless. All broken studs removed successfully by Stan with his trusty hand drill, followed by thread winkling and chasing.
-
Progress on the cylinders has continued sporadically, although every time I delved into the warren of passageways, ever more rust, scale and carbon was found lurking in the deepest recesses. In particular, there was far more carbon than I had realised in the inlet and exhaust ports, the laborious removal of which has revealed a surprisingly nice smooth surface beneath. Finally it was time to lap the valves in and this procedure was accomplished without problems, once we had increased the diameter of the twiddling stick, with a length of suitable rubber hose. TBC.


-
Fixing the seat is an overdue task which I have been attempting to rectify. The front fixings are straight forward enough and once marked up I was able to drill the clearance holes by laying the seat on its back. Once the frame was drilled and set back in place it was a simple matter to mark the holes on the newly extended chassis brackets with a pencil and drill them too. Bolts were duly fitted and thus encouraged I moved to the rear fixings. There is no frame at the back, so fixing depends upon vertical straps which are attached by coach bolts to the rear wall of the seat and also by studded ends to the chassis brackets. These studded ends were apparently fire welded to the straps, a bit of a lost art, requiring the use of wrought iron which is hard to find today. I made up some suitable bits and Stan made short work of the welding with his trusty TIG . After a simple clean up, we ended up with these. With added Bonda. It just remains to drill the holes and fit the bolts and that is for another day.


-
The cylinder castings are awaiting engineering to deal with some broken studs. These are mostly awkward little numbers which will have to be drilled out and re tapped. One exhaust stud however was poking out sufficiently to have a go at it . A nut was sourced and welded direct to the stud end by Stan. This technique allows a good purchase on the stud end and transmits some local heat to the stud. Once allowed to cool it was encouraged with some 'loosey juice' and Stan applied the spanner of doom ! Unfortunately not the hoped for result ! We now have another drilling job. Threads on Thornycrofts of this era are known for tight tolerances. It was actually a company policy and often not ideal when it comes to dismantling after 100 years. Never mind, a drill it shall be ! I contented myself with another visit to the internal passages, where even more crap was found lurking in corners. However, the rear block is now ready for some valve lapping. Now where did I put those valves.....


.thumb.JPG.5628c7c1345766346a4a3287f8665d00.JPG)


.jpg.543f4d6009711864f40c7599924d777c.jpg)


